# APIMatic Docs — Full Content > Full markdown source for every page on https://docs.apimatic.io, concatenated in sidebar order. Sectioned by '---' separators with each page's source URL above its title. Curated index: https://docs.apimatic.io/llms.txt --- # Introduction Source: https://docs.apimatic.io/ import { Rocket, CodeXml, BookOpenText, SquareDashedMousePointer, Terminal, SquareTerminal, ArrowRightLeft, Puzzle } from 'lucide-react'; APIMatic helps you **create the best Developer Experience for your API**. With APIMatic, you can generate beautifully documented SDKs, spin up API Documentation Portals, lint your API Definitions and convert them into other formats.

CLI Quickstart

Set up the APIMatic CLI. Generate SDKs and API Developer Portals right from your command line.


### Context Plugins AI coding agents fail at API integrations because they lack accurate, up-to-date API context. APIMatic context plugins fix this by giving agents version-aware access to your SDK, code samples, and integration workflows, directly in the developer's IDE.

Context Plugins

Give AI coding agents accurate, version-aware API context so they generate correct, production-ready integrations, without leaving the IDE.


### SDKs APIMatic's Code Generator generates SDKs along with reference documentation and code samples for PHP, Ruby, Python, C#, Golang, Java, and JavaScript/TypeScript (Web & Node.js).

Generate and Deploy SDKs

Auto-generate complete SDKs (aka client libraries) for your API and publish them to package managers in minutes.


### API Documentation Portals APIMatic generates API documentation portals from your API definition using a Docs as Code workflow.

Create API Portals

Build API Portals using the same tools you use to write code. Ideal for power users or larger teams seeking more flexibility and control.


### API Governance and Transformation The quality of auto-generated SDKs and Documentation heavily relies on good quality API Definitions. Use APIMatic's API Governance tools to ensure that your API definitions are optimized for SDKs and Docs generation.

Lint OpenAPI Definitions in VS Code

Validate your API definitions against 1000+ validation and lint rules and auto-fix violations using this free VS Code Extension.

Transform API Specification Formats

Learn how API definitions can be converted into any of the 15 supported API specification formats via GUI or APIMatic API.


### Quick Links ** - [Customizing SDKs](generate-sdks/overview-sdks.md#customize-your-sdk)**
** - [Merging multiple API Definitions](manage-apis/api-merging.md)**
** - [API Recipes ↗](pathname:///platform-api/#/http/guides/generating-on-prem-api-portal/guided-walkthroughs)**
** - [API Copilot](changelog/introducing-api-copilot)**
--- # Quickstart Source: https://docs.apimatic.io/cli-getting-started/portal-quickstart-dac/ This quickstart guide will help you swiftly set up a customizable API Documentation Portal for your APIs using the APIMatic Command Line Interface (CLI). By the end of this guide, you'll have created a fully functional API Documentation Portal with: * Interactive API reference documentation * Live API playground for testing API Endpoints * Multi-language SDKs with ready-to-use code samples * Language-specific getting started guides **Time required:** ~5 minutes Lets get started! ## Setup ### 1. Install the APIMatic CLI Before you begin, ensure you have Node.js ( **>= v20**) and npm installed. You can quickly check by running `node -v` and `npm -v` in your terminal. To install the [APIMatic CLI](https://www.npmjs.com/package/@apimatic/cli), open your terminal or command prompt and run the following command: ```bash npm install -g @apimatic/cli ``` If you encounter any issues during installation, ensure Node.js is properly installed and up-to-date. **Verify installation:** ```bash apimatic --version # Expected output: @apimatic/cli/1.1.0 [platform] [node version] # Note: The installed CLI version number may be different in your case. ``` ✅ **Success**: CLI is installed and ready to use! ### 2. Login Authenticate with your APIMatic account: ```bash apimatic auth login ``` Follow the browser redirection to: 1. Enter your APIMatic email address 2. Enter your password 3. Click sign in #### Verify Login: ```bash apimatic auth status #Expected output: ┌ Status │ ◇ Retrieved subscription info │ ● Account Information: │ Email: 'user@apimatic.io' │ Allowed Languages: 'csharp', 'go', 'java', 'php', 'python', 'ruby', 'typescript' │ └ Succeeded ``` ✅ **Success**: You're authenticated and ready to use APIMatic CLI! ### 3. Run Quickstart It's recommended to start your project in a new, empty directory. Create a new directory and navigate into it. ```bash mkdir hello-apimatic cd hello-apimatic ``` Then, create your first API portal or SDK using the interactive quickstart: ```bash apimatic quickstart ``` To get started with an API portal, select the `API Documentation Portal` option: ```bash ● Welcome to the APIMatic quickstart wizard. │ │ This wizard will guide you through creating your first SDK or API Documentation Portal in just four easy steps. │ Let's get started! │ ◆ What would you like to create? │ ● API Documentation Portal (Generate API docs + SDKs) │ ○ SDK ``` The interactive wizard will walk you through: * Importing your API definition. * Selecting the SDK languages you want to generate. * Setting up the basic project scaffolding for your portal. * Generating the API Portal files. * Finally, starting a local development server to preview your portal. **Expected Final Output:** ```bash ◇ Portal generated successfully. │ ● Portal artifacts can be found at 'C:\portal'. │ │ The portal is running at http://localhost:3000 │ │ Press CTRL+C to stop the server. │ ◇ Next steps ─────────────────────────────────────────────────────────╮ │ │ │ Use the API Playground or an SDK to call your API. │ │ Customize the Portal theme, add API recipes and enable AI features │ │ https://docs.apimatic.io/cli-getting-started/advanced-portal-setup │ │ │ ├──────────────────────────────────────────────────────────────────────╯ ``` ✅ **Success**: Your API portal is running locally! Your browser should open automatically and display the created Portal. :::info If you encounter any issues during this process, reach out to our [support team](https://www.apimatic.io/contact) for assistance. ::: ### What's Next? Time to see what your API portal can do! 1. **Explore the API reference** - Browse the auto-generated endpoints and models to see how your OpenAPI definition translates into documentation. 2. **Test the API playground** - Provide your authentication details and input parameters to make live API calls directly from the browser. 3. **Try out an SDK** - Download an SDK, follow the setup instructions in the Getting Started guide, and use the provided code samples to make your first API call. Your API portal is running on a local server. If you terminate this live server, you can restart it by navigating to your project directory and running the following command: ```bash apimatic portal serve ``` ### Continue your API Portal journey Now that you have a basic API Portal set up, you can continue to enhance it in the next guide on [Customizing your API Portal](advanced-portal-setup.md). --- # Customize your API Portal Source: https://docs.apimatic.io/cli-getting-started/advanced-portal-setup/ Great job completing the quickstart! You now have a functional API Portal with auto-generated documentation. But the real magic happens when you customize it to match your brand, add helpful content, and unlock advanced features that will make developers (and AI Agents) love your API. This guide will walk you through some essential customizations that will elevate your API Portal from functional to exceptional. :::note If you haven't created an API Portal yet, please refer to the [Quickstart](portal-quickstart-dac.md) guide. ::: ### What You'll Accomplish In the next **15 minutes**, you'll learn how to: - [**Enrich your content**](#1-add-a-documentation-page-to-the-api-portal) by adding custom documentation pages that provide context beyond your API reference - [**Guide developers through complex workflows**](#2-add-a-recipe-to-the-api-portal) using interactive API recipes - [**Match your brand**](#3-customize-the-api-portal-theme-and-layout) with custom themes and colors that reflect your company's identity - [**Make you Documentation AI-accessible**](#4-generate-an-llmstxt-file) by generating LLMs.txt files - [**Enable an AI assistant**](#5-enable-api-copilot) to answer Developer questions about your API - [**Drive more traffic to your Portal by optimizing it for search engines**](#6-enable-seo-optimization) that help Developers find your APIs ### Before you begin - All commands in this guide should be run from your **project root directory** (the directory containing your `APIMATIC-BUILD.json` file). Make sure you're in the correct location before starting: ```bash cd your-project-name/src ls # You should see the directory structure, including the APIMATIC-BUILD.json file ``` - Each section builds upon the previous one, but you can also jump to specific customizations based on your immediate needs. Let's get started! ## 1. Add a Documentation page to the API Portal Enhance your API Portal with a custom documentation page. Custom documentation pages allow you to add product guides, FAQs or any other relevant documentation to your API Portal. 1. **Navigate to the content/guides directory in your project source directory:** ```bash cd content/guides ``` 2. **Create a new markdown file:** Create a new markdown file and open it in your favourite text editor ```bash touch my-first-guide.md code my-first-guide.md ``` 3. **Add content to your markdown page:** ``` # Ode to an API In realms where data flows like streams, APIs fulfill developers’ dreams. A JSON handshake, crisp and clean, Connects the apps behind the screen. With endpoints nested deep and wide, They summon structs with practiced pride. Auth tokens guard the sacred gate, While headers speak of client state. A GET for facts, a POST to send, A PATCH to fix, a DELETE to end. With Swagger scrolls and OpenAPI, They whisper truth to SDKs nigh. So raise a curl to RESTful peers, To webhooks pinging through the years— For every call that we compose, An interface of prose arose. ``` 4. **Update your API Portal navigation:** The new page you created needs to be added to the API Portal’s side-nav. This can be done by running the `portal toc new` command. This command overwrites your existing `toc.yml` file; any changes made to your project directory are reflected in the updated file. **Tip:** Keep your live preview running (`portal serve`) in one terminal and run this command in a new terminal window. Your changes will appear automatically in your live preview! ```bash apimatic portal toc new ``` **Expected output** ```bash ┌ New TOC │ ◇ The destination file 'C:\src\content\toc.yml' already exists, do you want to overwrite it? │ Yes │ ● The TOC file successfully created at: 'C:\src\content\toc.yml' │ └ Succeeded ``` 5. **View your new page:** Start your local development server by running the following command, and then look for the page you just added in the Portal’s Side Navigation: ```bash apimatic portal serve ``` ✅ **Success**: Your custom page is now part of your API Portal! ## 2. Add a Recipe to the API Portal API Recipes are interactive tutorials that help developers learn about and try complex API workflows. [See how Verizon deploys](https://www.verizon.com/business/5g-edge-portal/api-documentation.html#/http/guided-walkthroughs/iot-how-to-s/guided-walkthroughs/how-to-activate-a-device) API Recipes to help Developers learn about 5G APIs Create and add your first API recipe to the API Portal using the API Recipe creation wizard. The API Recipe wizard will guide you through: 1. **Recipe Setup:** Create a recipe and add it to the API Portal 2. **Step Configuration:** Add steps to demonstrate an API workflow. ```bash apimatic portal recipe new ``` **Expected output** ```bash ┌ New Recipe │ ◇ Welcome to the API Recipe Generation Wizard. │ ● This wizard will guide you through the process of creating an API Recipe. │ │ An API Recipe is a collection of steps that allows you to define a single use case for your API Documentation portal. │ Learn more: https://docs.apimatic.io/platform-api/#/http/guides/generating-on-prem-api-portal/api-recipes │ │ Let's get started! │ ◇ Enter a name for your API Recipe: │ User Authentication Flow │ ◇ Add Steps to your API Recipe: │ │ You can add: │ 1. Content Step: Display custom content, such as instructions or information related to your API. │ 2. Endpoint Step: Display an API endpoint, its playground and other relevant details. │ Steps appear in the order you add them. │ Let's proceed to adding steps to your API Recipe. │ ◇ Select the type of step you want to add: │ Endpoint Step │ ◇ Enter a name for the step: │ Step 1 │ ◇ Endpoints extracted │ ◇ Select the endpoint group name: │ user │ ◇ Select the name of the endpoint: │ loginUser │ ◇ Enter a description for the endpoint: │ Log into the system. │ ◇ Step has been added successfully. │ ◇ Do you want to add another step? │ No │ ● A new API Recipe has been created successfully. │ ● You can edit the following files to customize your API Recipe: │ └─ src │ ├─ content │ | └─ toc.yml # Contains the API Recipes group with a new page for your API recipe │ └─ static │ └─ scripts │ └─ recipes │ └─ UserAuthenticationFlow.js # Generated recipe script file containing all of the steps │ │ ◇ Next Steps ───────────────────────────────────────────────────────────────────╮ │ │ │ Run the command 'apimatic portal serve' to preview your documentation portal │ │ │ ├────────────────────────────────────────────────────────────────────────────────╯ │ └ Succeeded ``` **View your new recipe:** Start your local development server by running the following command, and then look for the recipe you just added in the Portal’s Side Navigation: ```bash apimatic portal serve ``` Your API Portal now includes a foundational API Recipe. However, API recipes offer more extensive capabilities, such as the ability to transfer data between steps and to set default values for individual steps. Taking advantage of these advanced features will require you to write some basic JavaScript code; consult the [API Recipes documentation](https://docs.apimatic.io/platform-api/#/http/guides/generating-on-prem-api-portal/api-recipes) to learn more. ✅ **Success**: Your API recipe is now available to guide developers! ## 3. Customize the API Portal Theme and Layout Make your API Portal match your company’s brand identity: 1. **Open the `APIMATIC-BUILD.json` file in a code editor.** 2. **Add the following `colors` configuration to the end of the `portalSettings.theme` object** ```json "colors": { "primaryColor": { "light": "#400072", "dark": "#D8A3FF" }, "secondaryColor": { "light": "#CAF55C", "dark": "#CAF55C" }, "linkColor": { "light": "#8C21DF", "dark": "#CAF55C" } } ``` 3. **Preview your API Portal** To preview your updated API Portal, ensure your development server is running. If it's not, start it by executing the following command: ```bash apimatic portal serve ``` **Theme Updates Explained** The theme object you added has customized your API Portal with the following changes: * The primary color is set to "#400072" in light mode and "#D8A3FF" in dark mode. * The secondary color is "#CAF55C" in both light and dark modes. * The link color is "#8C21DF" in light mode and "#CAF55C" in dark mode. APIMatic offers extensive theme and page layout customization options for your Portal, beyond these basic customizations. For more details, refer to APIMatic's documentation on [Theme](https://docs.apimatic.io/platform-api/#/http/guides/generating-on-prem-api-portal/build-file-reference/generateportal-portalsettings-theme) and [Layout](https://docs.apimatic.io/platform-api/#/http/guides/generating-on-prem-api-portal/build-file-reference/generateportal-portalsettings-theme-layout) configurations. ✅ **Success**: Your API Portal looks sleek! ## 4. Generate an LLMs.txt file LLMs.txt is a new web standard that makes your documentation AI-accessible. It enables tools like Cursor, GitHub Copilot, ChatGPT, and Claude to quickly understand your documentation. 1. **Open the `APIMATIC-BUILD.json` file in a code editor.** 2. **Update your build configuration:** Add the following configuration to the end of the `generatePortal` object in your `APIMATIC-BUILD.json` file. **Note:** The `baseUrl` should match where your portal is running locally. If you're using the default `portal serve` command, this will be `http://localhost:3000`. ```json "baseUrl": "http://localhost:3000", "llmsContextGeneration": { "enable": true } ``` **Understanding LLMs.txt Files** After adding the above configurations, your API Portal will generate two files: * **llms.txt**: This is a small, summary-focused index file that provides a structured overview of the content of your API Portal. * **llms-full.txt**: This is a much larger, comprehensive file that includes the full content of your API Portal in one consolidated markdown file. You can learn more about LLMs.txt files [here](https://llmstxt.org/). **View your LLMs.txt Files** To preview the newly generated files, ensure your development server is running. If it's not, start it by executing the following command: ```bash apimatic portal serve ``` Next, navigate to the `/llms.txt` path of your API Portal to view the llms.txt file and the `/llms-full.txt` path to view the llms-full.txt file, for instance ,`http://localhost:3000/llms-full.txt.` ✅ **Success**: Your API Portal is now AI-accessible! ## 5. Enable API Copilot Add an AI-powered assistant to help developers learn and integrate with your API. API Copilot provides instant answers to questions about your API directly within your documentation portal. **Configure API Copilot** Run the copilot configuration command to select and set up your AI assistant: ```bash apimatic portal copilot ``` **Expected output** ```bash ┌ Configure API Copilot │ ◇ Subscription info retrieved │ ◇ API Copilot can only be active on one Portal at a time. Configuring it on this Portal will disable it on any previously configured Portal. Do you want to use this key: '967a9070--aaaa-cccc-bbbb-9e3b140c6307'? │ Yes │ ◇ Opening markdown editor for you to enter welcome message in... │ ● API Copilot configured successfully! │ │ Copilot ID: '967a9070--aaaa-cccc-bbbb-9e3b140c6307' │ Status: 'Enabled' │ │ Configuration saved to: 'APIMATIC-BUILD.json' │ ◇ Next Steps ────────────────────────────────────────────────────────────────╮ │ │ │ API Copilot will index your content the next time you run │ │ 'apimatic portal generate' or 'apimatic portal serve'. │ │ This process can take up to 10 minutes, depending on your API’s size. │ │ │ │ To see your copilot: If your portal is already running, refresh the page. │ │ Otherwise, run 'apimatic portal serve', │ │ select any programming language in the Portal and │ │ look for the chat icon in the bottom-right corner. │ │ │ ├─────────────────────────────────────────────────────────────────────────────╯ │ └ Succeeded ``` **Understanding API Copilot** After running the configuration command, your `APIMATIC-BUILD.json` file will be updated with copilot settings that enable: - **Contextual AI assistance:** API Copilot learns from your API specification and documentation to provide accurate answers - **Interactive developer support:** API Copilot appears as a chat interface within your API Portal, allowing developers to ask questions directly without leaving the documentation. **View your API Copilot** Start your local development server to see the copilot in action: ```bash apimatic portal serve ``` Look for the chat interface in the bottom-right corner of your API Portal. Click it to interact with your new AI assistant! You can learn more about the API Copilot in our [documentation](/changelog/introducing-api-copilot/). ✅ **Success**: Your API Portal now includes an AI-powered assistant to answer Developer questions! ## 6. Enable SEO optimization The default API Portal is a Single-Page Application (SPA). SPAs aren't SEO-friendly but more straightforward to deploy and less prone to deployment mistakes. APIMatic supports generating an SEO-friendly API Documentation Portal with a few changes to the Build file and support from the server-side. To optimize your Portal for search engines, add the following configuration to the end of the `generatePortal` object in your `APIMATIC-BUILD.json` file: ```json "indexable": {} ``` If you followed along with the steps in the previous section to generate an llms.txt file, your `generatePortal` object should already contain a `baseUrl` property. If it doesn't already exist, you will need to add it as well. **Note:** The `baseUrl` should match where your portal is running locally. If you're using the default `portal serve` command, this will be `http://localhost:3000`. ```json "baseUrl": "http://localhost:3000" ``` This is what your `generatePortal` configuration should look like now: ```json { "generatePortal": { . . . "baseUrl": "http://localhost:3000", "indexable": {} } } ``` **View your SEO-enabled API Portal** Start your local development server to see your SEO-enabled Portal: ```bash apimatic portal serve ``` **SEO optimizations explained** Enabling SEO for an APIMatic API Portal: * Generates HTML files for all pages with correct `` and canonical tags. * Ensures that the API Portal uses HTML History API for crawler-friendly routing. * Generates a Meta redirect HTML file for redirects. * Generates a `_redirect` file for all necessary redirects. * Generates a sitemap.xml for page discovery. * Generates a 404.html to prevent SPA misidentification. * Generates a customizable robots.txt to guide crawlers. Learn more about APIMatic’s support for SEO optimization [here](pathname:///platform-api#/http/guides/generating-on-prem-api-portal/build-file-reference/search-engine-optimization). ✅ **Success**: Your API Portal is optimized for search engines! ## What's Next? ::::info See Your API's Full Potential–Request a Free Custom Demo! Here's what we're offering you, completely free: - A **personalized demo** showcasing the full platform capabilities - A custom **proof of concept** built with your actual API specification - **Expert consultation** on optimizing your developer experience strategy - **Zero commitment** required–seriously, no strings attached! Our team has helped companies like PayPal, Verizon, and hundreds of others transform their API programs. We'd love to show you what's possible for your APIs too. 🎯 [Get Your Free Custom Demo & POC →](https://www.apimatic.io/contact) :::: ### Learn more about the API Portal Ready to go deeper? Explore these advanced topics: - [Add a Custom header and footer to your API Portal](pathname:///platform-api/#/http/guides/generating-on-prem-api-portal/header-and-footer-customization/) - [Inject Authentication information](pathname:///platform-api/#/http/guides/generating-on-prem-api-portal/dynamic-configurations/) - [Implement RBAC](pathname:///platform-api/#/http/guides/generating-on-prem-api-portal/filtering-api-by-roles/) - [Automate deployments via CI/CD Pipelines](/docs-as-code/automate-api-portal-generation-via-apimatic-docs-as-code.md) --- # Specifying API Metadata Source: https://docs.apimatic.io/manage-apis/apimatic-metadata/ You can import or transform your API definition along with a metadata file that will allow you to configure certain processes in APIMatic as well as help override or filter out certain parts of the API definition without requiring any change in the input API specification itself. ## What Can You Achieve With a Metadata File? A metadata file provides the following capabilities: - Settings to help [configure various processes](#configuring-apimatic-processes-with-metadata) an API definition goes through, in order to get desired results. For example, the metadata file provides settings that helps you configure transformation, import, export, merging, code generation etc. - Options to [filter out parts of the API definition](#filtering-out-parts-of-api-definition-with-metadata) without needing to change the original API specification document. For example, you can remove internal endpoints of your API definition and related data. - Ability to [override parts of the API definition](#overriding-parts-of-api-definition-with-metadata) with information provided in the APIMatic metadata file. For example, you can override the default authentication settings of your API. ## How to Provide a Metadata File? - You can provide this file along with your API definition during [import](/web-dashboard-retired) through [APIMatic Dashboard](https://app.apimatic.io/dashboard) or when [converting APIs](/api-transformer/overview-transformer) through the Transformer. - The metadata file must be a valid **JSON** file and the file name MUST start with **"APIMATIC-META"**. - The API definition must be provided in the form of a **ZIP** file that contains both the API specification document (for example, OpenAPI) and the metadata file. Within the ZIP file, the metadata file **must exist at the same level as that of the API definition**. It shouldn't be nested at a different level. ## Metadata - An Example Here is an example directory structure where `spec.json` is the API specification document that needs to be imported/transformed. The metadata file named `APIMATIC-META.json` is placed at the same level as the API specification document and in the same directory. ``` dir\ spec.json APIMATIC-META.json ``` A sample of a metadata file `APIMATIC-META.json` is given below: ```json { "MergeConfiguration": { "MergeApis": false }, "ImportSettings": { "PreferJsonSchemaNameOverTitle": true, "AppendParentNameForClashes": false, "AutoGenerateTestCases": true, "PreferSwaggerOperationSummaryOverId": false }, "ExportSettings": { "ExportExtensions": false, "UseDateTimeOnlyInRaml": false, "AddRefSiblingDataInAllOfSchema": false, "EncodeUrlParamsInPostman": true }, "ServerConfiguration": { "DefaultEnvironment": "production", "DefaultServer": "default", "Environments": [ { "Name": "production", "Servers": [ { "Name": "default", "Url": "http://example.com" } ] } ], "Parameters": [] }, "TestGenSettings": { "Configuration": {}, "TestTimeout": 30, "PrecisionDelta": 0.01 }, "CodeGenSettings": { "SynchronyMode": "Asynchronous", "ModelSerializationScheme": "Json", "ArraySerialization": "Indexed", "Nullify404": true } } ``` ## Configuring APIMatic Processes With Metadata Using the APIMatic metadata file, you can configure the following processes in APIMatic in order to get the output that best suits your needs: - The API definition import process can be [configured using import settings](/manage-apis/import-export-settings/#import-settings). - The API definition export process can be [configured using export settings](/manage-apis/import-export-settings/#export-settings). - The API definition validation process can be [configured using a validation configuration](/validate-lint-apis/configuring-validation). - Merging of multiple API definitions can be enabled and [configured using a merge configuration and related settings](/manage-apis/api-merging/#configuring-the-merge-process). - The API definition transformation process can be configured using a mix of the above mentioned settings as documented [here](/api-transformer/configuring-transformer/). - The code generation process used for generating client SDKs from API definitions can be [configured using Code Generation settings](/generate-sdks/customize-sdks/codegen-settings/codegen-settings-overview/). - The test case generation process during code generation can be configured using the [Test Case Generation settings](/testing/configure-test-case-generation/). ## Filtering Out Parts of API Definition With Metadata The metadata offers the ability to filter out endpoints and their related data in an API definition on the basis of **tags**. Additionally, you can filter individual schema properties and parameters within your API specification. Depending on the API specification format, tags can be specified for endpoints, properties, and parameters in different ways, which is discussed in the sections below. Filtering this way can be useful for removal of any private or internal elements that are part of your API specification document but you don't want to import. During filtering, when endpoints are removed any redundant model definitions and authentication configurations tied only to those endpoints will also be removed. The filtering options available are described below: ### Endpoint Level Filtering | Property | Type | Details | | -------- | ---- | ------- | | `KeepEndpointsWithTags` | Array[String] | When this setting is used only the endpoints in an API definition that contain these tags will be kept while all others will be removed. If `RemoveEndpointsWithTags` is also used, then the removal of endpoints with tags specified in `RemoveEndpointsWithTags` takes place first while the filtering with current tags configuration applies later. | | `RemoveEndpointsWithTags` | Array[String] | When this setting is used, all endpoints with the tags specified in this list are removed while others remain unaffected. If `KeepEndpointsWithTags` is also used, the endpoints with tags specified in the current tags configuration will be removed first and then the filtering on the basis of tags configuration in `KeepEndpointsWithTags` will take effect. | | `MaximumAllowedEndpoints` | Integer | This will help remove any endpoints that fall above the maximum threshold specified using this setting. This type of filtering will be applied after any tags-specific filtering performed using `KeepEndpointsWithTags` or `RemoveEndpointsWithTags`. | ### Property and Parameter Level Filtering | Property | Type | Details | | -------- | ---- | ------- | | `RemoveSchemaPropertiesWithTags` | Array[String] | When this setting is used, all schema properties with the tags specified in this list are removed from the API definition. If removing properties leaves behind orphaned schemas, those schemas are automatically removed as well. By default, examples are also updated to remove references to the filtered properties across endpoint-level examples, custom type examples, and child schemas that inherit from filtered parent schemas. | | `RemoveParametersWithTags` | Array[String] | When this setting is used, all parameters (path, query, header, and cookie) with the tags specified in this list are removed from the API definition. If removing parameters leaves behind orphaned schemas, those schemas are automatically removed as well. | :::caution Use the `RemoveSchemaPropertiesWithTags` setting with caution as it involves significant risks. This feature removes properties at the schema level throughout your API specification and can have wide-ranging effects, including impacts to generated SDKs, documentation, schema validation, schema relationships, examples, and API contracts. **[View Associated Risks and Impacts](#associated-risks-and-impacts)** ::: ### Configuring Endpoint Level Tags In Your API Specification Document Tags can be specified for OpenAPI and RAML files as shown below: #### OpenAPI (v2.0, v3.x) OpenAPI offers grouping operations (or endpoints) using tags natively using the `tags` property: ```yml /pets: get: operationId: listPets tags: - pets ``` #### RAML (v1.0) For RAML, we [offer annotations to help specify tags at method level](/specification-extensions/raml-apimatic-annotations/#annotation-for-method-level-tags): ```yml /pet: get: (x-tags): - pets displayName: List pets ``` ### Configuring Property and Parameter Level Tags In Your API Specification Document For more granular filtering, you can tag individual properties within schemas and parameters using the `x-tags` extension field. #### Tagging Schema Properties Use the `x-tags` field to associate tags with properties in your schema definitions: ```yml DeviceInfo: type: object properties: id: type: string x-tags: ["schema1"] name: type: string x-tags: ["beta", "internal"] status: type: string ``` #### Tagging Parameters Similarly, add `x-tags` to parameters at the endpoint level: ```yml parameters: - name: deviceId in: path required: true schema: type: string x-tags: ["schema1"] example: "device-123" - name: apiVersion in: query required: false schema: type: string x-tags: ["beta"] example: "v2" ``` ### Example Usage #### Endpoint Level Filtering Let's say you have two endpoints in your OpenAPI file. The first endpoint `listPets` has two tags `pets` and `private` specified while the second endpoint `listCatalogItems` has two tags `pets` and `public` specified: ```yml /pets: get: operationId: listPets tags: - pets - private .......... /pets/catalog/entries: get: operationId: listCatalogItems tags: - pets - public .......... ``` If you decide to keep endpoints with tag `pets`, upon API filtering both endpoints will be preserved since they both contain `pets` as their tag: ```json { "KeepEndpointsWithTags": ["pets"] } ``` If you decide to remove the internal endpoints with tag `private`, upon API filtering only the first endpoint `listPets` and its related schema definitions will be removed while the information related to the second endpoint `listCatalogItems` will be preserved. ```json { "RemoveEndpointsWithTags": ["private"] } ``` If you use both settings together as shown below, endpoints with the tag `private` and their related information will be removed first, and the remaining endpoints with the tag `pets` will be preserved. In the end, you'll be left with only one endpoint: `listCatalogItems`. ```json { "KeepEndpointsWithTags": ["pets"], "RemoveEndpointsWithTags": ["private"] } ``` #### Property and Parameter Level Filtering Let's say you have a schema definition with tagged properties: ```yml DeviceInfo: type: object properties: id: type: string x-tags: ["public"] name: type: string x-tags: ["beta"] internalId: type: string x-tags: ["internal"] status: type: string ``` And an endpoint with tagged parameters: ```yml /devices/{deviceId}: get: parameters: - name: deviceId in: path required: true schema: type: string x-tags: ["public"] - name: debugMode in: query schema: type: boolean x-tags: ["internal"] ``` If you want to remove all internal and beta properties/parameters from your API definition: ```json { "RemoveSchemaPropertiesWithTags": ["beta", "internal"], "RemoveParametersWithTags": ["internal"] } ``` After filtering: - The `name` and `internalId` properties will be removed from the `DeviceInfo` schema - The `debugMode` parameter will be removed from the endpoint - Only the `id` and `status` properties will remain in `DeviceInfo` - Only the `deviceId` parameter will remain in the endpoint - All examples referencing the removed **properties** (`name` and `internalId`) will be automatically cleaned up #### Combining Endpoint and Property Level Filtering You can use both endpoint-level and property-level filtering together by specifying each setting individually: ```json { "RemoveEndpointsWithTags": ["internal"], "RemoveSchemaPropertiesWithTags": ["beta"], "RemoveParametersWithTags": ["deprecated"] } ``` Alternatively, you can use the **`RemoveInformationWithTags`** property to combine all three filtering levels with a single setting: ```json { "RemoveInformationWithTags": ["internal", "beta", "deprecated"] } ``` When using `RemoveInformationWithTags`, the specified tags will be applied across all filtering levels simultaneously: 1. Remove all endpoints tagged with the specified tags 2. Remove all schema properties tagged with the specified tags and update all related examples 3. Remove all parameters tagged with the specified tags 4. Clean up orphaned schemas that are no longer referenced **Example:** If you use: ```json { "RemoveInformationWithTags": ["internal"] } ``` This is equivalent to: ```json { "RemoveEndpointsWithTags": ["internal"], "RemoveSchemaPropertiesWithTags": ["internal"], "RemoveParametersWithTags": ["internal"] } ``` All endpoints, schema properties, and parameters tagged with `internal` will be removed from your API definition in a single operation. ## Associated Risks and Impacts When using the `RemoveSchemaPropertiesWithTags` feature, the following risks and impacts should be considered: - Example descriptions/summaries may still reference removed properties, creating misleading documentation where text doesn't match actual content - `minProperties`/`maxProperties` constraints may become impossible to satisfy after property removal - Removed properties will be treated as unvalidated additional properties if `additionalProperties: true` is set - When example cleanup is disabled through the [`import setting`](/manage-apis/import-export-settings/#import-settings-object) `RemoveUndeclaredPropertiesFromExample` , removed properties appear as additional properties in the portal and generated code samples. - Removing a discriminator property breaks the entire polymorphic schema structure - Property removal from parent schemas propagates to all child schemas inheriting via `allOf` - Removing distinguishing properties can make `oneOf`/`anyOf` schemas identical, causing validation ambiguity - Default values assigned to removed properties are lost, potentially changing API behavior - Callback payload structures change when they reference schemas with removed properties - Links with runtime expressions break when they reference removed properties ## Overriding Parts of API Definition With Metadata :::note This section is intended for advanced use-cases only. We recommend that you [talk to our technical support team](https://www.apimatic.io/contact/) before proceeding. ::: You can override the following parts of the API definition by specifying related objects in the Metadata: - [API Description](#api-description) - [Contact Details](#contact-details-override) - [Authentication Information](#authentication-information-override) - [Server Configuration](#server-configuration-override) - [Additional Headers](#additional-headers-override) ### API Description You can provide a description for your API in the APIMatic UI as described [here](/web-dashboard-retired). To define these details via the metadata file, you need to add a `Description` property as follows: **Example:** ```json { "Description": "This is an API description. Add as many details as you like." } ``` ### Contact Details Override The contact details can be defined in the APIMatic UI as described here [Contact Information](/web-dashboard-retired). To define these details via the metadata file, you need to specify the [Contact Object](#contact-object) as follows: **Example:** ```json { "Contact": { "Name": "John Doe", "Url": "https://www.example.com/contact/details", "Email": "john.doe@example.com" } } ``` #### Contact Object **Name**: Contact The Contact Object has the following properties: | Property | Type | Details | | -------- | ---- | ------- | | `Name` | String | Name of person or organization. | | `Url` | String | URL pointing to further contact information. | | `Email` | String | Email of the person or organization. | ### Authentication Information Override The details on the authentication options available in the APIMatic UI are described [here](/web-dashboard-retired). To enable these options via the metafile, you need to specify the [Authentication Object](#authentication-object) as follows: **Example:** ```json { "Authentication": { "Type": "Basic", "Parameters": [ { "Name": "username", "Description": "your username" }, { "Name": "key", "Description": "your api key" } ] } } ``` #### Authentication Object **Name**: Authentication The Authentication Object has the following properties: | Property | Type | Details | | -------- | ---- | ------- | | `Type` | [Authentication Type](#authentication-type) | Specifies the type of authentication mechanism to apply. The value must be a valid string value from the list of values specified in this [section](#authentication-type). | | `Parameters` | Array[[Parameter Object](#parameter-object)] | The list of parameters that need to be sent as part of the authentication mechanism. | | `OAuth2AuthorizationServer` | String | Name of server which serves as the base URL for the Authorization endpoint.| | `AuthorizationUrl` | String | The route for the Authorization endpoint. This must be a relative URL. | | `OAuth2Server` | String | Name of server which serves as the base URL for the Token endpoint. | | `AccessTokenUrl` | String | The route for the Token endpoint. This must be a relative URL. | | `Scopes` | Array[[Scope Object](#scope-object)] | List of scope definitions for [OAuth v2.0 authentication mechanism](/web-dashboard-retired). | | `OAuth2ClientIdExample` | String | A value that can be used as an example or demo client ID for OAuth 2 auth types that support this parameter. | | `OAuth2ClientSecretExample` | String | A value that can be used as an example or demo client secret for OAuth 2 auth types that support this parameter. | | `OAuth2UsernameExample` | String | A value that can be used as an example or demo client username for OAuth 2 auth types that support this parameter. | | `OAuth2PasswordExample` | String | A value that can be used as an example or demo client password for OAuth 2 auth types that support this parameter. | #### Authentication Type Following are valid values for available authentication types in APIMatic: | Type | Details | | ---- | ------- | | `None` | No authentication mechanism will be applied. | | `Basic` | Basic authentication flow will be applied. | | `OAuth_v2_BearerToken` | OAuth v2.0 bearer token authentication mechanism will be applied. | | `OAuth_v2_WebServerFlow` | OAuth v2.0 authorization code grant type will be used. | | `OAuth_v2_TwoLeggedFlow_ClientCredentials` | OAuth v2.0 client credentials grant type will be used. | | `OAuth_v2_ImplicitGrantFlow_UserAgent` | OAuth v2.0 implicit grant type will be used. | | `OAuth_v2_Resource_Owner_Password` | OAuth v2.0 resource owner password grant type will be used. | | `OAuth_v2_Password_Only` | A variant of OAuth v2.0 resource owner password grant type that doesn't require client id and client secret will be used. | | `CustomQuery` | Authentication flow that uses custom parameters sent in the query will be used. | | `CustomHeader` | Authentication flow that uses custom parameters sent in the header will be used. | | `CustomField` | Authentication flow that uses custom parameters sent in as form parameters will be used. | | `JWT` | JWT authentication mechanism will be applied. | | `CookieAuth` | Cookie based authentication mechanism will be applied. | #### Parameter Object | Property | Type | Details | | -------- | ---- | ------- | | `Name` | String | Name of the authentication parameter. | | `Description` | String | Details of the authentication parameter. | | `DefaultValue` | String | Any default value for the authentication parameter. | **Example**: ```json { "Name": "apikey", "Description": "An API key is required for authentication" } ``` #### Scope Object | Property | Type | Details | | -------- | ---- | ------- | | `Name` | String | A unique user-friendly name or ID for the scope. | | `Value` | String | Actual value of the scope to be used during OAuth v2.0 authentication. | | `Description` | String | A text describing what the scope does. | **Example**: ```json { "Name": "Read Notes", "Value": "read:notes" } ``` ### Server Configuration Override The details on the server configuration options available in the APIMatic UI are described [here](/web-dashboard-retired). To enable these options via the metafile, you need to specify the [Server Configuration Object](#server-configuration-object) as follows: **Example:** ```json { "ServerConfiguration": { "DefaultEnvironment": "production", "DefaultServer": "default", "Environments": [ { "Name": "production", "Servers": [ { "Name": "default", "Url": "https://example.com/production/{param}" } ] }, { "Name": "sandbox", "Servers": [ { "Name": "default", "Url": "https://example.com/sandbox/{param}" } ] } ], "Parameters": [ { "Name": "param", "Type": "String", "DefaultValue":"Default Value for Param" } ] } } ``` #### Server Configuration Object **Name**: ServerConfiguration The Server Configuration Object has the following properties: | Property | Type | Details | | -------- | ---- | ------- | | `DefaultEnvironment` | String | This is the environment to be used by default across the API. | | `DefaultServer` | String | This is the server to be used by default. This can be overridden at the endpoint level. | | `Environments` | Array[[Environment Object](#environment-object)] | List of environments available in the API. An environment consists of a set of servers with base URL values. | | `Parameters` | Array[[Server Parameter Object](#server-parameter-object)] | List of path parameter definitions that can be referenced by server urls in the server configuration environments. | #### Environment Object The Environment Object has the following properties: | Property | Type | Details | | -------- | ---- | ------- | | `Name` | String | Name of the environment (for example, `Production`). | | `Description` | String | Brief description of the environment. | | `DisableTryItOut` | Boolean | Default: `false`. When set to `true`, the Try It Out button will be disabled on the API portal for this environment, preventing users from making live API calls against it. | | `Servers` | Array[[Server Object](#server-object)] | This lets you specify multiple servers within an environment. A server comprises of a name and a URL. The names of the hosts remain consistent over different environments but their values may vary. | #### Server Object The Server Object has the following properties: | Property | Type | Details | | -------- | ---- | ------- | | `Name` | String | Name of the server. | | `Url` | String | Base URL for the server. | #### Server Parameter Object The Server Parameter Object has the following properties: | Property | Type | Details | | -------- | ---- | ------- | | `Name` | String | Name of the path parameter used in a server URL. | | `Description` | String | This describes the path parameter. | | `Type` | String | This is the name of the type assigned to the path/template parameter. A path parameter can be of the following types: String, Number, Number Enumeration, String Enumeration. | | `DefaultValue` | String | Value that has to be assigned to Parameter | ### Additional Headers Override The details on the additional headers available in the APIMatic UI are described [here](/web-dashboard-retired). To enable these options via the metafile, you need to specify the [Additional Headers Object](#additional-headers-object) as follows: **Example:** ```json { "AdditionalHeaders": [ { "Name": "header", "Description": "This is a header description.", "DefaultValue": "default value for header" } ] } ``` #### Additional Headers Object **Name**: AdditionalHeaders The Additional Headers Object has the following properties: | Property | Type | Details | | -------- | ---- | ------- | | `Name` | String | Name given to the header that has to be added with the API request. | | `Description` | String | Brief description about the header. | | `DefaultValue` |String | Value that has to be assigned to the header. | --- # Import and Export Settings Source: https://docs.apimatic.io/manage-apis/import-export-settings/ The [APIMatic Metadata file](/manage-apis/apimatic-metadata/) carries two sets of configuration settings that control how an API definition is read in and written back out: - [Import settings](#import-settings) control how your API specification document is interpreted when APIMatic reads it, for example, whether schema keys are preferred over schema titles during OpenAPI import. - [Export settings](#export-settings) control how your API definition is written when APIMatic converts it into another specification format, for example, whether vendor extensions are included in the output. Both sets of settings apply wherever APIMatic reads or writes an API definition, including the [API Transformer](/api-transformer/configuring-transformer/), the [APIMatic CLI](/apimatic-cli/intro-and-install), and the [APIMatic extension for VS Code](/validate-lint-apis/vs-code-apimatic-extension/overview). ## Import Settings The import configuration settings can be placed in an [Import Settings Object](#import-settings-object) in the root object of the Metadata file using the `ImportSettings` property as shown below: ```json { "ImportSettings": { "PreferJsonSchemaNameOverTitle": true, "AppendParentNameForClashes": true, "AllowModelTypesWithNoFields": true } } ``` ### Import Settings Object The available properties and their respective types are as follows: | Setting | Type | Purpose | | ------- | ---- | ------- | | ExampleResolvingMaxDepth | Integer | **Default**: `1`. The maximum depth for importing models from nested schemas present within examples. If you are facing performance issues, consider setting this to a lower value. | | PreferJsonSchemaNameOverTitle | Boolean | **Default**: `false`. If a `title` is specified in a JSON Schema definition we consider that as the model name. However, when this flag is set as `true`, we give precedence to the definition name instead of the one specified using property `title`. | | AppendParentNameForClashes | Boolean | **Default**: `false`. When loading models/complex types, if there is a clash in names we append a number with the name of the clashing type. When this flag is set as `true`, the name of the parent component is appended with the name instead. | | IgnoreRamlTypeDeclarationDisplayName | Boolean | **Default**: `false`. When set to `true`, the `displayName` property for any RAML v.1.0 [Type Declaration Object](https://github.com/raml-org/raml-spec/blob/master/versions/raml-10/raml-10.md#type-declarations) will be ignored and the key name specified at the time of declaring this object will be preferred instead. | | PreferSwaggerOperationSummaryOverId | Boolean | **Default**: `false`. When set to `true`, we will give more precedence to OpenAPI/Swagger Operation Object's `summary` instead of `operationId` during endpoint name extraction. | | AutoGenerateTestCases | Boolean | **Default**: `true`. For several formats like OpenAPI (v3.x), API Blueprint, RAML, Postman and HAR, we support auto-generating test cases from request/response examples (if any are present). This can be disabled by setting this flag to `false`. | | AllowModelTypesWithNoFields | Boolean | **Default**: `false`. When set to `true`, model definitions containing no properties/fields will also be imported. | | IgnoreInlineEnumModelDescription | Boolean | **Default**: `false`. When set to `true`, ignores any `description` defined inline for an enum schema. | | ImportMultipleResponses | Boolean | **Default**: `true`. When set to `false`, any data related to multiple responses including additional types created for these responses will be removed. | | LoadOneOfAsOptionalFields | Boolean | **Default**: `false`. When set to `true`, `oneOf` schemas will be combined and imported as a single model with all fields considered as optional. | | ImportArrayOfMapsAndMapOfArrays | Boolean | **Default**: `false`. Schemas containing arrays of maps or maps of arrays will be treated as dynamic types during import, by default. When this flag is set to `true`, however, such schema definitions will be imported and the type set accordingly. | | ImportTypeCombinators | Boolean | **Default**: `true`. Type combining constructs like union types, `anyOf`, `oneOf` and `not` will be imported by default. Any extra types associated with these constructs will also be loaded. To disable this, set the flag value to `false`. | | UseRamlUnionTypeAsOneOf | Boolean | **Default**: `true`. RAML `v1.0` union types are loaded as the equivalent of `oneOf` type construct by default. When set to `false`, the union types are loaded as an equivalent of the `anyOf` type construct. | | ImportWsdlWithJsonMediaTypes | Boolean | **Default**: `false`. When set to `true`, all `application/xml` request/response media types will be treated as `application/json` during WSDL import. XML metadata (including details about XML node name, namespace, prefix etc.) will also not be imported. | | EnableCookieAuthentication | Boolean | **Default**: `false`. When set to `true`, allows the import of `cookie` authentication schemes. | | AllowAuthForEmptySecurityObject | Boolean | **Default**: `false`. When set to `true`, allows authentication to be enabled even when the operation level `security` object is empty. | | ImportFromOpenApiDiscriminatorMapping | Boolean | **Default**: `true`. When set to `false`, information from the `mapping` property in the OpenAPI v3 [Discriminator object](https://github.com/OAI/OpenAPI-Specification/blob/main/versions/3.0.0.md#discriminatorObject) isn't imported. | | ImportRequestBodyContentTypeHeader | Boolean | **Default**: `true`. When set to `false`, request's content type information won't be imported as explicit Content-Type header. | | ImportMultipleAuthentication | Boolean | **Default**: `true`. All authentication schemes available in the API are loaded as is, by default. When set to `false`, however, only the first authentication scheme from the API will be imported. | | ImportOpenApi3EmptySchema | Boolean | **Default**: `true`. Empty schema declarations won't be ignored by default. If set to `false` an empty schema will be treated as if no schema was declared. | | LoadBaseTypesForOneOfAnyOfDiscriminator | Boolean | **Default**: `false`. By default, no additional base types will be created and exporting to formats where discriminator isn't supported alongside `oneOf`/`anyOf` may see loss of information related to it. When set to `true`, additional base types will be created for cases where discriminator information is present alongside `oneOf` or `anyOf`. | | ImportTypeCombinatorsWithOnlyOneType | Boolean | **Default**: `true`. By default, type combinators (for example, anyOf, oneOf, not) containing only one type definition in their list will be imported as is. When set to `false`, the type combinators lists won't be populated. Instead, the single type definition will be extracted from the list and considered as the default type of the component. | | AppendParentSchemaNameToOneOfAnyOfBaseType | Boolean | **Default**: `false`. Base types auto-generated from cases involving `oneOf/anyOf` discriminators will have default names. When set to `true`, the name of the parent schema may be appended with the default name, if applicable. This is recommended for cases where multiple oneOf/anyOf schemas are expected to have the same discriminator property name. | | IgnoreEndpointSummary | Boolean | **Default**: `false`. By default, an endpoint's summary won't be assigned to the endpoint's description if it's missing. When set to `true`, the summary is set as the endpoint's description in the scenario where the description hasn't been explicitly defined. | | PreserveSingleValueEnum | Boolean | **Default**: `false`. By default, an enum containing only a single value will be converted to a constant for OpenAPI 3.0. When set to `true`, the enum isn't converted to a constant and remains an enum. | | UseStrictValidation | Boolean | **Default**: `false`. The default validation is flexible and may disregard some issues in the spec to make it easier for users to import their specs. When set to `true`, all mandatory/recommended validation and lint checks will be enforced. | | ImportAdditionalHeader | Boolean | **Default**: `true`. By default, an additional header is imported when multiple authentication schemes have been defined. When set to `false`, this additional header isn't imported. | | ImportAdditionalErrorModels | Boolean | **Default**: `true`. When set to `false`, any additional error models generated for multiple error responses upon import are removed. | | ImportAdditionalCustomTypeAdditionalFields | Boolean | **Default**: `true`. When set to `false`, `additionalProperties` defined within a schema aren't imported. | | AllowAdditionalEnumItems | Boolean | **Default**: `false`. When set to `true`, allows all enumeration schemas to accept any unknown properties defined. | | ImportAdditionalTypeCombinatorModels | Boolean | **Default**: `true`. When set to `false`, prevents importing additional unused models associated with type combinators. | | RemoveUndeclaredPropertiesFromExample | Boolean | **Default**: `null`. Removes properties from examples that don't exist in schema definitions. When using `RemoveSchemaPropertiesWithTags`, example cleanup happens automatically unless explicitly set to `false`. Setting to `false` prevents example cleanup even during property filtering processes. Can be used standalone by setting to `true` to clean up all examples in the spec without any filtering. | ## Export Settings You can configure how your input API definition is exported by providing export-specific configuration settings in the [APIMatic Metadata file](/manage-apis/apimatic-metadata/). Note that the Metadata file is always supplied alongside the input API specification document, so export settings are declared at the same time as import settings and take effect when the API definition is later written out. The export configuration settings can be placed in an [Export Settings Object](#export-settings-object) in the root object of the Metadata file using the `ExportSettings` property as shown below: ```json { "ExportSettings": { "ExportExtensions": true, "GenerateModelSamples": true } } ``` ### Export Settings Object The available properties and their respective types are as follows: | Setting | Type | Purpose | | ------------- | ---- | ------- | | ExportExtensions | Boolean | **Default**: `false`. If `true`, any extensions, if supported in the selected export format, will be exported to the output file. | | GenerateModelSamples | Boolean | **Default**: `true`. By default, when exporting to Postman (v1.0,2.0), parameter/request/response samples will be auto-generated (where needed) except when importing from WSDL or WADL. Sample generation can be enabled/disabled using this flag. | | UseDateTimeOnlyInRaml | Boolean | **Default**: `false`. If `true`, then all date-time fields are exported with type `datetime-only` instead of `datetime` in RAML `v1.0`. | | SetPostmanParamValuesAsVariables | Boolean | **Default**: `false`. If `true`, auto-generated sample values for Postman parameters (query/path) will be stored inside collection variables instead of being directly embedded in the parameter definitions. The name of the variable will be the parameter's name. The values stored in the variables can then be adjusted through the `Variables` section in Postman's Collection editor. | | AddRefSiblingDataInAllOfSchema | Boolean | **Default**: `true`. Any sibling data linked to a schema definition that also uses $ref will be exported by placing the reference and sibling data in the `allOf` construct. If set to `false`, the sibling data will be ignored. | | EncodeUrlParamsInPostman | Boolean | **Default**: `true`. Enable/disable request URL encoding when exporting to Postman. | | UseXsdBase64BinaryType | Boolean | **Default**: `false`. By default, the `File` or `Binary` types are exported as `xs:hexBinary` in XML schemas. If `true`, the types will be exported as `xs:base64Binary` instead. | | ExportXmlMetaData | Boolean | **Default**: `true`. By default, XML metadata (For example, XML node name, namespace, prefix, etc.) is set for XML entities when exporting to OpenAPI `v3.x`, `v2.0` or RAML `v1.0`. If `false` the XML metadata won't be exported. | | ExportDiscriminatorMappingValues | Boolean | **Default**: `true`. When set to `false`, information about discriminator values aren't exported to `mapping` information of the [Discriminator object](https://github.com/OAI/OpenAPI-Specification/blob/main/versions/3.0.0.md#discriminatorObject) in OpenAPI v3. | | ExportAnyType | Boolean | **Default**: `true`. By default, type `any` will be exported where applicable. When set to `false`, type `any` will be exported as `object`/`string` instead. | | ExportGlobalTypeCombinators | Boolean | **Default**: `true`. By default, global type combining constructs, for example, `anyOf`, `oneOf`, `not` or union types will be defined once globally and the referencing schemas will refer them via their unique name/path in applicable formats like OpenAPI `v3.0` and RAML. When set to `false`, the global type combining schemas will be embedded inline in all schemas referencing them. | | ExportOptionalParametersAsDisabled | Boolean | **Default**: `false`. By default, optional parameters are enabled in exported Insomnia and Postman Collection files. When set to `true`, request parameters marked as optional will appear disabled in the aforementioned types of files, upon export. | | ExportApiKeyAuthInPostman | Boolean | **Default**: `true`. By default, if a request in Postman needs an API key to be sent as a header/query parameter, it's set as its authentication type. When set to `false`, the API key is instead added as an explicit request parameter. This is especially recommended for cases where a request needs multiple API keys to be sent as part of its authentication, which is a scenario otherwise not supported in Postman authentication types. | | GenerateSampleValueFromRegexPattern | Boolean | **Default**: `false`. By default, this is disabled due to performance overhead. When set to `true` and a regex pattern is specified, the sample value will be generated based on the specified regex pattern in case of export to Insomnia or Postman Collection. | | ForceAllowModelExampleExportForSampleGeneration | Boolean | **Default**: `false`. By default, sample auto generation in Postman and Insomnia export don't reuse any examples specified at model level for risk of exporting examples that may contain read-only or write-only properties where they may not be allowed. This setting should be set to `true` if you don't believe that a risk of read-only or write-only fields exist and so any examples specified at model level shouldn't be ignored. | | UseHttpMethodPrefixForAutoGeneratedWsdlNames | Boolean | **Default**: `true`. When set to `false`, WSDL export won't add endpoint's HTTP method as a prefix to auto-generated names of related components, for example, names of schema types, operation name, etc. | | UseEnvironmentNamesForServerVariables | Boolean | **Default:** `false`. When set to `true`, environment names will be appended to server variable names in the generated Postman Collection to avoid duplication and improve clarity. Additionally, if each environment contains only a single server, the variable name will be replaced entirely with the environment name.| --- # Merge Multiple API Definitions Source: https://docs.apimatic.io/manage-apis/api-merging/ If you have multiple API specification documents and wish to create a unified API Portal or obtain a single SDK per language out of them, you can use our merging feature to combine the API specifications into one. The merging feature can also allow you to transform multiple API specifications into a single API specification in a format of your choice using [API Transformer](https://apimatic.io/transformer). It's possible to merge together API specification documents of different formats, for example, OpenAPI, RAML, and others. :::note Merging multiple API specification documents shouldn't be confused with importing or transforming a single API specification split into multiple files which is handled by the importer/Transformer automatically. ::: ## How Does Merging Work? When multiple API definitions are provided as input, the merger selects two API definitions at a time and merges them together. The output of the merged API is then merged with the third API definition, continuing until all definitions are merged. By default, APIMatic merges API definitions using the *Take Left* merge strategy. When two API definition files are being merged, APIMatic will try to keep elements such as endpoints and schemas from both the APIs while some elements may only be picked from the first API. The merging strategy, therefore, varies from component to component. However, if there is a conflict, the value from the first (left) API definition will take precedence by default. The merging process can be easily configured which will be discussed [later](#configuring-the-merge-process). The process of merging two API specifications is illustrated below: ![Merge APIs](/images/manage-apis/merge-process.png) Merging of more than two API specifications can look something like as shown below: ![Merge APIs Chaining](/images/manage-apis/merge-chaining.png) ## Merging Two API Specifications - A Basic Example For this example, we will only consider merging two API specification documents for simplicity purposes. You can, however, add any number of specifications for merging. 1. Create a root directory in your local system, say `dir`. 2. Take any two API specification documents (say `spec1.json` and `spec2.json`) and place them in separate directories (say `dir1` and `dir2` respectively) within the root directory `dir` as follows: ``` dir\ dir1\ spec1.json dir2\ spec2.json ``` 3. Add an empty [Metadata](/manage-apis/apimatic-metadata/) JSON file in the root directory and assign it the name `APIMATIC-META.json` ``` dir\ dir1\ spec1.json dir2\ spec2.json APIMATIC-META.json ``` 4. Open the Metadata file and add the following to enable merging. ```json { "MergeConfiguration": { "MergeApis": true, "MergedApiName": "Merged API" } } ``` If you don't intend to generate an SDK/portal but only want to perform a transformation, you will need to disable code-generation specific validation, which is performed during merging, by adding the flag `SkipCodeGenValidation` to the configuration merge settings as follows: ```json { "MergeConfiguration": { "MergeApis": true, "MergedApiName": "Merged API", "MergeSettings": { "SkipCodeGenValidation": true } } } ``` Save the changes and close the file. 5. ZIP the contents of the root directory **without including the root directory itself**. The resulting zipped file should be ready for upload to APIMatic for [import](#importing-the-zipped-file-for-sdkportal-generation) or [transformation](#transforming-the-zipped-file). Make sure you are using the `.zip` format to ZIP your files. ### Importing the Zipped File for SDK/Portal Generation 1. On the [APIMatic Dashboard](https://app.apimatic.io/dashboard), click on the **Import** option. ![Import API](/images/manage-apis/import-api.png) 2. Click on **Browse** and select the `.zip` file containing the API definitions to merge. Click on **Import**. ![Merge APIs](/images/manage-apis/merging-apis-import.png) 3. Before import, the ZIP file will be [validated](#validating-the-zipped-file) for possible syntax/semantic issues. 4. Once the merged API definition is imported, it will be visible in the list of APIs in the **Dashboard** as shown below: ![Added Merged API](/images/manage-apis/merged-api.png) 5. You can now [create an API portal](/cli-getting-started/portal-quickstart-dac) or [generate SDKs](/generate-sdks/create-sdks/create-sdks-through-cli) for this merged API. ### Transforming the Zipped File 1. On the [APIMatic Dashboard](https://app.apimatic.io/dashboard), click on the **Transform API** option. ![Transform API](/images/manage-apis/transform-api.png) 2. Click on **Choose file** and select the `.zip` file containing the API definitions to merge. Select the **Export Format** from the dropdown, then click on **Convert**. ![Merge APIs](/images/manage-apis/merging-apis-transform.PNG) 3. Before transformation, the ZIP file will be [validated](#validating-the-zipped-file) for possible syntax/semantic issues. 4. If validation passes, you can click on **Proceed** to start downloading of the converted merged output. ### Validating the Zipped File Before import or transformation, APIMatic performs validation of each of the API definition files that are to be merged as well as validation of the API definition created after merging. The validation involves checks to ensure that the API definitions are structurally correct and contain complete information to ensure comprehensiveness of the files. There are 3 levels of validation messages that you may encounter: - **Errors:** Any syntax/semantic issues found in the API definition; for example, if a GET method contains a request body. API definition file import **can't proceed** in case of an error. You will be required to fix the issues listed for your definition if that happens. - **Warnings:** Any unexpected behaviour that may affect the output; for example, if the parameter example provided is invalid. Warnings won't **halt** API import, but it's recommended that you fix these issues so your API definition results in the best possible experience. - **Messages:** Recommendations or suggestions that can help enhance your API definition and its completeness. For example, messages can point out that an endpoint description or a parameter example is missing. Messages won't **halt** API import. ## API Merging To perform merging of multiple API specifications, you need to correctly structure the input specifications and configure the merging process based on your needs. Each of these steps are discussed in detail below. ### Directory Structure Structuring the API specification documents correctly is essential for correct output. Some key points to note are: #### 1. Dedicated Sub-Directory for Each API Definition Each API definition (whether it's a single file or composed of multiple files) needs to be placed in a dedicated sub-directory. There is no limit on the number of sub-directories, therefore, you can merge any number of API specification documents this way. The sub-directory can optionally contain a [metadata file](apimatic-metadata.md) for configuring how the specification document in this directory needs to be imported. The available configurations are discussed [here](/manage-apis/apimatic-metadata/#what-can-you-achieve-with-a-metadata-file). #### 2. Parent Directory of Sub-Directories The sub-directories need to be placed in a parent directory that **must contain a [metadata file](apimatic-metadata.md) at the same level** with [configurations](#configuring-the-merge-process) to enable and customize merging of the specifications in the sub-directories. #### 3. Types of Sub-Directory Structuring in Parent Directory ##### Linear Sub-Directory Structure In simpler cases, all sub-directories will likely be placed at the same level in the root directory, that is, a linear sub-directory structure. An example is shown below: ```json dir\ APIMATIC-META-MAIN.json // Will contain merge settings spec1\ openapi.json APIMATIC-META.json // Can contain any specific settings for CodeGen, import/export etc spec2\ openapi.json spec3\ schemas\ pet.raml dog.raml cat.raml main.raml APIMATIC-META.json ``` - `spec1`, `spec2`, and `spec3` are three dedicated sub-directories for the API specifications that are to be merged. - `spec3` is a RAML specification document split into multiple files whereas the OpenAPI specification documents in `spec1` and `spec2` comprises of a single file only. - `spec1` and `spec3` each use a metadata file `APIMATIC-META.json` to configure how the `spec1` and `spec3` are imported, respectively. - A metadata file `APIMATIC-META-MAIN.json` is present in the root directory `dir` that should contain the [Merge Configuration Object](#merge-configuration-object) to help enable and configure merging of its sub-directories. Therefore, its content can look something like: ```json { "MergeConfiguration": { "MergeApis": true, "MergeOrderOfDirectories": ["spec1", "spec2", "spec3"], "MergedApiName": "Merged API", "MergeSettings": { "ConflictStrategy": "KeepLeft" } } } ``` :::important The order of the API definition files in the `MergeOrderOfDirectories` setting matters, as the merging will be applied based on this order. ::: - As can be seen from the example, it's possible to merge specifications of different formats like RAML and OpenAPI. ##### Nested Sub-Directory Structure It's possible to nest sub-directories within another sub-directory. In such a case, the sub-directory becomes a parent directory and must contain the required metadata file to enable and configure merging of its child directories. A nested sub-directory structure like this is recommended if out of all the API definitions that are required to be merged, some are semantically similar to each other (that is, share common parts in their API definitions) while others are completely different. So, you structure in a way such that the similar ones are merged together first and their output is then merged with other remaining distinct API definitions. An example is shown below: ```json dir\ APIMATIC-META-MAIN.json spec1\ spec3\ openapi.json spec4\ openapi.json APIMATIC-META-MAIN.json spec2\ openapi.json ``` - `spec1` and `spec2` are two dedicated sub-directories for API specifications and are placed directly in the root directory `dir`. - `spec3` and `spec4` are two dedicated sub-directories for API specifications but are placed in the parent directory `spec1`. Here `spec3` and `spec4` likely share some common parts in their API definitions. - The metadata file `APIMATIC-META-MAIN.json` in `spec1` will contain the [Merge Configuration Object](#merge-configuration-object) and help enable merging of `spec3` and `spec4`. Its content can look like the following: ```json { "MergeConfiguration": { "MergeApis": true, "MergeOrderOfDirectories": ["spec3", "spec4"], "MergedApiName": "First API", "MergeSettings": { "ConflictStrategy": "KeepLeft" } } } ``` - The metadata file `APIMATIC-META-MAIN.json` in root directory `dir` will contain the [Merge Configuration Object](#merge-configuration-object) and help enable merging of`spec1` and `spec2`. Its content can look like the following: ```json { "MergeConfiguration": { "MergeApis": true, "MergeOrderOfDirectories": ["spec1", "spec2"], "MergedApiName": "Merged API", "MergeSettings": { "ConflictStrategy": "KeepLeft" } } } ``` - The merging of the above directory structure will work as follows: 1. `spec3` and `spec4` will be merged first based on the configuration present in the `APIMATIC-META-MAIN.json` in `spec1`. 2. The merged output of `spec1` from previous step will then be merged with `spec2` based on the configuration present in the `APIMATIC-META-MAIN.json` metadata file in the root directory `dir`. ### Configuring the Merge Process The merge process can be enabled and configured using a [metadata file](apimatic-metadata.md) which is placed in the parent directory containing the sub-directories. The following two objects can be added in this file and help control how the sub-directories are imported and merged: - [Global Import Settings](#global-import-settings) - [Merge Configuration Object](#merge-configuration-object) ```json { "MergeConfiguration": { "MergeApis": true, "MergeOrderOfDirectories": ["SpecDirectory1", "SpecDirectory2"], "MergedApiName": "Merged API", "MergeSettings": { "ConflictStrategy": "KeepLeft" } }, "ImportSettings": { "PreferJsonSchemaNameOverTitle": true } } ``` #### Global Import Settings You can optionally provide global [import settings](/manage-apis/import-export-settings/#import-settings-object) in the root metadata file that will help control how all API specifications in the sub-directories are imported. The global import settings applied this way can be overridden for any API by providing import settings in the API's sub-directory metadata file. #### Merge Configuration Object This is a required object using which you can enable merging and optionally configure it as well. **Name**: MergeConfiguration | Setting | Type | Purpose | | ------- | ---- | -------- | | MergeApis | Boolean | **Required** Enables merging of APIs. By default this is set to `false`. | | MergeSettings | [Merge Settings Object](#merge-settings-object) | Settings to configure the merge process. See [Merge Settings](#merge-settings-object) object for more detail. | | MergeOrderOfDirectories | Array[String] | Paths of the sub-directories to be merged, relative from the parent directory in which they're placed. **The order of the API definition files in this list matters, as the MergeSettings configuration will be applied based on this order.** | | MergedApiName | String | Name of the final merged API. | **Example**: ```json { "MergeApis": true, "MergeOrderOfDirectories": ["SpecDirectory1", "SpecDirectory2"], "MergedApiName": "Merged API", "MergeSettings": { "ConflictStrategy": "KeepLeft" } } ``` #### Merge Settings Object **Name**: MergeSettings This object allows configuration of the merge process when merging two APIs. | Setting | Type | Purpose | Default Value | | ------- | ---- | ------- | ------------- | | ConflictStrategy | Enum[[Merge Conflict Strategy](#merge-conflict-strategy)] | Conflict strategy to use when a conflict arises during merge. | `KeepLeft` | | DescriptionConflictStrategy | Enum[[Merge Conflict Strategy](#merge-conflict-strategy)] | By default, the conflict strategy specified in `ConflictStrategy` will be used for resolving conflicts in descriptions. However, the default conflict strategy for descriptions can be overridden using this setting. | Value of `ConflictStrategy` | | DeepCompareFieldTypes | Boolean | Whether to compare field level referenced custom types/models by names only or by actually retrieving and comparing their model type definitions. | `false` | | AppendParentNameInNamingConflict | Boolean | Append parent name to entity when there is a conflict between names instead of appending a number at the end. | `false` | | SkipCodeGenValidation | Boolean | Configures validation strictness of individual APIs and the merged API. | `false` | | NumberStartIndexForNameConflict | Number | When resolving conflicts in names of components (for example, endpoints), a number is appended at the end of the conflicting name to make it unique. This setting controls the starting value of this number. | 1 | | MergeMultipleAuthentication | Boolean | Allow more than one authentication schemes present in the individual APIs, or the APIs being combined, to be merged together. | `true` | | PrefixEntityNamesWithApiNameBeforeMerge | Boolean | This setting will prefix names of all entities of an API with the API's name before merging, in order to prevent conflicts when this API is merged with another. The entities renamed this way include models, endpoints, endpoint level test cases, authentication schemes and those of server configuration, etc. | `false` | | PostfixEntityNamesWithApiNameBeforeMerge | Boolean | This setting will postfix names of all entities of an API with the API's name before merging, in order to prevent conflicts when this API is merged with another. The entities renamed this way include models, endpoints, endpoint level test cases, authentication schemes and those of server configuration, etc. | `false` | | DeduplicateModels | Boolean | This setting will remove or rename any duplicate/redundant model definitions to prevent clashes of models during merge. If deduplication is disabled, the models of the two APIs being merged will simply be combined together. Disable deduplication of models **only** if you are sure that the APIs being merged have models with unique names. Note, that names are compared in a case-insensitive manner therefore, if two models are named `status` and `Status` they're considered conflicting and one of these must be renamed to prevent a clash. | `true` | | CompareModelsAndFieldsExamples | Boolean | When enabled, this setting will compare schema examples during the schema deduplication process in merging. (This step could be performance-costly.) | `false` | #### Merge Conflict Strategy When merging two APIs together, conflicts are possible, for example, entities with the same name can exist in both APIs but with different definitions. In such a case, one of the entities must be renamed to resolve the conflict. The merge conflict strategy helps the merger decide which of the conflicting entities to update or remove in order to resolve the conflict. The possible values of a merge conflict strategy and some details about them are given below: | Value | Details | | ----- | ------- | | `KeepLeft` | The conflicting entity from the left API will be picked up as is while that of the right API will be discarded or updated depending upon the type of the entity being merged. | | `KeepRight` | The conflicting entity from the right API will be picked up as is while that of the left API will be discarded or updated depending upon the type of the entity being merged. | | `KeepBoth` | If applicable, values of both conflicting entities will be combined without alteration. If this strategy isn't applicable for an entity, the conflict resolution will fallback to using `KeepLeft`. | | `Merge` | If applicable, values of both conflicting entities will be merged together intelligently. Some alteration is possible. If this strategy isn't applicable for an entity, the conflict resolution will fallback to using `KeepLeft`. | ### Post-Processing the Merged Output It's possible to configure, filter or override parts of the merged API definition in the same way it's done for a regular import or transformation. This is achieved by adding required configurations in the same [metadata file](apimatic-metadata.md) that's provided in the parent directory and is used for enabling merging, for example, if you are looking to transform the merged output into OpenAPI and want extensions enabled when you do so, you can enable the export setting `ExportExtensions` in your parent directory metadata file as follows: ```json { "MergeConfiguration": { "MergeApis": true, "MergeOrderOfDirectories": ["SpecDirectory1", "SpecDirectory2"], "MergedApiName": "Merged API", "MergeSettings": { "ConflictStrategy": "KeepLeft" } }, "ExportSettings": { "ExportExtensions": true } } ``` This way the OpenAPI output file obtained after merging and then transforming the merged API definition will have extensions included. For more details on available options to post-process a merged output, please see relevant section [here](/manage-apis/apimatic-metadata/#what-can-you-achieve-with-a-metadata-file). --- # Get API Integration Keys Source: https://docs.apimatic.io/manage-apis/get-api-keys/ API Integration keys are your APIs unique identifiers for integrating with services and for managing your APIs via APIMatic's APIs. To view your API's integration keys: 1. On the [APIMatic Dashboard](https://app.apimatic.io/dashboard) click on the kebab menu (three vertical dots) on the API tile for which you want the API Integration key. ![Selection from three dots](/images/manage-apis/21.PNG) 2. Select **API Integration Keys** from the options. ![View API Integration Key](/images/manage-apis/30.PNG) 3. The keys will be displayed as follows: ![View API Integration Key](/images/manage-apis/31.PNG) --- # View API Logs Source: https://docs.apimatic.io/manage-apis/view-api-logs/ You can view code generation and package publishing logs for an API. - Each record for the **generated SDK** contains information of the time you generated this SDK, the platform you generated SDK for, from where the generated SDK is invoked (Website or API) and also a link to download this generated SDK without additional cost. - Each record for the **published package** contains information of the date/time you published the package, template and repository you used for package publishing, package name, version and link to the published package. 1. On the [APIMatic Dashboard](https://app.apimatic.io/dashboard), click on the kebab menu (three vertical dots) on your API tile. ![Selection from three dots](/images/manage-apis/21.PNG) 2. Select **View API Logs** from the options to show the logs. ![View API Logs](/images/manage-apis/32.PNG) 3. To view the SDK logs for a specific version, select the API version from the drop-down menu and click on the **Zipped** tab. ![API Logs](/images/manage-apis/33.PNG) 4. To view the package publishing logs for a specific version, select the API version from the drop-down menu and click on the, select the **Published** tab. ![API Logs](/images/manage-apis/34.PNG) :::note This is different from the **View Logs** option which combines code generation logs of all the APIs instead of showing logs of just one particular API. Please refer to [Activity Log](account-management/activity-log.md) documentation for more details. ::: --- # Overview Source: https://docs.apimatic.io/validate-lint-apis/overview/ When a user uploads an API specification document on APIMatic, the document is passed through certain validation steps during which a number of validation messages may be shown to the user as output. The severity of the messages will indicate whether the user can proceed to do other actions on our products with his document or not e.g. transforming the API to some other format, generating an SDK or a portal, etc. We recommend [using our VS code extension](#vs-code-extension-for-validation) for easily validating and linting your API specification documents in a more familiar environment. ## Key Concepts ### Rules and Rulesets Each message shown to the user indicates a **rule** that was violated. Related rules are grouped together in documents called **rulesets**. Therefore, a rule is uniquely identified by knowing the id of the ruleset to which the rule belongs (e.g. `apimatic-preliminary-validation`) and the id of the rule itself (e.g. `required-server-url `). If you prefer to keep things short, the same rule can also be uniquely identified with a rule code instead e.g. `APIMATICPRE_V036`. ### Severity of Messages The severity of the messages can range from `Blocking` (very severe) to `Information` (not severe): | Severity Level | Details | | -------------- | ------- | | Blocking | This is more severe than an **Error**. It indicates that the validation process has found a critical issue in the document that needs to be resolved before the document can be further validated. | | Error | This is less severe than a **Blocking** error but is more severe than a **Warning**. It indicates presence of one or more syntax or semantic issues in the API specification document e.g. a request body defined in a GET method. An error will not block the validation process. However, the document needs to be fixed before it can be used to generate any further output e.g. transformed output, SDK, portal, etc. | | Warning | This is less severe than an **Error** but more severe than an **Information** message. It indicates presence of one or more syntax/semantic issues in the API specification document which are not always severe enough to block the output generation. However, not fixing these issues in the document can affect the quality of the output e.g. a message indicating that the name exceeds maximum length restrictions can have adverse effects on the generated output. | | Information | This is the least severe form of a message. These are generally just recommendations or suggestions that can help enhance your API definition and its completeness e.g. messages that point out that an endpoint description or a parameter example is missing. | ### Rule System of a Message The messages shown to the users can belong to two types of rule systems: | Rule System | Details | | ----------- | ------- | | Syntax | This system of rules is related to validity of structure of statements or expressions. It dictates which combinations of symbols, statements or expressions is valid and which is not e.g. JSON syntax dictates that all property keys are enclosed in quotes. | | Semantic | As opposed to the syntax rule system, semantic rule system is more related to whether the constructs convey the correct meaning or are contexually valid or not e.g. a request body should not be defined in a GET method. This is syntactically valid but does not follow the semantic rule system. | ### Validation versus Linting Rules | Rule Type | Details | | --------- | ------- | | Validation | Validation rules check for whether your API description is valid against pre-defined standards of the format in which your API description is written. Additionally, there can be checks to ensure that your API description is technically correct or not e.g. a parameter must have a name is a validation rule. | | Linting | Linting rules are generally style checks or recommendations that can help enhance you API description document. However, not complying with those checks will not make your document invalid. e.g. a parameter must have a description is a linting rule. | ## Available Rulesets Full list of available rulesets against which your API description file may be validated/linted is available [here](/rulesets/overview). ## Configuring Validation and Linting You can configure how APIMatic default validation/linting rules are applied on your API description files using the APIMatic Metadata file validation configuration feature as described [here](/validate-lint-apis/configuring-validation). ## Adding Custom Rules You can also create and add your own linting rules in a custom ruleset and apply that on your API description documents. For more details, please see documentation on [adding your own rules](/validate-lint-apis/adding-your-own-rules). ## VS Code Extension for Validation If you use Visual Studio Code, we also [offer an extension](https://marketplace.visualstudio.com/items?itemName=apimatic-developers.apimatic-for-vscode) that can help you easily validate and lint multiple API description files (e.g. OpenAPI) without the need to head over to the APIMatic Dashboard each time. It will help you run standard checks on your API description files as well as additional rules enforced by APIMatic. Once validated, you can easily export your API description files to APIMatic Dashboard without leaving your extension. For more details please see [detailed documentation here](/validate-lint-apis/vs-code-apimatic-extension/overview). --- # VS Code APIMatic Extension Overview Source: https://docs.apimatic.io/validate-lint-apis/vs-code-apimatic-extension/overview/ APIMatic [offers a VS Code extension](https://marketplace.visualstudio.com/items?itemName=apimatic-developers.apimatic-for-vscode&__hstc=245086810.2b533b0fade59d9ff8447ecf4505f32c.1699608692414.1706082233756.1706159622357.68&__hssc=245086810.2.1717741151156&__hsfp=4274364872&hsCtaTracking=a71b0d94-3c82-4f01-8650-1072ee264e52%7C5460378e-4f3a-43f1-985f-1290632e100e) that enables you to easily validate and lint your API definition files in any of the [supported formats](/web-dashboard-retired). The API definition files aren't only validated against standard checks but also linted for ensuring smoother SDK generation, Developer Experience Portal generation and API specification format transformation. ![VS Code Extension APIMatic API Explorer](/images/vs-code-extension/docs/vs-code-extension-main.png) The extension provides a **richer validation experience** by offering dedicated views with messages organized for easy navigation, contextual data for each issues (for example, line and path information, call tree to trace origin) as well as detailed descriptions, hints and reference documentation links for resolving issues quickly. It also supports automatic fixing of common issues found in OpenAPI v3 files (for example, inline schemas) that hinder output quality or generation. You can also generate summary reports in multiple formats (PDF, HTML, JSON, Markdown) for sharing with any relevant stakeholders. Once your API definition is ready, you can easily **export them to your APIMatic Dashboard** for SDK/DX portal generation without needing to leave the VS Code extension. Additionally, you can also perform **transformation to a selected export format** and obtain the output within your workspace. ## Installation Guide First, make sure that you have: 1. Visual Studio Code version 1.75.0 or above installed. [Use download link](https://code.visualstudio.com/download). 2. A stable internet connection. Next, to install the _APIMatic for VS Code_ extension, simply head over to the [Visual Studio Marketplace](https://marketplace.visualstudio.com/items?itemName=apimatic-developers.apimatic-for-vscode&__hstc=245086810.2b533b0fade59d9ff8447ecf4505f32c.1699608692414.1706082233756.1706159622357.68&__hssc=245086810.2.1717741151156&__hsfp=4274364872&hsCtaTracking=a71b0d94-3c82-4f01-8650-1072ee264e52%7C5460378e-4f3a-43f1-985f-1290632e100e): ![APIMatic for VS Code Extension Marketplace](/images/vs-code-extension/docs/vscode-marketplace.png) On successful installation, the APIMatic API Explorer should be visible in the Activity Bar: ![VS Code APIMatic Explorer View](/images/vs-code-extension/docs/apimatic-api-explorer.png) For further information regarding installation of a VS Code extension, please visit the official documentation [here](https://code.visualstudio.com/docs/editor/extension-marketplace#_install-an-extension). ## Getting Started - VS Code Walkthrough To help you quickly familiarize yourself with all the main features and capabilities, the extension includes a comprehensive getting started walkthrough as part of the [VS Code welcome feature](https://code.visualstudio.com/docs/getstarted/tips-and-tricks#_getting-started): ![Walkthrough](/images/vs-code-extension/docs/walkthrough.png) This step-by-step guide provides a hands-on experience, making it easier for you to get started. If you're having trouble finding the walkthrough or need to revisit it later, you can also access it using the extension's [Help view](/validate-lint-apis/vs-code-apimatic-extension/about-extension-components/#help--view) **Start Walkthrough** option: ![Help view](/images/vs-code-extension/docs/help-view.png) ## Getting Started - How to Validate an API Definition ### Step 1: Authorize Yourself With APIMatic To start using the extension, you first need to authorize yourself with APIMatic. Click on the **Authorize** button visible in the welcome view: ![Authorize](/images/vs-code-extension/docs/authorize.png) This will open up the APIMatic login page in your default browser. If you are a new user, you will need to sign up first which should take a few quick steps (and its free): ![Sign up](/images/vs-code-extension/docs/sign-up-or-login.png) Once you have successfully logged in, you will be redirected back into your VS Code extension: ![Successful Login Redirect](/images/vs-code-extension/docs/successful-login-redirect.png) Your session details will be visible in the [**Manage Session** view](/validate-lint-apis/vs-code-apimatic-extension/about-extension-components/#manage-session-view) of the APIMatic API Explorer: ![Manage Session](/images/vs-code-extension/docs/authorized.png) ### Step 2: Open an API Workspace Folder To validate your API definition, you need to have a dedicated workspace folder open in your VS Code where you will work with one or more files associated with the API definition itself. If you already have a folder open that also contains an API definition (for example, OpenAPI), you will receive a notification to open it as an API workspace in the extension. Click **Yes** to select it as your API workspace: ![Notification](/images/vs-code-extension/docs/auto-detect-workspace.png) If you don't have an existing API workspace folder, you can still open it as your API workspace. For this guide, we use an empty workspace folder as shown below: ![Empty Workspace](/images/vs-code-extension/docs/empty-api-workspace.png) Navigate to the APIMatic API Explorer view in the Activity Bar and click on **Use Current Workspace Folder** to select current folder as your API workspace. ![Use Current Folder Workspace](/images/vs-code-extension/docs/current-workspace-folder-welcome-view.png) ### Step 3: Import an API Definition If your workspace already contains an API definition, its main entry file will be automatically detected and the validation should start automatically. However, for our current example the workspace doesn't contain any API definition, therefore, a welcome view is shown with various options to create/import an API definition. ![Workspace Welcome View](/images/vs-code-extension/docs/workspace-spec-welcome-view.png) We will import a JSON sample file using the relevant options as shown below: ![Workspace Welcome View](/images/vs-code-extension/docs/json-sample-api-import.png) ### Step 4: Fix any issues in the API Definition As soon as an API definition is added to the workspace, it will be automatically validated. You can also manually trigger validation by saving your API definition files. When the validation completes, the APIMatic API Explorer views, Editor and Problems view will be populated with relevant data to help you tackle all issues. ![API Definition Validation](/images/vs-code-extension/docs/validation-sample-spec.png) Once you have resolved all blocker issues, you can export your API definition to your [APIMatic Dashboard](https://app.apimatic.io/dashboard) to start generating an SDK or a Developer Experience Portal. ## Capabilities The VS Code extension offers the following: - [Setting up an API workspace.](/validate-lint-apis/vs-code-apimatic-extension/setting-up-api-workspace) - [Validating an API workspace.](/validate-lint-apis/vs-code-apimatic-extension/validating-api-workspace) - [Automatically fixing an API workspace.](/validate-lint-apis/vs-code-apimatic-extension/auto-fixing-api-workspace) - [Building an API workspace.](/validate-lint-apis/vs-code-apimatic-extension/building-api-workspace) - [Exporting an API workspace to APIMatic Dashboard.](/validate-lint-apis/vs-code-apimatic-extension/exporting-api-workspace/) - [Transforming API workspace specification format.](/validate-lint-apis/vs-code-apimatic-extension/transforming-api-workspace/) ## Advanced - [About Extension Components](/validate-lint-apis/vs-code-apimatic-extension/about-extension-components.md) --- # Setting Up an API Workspace Source: https://docs.apimatic.io/validate-lint-apis/vs-code-apimatic-extension/setting-up-api-workspace/ To work with one or more API definitions in the APIMatic's VS Code extension, you are first required to select a workspace folder in VS Code as your dedicated API workspace with all relevant files. There are several ways available to set up your API workspace and we will walk you through each of the available options below. :::note Ensure that your API workspace contains only relevant files for the API definition. See tips for [working with large workspaces](#managing-large-workspaces) in the extension without affecting performance. ::: The documentation covers the following topics: - [Opening an API Workspace](#opening-an-api-workspace) - [Option 1: Open a New API Workspace](#option-1-open-a-new-api-workspace) - [Option 2: Open Last API Workspace](#option-2-open-last-api-workspace) - [Option 3: Use Current Workspace as API Workspace](#option-3-use-current-workspace-as-api-workspace) - [Adding an API Definition to Your Workspace](#adding-an-api-definition-to-your-workspace) - [Adding/Importing an Existing API Definition](#addingimporting-an-existing-api-definition) - [Option 1: Adding a Sample File](#option-1-adding-a-sample-file) - [Option 2: Importing an Existing File from Local System](#option-2-importing-an-existing-file-from-local-system) - [Option 3: Importing an Existing File from Public URL](#option-3-importing-an-existing-file-from-public-url) - [Creating an API Definition from Scratch](#creating-an-api-definition-from-scratch) - [Option 1: From an Empty File](#option-1-from-an-empty-file) - [Option 2: From a Template](#option-2-from-a-template) - [Working with an API Definition](#working-with-an-api-definition) - [Closing an API Workspace](#closing-an-api-workspace) - [Managing Large Workspaces](#managing-large-workspaces) - [Configuring Workspace Notifications](#configuring-workspace-notifications) ## Opening an API Workspace If you just opened a workspace folder with an API definition (for example, OpenAPI) or opened an API definition file directly, you may receive a [notification](#configuring-workspace-notifications) to open the folder or the API definition's parent folder as an API workspace in the extension. Click **Yes** to select it as your API workspace: ![Notification](/images/vs-code-extension/docs/auto-detect-workspace.png) Alternatively, you can simply navigate to the **APIMatic API Explorer** view from the **Activity Bar**. Based on your usage, you may see one or more of the following options: ![API Workspace Options](/images/vs-code-extension/docs/api-workspace-open-options.png) Here is what you can expect from each of these: ### Option 1: Open a New API Workspace The **Open New Workspace Folder** option will let you browse your system for a folder that you can use as your API workspace: ![Open New API Workspace Folder](/images/vs-code-extension/docs/open-new-workspace-folder.png) Choose a folder and click on **Select Folder** to open it in the **APIMatic API Explorer** view as an API workspace. Note, that this will close your existing workspace session, if any. ### Option 2: Open Last API Workspace The **Open Last API Workspace Session** option will only be available if you've previously worked on an API workspace. Selecting this option will help restore your last API workspace session so you can resume working from where you left. ### Option 3: Use Current Workspace as API Workspace The **Use Current Workspace Folder** option will be available if you have a workspace folder open that isn't already marked as an API workspace. Selecting this option will keep your current folder open but will make it accessible in the **APIMatic API Explorer** view as an API workspace. ## Adding an API Definition to Your Workspace Once you have your API workspace ready, you can begin the next steps of adding an API definition along with any relevant files. We offer some options to help you get started, in the **Open/Create API Definition** side view which are discussed in more detail in the next few sections. ![Workspace API Definition Options](/images/vs-code-extension/docs/workspace-spec-welcome-view.png) ### Adding/Importing an Existing API Definition If you already have a raw API definition file in your local system or at a public URL, you can import that into your workspace using the relevant import options. Alternatively, if you are just looking to explore the extension and get an idea of things, you can even add a sample file. All of these options should be visible to you under the **Add/Import** title: ![Add Import API Definition](/images/vs-code-extension/docs/add-import-api-definition.png) #### Option 1: Adding a Sample File Click on **Add Sample File**. You will be asked to select the desired output format (`json` or `yaml`) after which a `sample-petstore.<ext>` will be added in your API workspace instantly. ![Sample API Import](/images/vs-code-extension/docs/json-sample-api-import.png) #### Option 2: Importing an Existing File from Local System You can browse your local system and import any existing API definition file into your current API workspace using the **Import Existing File** option. The API definition file must be in one of the [supported formats](/web-dashboard-retired). Note, that multi-file selection or ZIP files aren't supported for this option. ![Import Existing File](/images/vs-code-extension/docs/import-existing-file.png) #### Option 3: Importing an Existing File from Public URL If your raw API definition file is available publicly at a URL, you can import it into your current API workspace using the **Import File from Public URL** option. The API definition file must be in one of the [supported formats](/web-dashboard-retired). Note, that multi-file selection or ZIP files aren't supported for this option. Ensure that you have a stable network connection and then provide a valid public URL path in the input dialog that opens: ![Import Existing File](/images/vs-code-extension/docs/download-api-file.png) If the URL is valid, the file should download successfully into your workspace in a few seconds (depending upon the size): ![Import Existing File](/images/vs-code-extension/docs/downloaded-api-file.png) ### Creating an API Definition from Scratch If you don't have an API definition, you can create one from scratch using options listed under the **Create** title: ![Add Import API Definition](/images/vs-code-extension/docs/create-api-definition.png) #### Option 1: From an Empty File Click on **Create Empty File**. You will be asked to select the desired output format (`json` or `yaml`) after which a `openapi.<ext>` will be added in your API workspace instantly. ![Create Empty File](/images/vs-code-extension/docs/create-empty-file.png) #### Option 2: From a Template We can help you create a basic OpenAPI definition by collecting relevant metadata and generating an API definition accordingly. Click on the **Create File from Template** option to begin. - First, you will be required to enter a short meaningful name for your API service: ![Create File From Template API Name](/images/vs-code-extension/docs/create-file-from-template-api-name.png) - Next, you will be asked to briefly describe what service your API provides: ![Create File From Template API Description](/images/vs-code-extension/docs/create-file-from-template-api-description.png) - Next, enter the URL of the server at which your API is served: ![Create File From Template API Server](/images/vs-code-extension/docs/create-file-from-template-api-server.png) - Lastly, pick an output format for your API definition file (JSON/YAML): ![Create File From Template API Format](/images/vs-code-extension/docs/create-file-from-template-format.png) After the above data is collected, an API definition file will be instantly generated in your API workspace based on the collected information: ![Created File From Template](/images/vs-code-extension/docs/created-file-from-template.png) ### Working with an API Definition We recommend defining your API using the latest available OpenAPI specification version. If you feel the need to refer to the specification documentation at any time while working on your API definition, you can click on the API format name in the status bar at the bottom right side which will open the standard documentation within the extension in a separate tab: ![Reference Documentation](/images/vs-code-extension/docs/reference-documentation.png) ## Closing an API Workspace To close a currently open API workspace in the extension (not the VS Code), you can use the **Close API Workspace** option from the [Manage Session](/validate-lint-apis/vs-code-apimatic-extension/about-extension-components/#manage-session-view) view: ![Close API Workspace](/images/vs-code-extension/docs/close-api-workspace.png) You will be asked to confirm this action before proceeding: ![Close API Workspace Confirmation](/images/vs-code-extension/docs/close-api-workspace-confirmation.png) Once closed, validation and other features won't work until the workspace is re-opened/re-selected as an API workspace. :::note Closing the API workspace will only remove the extension's access to the workspace folder. The workspace folder will still remain open in VS Code. ::: ## Managing Large Workspaces For optimal performance, it's recommended to keep the API workspace small and focused with only relevant files present. Ideally, the workspace shouldn't exceed 20MB in size. However, if you have a large workspace that you would like to open in your VS code, there are certain ways available to improve extension performance. Without those measures, you may encounter performance related warnings as shown below: ![Large Workspace](/images/vs-code-extension/docs/large-workspace.png) Here are some tips for better performance when working with large workspaces: - Manually delete any extra files or folders that aren't relevant and can be safely removed. - Exclude the files or folders that aren't directly related to the API definition itself using the [Workspace File Navigator view's](/validate-lint-apis/vs-code-apimatic-extension/about-extension-components/#workspace-file-navigator-view) [**Exclude**](/validate-lint-apis/vs-code-apimatic-extension/about-extension-components/#exclude-filefolder-from-api-workspace) option: ![Exclude](/images/vs-code-extension/docs/exclude.png) Excluded files/folders will remain in the workspace but will be safely ignored by the extension for all of its operations. ## Configuring Workspace Notifications If the extension doesn't have any API workspace open, it will still run in the background, automatically detect API definition files and show relevant notifications: - On loading a new workspace folder with one or more API definitions: ![Notification](/images/vs-code-extension/docs/auto-detect-workspace.png) - On opening an API definition file directly: ![Notification](/images/vs-code-extension/docs/auto-detect-api.png) If you no longer wish to receive such notifications, you can click on the **Don't Ask Again** option: ![Don't Ask Again](/images/vs-code-extension/docs/dont-ask-again.png) Disabling file specific notifications will disable notifications for all workspaces by default. Disabling notifications shown for currently open workspace folder will, by default, disable notifications for that particular workspace only. You will be asked to confirm whether you wish to continue receiving notifications for other workspaces or not: ![Don't Ask Again](/images/vs-code-extension/docs/dont-ask-again-ever.png) Once your notification preferences have been updated, you can change them at any time from the extension settings. To do this, navigate to the VS Code [**Settings**](https://code.visualstudio.com/docs/getstarted/settings) (click on the gear icon at the bottom left side of the **Activity Bar**): ![Settings](/images/vs-code-extension/docs/settings.png) Next, navigate to the **APIMatic** settings from the **Extensions** side-menu: ![Settings](/images/vs-code-extension/docs/apimatic-settings.png) Here you can toggle notifications for the **_When API File is Detected_** setting either for a specific workspace or globally for all workspaces in the User tab, as per your preferences. --- # Validating an API Workspace Source: https://docs.apimatic.io/validate-lint-apis/vs-code-apimatic-extension/validating-api-workspace/ Once your [API workspace is set up](/validate-lint-apis/vs-code-apimatic-extension/setting-up-api-workspace) along with an API definition, you can start validating it. The extension offers multiple dedicated views to help you get the information you need as efficiently as possible. ![Validate](/images/vs-code-extension/docs/validate.gif) The documentation covers the following topics: - [Triggering the Validation](#triggering-the-validation) - [Validation Messages in the Problems View](#validation-messages-in-the-problems-view) - [Validation Messages in the Active File Editor](#validation-messages-in-the-active-file-editor) - [Issues at Cursor Position](#issues-at-cursor-position) - [Obtaining a Workspace Validation Summary](#obtaining-a-workspace-validation-summary) - [Generating Validation Reports](#generating-validation-reports) - [Finding Additional Information for a Validation Issue](#finding-additional-information-for-a-validation-issue) - [Configuring Validation](#configuring-validation) - [Adding Your Own Linting Rules](#adding-your-own-linting-rules) - [Merge-Aware Validation](#merge-aware-validation) - [Configuring Maximum Validation Messages Limit](#configuring-maximum-validation-messages-limit) ## Triggering the Validation The validation process triggers automatically with the following events: - When the API workspace is loaded at startup. - When a new API workspace is loaded after the workspace folder changes. - When a user saves a file present in the API workspace. In case of any trouble, the validation can also be manually triggered using the status bar button. Note, however, that the validation only works on saved files and any unsaved changes aren't considered: ![Validate Workspace](/images/vs-code-extension/docs/validate-workspace.png) For validation triggering to work as expected, it's important that your API workspace contains a main entry file in one of the [supported specification formats](/web-dashboard-retired) with all relevant identification metadata available, for example, OpenAPI `v3.1` files must contain a root level `openapi` property with value set as `3.1.0`. The extension automatically detects the main entry file based on this identification metadata, highlights its name and labels the detected file with a small `api` keyword next to the file name in the [**Workspace File Navigator**](/validate-lint-apis/vs-code-apimatic-extension/about-extension-components/#workspace-file-navigator-view) view: ![API Label](/images/vs-code-extension/docs/api-label.png) If you don't see this label in front of any of your files, and your workspace contains multiple directories it's possible that your file is hidden from view. To reveal the main file in such cases, you can use the reveal feature. Hover near the [**Workspace File Navigator**](/validate-lint-apis/vs-code-apimatic-extension/about-extension-components/#workspace-file-navigator-view) view title and click on the [**Reveal All Main API Files**](/validate-lint-apis/vs-code-apimatic-extension/about-extension-components/#reveal-all-main-api-files) option: ![Reveal Main Files](/images/vs-code-extension/docs/reveal-main-file.png) This will expand all directories and highlight any files labelled as `api` . ![Revealed Main File](/images/vs-code-extension/docs/revealed-main-file.png) If you are still unable to find a file with the `api` label, it's likely that your main entry file lacks the identification data we require. Please see our [troubleshooting tips](/web-dashboard-retired) to resolve such issues. Once the main file is detected, you should see the validation process being triggered as expected. The validation process will run in the background. While the validation is running, you should see a `Validating...` message in the status bar: ![Validating](/images/vs-code-extension/docs/validating.png) ## Validation Messages in the Problems View Once the validation completes, you should see one or more validation logs in the VS Code **Problems** view if any issue is found in your API definition: ![Problems View](/images/vs-code-extension/docs/problems-view.png) The validation log will be shown with the appropriate severity level and contain the source name (APIMatic), issue message, line/path information as well as any contextual data related to the issue in the form of key-value pairs, for example, in the above screenshot the name of the unused tag is shown in a key-value form with key set as `Undefined Tag`. The validation message will also list the issue code (`OPENAPI3APIMATIC_L235`) which can be used to view more details about it in the [**Learn More**](/validate-lint-apis/vs-code-apimatic-extension/about-extension-components/#learn-more-view) view. ## Validation Messages in the Active File Editor If you currently have a workspace file open in the **Editor** with validation issues, those issues will be highlighted in the editor at a specific line and position with appropriate squiggles based on severity of messages. Hovering over a squiggly will provide you further information about the issue, for example, the source (APIMatic), issue message, line/path information as well as any contextual data related to the issue in the form of key-value pairs, for example, in the screenshot below the name of the unused tag is shown in a key-value form with key set as `Undefined Tag`. The hover message will also list the issue code (`OPENAPI3APIMATIC_L235`) which can be used to view more details about it in the [**Learn More**](/validate-lint-apis/vs-code-apimatic-extension/about-extension-components/#learn-more-view) view. ![Editor Validation](/images/vs-code-extension/docs/editor-validation.png) In some cases, the hover message may also show information about components referencing the current component using `$ref`: ![Reference Jump](/images/vs-code-extension/docs/reference-jump.png) For more details about this feature, please see related documentation [here](/validate-lint-apis/vs-code-apimatic-extension/about-extension-components/#violation-call-trees). ### Issues at Cursor Position The amount of information that can be provided for an issue in the hover message is limited. Therefore, the dedicated view named [**Active Violations**](/validate-lint-apis/vs-code-apimatic-extension/about-extension-components/#active-violations-view) can be used to view complete set of issues/violations and their details, based on where your current cursor position is in the active editor. ![Active Violations](/images/vs-code-extension/docs/active-violations.png) The details of a particular violation can include the following: - Message associated with the issue. - Severity of the issue. - Key-value pairs contextual data (if any) associated with the issue. - Location, for example, line/path information for the issue. - Reference call tree to help trace origin of issue when the current component containing the issue is referenced by one or more components. ## Obtaining a Workspace Validation Summary To get an overall summary of all validation issues found in the complete API workspace, you can use the dedicated [**Workspace Validation Summary**](/validate-lint-apis/vs-code-apimatic-extension/about-extension-components/#workspace-validation-summary-view) view. This view offers intelligent grouping of the issues to help you tackle problems efficiently as well as gives you an overall score of your workspace which can help roughly predict the quality of output you can hope to get in any API tool (including APIMatic) with your current API definition: ![Workspace Validation Summary](/images/vs-code-extension/docs/workspace-validation-summary.png) As can be seen in the screenshot, the issues in this view are grouped into various meaningful categories based on their severity, whether they're validation or linting messages or whether they affect code generation or documentation generation. Within these groups, the issue instances are further grouped on the basis of the issue message. Therefore, you can easily select a particular issue based on its severity and then be able to navigate through all of its instances across the whole workspace as well. Similarly, if you want to resolve validation issues before moving on to linting issues, you can do that easily as well. ### Generating Validation Reports If you wish to share the validation summary of your API definition with external stakeholders, we recommend that you generate a validation report in one of the supported formats. Hover near the [**Workspace Validation Summary**](/validate-lint-apis/vs-code-apimatic-extension/about-extension-components/#workspace-validation-summary-view) view title and you should see a `Generate Audit Report(s)` button near the top right corner. Click on it: ![Validation Report](/images/vs-code-extension/docs/generate-audit-report.png) Select the desired output format of the report (`JSON`/`HTML`/`Markdown`/`PDF`): ![Validation Report Format](/images/vs-code-extension/docs/choose-report-format.png) Next, you can optionally provide the name of the individual or organization to whom you intend to address the report: ![Validation Report Addressee](/images/vs-code-extension/docs/provide-report-addressee.png) Once the information collection is completed, the generated report will be downloaded into the root folder of your API workspace: ![Validation Report Generated](/images/vs-code-extension/docs/report-generated.png) Here is a preview of a sample report generated with this option: ![Report](/images/vs-code-extension/docs/report.png) Note, that if multiple APIs are involved in the workspace or the workspace has also been built for APIMatic using the [**Build**](/validate-lint-apis/vs-code-apimatic-extension/building-api-workspace/) option, multiple reports may be generated in the form of a ZIP file. ## Finding Additional Information for a Validation Issue There are several alternative ways available to access more details for a validation issue, for example, hints, external documentation, and links. These include: - Click on `(?)` next to an issue message in either the [**Active Violations**](/validate-lint-apis/vs-code-apimatic-extension/about-extension-components/#active-violations-view) or [**Workspace Validation Summary**](/validate-lint-apis/vs-code-apimatic-extension/about-extension-components/#workspace-validation-summary-view) views: ![Open Learn More](/images/vs-code-extension/docs/open-learn-more.png) - OR click on the message code in the **Problems** view: ![Problems View code](/images/vs-code-extension/docs/problems-view-rule-code.png) - OR hover over a problem in the **Editor** and click on the message code: ![Editor Hover Message Code](/images/vs-code-extension/docs/editor-hover-message-code.png) Doing any of the above actions will open up the [**Learn More** view](/validate-lint-apis/vs-code-apimatic-extension/about-extension-components/#learn-more-view) with all relevant details associated with the issue: ![Learn More View](/images/vs-code-extension/docs/learn-more-view.png) This view can be [expanded further](/validate-lint-apis/vs-code-apimatic-extension/about-extension-components/#expand-rule-details) to explore details more easily: ![Learn More View Expanded](/images/vs-code-extension/docs/expanded-learn-more.png) ## Configuring Validation You can configure the validation and linting process by providing a [validation configuration object](/validate-lint-apis/configuring-validation/#validation-configuration-object) in the APIMatic's Metadata file. The extension allows you to easily add a [Metadata](/manage-apis/apimatic-metadata/) file with a default validation configuration as follows: - Hover near the [**Workspace File Navigator**](/validate-lint-apis/vs-code-apimatic-extension/about-extension-components/#workspace-file-navigator-view) view title and click on the **Add APIMatic Metadata Configuration File** option: ![Add Metadata File](/images/vs-code-extension/docs/add-metadata-file.png) - You will be asked to select all items you'd like to initialize in the APIMatic Metadata file. For the current example, we will only select `Validation` from the list: ![Validation Configuration](/images/vs-code-extension/docs/validation-configuration.png) - After proceeding, an APIMatic Metadata file will be successfully added in your workspace with a default validation configuration as shown below: ![Validation Configuration Added](/images/vs-code-extension/docs/validation-configuration-added.png) Please see our detailed documentation to learn more about [configuring validation](/validate-lint-apis/configuring-validation/). While configuring, you may find it useful to refer with the [Learn More view](/validate-lint-apis/vs-code-apimatic-extension/about-extension-components/#learn-more-view) to obtain more details about the rule/ruleset you are looking to configure, for example, you can obtain the ids of the rule/ruleset as described [here](/validate-lint-apis/vs-code-apimatic-extension/about-extension-components/#copy-rule-and-ruleset-id). ## Adding Your Own Linting Rules The extension supports validation against any custom lint rules defined by the user. See our detailed documentation to learn more about [adding your own rules](/validate-lint-apis/adding-your-own-rules/). ## Merge-Aware Validation APIMatic [supports merging](/manage-apis/api-merging/) of multiple API definitions. To ensure a successful merge, it's required that: - Each API definition involved in the workspace is valid, that is, it has no validation errors. - Each API definition, when built for APIMatic using the [**Build**](/validate-lint-apis/vs-code-apimatic-extension/building-api-workspace/) option, results in a successful build. - Each API definition when merged with another, results in a valid API definition which has no validation errors and also passes the build process. The VS code extension lets you perform all of the above forms of validation layers on your APIs to be merged such that all views associated with validation, that were discussed earlier, are populated with data of all the APIs involved. For better performance and ease of understanding, we recommend that you validate and build a single API definition at one time. This can be done by opening the API workspace folder containing only the specific API definition's files. Once you have ensured that all API's are valid this way, you can open the root workspace folder as your API workspace which contains the directories of all of your API definitions as well as the base APIMatic Metadata file responsible for initiating the merge process. [**Build**](/validate-lint-apis/vs-code-apimatic-extension/building-api-workspace/) this folder to ensure that all merge related checks pass for all your API definitions. If build passes, you should be able to easily [export](/validate-lint-apis/vs-code-apimatic-extension/exporting-api-workspace/) your workspace to APIMatic Dashboard for SDK/portal generation. ## Configuring Maximum Validation Messages Limit VS Code limits the maximum no. of validation messages per file to approximately 1000. To respect that and prevent any disconnect between the extension validation information and one shown on the **Editor** and **Problems** views, we've also limited the maximum no. of validation messages per file to be 999 by default. However, for bigger API definition files it's often common to see larger no. of issues in a single file. In such cases, if a user wishes to see the complete list of validation issues in the extension as well as generate full validation reports, they can change the maximum limit as per their needs or remove it entirely, from the extension settings. To do this, navigate to the VS Code [**Settings**](https://code.visualstudio.com/docs/getstarted/settings) (click on the gear icon at the bottom left side of the **Activity Bar**): ![Settings](/images/vs-code-extension/docs/settings.png) Next, navigate to the **APIMatic** settings from the **Extensions** side-menu: ![Settings](/images/vs-code-extension/docs/apimatic-settings-validation.png) Here the limit value set in the **_Max Problems Per File_** setting can be increased/decreased either for a specific workspace or globally for all workspaces in the _User_ tab, as per needs. To allow an infinite number of problems, leave the value empty. Note, however, that changing the validation problems limit will only affect the extension views and validation reports and won't alter the VS Code **Problems** view or no. of **Editor** problems due to limits set by the VS Code itself. --- # Auto Fixing an API Workspace Source: https://docs.apimatic.io/validate-lint-apis/vs-code-apimatic-extension/auto-fixing-api-workspace/ Auto fixing, as the name suggests, can help facilitate you by resolving some common issues in your API definition automatically. For example, OpenAPI and other popular API specification formats aren't inherently designed for code generation and therefore it's quite common to see inline schemas in API definitions. Inline schemas negatively impact the output quality of the generated SDKs/Developer Experience Portals. However, most users aren't familiar with them and may have trouble tackling them efficiently. This is where auto fixing can help as it can easily convert such schemas into global schemas by intelligently assigning unique but meaningful names to them. After auto fixing has completed, users will have full control to refine the names as they wish. Similarly, auto fixing can help resolve other common issues as well. ![Auto Fix](/images/vs-code-extension/docs/auto-fix.gif) By default, the auto fix process runs for the whole API workspace and tries to resolve as many [supported issues](#rules-supported-for-auto-fixing) as possible. Support for auto fixing specific issues based on user preference will be added in the future. ## Pre-Requisites Auto fixing requires the following: - The API definition has been validated at least once. - None of your API definition files contain basic JSON/YAML syntax errors. If errors are found, the auto fix may not proceed further or quit with the following message pop-up: ![Auto Fix Fail](/images/vs-code-extension/docs/auto-fix-json-syntax-error.png) ## Auto Fixing Your API Workspace To begin auto fixing your API workspace, you need to click the (💡) icon from the left side of the status bar: ![Auto Fix Button](/images/vs-code-extension/docs/auto-fix-button.png) The auto fix process will start in the background after verifying that the validation process has occurred. While the auto fixing is running, you should see a `Auto-fixing...` message in the status bar: ![Auto Fix Running](/images/vs-code-extension/docs/auto-fix-running.png) If your API definition contains issues that can't be auto fixed or the auto fixing fails, you will see the following message pop-up: ![Auto Fix Not Done](/images/vs-code-extension/docs/no-auto-fix-done.png) If the auto fixing proceeds successfully, you should shortly start seeing live logs for the changes being made to the files including information of what was added/removed/updated and where: ![Auto Fix Logs](/images/vs-code-extension/docs/auto-fix-logs.png) Once the auto fix process completes, you will have the option to either save or undo all the changes made: ![Auto Fix Completed](/images/vs-code-extension/docs/auto-fix-completed.png) At this point you can review the logs to make your decision and proceed accordingly. If you choose to save all changes, the workspace will be re-validated and issues fixed will be removed from the validation list. ## Auto Fixing Specific Violation or Instance If you prefer not to auto fix the entire API workspace, the VS Code Extension also supports fixing individual violations or even specific instances of a violation. To fix all instances of a particular violation, hover over the violation in the **Workspace Validation Summary**. You will see a (💡) icon next to it. Clicking this icon will trigger auto fixing for all instances related to that specific violation. ![Auto Fix Violation](/images/vs-code-extension/docs/auto-fix-violation.png) You can also choose to fix just a single instance instead of all related ones. Hover over the specific instance in the violations list and click the (💡) icon that appears next to it. This will apply the fix only to that particular occurrence. ![Auto Fix Violation](/images/vs-code-extension/docs/auto-fix-violation-instance.png) These targeted options give you greater flexibility and control when addressing validation issues in your OpenAPI definition. ## Rules Supported for Auto Fixing Depending upon the use-cases, auto fixing may support automatically resolving issues associated with the following rules only: - [resolvable-reference](/rulesets/input-file-validation/resolvable-reference/) - [operation-id-exists](/rulesets/openapi-v3-apimatic-linting/operation-id-exists/) - [no-inline-complex-schema-definition](/rulesets/openapi-v3-apimatic-linting/no-inline-complex-schema-definition/) - [no-inline-enum-schema-definition](/rulesets/openapi-v3-apimatic-linting/no-inline-enum-schema-definition/) - [valid-operation-id](/rulesets/openapi-v3-codegen-syntax-linting/valid-operation-id/) - [info-description-exists](/rulesets/openapi-v3-docsgen-linting/info-description-exists/) - [at-least-one-tag-reference](/rulesets/openapi-v3-apimatic-linting/at-least-one-tag-reference/) - [pre-defined-operation-tag-in-global-tags](/rulesets/openapi-v3-apimatic-linting/pre-defined-operation-tag-in-global-tags/) - [unique-tag](/rulesets/openapi-v3-apimatic-linting/unique-tag/) - [unique-case-insensitive-global-tag-name](/rulesets/openapi-v3-codegen-linting/unique-case-insensitive-global-tag-name/) - [unique-schema-enum-list-items](/rulesets/openapi-v3-standards-linting/unique-schema-enum-list-items/) - [parameter-example-or-examples-exist](/rulesets/openapi-v3-docsgen-linting/parameter-example-or-examples-exist/) - [schema-example-or-default-value-exists](/rulesets/openapi-v3-docsgen-linting/schema-example-or-default-value-exists/) - [valid-schema-examples](/rulesets/openapi-v3-standards-linting/valid-schema-examples/) - [operation-optional-parameters-after-required-parameters](/rulesets/openapi-v3-codegen-linting/operation-optional-parameters-after-required-parameters/) This list will be updated as more and more rules are supported for auto fixing. --- # Building an API Workspace Source: https://docs.apimatic.io/validate-lint-apis/vs-code-apimatic-extension/building-api-workspace/ If you are looking to generate SDKs, Developer Experience Portals or simply transforming your API definition's format to another specification format, you need to ensure that your API definition is valid for and compatible with APIMatic. This is ensured through a "Build" step that essentially converts the API definition into an intermediate format supported by APIMatic and runs additional checks on it. If the build is successful, you can proceed to generating SDKs/portals or transforming as required. If not, you will need to take some extra steps in your API definition to ensure they are ready for APIMatic. The build process for transformation is more flexible than one performed for code generation which strictly enforces a few extra checks e.g. those related to naming conventions. ## Pre-Requisites In order to build your API workspace in the VS Code extension, it is required that your workspace has passed through the validation layer and that did not result in any validation errors (blocking or otherwise). If it did, you may see an error like below: ![Build Error](/images/vs-code-extension/docs/build-with-validation-errors.png) Note, that validation warnings or any linting errors are allowed and will not prevent the build from proceeding. ## Building the API Workspace To build your API workspace, you need to click the tools (🛠️) icon from the left side of the status bar: ![Build Workspace](/images/vs-code-extension/docs/build-workspace.png) The build process will start in the background after verifying that the validation process has occurred and did not result in any blocking errors. While the build is running, you should see a `Building...` message in the status bar: ![Build Running](/images/vs-code-extension/docs/building.png) Depending on whether the build passes or not, you will see a `Build Passed` or a `Build Failed` message in the status bar: ![Build Success](/images/vs-code-extension/docs/build-success.png) The validation views will be populated with additional messages from the build process with codes beginning with `APIMATIC`. If the build fails, the messages will include errors as well. ![Build Messages](/images/vs-code-extension/docs/build-messages.png) You will need to re-trigger the build process each time the validation information changes for the API workspace. ### Building for API Specification Transformation By default, the build process will enforce code generation specific checks as well. If you only intend to perform a simple API specification transformation for your API definition, you should configure the validation process as described [here](/validate-lint-apis/vs-code-apimatic-extension/validating-api-workspace/#configuring-validation) and set the `SkipCodeGenerationChecks` flag to `true`. --- # Exporting an API Workspace to APIMatic Dashboard Source: https://docs.apimatic.io/validate-lint-apis/vs-code-apimatic-extension/exporting-api-workspace/ You can easily export your API workspace from within the VS Code extension to your [Dashboard](https://app.apimatic.io/dashboard) once your API definition is ready. The export will essentially collect all files from the API workspace and [import](/web-dashboard-retired) them as a single API entity in the [Dashboard](https://app.apimatic.io/dashboard). The exact behavior you can expect from this feature is discussed in this document. ![Export](/images/vs-code-extension/docs/export.gif) ## Pre-Requisites - You must be authorized with APIMatic using an **Authentication Key** to export your API workspace. To obtain an authentication key please see relevant documentation [here](/account-management/obtaining-auth-keys/). When exporting, you will be prompted to provide the authentication key the first time: ![Authorization](/images/vs-code-extension/docs/authorization.png) Only if the provided key is valid, will you be allowed to proceed with the export. You won't be prompted for the key again for as long as it's valid. - In order to export your API workspace to the Dashboard, it's required for your workspace to pass the [Build](validate-lint-apis/vs-code-apimatic-extension/building-api-workspace) first. The build must be run with code generation checks enabled, that is, if you are using an [APIMatic Metadata file](/manage-apis/apimatic-metadata/) it must not set the `SkipCodeGenerationChecks` flag in the [Validation Configuration](/validate-lint-apis/configuring-validation/#validation-configuration-object) to `true`. ## Exporting the API Workspace To export your API workspace, click on the upload (☁️) icon from the left side of the status bar: ![Export to Dashboard](/images/vs-code-extension/docs/export-dashboard.png) The export process will begin instantly. If your workspace isn't already built, the build process will start first: ![Build Running](/images/vs-code-extension/docs/building.png) If the build passes, the export process will proceed to importing the workspace into the APIMatic Dashboard. At this point you should see a `Exporting...` message in the status bar: ![Export Running](/images/vs-code-extension/docs/exporting.png) If you are exporting for the first time, a successful export will create a new API group entity in your APIMatic Dashboard: ![Export Successful](/images/vs-code-extension/docs/export-successful.png) The exported entity should be visible in your Dashboard: ![Export Successful](/images/vs-code-extension/docs/exported.png) Subsequent export requests will update the existing entity if it still exists and with the same API name. When updating the same version of an existing API group entity, existing version will only be replaced after taking consent. If consent isn't given, a new API group entity will be created in the Dashboard instead: ![Export Consent](/images/vs-code-extension/docs/replace-for-export.png) If a new version is being exported for the same API group entity (that is, with the same name), it will be added as a separate new version within the same API group entity without replacing the older versions: ![Export New Version](/images/vs-code-extension/docs/new-version-export.png) This is how it will look like for your API entity in the Dashboard: ![New Version in Dashboard](/images/vs-code-extension/docs/multi-versions-export.png) ## Configuring the Export Process An export from the VS Code extension is essentially an "import" into the Dashboard. You can largely control how this import works and affects the SDK/Developer Experience portal generation, using various [configuration options](/manage-apis/import-export-settings/#import-settings-object). The VS Code extension allows you to easily add a [Metadata](/manage-apis/apimatic-metadata/) file with default import settings as follows: - Hover near the **Workspace File Navigator** view title and click on the **Add APIMatic Metadata Configuration File** option: ![Add Metadata File](/images/vs-code-extension/docs/add-metadata-file.png) - You will be asked to select all items you'd like to initialize in the APIMatic Metadata file. For the current example, we will only select `Import` from the list: ![Import Configuration](/images/vs-code-extension/docs/import-configuration.png) - After proceeding, an APIMatic Metadata file will be successfully added in your workspace with default import settings as shown below: ![Import Configuration Added](/images/vs-code-extension/docs/import-configuration-added.png) ## For More Information You can find out more details [here](/web-dashboard-retired) about how an exported API definition's import to the Dashboard works. --- # Transforming API Workspace Specification Format Source: https://docs.apimatic.io/validate-lint-apis/vs-code-apimatic-extension/transforming-api-workspace/ You can easily transform the API specification format being used by your API workspace to a different format using our VS Code extension's Transform feature. ![Transform](/images/vs-code-extension/docs/transform.gif) ## Pre-Requisites - You must be authorized with APIMatic using an **Authentication Key** to transform your API workspace. To obtain an authentication key please see relevant documentation [here](/account-management/obtaining-auth-keys/). When transforming, you will be prompted to provide the authentication key the first time: ![Authorization](/images/vs-code-extension/docs/authorization.png) Only if the provided key is valid, will you be allowed to proceed with the transformation. You will not be prompted for the key again for as long as it is valid. - In order to transform your API workspace, it is required for your workspace to pass the [Build](/validate-lint-apis/vs-code-apimatic-extension/building-api-workspace/#building-for-api-specification-transformation) first. ## Transforming the API Workspace Format To transform your API workspace specification format, click on the two-way arrow (`<->`) icon from the left side of the status bar: ![Transform Spec](/images/vs-code-extension/docs/transform-spec.png) Select the desired output API specification format from the list e.g. OpenAPI `v3.1`: ![Transform Spec Format](/images/vs-code-extension/docs/transform-format.png) Next, select the destination folder where you would like to save the transformed output file: ![Transformed Spec Folder](/images/vs-code-extension/docs/transform-destination.png) After selecting a folder, if your workspace isn't already built, the build process will start first: ![Build Running](/images/vs-code-extension/docs/building.png) If the build passes, the transformation process will start next. During this, you should see a `Transforming...` message in the status bar: ![Transform Running](/images/vs-code-extension/docs/transforming.png) When the transformation is complete, the converted output will be downloaded into your workspace root folder: ![Transform Completed](/images/vs-code-extension/docs/transformed.png) ## Configuring the Transformation Process Transformation can be easily configured using various [available options](/api-transformer/configuring-transformer/). Since transformation is essentially import and export steps combined into one step, the VS Code extension allows you to easily add a [Metadata](/manage-apis/apimatic-metadata/) file with default import and export settings as follows: - Hover near the **Workspace File Navigator** view title and click on the **Add APIMatic Metadata Configuration File** option: ![Add Metadata File](/images/vs-code-extension/docs/add-metadata-file.png) - You will be asked to select all items you'd like to initialize in the APIMatic Metadata file. For the current example, we will only select `Import` and `Export` from the list: ![Import Export Configuration](/images/vs-code-extension/docs/import-export-configuration.png) - After proceeding, an APIMatic Metadata file will be successfully added in your workspace with default import and export settings as shown below. You can play around with these settings to control the transformation process as per your needs: ![Import Export Configuration Added](/images/vs-code-extension/docs/import-export-configuration-added.png) ## For More Information You can find out more details [here](/api-transformer/overview-transformer/) about our API Transformer solution and its related information. --- # About Extension Components Source: https://docs.apimatic.io/validate-lint-apis/vs-code-apimatic-extension/about-extension-components/ The APIMatic's VS Code extension makes two major contributions to the VS Code: - An [APIMatic API Explorer view container](#apimatic-api-explorer-view-container) and - Several [status bar actions](#status-bar-actions). This document covers each of the above component in detail. ## APIMatic API Explorer View Container You will find all important views associated with the extension, in the **APIMatic API Explorer** view located in the Activity Bar. These views allow for easy API file navigation as well as for understanding validation issues better. ![APIMatic API Explorer](/images/vs-code-extension/docs/apimatic-api-explorer.png) Full list of views associated with the APIMatic API Explorer view container is given below: 1. [Workspace File Navigator View](#workspace-file-navigator-view) 2. [Workspace Validation Summary View](#workspace-validation-summary-view) 3. [Active Violations View](#active-violations-view) 4. [Learn More View](#learn-more-view) 5. [Manage Session View](#manage-session-view) 6. [Help 💡 View](#help--view) ![APIMatic API Explorer Views](/images/vs-code-extension/docs/apimatic-api-explorer-views.png) ### Workspace File Navigator View The main purpose of this view is to make it easier for users to navigate through and work with files and folders involved in the [API workspace](/validate-lint-apis/vs-code-apimatic-extension/setting-up-api-workspace/). ![Workspace File Navigator](/images/vs-code-extension/docs/workspace-file-navigator.png) This view offers the following functionalities: - [Open Files in the Editor](#open-files-in-the-editor) - [Main API File Highlighting and Labelling](#main-api-file-highlighting-and-labelling) - [Reveal All Main API Files](#reveal-all-main-api-files) - [Add an APIMatic Metadata File](#add-an-apimatic-metadata-file) - [APIMatic Metadata Files Labelling](#apimatic-metadata-files-labelling) - [Exclude File/Folder from API Workspace](#exclude-filefolder-from-api-workspace) - [Refresh View](#refresh-view) - [Edit Files and Folders](#edit-files-and-folders) - [Collapse All Folders](#collapse-all-folders) #### Open Files in the Editor Clicking on a file's name will open it in the VS Code Editor. However, only textual or non-binary files can be opened this way. #### Main API File Highlighting and Labelling To distinguish API definition's main entry files from other files, they are given a default background color and have an `api` label attached after the file name: ![Main File Highlight](/images/vs-code-extension/docs/main-file-highlight.png) #### Reveal All Main API Files If you are dealing with multiple API definitions in your API workspace or your main entry file for the API definition is nested within a folder, you can use the reveal feature to bring all main API files in the workspace directories into view. This will uncollapse all collapsed directory names to reveal nested items. - Hover near the **Workspace File Navigator** view title and click on the **Reveal All Main API Files** option as shown below: ![Reveal Main Files](/images/vs-code-extension/docs/reveal-main-files.png) - This will instantly expand all directories and reveal all highlighted main API files: ![Main Files Revealed](/images/vs-code-extension/docs/main-api-files-revealed.png) #### Add an APIMatic Metadata File If your API workspace lacks an APIMatic [Metadata](/manage-apis/apimatic-metadata/) file, the view offers an option to quickly add one: - Hover near the **Workspace File Navigator** view title and select the **Add APIMatic Metadata Configuration File** option as shown below: ![Add Metadata File](/images/vs-code-extension/docs/add-metadata-file-1.png) - You will be asked to select one or more configuration objects to initialize by default. Pick as per requirements: ![Metadata File Configuration](/images/vs-code-extension/docs/metadata-file-configuration.png) - A metadata file with selected configurations will be instantly added in the API workspace: ![Metadata File Added](/images/vs-code-extension/docs/metadata-file-added.png) #### APIMatic Metadata Files Labelling To distinguish APIMatic's [Metadata](/manage-apis/apimatic-metadata/) files in the view from other files, a `meta` label is attached after their file name: ![Metadata File Label](/images/vs-code-extension/docs/metadata-label.png) #### Exclude File/Folder from API Workspace If your workspace contains files or folders that aren't directly linked to the API definition but are part of your API project only, it is recommended that you exclude them from your API workspace using the **Exclude** option in the **Workspace File Navigator**: ![Exclude](/images/vs-code-extension/docs/exclude.png) This option is also available in the context menu for each file/folder: ![Exclude-Context](/images/vs-code-extension/docs/exclude-context-menu.png) Excluding a file/folder adds its path to the root level `.apimaticvscodeignore` file (created from scratch if one doesn't exist already) of the API workspace in the form of a glob pattern: ![Excluded](/images/vs-code-extension/docs/excluded.png) This action will also hide the file/folder from the **Workspace File Navigator** view. The extension will safely ignore all such files during validation and all other operations. #### Refresh View If the files/folders involved in the API workspace have changed outside the VS Code extension, you can refresh the navigator view to get updated information for each file and folder. This can be done by hovering near the **Workspace File Navigator** view title and clicking on the refresh (🔃) icon: ![Refresh File Navigator](/images/vs-code-extension/docs/refresh-file-navigator-view.png) This will reload the files and folders as well as re-validate the workspace. #### Edit Files and Folders The files and folders in this view appear as read-only since basic file related functionalities (e.g. renaming, deleting or adding) are already available in the VS Code's [Explorer](https://code.visualstudio.com/docs/getstarted/userinterface#_explorer) view. If you still wish to perform some file/directory related actions, click on the pencil (✏️) icon that becomes visible on hover near the navigator view's title or the file/directory name: - Edit option near the file/directory name: ![Edit File/Directory](/images/vs-code-extension/docs/edit-file-navigator.png) - Edit option near the File Navigator view title: ![Edit Workspace Folder](/images/vs-code-extension/docs/edit-workspace-folder.png) Clicking on this will switch the active view to the Explorer and highlight your selected file/directory name in it so you can quickly perform required actions there. ![Edit in Explorer](/images/vs-code-extension/docs/edit-in-explorer.png) An alternative approach to doing this would be to open the context menu for a file/folder and clicking on the **Edit** option: ![Edit File/Directory via Context](/images/vs-code-extension/docs/edit-file-navigator-context.png) #### Collapse All Folders To quickly collapse all folders in the API workspace, hover near the **Workspace File Navigator** view title and click on the collapse all icon: ![Collapse All](/images/vs-code-extension/docs/collapse-all.png) All expanded directories will instantly be closed. ### Workspace Validation Summary View This view shows a summary of validation status of the complete API workspace. ![Workspace Validation Summary View](/images/vs-code-extension/docs/validation-summary-view.png) #### Generate Reports To share the validation summary with external stakeholders, you can generate one or more reports by clicking on the report (🗒️) button visible in the top right corner when you hover on the **Workspace Validation Summary** view title: ![Generate Audit Report](/images/vs-code-extension/docs/generate-audit-reports.png) Here is a preview of a sample report generated with this option: ![Report](/images/vs-code-extension/docs/report.png) To learn more about generating reports, please check out our documentation [here](/validate-lint-apis/vs-code-apimatic-extension/validating-api-workspace/#generating-validation-reports). #### Validation Status The overall pass/fail status is shown in the **Status** property. Possible values and what they mean are defined below: | Status | Details | | ------ | ------- | | Passed | All files in the API workspace are valid and have no issues. You can safely proceed to generating desired output from your API definition(s). | | Passed With Warnings | One or more files in the API workspace have some warnings but this won't be a blocker for generating an output from your API definition(s). | | Failed With Errors | One or more files in the API workspace contain errors that need to be resolved before you can generate any output for your API definition(s). | | Failed With Blocking Errors | One or more files in the API workspace contain blocker issues that are preventing the validation process from completing. Once these issues are resolved the validation process will resume and may detect more issues. No output can be generated from the API definition(s) unless all blocking issues (current and any upcoming) are resolved. | The overall status is decided based on the [severity of messages](/validate-lint-apis/overview/#severity-of-messages) logged for the API workspace. #### Score Labelled as **Percentage Score**, this is another measure to help you quickly determine how good or bad your API workspace definitions are doing in terms of number of issues, severity, type of issues, etc. You should aim for a score above 80% to get a better output from your API definition(s) in any API tool. #### Total Messages Labelled as **Total**, this property shows the total number of issues present across all files in your API workspace. This includes a sum of issue types and their particular instances. #### Messages by Severity Validation issues/messages are grouped based on [severity](/validate-lint-apis/overview/#severity-of-messages) level to help you tackle blocker issues first followed by warnings and so on. The severity level is followed by a count of message instances that are of the selected severity level. #### Validation/Linting Messages Issues are also grouped based on whether they are validation messages or linting messages. The total count of message instances of the selected type is mentioned at the end of the label. #### Code Generation and Documentation Messages Issues that are likely to affect code generation output are grouped under the **Code Generation** category. Similarly, issues that can affect quality of auto-generated documentation are grouped under the **Documentation** category. The total count of message instances of the selected category is mentioned at the end of the label. #### Instances Grouped by Message At the top-level, the messages are grouped either by severity or based on whether they are validation or linting messages. Instances of messages belonging to these groups are further grouped on the message value. Label of such groups show the message value followed by a count of instances belonging to the message. This grouping can be useful if you want to tackle a particular issue and all of its instances first before moving on to another issue. ![Grouped Issue Instances](/images/vs-code-extension/docs/grouped-issue-instances.png) If you want to understand what a message means, view hints to resolve the issue or just want to see more details about the rule that the message belongs to, you can click on the `(?)` visible when you hover near the message value. This should open the [Learn More View](#learn-more-view) with all relevant details. #### Navigating to a Message Instance Message instances are likely to have a file and line/path information attached to them. Clicking on an instance will take you to where the instance is located by first opening the target file and then highlighting the target line in the file. In some cases, where the instance may not be directly associated with a file, a path information will be available and clicking on the instance will not have any effect. #### Collapse All Nodes If the information becomes overwhelming you can quickly collapse all nodes of the view using the **Collapse All** option from the right corner of the view title: ![Collapse All](/images/vs-code-extension/docs/validation-summary-collapse-all.png) After collapsing, all inner nodes will be collapsed and only the root level ones will be shown: ![Collapsed](/images/vs-code-extension/docs/validation-summary-collapsed.png) ### Active Violations View This view provides additional contextual information for one or more violations that are currently active in either the Editor or in other views like the [Workspace Validation Summary view](#workspace-validation-summary-view). The information shown on hovering over a squiggly in the Editor, when working with an API workspace file, is quite limited. It is also possible that multiple issues exist at the squiggly point which makes the hover messages more confusing especially since they lack any severity information: ![Multi Messages Editor](/images/vs-code-extension/docs/multi-messages-editor.png) To make it easier to tackle issues at a particular point in the file open in the Editor, the **Active Violations** view updates itself with every cursor position change in the Editor and shows a list of issues/violations applicable at that position. For each issue, additional contextual information is provided as well to help users resolve issues more efficiently. ![Active Violations View](/images/vs-code-extension/docs/active-violations-view.png) #### Selected When a user selects a violation from either the list of violations from the [**Cursor**](#cursor) property of the Active Violations view or from the [Workspace Validation Summary view](#workspace-validation-summary-view), the selected violation and its details are shown under the **Selected** property of the Active Violations view. ![Selected Violation](/images/vs-code-extension/docs/selected-violation.png) #### Cursor This property shows the line number and position/column of your cursor in the active Editor followed by a total count of issues or violations nested inside it which are applicable at that particular position. The data that is available for each violation is described in the next few sections. #### Violation Message For each violation the root node represents the message associated with the issue, visible to you when you hover over the squiggly in the editor and which describes the problem in few short words. If you want to understand what a violation message means, view hints to resolve the issue or just want to see more details about the rule that the message belongs to, you can click on the `(?)` visible when you hover near a violation message value. This should open the [Learn More View](#learn-more-view) with all relevant details. #### Violation Severity Labelled as **Severity**, this property indicates the [severity level of the message](/validate-lint-apis/overview/#severity-of-messages). #### Violation Location Labelled as **Location**, this property shows the file path and the line number and position range within the file at which the issue exists i.e. unlike the cursor position which indicates a single point in the file, this location will contain full information of starting and ending line numbers and positions. If you click on the location information it will also highlight the specific range in the file. #### Violation Path Labelled as **Path**, this property shows either the breadcrumb path to the particular location or the JSON reference path, whatever is available. #### Violation Contextual Data Each issue may have dynamic key-value pairs attached with it that represents additional context for the issue: ![Contextual Data](/images/vs-code-extension/docs/active-violations-view-context.png) #### Violation Call Trees Labelled as **Call Tree**, this property contains complete data about components referencing the current component in question, using `$ref`. As the name suggests, this information is represented as a "tree" where the root node is the current component containing the issue and child nodes are components that are directly referencing this component using `$ref`. Inner children of these child nodes will be nodes directly referencing those nodes using `$ref` and so on. The purpose of a call tree is to help you understand scenarios where the issue may have originated based on **how** it was referenced. Here is an example of an OpenAPI file where the same object is incorrectly referenced as both a Parameter Object and as a response Schema Object: ![Incorrect Reference](/images/vs-code-extension/docs/incorrect-reference.png) Due to this, the referenced component has an error shown at the `required` property value: ![Referenced File](/images/vs-code-extension/docs/referenced-file.png) This `required` property is allowed to be a boolean if it is referenced as a Parameter Object. But the same `required` property can't be a boolean if it is referenced as a Schema Object. This implies that the error on the property `required` is due to the incorrect response Schema Object reference: ![Incorrect Response Reference](/images/vs-code-extension/docs/incorrect-response-reference.png) The call tree helps confirm this by showing only the incorrect response Schema Object reference as the root cause for the error on the `required` property: ![Call Tree](/images/vs-code-extension/docs/call-tree-for-reference.png) In this way, if the response schema reference is removed, the issue will be resolved. Without a call tree, it would have been difficult to understand the origin of the issue in the referenced component. #### Collapse All Nodes If the information becomes overwhelming you can quickly collapse all nodes of the view using the **Collapse All** option from the right corner of the view title: ![Collapse All](/images/vs-code-extension/docs/active-violations-collapse-all.png) After collapsing, all inner nodes will be collapsed and only the root level ones will be shown: ![Collapsed](/images/vs-code-extension/docs/active-violations-collapsed.png) ### Learn More View As the name suggests, this view helps you learn more about a particular issue by providing details about the rule associated with the issue. The information listed here is also available for each rule in our [official documentation of each ruleset](rulesets/overview/). The goal of providing the same information within the extension is to help save the user's time in searching for details to better understand the issue and to easily view hints for resolving it efficiently. ![Learn More View](/images/vs-code-extension/docs/learn-more-view-1.png) #### Open Rule Details in This View Details of a rule associated with an issue can be opened from: - [Workspace Validation Summary](#workspace-validation-summary-view) view. Learn more about it [here](#instances-grouped-by-message). - [Active Violations](#active-violations-view) view. Learn more about it [here](#violation-message). - Clicking on the message "code" from the **Problems** view or from the message visible in **Editor** when hovering over a problem. Learn more about it [here](/validate-lint-apis/vs-code-apimatic-extension/validating-api-workspace/#finding-additional-information-for-a-validation-issue). #### Expand Rule Details If you feel the need to repeatedly consult the Learn More view details or are having trouble navigating through the details because of the small view area, you can choose to expand the details and open them in a separate Editor tab instead. To do this, simply hover near the view title and click on the **Expand Validation Rule Details** button: ![Expand Learn More](/images/vs-code-extension/docs/expand-learn-more.png) Or click on the **View More** option at the bottom of the view: ![Expand Learn More](/images/vs-code-extension/docs/learn-more-view-more.png) The details will open in a separate tab as follows: ![Expanded Learn More](/images/vs-code-extension/docs/expanded-learn-more.png) A detailed breakdown of each property in this view is described below: | Property | Details | | -------- | ------- | | Rule Code | A short, unique identifier of the rule among all available rulesets. | | Message | The message displayed to the user (unless overridden) if this rule is violated. | | Description | Describes what the rule expects/dictates. | | Tips | Tips that can be followed to resolve any issues that occur when the rule is violated. | | Helpful Links | External links that can help provide more information for understanding the issues that occur when the rule is violated. | | Rule Id | Unique identifier of the [rule in a ruleset](/validate-lint-apis/overview/#rules-and-rulesets). | | Ruleset Id | Unique identifier of the [ruleset](/validate-lint-apis/overview/#rules-and-rulesets) to which the rule belongs. | | Default Severity | The default severity of the message which is displayed when the rule is violated. This severity may be overridden via configuration. | | Rule Type | Whether the rule is a [validation rule or a linting rule](/validate-lint-apis/overview/#validation-versus-linting-rules). | | Rule System Type | The [rule system](/validate-lint-apis/overview/#rule-system-of-a-message) that this rule belongs to. | | Category | A broad semantic category of the rule in the ruleset. | | Tags | Keywords or tags associated with the rule. | | Possible Impact On | A list of APIMatic products where you can expect your output to be negatively impacted if this rule is violated. | #### Copy Rule and Ruleset Id While [configuring validation](/validate-lint-apis/vs-code-apimatic-extension/validating-api-workspace/#configuring-validation), you may feel the need to find out a particular rule's id or its ruleset id. The Learn More view can be helpful in such cases as it allows you to copy the relevant ids. Simply hover near the id values in the view and click on the clipboard (📋) icon to copy the value: ![Copy Rule Id](/images/vs-code-extension/docs/copy-rule-id.png) #### Clear the View To clear the details visible in the view, hover near the view title and click on the **Clear Validation Rule Details** button in the top right corner: ![Clearing the View](/images/vs-code-extension/docs/clear-validation-rule-details.png) After clicking, details of the rule will be removed from the view until you select any other rule. ### Manage Session View This view contains details about your current session including your name and email information. This information is obtained after you [authorize the extension](/validate-lint-apis/vs-code-apimatic-extension/overview/#step-1-authorize-yourself-with-apimatic) using your APIMatic account: ![Manage Session View](/images/vs-code-extension/docs/manage-session-view.png) The view also provides options to manage the current session e.g. closing the currently open API workspace (if any) or resetting the session completely. #### Close the API Workspace If you have an [API workspace currently open](/validate-lint-apis/vs-code-apimatic-extension/setting-up-api-workspace/#opening-an-api-workspace) in the APIMatic API Explorer, you can close it in the extension by using the **Close API Workspace** option: ![Close API Workspace](/images/vs-code-extension/docs/close-api-workspace.png) You will be asked to confirm this action before proceeding: ![Close API Workspace Confirmation](/images/vs-code-extension/docs/close-api-workspace-confirmation.png) Once closed, validation and other features will not work until the [workspace is selected as an API workspace again](/validate-lint-apis/vs-code-apimatic-extension/setting-up-api-workspace/#opening-an-api-workspace). :::note Closing the API workspace will only remove the extension's access to the workspace folder. The workspace folder will still remain open in VS Code. ::: #### Reset and Logout If you wish to log out from the extension, you can click on the **Reset & Logout** button: ![Logout](/images/vs-code-extension/docs/logout-button.png) You can also use the right corner option from the view title for the same purpose: ![Logout Corner](/images/vs-code-extension/docs/logout-corner-button.png) You will be asked to confirm this action before proceeding: ![Close Session Confirmation](/images/vs-code-extension/docs/log-out-confirmation.png) To use the extension after logging out, you will need to [authorize yourself with APIMatic](/validate-lint-apis/vs-code-apimatic-extension/overview/#step-1-authorize-yourself-with-apimatic) again. :::note Logging out of the extension will only remove your access to the extension functionality and erase personal information from it e.g. name and email, but will not log you out of your APIMatic account elsewhere. ::: ### Help 💡 View As the name suggests, this view contains all relevant links and options to help you get started with the extension. ![Help view](/images/vs-code-extension/docs/help-view.png) You can use the **Start Walkthrough** option to open the [Getting Started APIMatic walkthrough](/validate-lint-apis/vs-code-apimatic-extension/overview/#getting-started---vs-code-walkthrough) in your VS Code. To report any issues, share feedback or get your queries answered, you can reach out to the APIMatic team through the **Contact Us** option or view detailed logs for troubleshooting using the **View Logs** option. You can also navigate to the dedicated extension documentation using the **Open Documentation** option. ## Status Bar Actions The APIMatic VS Code extension offers various workspace and editor level actions in the status bar: ![Status Bar](/images/vs-code-extension/docs/status-bar.png) ### Workspace Actions In VS Code, actions that affect the whole workspace are located on the left. This is also the case for workspace actions provided by APIMatic in the extension: ![Status Bar Workspace Actions](/images/vs-code-extension/docs/status-bar-workspace-actions.png) Following workspace actions are available: - [Validating the API Workspace](/validate-lint-apis/vs-code-apimatic-extension/validating-api-workspace/). - [Auto-fixing the API workspace](/validate-lint-apis/vs-code-apimatic-extension/auto-fixing-api-workspace/). - [Building the API workspace](/validate-lint-apis/vs-code-apimatic-extension/building-api-workspace/). - [Exporting the API workspace to APIMatic Dashboard](/validate-lint-apis/vs-code-apimatic-extension/exporting-api-workspace/). - [Transforming the API workspace specification format to another](/validate-lint-apis/vs-code-apimatic-extension/transforming-api-workspace/). The status bar may also display status messages from time to time when one of the above processes are running: ![Auto Fix Running](/images/vs-code-extension/docs/auto-fix-running.png) ### Editor Reference Documentation Action In VS Code, actions that are contextual or language-specific go towards the right. Accordingly, when working with API files in the Editor, the extension can display the API specification format name with a (📖) icon in the right end of the status bar as shown below: ![Status Bar Editor Actions](/images/vs-code-extension/docs/status-bar-editor-actions.png) Clicking on it will open the reference documentation linked to the specification. Documentation compatible with VS Code (e.g. GitHub URLs) will open within the extension. Others may use your default web browser to show the documentation: ![Reference Documentation](/images/vs-code-extension/docs/reference-documentation.png) --- # GitHub App Overview Source: https://docs.apimatic.io/validate-lint-apis/apimatic-github-app/github-app-overview/ ## Overview The **[APIMatic OpenAPI Linter](https://github.com/apps/apimatic-openapi-linter)** is a GitHub App designed to help you maintain high-quality OpenAPI definitions that are optimized for code generation and API documentation. With over **1200 built-in rules**, this tool validates your OpenAPI definitions to ensure that they meet the standards necessary for generating clean, efficient code and API portals. This GitHub App integrates seamlessly with your repositories to provide automatic validation of OpenAPI definitions whenever a pull request (PR) is created or updated, ensuring that your definitions are always in top shape. ## Key Features - **1200+ Built-in Rules**: Lints your OpenAPI definitions with a focus on quality code generation and API documentation. - **Continuous Integration**: Validates OpenAPI definitions after every pull request to ensure consistent code quality. - **GitHub Checks**: Displays validation results directly in the PR, helping you identify issues before merging. - **Detailed Validation Reports**: Generates detailed audit reports that can be shared and reviewed by your team. - **Multiple Definitions Support**: Supports validating multiple OpenAPI definitions in the same repository. - **Customizable Configuration**: Tailor the app to your needs, such as enabling/disabling GitHub checks or selecting specific definitions to validate. ## Exploring GitHub App's Components ### Validation Summary in PRs - **Single OpenAPI Definition**: When a single OpenAPI definition is validated, the app adds a summary comment to the PR showing the validation results. ![Single Validation Summary](/images/apimatic-github-app/pr-comment.png) - **Multiple OpenAPI Definitions**: If your PR modifies multiple OpenAPI definitions, each definition will have a separate validation result displayed in a collapsible format. ![Multiple Validation Summary](/images/apimatic-github-app/multiple-openapi-definitions.png) - **Merging Multiple Definitions**: If you're merging multiple OpenAPI definitions into one by defining OpenAPI definitions path in `.apimaticsettings.json`, the app validates both individual and merged definitions. The PR comment will include a validation summary for the merged API definition. ![Merged Definition Validation](/images/apimatic-github-app/merging.png) - **Detailed Audit Report**: After the validation summary, a link to the full audit report is provided. Click the link to view a detailed breakdown of the validation results, including specific rule violations and suggestions for fixing them. ![Audit Report Link](/images/apimatic-github-app/audit-report.png) ### Validation Dashboard Right after your successful installation, you are redirected to the dashboard that lists all the repositories where the app is installed along with all OpenAPI definitions available in each repository. The Dashboard also enables you to validate any OpenAPI file and see the detailed validation report. ![Validation Dashboard](/images/apimatic-github-app/dashboard.png) ### GitHub Checks Integration - **Successful Validation**: If all checks pass, you can merge the PR. - **Validation Errors**: If the validation fails, GitHub will mark the check as failed, but you can choose to skip the checks if `IgnoreValidationErrors` is set to `true`. - **Configuration Errors**: If there are any configuration issues (unauthorized installation, missing configuration file, or incorrect file paths), the app will provide appropriate notifications. ![Checks](/images/apimatic-github-app/check.png) --- # Installing GitHub App Source: https://docs.apimatic.io/validate-lint-apis/apimatic-github-app/installing-github-app/ ## Pre-requisites Before getting started, ensure you have the following: - **Repository Permissions**: You must have the appropriate permissions to install the app on your GitHub repository. If you're a member of an organization, the organization owner must approve the installation. - **APIMatic Account**: You need a free APIMatic account. Create one at [APIMatic.io](https://www.apimatic.io). ## Getting Started ### Step 1: Install the App 1. Go to the **[APIMatic OpenAPI Linter](https://github.com/apps/apimatic-openapi-linter)** GitHub App page and click "Install" to install the app. 2. Choose the GitHub account or organization where you want to install the app. 3. Select the repositories where you want the app to run. 4. Authorize the app with your APIMatic account (you will be automatically redirected to APIMatic's login page). Don't close the page until the authorization is successful and you see the dashboard. ![Installation Completed](/images/apimatic-github-app/dashboard.png) :::note If you're installing on an organization, the organization owner must approve the installation. ![Installation Requested](/images/apimatic-github-app/installation-request.png) ::: ### Step 2: Configure the App (Optional) Once installed, the app automatically triggers the validation on each pull request creation or synchronization. #### Define OpenAPI Definition Paths If you want to validate specific OpenAPI files or merged OpenAPI definitions, you may use `.apimaticsettings.json` file to define OpenAPI definition paths explicitly. Here's an example: ```json { "OpenAPIDefinitionPaths": [ "path/to/openapi/directory", "path/to/openapi.yaml", "path/to/openapi.json" ] } ``` This configuration tells the linter which OpenAPIs to validate. #### Skip Specific OpenAPI Definitions from Validation In certain cases, you might want to exclude specific OpenAPI definition files from the validation process, especially when you haven't explicitly defined `OpenAPIDefinitionPaths` and the GitHub App automatically detects all modified OpenAPI definitions in a pull request. To skip validation for specific files or directories, use the `SkipOpenAPIDefinitionPaths` option in your configuration file. This is useful when you want to prevent validation of files that are still in progress, deprecated, or not relevant to the current workflow. Here's an example: ```json { "SkipOpenAPIDefinitionPaths": [ "path/to/openapi/directory", "path/to/openapi.yaml", "path/to/openapi.json" ] } ``` Each entry in the array can point to a specific file or an entire directory. When specified, these paths will be excluded from validation even if they're detected as modified in a pull request. #### Configure GitHub Checks If you have branch protection rules that prevent merging PRs with failing checks, you can disable the GitHub checks by adding the following to your configuration file: ```json { "IgnoreValidationErrors": true } ``` :::note `IgnoreValidationErrors` is set to `false` by default, meaning GitHub checks will fail on validation errors. You can override this behavior by setting `IgnoreValidationErrors` to `true`. ::: ## How It Works After installation and configuration, the APIMatic OpenAPI Linter GitHub App automatically triggers validation for every pull request (PR) created or updated. ### Validation Process 1. When a PR is created or synchronized, the app runs the validation process in the background. 2. The results are displayed in the **PR Comment** section. 3. If validation passes, the PR can be merged. If validation fails, the PR will be blocked from merging (unless you don't have branch protection rules enabled or you opt to skip validation with `IgnoreValidationErrors` set to `true`). ## Customizing Validation APIMatic's OpenAPI Linter uses a highly configurable validation engine, allowing you to configure the checks based on your needs. - **Enabling/Disabling Rules**: [Customize the validation](../../configuring-validation/) by enabling or disabling specific rules or entire rulesets in your configuration file. - **Custom Rules**: You can [add custom validation rules](../../adding-your-own-rules/) to meet specific requirements for your API definitions. ### Example of Custom Rule Configuration ```json { "Id": "my-custom-ruleset", "Rules": [ { "Id": "max-operation-id-length-30", "VerificationMethod": "Length", "Targets": [ { "JsonPath": "$.paths.*.*.operationId" } ], "VerificationMethodArgs": { "Maximum": 30 }, "Message": "Operation id is too long." } ] } ``` This example shows how to enable a custom rule with specific parameters. ## Troubleshooting ### Common Issues 1. **Unauthorized Installation**: Make sure the GitHub app is installed correctly on the desired repositories and that the APIMatic account is properly linked. 2. **Invalid Configuration File**: Ensure that the file is syntactically correct and that its content is accessible. 3. **Incorrect OpenAPI Paths**: Double-check the file paths in your configuration file to ensure they're correct. 4. **Failed Checks**: If validation fails, check the PR comments or the detailed audit report for more information on which rules failed. For any further questions or support, visit our [Support Page](https://www.apimatic.io/contact). --- # Configuring Validation Source: https://docs.apimatic.io/validate-lint-apis/configuring-validation/ You can configure the validation process as per your requirements by providing a [validation configuration](#validation-configuration-object) in the [APIMatic's Metadata file](manage-apis/apimatic-metadata.md) which needs to be uploaded along with the API definition/specification: ```json { "ValidationConfiguration": { "SkipLinting": true } } ``` The capabilities that this configuration provides is as follows: * Skipping some rules of a ruleset, the entire ruleset or a group of rulesets e.g. skipping all linting rulesets. * Enabling only some rules from a ruleset and skipping the rest. * Enabling rules of a ruleset that are kept disabled by default either because of low priority or any other reason. * Overriding severity of rules depending on needs e.g. converting a warning into error. :::note The capabilities differ w.r.t. whether the ruleset is meant for validation or linting. **Validation rules/rulesets can only be enabled but not skipped nor can their severity be changed**. ::: ### Validation Configuration Object The available properties and their respective types are as follows: | Property | Type | Details | | -------- | ---- | ------- | | SkipCodeGenerationChecks | Boolean | When set to `true`, linting checks associated with code/SDK generation will not be performed. Code generation checks are enabled by default unless you are performing only transformations in the [API Transformer](https://apimatic.io/transformer). | | SkipLinting | Boolean | **Default**: `false`. When set to `true`, all linting rulesets will be entirely skipped and only validation rulesets will be applied. | | Rulesets | Map[String, [Ruleset Configuration](#ruleset-configuration-object)] | Configuration for each ruleset. The key is the unique id/code that identifies a ruleset and the value provides required configurations for that ruleset. The rulesets not specified here will work with default behavior. | **Example 1** - Skip all linting rules: ```json { "SkipLinting": true } ``` **Example 2** - Configuring a ruleset: The following configuration will let you skip the rule `no-ambiguous-path` from the `openapi-v3-standards-linting` ruleset and also downgrade the severity of all rules in the ruleset from `Warning` to `Information`. Here, `no-ambiguous-path` and `openapi-v3-standards-linting` are rule and ruleset ids respectively. ```json { "Rulesets": { "openapi-v3-standards-linting": { "Severity": "Information", "Rules": { "Skip": ["no-ambiguous-path"] } } } } ``` ### Ruleset Configuration Object This configuration object will let you configure a single ruleset. The available properties and their respective types are as follows: | Property | Type | Details | | -------- | ---- | ------- | | Skip | Boolean | **Default**: `false`. When set to `true`, all checks from the ruleset will be skipped/ignored. Only applicable for linting rulesets. | | Severity | [Rule Severity](/validate-lint-apis/overview/#severity-of-messages) | The severity set here will override severity level of all rules in the ruleset. Only applicable for linting rulesets. If a rule in this ruleset has severity overrides provided in the [rules configuration of the ruleset](#ruleset-rules-configuration-object), the rule level severity configuration will take precedence. | | FilePath | String | Relative path to a [custom ruleset file](/validate-lint-apis/adding-your-own-rules/#creating-and-applying-a-custom-ruleset-file). | | Rules | [Rules Configuration](#ruleset-rules-configuration-object) | Configuration for specific rules of the ruleset can be provided here. Rules not configured explicitly or implicitly here will work with default behavior. | **Example** ```json { "Skip": true } ``` ### Ruleset Rules Configuration Object This configuration will let you configure rules of a ruleset. The available properties and their respective types are as follows: | Property | Type | Details | | -------- | ---- | ------- | | EnableAll | Boolean | **Default**: `false`. When set to `true`, all rules of the ruleset will be applied including those that may be disabled by default and any configurations provided under `EnableOnly` or `Enable` will be ignored. | | EnableOnly | Array[String] | If a list of rule ids/codes is provided, only those rules from the ruleset will be applied and others will be skipped regardless of any default configuration or configurations provided using the `Enable` setting. Only applicable for linting rulesets. | | Enable | Array[String] | A list of rule ids/codes to enable. This can be used to enable rules from a ruleset that may be disabled by default for any reason (low priority or any other). The default behavior will be used for rules not specified here. | | Skip | Array[String] | If a list of rule ids/codes is provided, they will not be applied. Only applicable for linting rulesets. Rules listed here will be ignored regardless of any configurations provided under `EnableAll`, `EnableOnly` or `Enable`. | | Severity | Map[String, [Rule Severity](/validate-lint-apis/overview/#severity-of-messages)] | This will let you override severity of a rule e.g. changing an error to warning. Only applicable for linting rulesets. The key should be the id/code of the rule you wish to change severity of. | **Example 1** - Enable only selected rules from a ruleset: ```json { "EnableOnly": [ "unique-case-insensitive-header-parameter-names", //using rule id "OPENAPI3STANDARDS_L065" //using rule code ] } ``` **Example 2** - Skip a rule from a ruleset: ```json { "Skip": [ "no-ambiguous-path" ] } ``` **Example 3** - Changing severity of a rule: ```json { "Severity": { "valid-schema-example": "Error" } } ``` ### Complete Validation Configuration Example The examples above show individual configuration objects in isolation. Below is a complete example showing how all the pieces fit together inside the [APIMatic's Metadata file](manage-apis/apimatic-metadata.md). This is the full structure that should be uploaded alongside your API definition/specification: ```json { "ValidationConfiguration": { "SkipCodeGenerationChecks": false, "SkipLinting": false, "Rulesets": { "openapi-v3-standards-linting": { "Skip": false, "Severity": "Information", "Rules": { "EnableAll": false, "EnableOnly": [ "unique-case-insensitive-header-parameter-names", "no-ambiguous-path", "valid-schema-example" ], "Skip": [ "no-ambiguous-path" ], "Severity": { "valid-schema-example": "Error" } } }, "openapi-v3-apimatic-linting": { "Skip": true } } } } ``` In this example: * `SkipCodeGenerationChecks` and `SkipLinting` are set at the top level of the `ValidationConfiguration` object. * Two rulesets are configured under `Rulesets`: `openapi-v3-standards-linting` and `openapi-v3-apimatic-linting`. * For `openapi-v3-standards-linting`, the default severity is downgraded to `Information`, only specific rules are enabled via `EnableOnly`, the `no-ambiguous-path` rule is skipped, and the `valid-schema-example` rule severity is overridden to `Error`. * The `openapi-v3-apimatic-linting` ruleset is entirely skipped. :::note You don't need to include every property shown above. Only specify the properties you want to customize. All others use their default values. ::: --- # Adding Your Own Rules Source: https://docs.apimatic.io/validate-lint-apis/adding-your-own-rules/ :::note This feature is currently **only supported** for OpenAPI `v2.0` and `v3.0` files and works only when the `UseStrictValidation` [import setting](/manage-apis/import-export-settings/#import-settings-object) is set to `true`. ::: If you are looking to add your own rules beyond the capabilities provided by our built-in rulesets, you can create a custom ruleset and apply that on your API specification document. ### How Do Custom Rules Work? In a custom ruleset, you can configure rules that use built-in methods to verify one or more of the selected target components. If the target component fails verification, a lint warning will be logged. The severity of these messages as well as other details can be easily configured to suit your needs when defining the rules. ### Creating and Applying a Custom Ruleset File Custom rules need to be defined inside a custom ruleset file placed at a path relative to the main API specification document. The file must use valid JSON/YAML syntax and contain the [Ruleset Object](#ruleset-object) at root level. **Example**: ```json { "Id": "my-custom-ruleset", "Rules": [ { "Id": "max-operation-id-length-30", "VerificationMethod": "Length", "Targets": [ { "JsonPath": "$.paths.*.*.operationId" } ], "VerificationMethodArgs": { "Maximum": 30 }, "Message": "Operation id is too long." } ] } ``` In order to apply a custom ruleset on your API specification document, it needs to be referenced from within a APIMatic Metadata file's [validation configuration](/validate-lint-apis/configuring-validation) as shown below: ```json { "ValidationConfiguration": { "Rulesets": { "my-custom-ruleset": { "FilePath": "/path/to/ruleset/file" } } } } ``` ### Ruleset Object This object represents the root object that's placed in a custom ruleset file. The available properties are listed below: | Property Name | Type | Description | | ------------- | ---- | ----------- | | Id | String | **Required**. Unique identifier of the ruleset. Use only alphanumeric characters or dashes. | | Rules | Array[[Custom Lint Rule Object](#custom-lint-rule-object)] | **Required**. List of custom rule definitions that need to be applied on target components. The list must contain at least one rule definition. | | Name | String | A short user-friendly name of the ruleset. | | Description | String | A detailed description of the ruleset. | | Severity | [Severity](/validate-lint-apis/overview/#severity-of-messages) | **Default**: `Warning`. Global declaration of severity of all rules. Can be overridden at rule level. | | ExternalLinks | Array[String] | List of external links that may provide additional details about the ruleset. | | Tags | Array[String] | Tags that will be shown along with rules of the ruleset for more context and to facilitate searching. | ### Custom Lint Rule Object The available properties to describe a custom rule are listed below: | Property Name | Type | Description | | ------------- | ---- | ----------- | | Id | String | **Required**. Unique identifier of the rule across the ruleset. Use only alphanumeric characters or dashes. | | Targets | Array[[Rule Target Object](#rule-target-object)] | **Required**. Identifies the target components that need to be verified with the current rule. The list must contain at least one target. | | VerificationMethod | [Verification Method](#verification-methods) | **Required**. Name of the pre-defined method that needs to be applied on the selected object as part of the rule verification. | | VerificationMethodArgs | Map[String, Any] | Key-value pairs containing arguments to pass to the verification method where the key represents the argument name. Depending upon the selected `VerificationMethod`, one or more arguments may be required. | | Message | String | The message that needs to be displayed during the validation process if a violation of the rule is found. If not specified, a default message will be used. It's recommended to keep this message short. | | Severity | [Severity](/validate-lint-apis/overview/#severity-of-messages) | By default, the ruleset level global severity will be applicable (`Warning` by default). The global severity can be overridden with the severity specified here. | | Name | String | Short user-friendly name for the rule. | | Description | String | Describes the rule in detail. For example, it can specify what kind of verification is expected and on what types of target components. | | ExternalLinks | Array[String] | External links that can provide more details about the current rule. | | Hints | Array[String] | Any tips/suggestions that can help someone easily resolve the violations of the current rule. | | Tags | Array[String] | Tags that can be shown with the rule for more context and to help in searching as well. | ### Rule Target Object The available properties to help select rule target components are listed below: | Property Name | Type | Description | | ------------- | ---- | ----------- | | JsonPath | String | **Required**. A valid JSONPath expression that helps locate and select the components on which the rule needs to be applied. | | KeysOnly | Boolean | The target objects will be converted into a list of keys (extracted from the top level of an object). **Only applicable if selected targets are objects.** | | SelectWithKeys | Array[String] | For each target object, only properties with specified keys will be evaluated. Mutually exclusive with `IgnoreWithKeys`. **Only applicable if selected targets are objects.** | | IgnoreWithKeys | Array[String] | For each target object, properties with specified keys won't be evaluated. Mutually exclusive with `SelectWithKeys`. **Only applicable if selected targets are objects.** | ### Verification Methods Available verification methods are listed below: | Method Name | Description | | ----------- | ----------- | | Pattern | More details can be found [here](/validate-lint-apis/verification-methods/pattern). | | Order | More details can be found [here](/validate-lint-apis/verification-methods/order). | | Length | More details can be found [here](/validate-lint-apis/verification-methods/length). | | Required | More details can be found [here](/validate-lint-apis/verification-methods/required). | --- # Overview Source: https://docs.apimatic.io/rulesets/overview/ ## Available Rulesets API description files imported into APIMatic are [validated and linted](/validate-lint-apis/overview) against the rulesets listed below, along with their reference documentation: * [APIMatic](/rulesets/apimatic) * [OpenAPI/Swagger](/rulesets/openapi) * [API Blueprint](/rulesets/api-blueprint) * [RAML](/rulesets/raml) * [Postman](/rulesets/postman) * [HAR](/rulesets/har) * [Insomnia](/rulesets/insomnia) * [WADL](/rulesets/wadl) * [WSDL](/rulesets/wsdl) * [I/O Docs](/rulesets/i-o-docs) * [Google Discovery](/rulesets/google-discovery) * [Data](/rulesets/data) --- # APIMatic Rulesets Source: https://docs.apimatic.io/rulesets/apimatic/ The list of rulesets currently used by APIMatic for validating any API specification document is given below. These may include additional checks that a specification's standard may not enforce itself but are necessary to ensure good quality output from various APIMatic's products like Code Generator, DX Portal generator, Transformer, etc. ## Validation Rulesets * [Input File Validation](/rulesets/input-file-validation/overview) * [Metadata File Validation](/rulesets/metadata-validation/overview) * [User Custom Ruleset Syntax Validation](/rulesets/custom-ruleset-syntax-validation/overview) * [User Custom Ruleset Validation](/rulesets/custom-ruleset-validation/overview) * [APIMatic Post-Processing Validation](/rulesets/apimatic-post-processing-validation/overview) * [APIMatic Post-Processing Validation for Code-Generation](/rulesets/apimatic-post-processing-codegen-validation/overview) * [APIMatic Preliminary Validation](/rulesets/apimatic-preliminary-validation/overview) * [APIMatic Validation for Code Generation](/rulesets/apimatic-codegen-validation/overview) * [APIMatic Gavel Validation](/rulesets/apimatic-gavel-validation/overview) * [APIMatic Process Validation](/rulesets/apimatic-process-validation/overview) * [APIMatic Syntax Validation](/rulesets/apimatic-syntax-validation/overview) ## Linting Rulesets * [APIMatic Preliminary Linting](/rulesets/apimatic-preliminary-linting/overview) * [APIMatic Linting for Portal Generation](/rulesets/apimatic-docs-linting/overview) --- # OpenAPI Rulesets Source: https://docs.apimatic.io/rulesets/openapi/ The list of rulesets currently used by APIMatic for validating OpenAPI documents (`v1.x`, `v2.0`, `v3.x`) is provided below. These include rules defined by the standard as well as additional checks enforced by APIMatic for a better output. ## Validation Rulesets * [OpenAPI v3 Syntax Validation](/rulesets/openapi-v3-syntax-validation/overview) * [OpenAPI v3 Standards Validation](/rulesets/openapi-v3-standards-validation/overview) * [OpenAPI/Swagger v2 Standard Validation](/rulesets/swagger-v2-standards-validation/overview) * [OpenAPI/Swagger v2 Syntax Validation](/rulesets/swagger-v2-syntax-validation/overview) * [OpenAPI/Swagger v1 Validation](/rulesets/swagger-v1-validation/overview) ## Linting Rulesets * [OpenAPI v3 Syntax Linting](/rulesets/openapi-v3-syntax-linting/overview) * [OpenAPI v3 Standards Linting](/rulesets/openapi-v3-standards-linting/overview) * [OpenAPI v3 APIMatic Linting](/rulesets/openapi-v3-apimatic-linting/overview) * [OpenAPI v3 APIMatic Syntax Linting](/rulesets/openapi-v3-apimatic-syntax-linting/overview) * [OpenAPI v3 APIMatic Linting for Code Generation](/rulesets/openapi-v3-codegen-linting/overview) * [OpenAPI v3 APIMatic Syntax Linting for Code Generation](/rulesets/openapi-v3-codegen-syntax-linting/overview) * [OpenAPI v3 APIMatic Linting for Portal Generation](/rulesets/openapi-v3-docsgen-linting/overview) * [OpenAPI v3 APIMatic Syntax Linting for Portal Generation](/rulesets/openapi-v3-docsgen-syntax-linting/overview) * [OpenAPI v2 APIMatic Linting](/rulesets/swagger-v2-apimatic-linting/overview) * [OpenAPI v3 Agentic Tools Linting](/rulesets/openapi-v3-agentic-tools-linting/overview) --- # API Blueprint Rulesets Source: https://docs.apimatic.io/rulesets/api-blueprint/ The list of rulesets currently used by APIMatic for validating API Blueprint documents is provided below. These include rules defined by the standard as well as additional checks enforced by APIMatic for a better output. ## Validation Rulesets * [API Blueprint Validation](/rulesets/api-blueprint-validation/overview) --- # RAML Rulesets Source: https://docs.apimatic.io/rulesets/raml/ The list of rulesets currently used by APIMatic for validating RAML documents (`v0.8`, `v1.0`) is provided below. These include rules defined by the standard as well as additional checks enforced by APIMatic for a better output. ## Validation Rulesets * [RAML Validation](/rulesets/raml-validation/overview) --- # Postman Rulesets Source: https://docs.apimatic.io/rulesets/postman/ The list of rulesets currently used by APIMatic for validating Postman documents (e.g. Postman Collections `v1.0` or `v2.x`, Postman Data Dump, Postman Environment file, etc.) is provided below. These include rules defined by the standard as well as additional checks enforced by APIMatic for a better output. ## Validation Rulesets * [Postman Validation](/rulesets/postman-validation/overview) --- # HAR Rulesets Source: https://docs.apimatic.io/rulesets/har/ The list of rulesets currently used by APIMatic for validating HAR documents is provided below. These include rules defined by the standard as well as additional checks enforced by APIMatic for a better output. ## Validation Rulesets * [HAR Validation](/rulesets/har-validation/overview) --- # Insomnia Rulesets Source: https://docs.apimatic.io/rulesets/insomnia/ The list of rulesets currently used by APIMatic for validating Insomnia Export format documents is provided below. These include rules defined by the standard as well as additional checks enforced by APIMatic for a better output. ## Validation Rulesets * [Insomnia Validation](/rulesets/insomnia-validation/overview) --- # WADL Rulesets Source: https://docs.apimatic.io/rulesets/wadl/ The list of rulesets currently used by APIMatic for validating WADL `v2006` and `v2009` documents is provided below. These include rules defined by the standard as well as additional checks enforced by APIMatic for a better output. ## Validation Rulesets * [WADL Validation](/rulesets/wadl-validation/overview) --- # WSDL Rulesets Source: https://docs.apimatic.io/rulesets/wsdl/ The list of rulesets currently used by APIMatic for validating WSDL `v1.1` documents is provided below. These include rules defined by the standard as well as additional checks enforced by APIMatic for a better output. ## Validation Rulesets * [WSDL Validation](/rulesets/wsdl-validation/overview) --- # I/O Docs Rulesets Source: https://docs.apimatic.io/rulesets/i-o-docs/ The list of rulesets currently used by APIMatic for validating I/O Docs documents is provided below. These include rules defined by the standard as well as additional checks enforced by APIMatic for a better output. ## Validation Rulesets * [I/O Docs Validation](/rulesets/io-docs-validation/overview) --- # Google Discovery Rulesets Source: https://docs.apimatic.io/rulesets/google-discovery/ The list of rulesets currently used by APIMatic for validating Google Discovery documents is provided below. These include rules defined by the standard as well as additional checks enforced by APIMatic for a better output. ## Validation Rulesets * [Google Discovery Validation](/rulesets/google-discovery-validation/overview) --- # Data Rulesets Source: https://docs.apimatic.io/rulesets/data/ The list of rulesets currently used by APIMatic for validating data documents (e.g. JSON data, JSON schema, YAML data, XML data, XML schema) is provided below. These rulesets help verify compatibility of such documents with APIMatic as well as ensure they follow valid syntax. ## Validation Rulesets * [JSON Validation](/rulesets/json-validation/overview) * [JSON Schema Validation](/rulesets/json-schema-validation/overview) * [YAML Semantic Validation](/rulesets/yaml-semantic-validation/overview) * [YAML Syntax Validation](/rulesets/yaml-syntax-validation/overview) * [XML Validation](/rulesets/xml-validation/overview) --- # Specification Extensions Overview Source: https://docs.apimatic.io/specification-extensions/spec-extensions-overview/ APIMatic allows you to extend the functionality of your OpenAPI/Swagger, API Blueprint and RAML specification files to cater to features not supported in the standard API specification. This allows you to configure APIMatic products including API Transformer, Code Generator and more. Some of the extensions also enable you to utilize parameter types for resources that aren't natively available otherwise. APIMatic offers [Code Generation settings](/generate-sdks/customize-sdks/codegen-settings/codegen-settings-overview) to configure generic code styling, endpoint settings, model settings, continuous integration settings and more during code generation. Similarly, [Server Configurations](/web-dashboard-retired) can be used to create multiple environments, multiple servers, and server urls with template parameters. OpenAPI/Swagger supports [vendor extensions](https://swagger.io/docs/specification/openapi-extensions/) and RAML supports [annotations](https://github.com/raml-org/raml-spec/blob/master/versions/raml-10/raml-10.md#annotations), so this allows users to extend their API specifications to utilize code generation, test generation and server configuration. The specification extensions are supported through the following features of APIMatic: 1. [API Transformer](api-transformer/overview-transformer.md) 2. [APIMatic API](pathname:///platform-api#/http/getting-started) 3. [Importing API Specification](/web-dashboard-retired) ## Supported Extensions You can find detailed documentation for APIMatic extensions available for OpenAPI/Swagger, API Blueprint and RAML: - [OpenAPI CodeGen Extensions](swagger-codegen-extensions.md) - [OpenAPI Server Configuration Extensions](swagger-server-configuration-extensions.md) - [OpenAPI Test Cases Extensions](swagger-test-cases-extensions.md) - [API Blueprint Extensions](blueprint-extensions.md) - [RAML Annotations](raml-apimatic-annotations.md) --- # OpenAPI CodeGen Extensions Source: https://docs.apimatic.io/specification-extensions/swagger-codegen-extensions/ import Tabs from '@theme/Tabs'; import TabItem from '@theme/TabItem'; OpenAPI/Swagger (`v2.0`, `v3.x`) facilitates third-party vendors to implement tool-specific extensions. These extensions allow customizing behaviors beyond simple API definitions. We at APIMatic also offer extensions that are specific to Code Generation and can be specified within your OpenAPI definition file. These extensions allow you to customize the APIMatic code generation engine as per your requirements. The following documentation discusses the extensions available and how to use them. ## Code Generation Settings and OpenAPI Extensions In the case of Swagger/OpenAPI, we provide extensions that you can use within your OpenAPI definition to specify code generation settings and get the desired customizability. We also provide similar extensions for API Blueprint whose details can be viewed at [API Blueprint Extensions](specification-extensions/blueprint-extensions.md). The extensions are supported by both the "Import" API operation, as well as by our Code Generation as a Service API. ## CodeGen Extensions and How To Use Them We offer the following CodeGen extensions: 1. [Advanced Settings for Endpoints](#advanced-settings) 2. [Additional Headers](#additional-headers) 3. [Basic Authentication Extensions](#basic-authentication-extensions) 4. [OAuth 2.0 Extensions](#oauth-20-extensions) 5. [Discriminator Value Extension](#discriminator-value-extension) 6. [Enumeration Extensions](#enumeration-extensions) 7. [Datetime Extensions](#datetime-extensions) 8. [Dynamic Response Extension](#dynamic-response-extension) 9. [Exception Model Name Extension](#exception-model-name-extension) 10. [Example Extensions](#example-extensions) 11. [API Metadata Extensions](#api-metadata-extensions) 12. [API Filtering Roles Extension](#api-filtering-roles-extension) 13. [Applied Authentication Options Extension](#applied-authentication-options-extension) 13. [Pagination Extension](#pagination-extension) 14. [Webhook Group Extension](#webhook-group-extension) 15. [Callback Group Extension](#callback-group-extension) 16. [SSE Sentinel Extension](#sse-sentinel-extension) ### Advanced Settings APIMatic allows further customization of endpoints (called operations in OpenAPI) through the Advanced Settings extensions. These extensions can be specified inside the Operation Object ([v2](https://github.com/OAI/OpenAPI-Specification/blob/master/versions/2.0.md#operationObject), [v3](https://github.com/OAI/OpenAPI-Specification/blob/master/versions/3.0.0.md#operationObject)). Two extensions are currently available which are defined below: 1. [Operation Settings](#operation-settings) 2. [Multiple Body Parameters Setting](#multiple-body-parameters-setting) 3. [Deprecation Details](#deprecation-details) 4. [Overriding Parameter Names](#overriding-parameter-names) #### Operation Settings These settings are specified using property name `x-operation-settings`. See an example as follows: ```json "paths": { "/pets": { "post": { ... "operationId": "addPet", "x-operation-settings": { "collectParameters": false, "allowDynamicQueryParameters": true, "allowDynamicFormParameters": false, "isMultiContentStreaming": false, "methodName": "create", "groupName": "pets", "forceRetries": true } } } } ``` Details of the properties available within this extension are given below: | Property | Type | Purpose | | -------- | ---- | ------- | | `collectParameters` | Boolean | When true, this operation's parameters are expected to passed as a collection. For example in PHP, the generated method expects a Map containing parameters as Key-Value pairs. This is currently implemented for PHP, Python, GO, and Objective-C. | | `useModelPostfix` | Boolean | When true, a postfix "Model" is appended to all classes generated from schemas. | | `allowDynamicQueryParameters` | Boolean | When true, the generated method has an additional Map input, which may contain dynamic number of query parameters as Key-Value pairs. | | `allowDynamicFormParameters` | Boolean | When true, the generated method has an additional Map input, which may contain dynamic number of form parameters as Key-Value pairs. | | `isMultiContentStreaming` | Boolean | When true, it indicates that this operation is a streaming endpoint. For example, Twitter Streaming API endpoints. | | `parameterCollectionName` | String | Represents the name of the model that represents CollectedParameters. | | `methodName` | String | When specified, it's used instead of the operation name (extracted from the operation ID/summary) for generating method names in SDKs. While an operation ID in OpenAPI needs to be unique across the complete API, the method name should ideally be unique among all operations in a particular path item only. | | `responseMapping` | [Response Mapping Object](#response-mapping-object) | Response mapping strategy to use for mapping the HTTP response to the result passed to the endpoint caller in an SDK. This will override the response mapping specified in the CodeGen settings if any. | | `groupName` | String | When specified, it's used for generating the endpoint's group name in SDKs/docs instead of the first tag name specified in an Operation object. | | `forceRetries` | Boolean | When set to `true`, the SDKs can force retry an endpoint regardless of whether it's idempotent or not. If `false`, the endpoints won't be retried. By default, only idempotent endpoints are retried. | | `errorTemplates` | Map [String, String] | Custom-templated messages that can be provided for overriding default exception messages thrown in SDKs for error responses. More details can be found [here](#error-templates). Note, that an error template specified at operation level will override the one specified under [CodeGen settings](/generate-sdks/customize-sdks/codegen-settings/exception-settings/#error-templates) for the same error template key. | | `skipAdditionalHeaders` | Boolean | When set to `true`, any [additional headers](#additional-headers) applied at API level will be ignored for the current endpoint. This is set to `false` by default. | #### Multiple Body Parameters Setting: Since OpenAPI doesn't allow defining multiple body parameters, you can use this setting to help unwrap any body parameter into multiple body parameters for Code Generation purposes. Essentially, this setting is a `boolean` flag specified using the name `x-unwrap-body` inside the Operation object. You can simply define a schema in the OpenAPI/Swagger file (generally inside `#/definitions` or `#/components/schemas` depending on the OAS/Swagger version) where schema fields will represent the body parameters. Link this schema in the body parameter definition of the Operation object and set the flag to `true`. We will then automatically unwrap the body schema into multiple body parameters during the import process. A usage example of the flag described above is shown below: ```json "post": { "summary": "Multiple body parameters", "parameters": [{ "name": "body", "in": "body", "required": true, "schema": { "$ref": "#/definitions/bodySchema" } }], "x-unwrap-body": true } ``` Here the schema fields of `bodySchema` represent the actual body parameters. #### Deprecation Details: This extension can be used inside the Operation object using key `x-deprecation-details`. This extension allows you to define additional details for your operation if it has been declared as deprecated using the OAS `deprecated` property. The properties available for describing the deprecated operation in more detail are: | Property | Type | Purpose | | -------- | ---- | ------- | | message | String | Helps describe any additional information about the deprecated operation for example reason, alternative, etc. | | deprecatedInVersion | String | Helps specify the version in which this item was deprecated. | A usage example of the above extension is given below: ```json "post": { ... "operationId": "addPet", "summary": "Deprecated operation", "deprecated": true, "x-deprecation-details": { "message": "This operation is deprecated. Use createPet", "deprecatedInVersion": "2.0" } } ``` #### Overriding Parameter Names To enhance the usability and clarity of parameter names in your SDKs and API documentation, you can use the parameter-level extension `x-unique-name`. This extension allows you to: 1. **Resolve Duplicate Names**: Provide a unique secondary name for parameters that share the same name, ensuring clarity in the Code and API portal. 2. **Simplify Long or Unfriendly Names**: Replace overly lengthy or technical parameter names with a user-friendly alternative, improving the overall developer experience. ##### Key Considerations - The name specified in `x-unique-name` must not conflict with any existing parameter names in the API. - This secondary name is **only used for display purposes** in the Code and API portal and doesn't alter the actual API calls or their behavior. ##### Example Here's an example of how to use `x-unique-name`: ```yaml parameters: - name: id in: query required: true schema: type: string x-unique-name: userId - name: id in: path required: true schema: type: string x-unique-name: orderId ``` In the example above: - Both `id` parameters are distinguished using `x-unique-name` as `userId` and `orderId` in the Code and API documentation. - API consumers will see these friendly names in the SDKs and the portal, but the actual parameter name remains `id` for API requests. This extension ensures your Code and API documentation is intuitive and developer-friendly without impacting the technical implementation. ### Additional Headers: APIMatic allows defining global headers that are sent with every API call using the Addition Headers extension. These headers are in addition to any headers required for authentication or defined as parameters. These headers can be specified inside the Security Scheme Object ([v2](https://github.com/OAI/OpenAPI-Specification/blob/master/versions/2.0.md#securitySchemeObject), [v3](https://github.com/OAI/OpenAPI-Specification/blob/master/versions/3.0.0.md#securitySchemeObject)) using property name `x-additional-headers`. See an example below: <Tabs defaultValue="2.0" values={[ {label: 'OpenAPI 2.0', value: '2.0'}, {label: 'OpenAPI 3.x', value: '3.0'}, ]}> <TabItem value="2.0"> ```json "securityDefinitions": { "basicAuth": { "type": "basic", "x-additional-headers": [ { "name": "api-version", "description": "The version number indicator for the API", "default": "1.1" }, { "name": "sdk-version", "description": "The version number indicator for the SDK", "default": "1.1.0.1" } ... ] } } ``` </TabItem> <TabItem value="3.0"> ```json "securitySchemes": { "basicAuth": { "type": "http", "scheme": "basic", "x-additional-headers": [ { "name": "api-version", "description": "The version number indicator for the API", "schema": { "default": "1.1" } }, { "name": "sdk-version", "description": "The version number indicator for the SDK", "schema": { "default": "1.1.0.1" } } ... ] } } ``` </TabItem> </Tabs> An additional header is defined using a subset of the properties of the Parameter Object ([v2](https://github.com/OAI/OpenAPI-Specification/blob/master/versions/2.0.md#parameterObject), [v3](https://github.com/OAI/OpenAPI-Specification/blob/master/versions/3.0.0.md#parameterObject)). The available properties are: | Property | Type | Purpose | | -------- | ---- | ------- | | name | String | Name of the header | | description | String | Any details regarding the header | | default | String | Any default value for the header | ### Basic Authentication Extensions By default, basic authentication requires `username` and `password` as input parameters. If you need to override the names of these parameters for code generation, you can use the extensions described below: | Extension | Type | Description | | --------- | ---- | ----------- | | `x-rename-username-as` | String | The alternate name for `username` parameter for example `name` | | `x-rename-password-as` | String | The alternate name for `password` parameter for example `secret` | Both the above extensions can be used inside the Security Scheme Object ([v2](https://github.com/OAI/OpenAPI-Specification/blob/master/versions/2.0.md#securitySchemeObject), [v3](https://github.com/OAI/OpenAPI-Specification/blob/master/versions/3.0.0.md#securitySchemeObject)) as follows: <Tabs defaultValue="2.0" values={[ {label: 'OpenAPI 2.0', value: '2.0'}, {label: 'OpenAPI 3.x', value: '3.0'}, ]}> <TabItem value="2.0"> ```json "securityDefinitions": { "basicAuth": { "type": "basic", "x-rename-username-as": "name", "x-rename-password-as": "secret" } } ``` </TabItem> <TabItem value="3.0"> ```json "securitySchemes": { "basicAuth": { "type": "http", "scheme": "basic", "x-rename-username-as": "name", "x-rename-password-as": "secret" } } ``` </TabItem> </Tabs> ### OAuth 2.0 Extensions: APIMatic also offers several extensions to help you configure your OAuth 2.0 security definition. For v2.0, you can use these extensions inside the [Security Scheme Object](https://github.com/OAI/OpenAPI-Specification/blob/master/versions/2.0.md#securitySchemeObject) and for v3.x inside the [OAuth Flow Object](https://github.com/OAI/OpenAPI-Specification/blob/master/versions/3.0.0.md#oauthFlowObject) as follows: <Tabs defaultValue="2.0" values={[ {label: 'OpenAPI 2.0', value: '2.0'}, {label: 'OpenAPI 3.x', value: '3.0'}, ]}> <TabItem value="2.0"> ```json "securityDefinitions": { "oauth2": { "type": "oauth2", "flow": "password", "tokenUrl": "http://example.com/tokenurl", "x-skip-client-authentication": false, "x-oauth2-clientid-example": "clientid", "x-oauth2-clientsecret-example": "clientsecret", "x-oauth2-credentials-placement": "header", "x-oauth2-username-example": "username", "x-oauth2-password-example": "password" } } ``` </TabItem> <TabItem value="3.0"> ```json "securitySchemes": { "oauth2": { "type": "oauth2", "flows": { "password": { "tokenUrl": "http://example.com/tokenurl", "x-skip-client-authentication": false, "x-oauth2-clientid-example": "clientid", "x-oauth2-clientsecret-example": "clientsecret", "x-oauth2-credentials-placement": "header", "x-oauth2-username-example": "username", "x-oauth2-password-example": "password", "x-allow-additional-oauth-fields": true, "x-additional-oauth-fields": { "prop1":{ "type": "string" }, "prop2":{ "type": "integer" } } } } } } ``` </TabItem> </Tabs> The detailed explanation of all these extensions is given below: | Extension | Type | Description | Applicable to Flows | | -------- | ---- | ------- | ---- | | `x-skip-client-authentication` | Boolean | The OAuth 2.0 flow of resource owner password credentials will normally involve client app authentication using Client Id and Client Secret. However, if you want to skip this authentication for Code Generation purposes, you can set its value to `true` | `password` | | `x-oauth2-clientid-example` | String | Specifies a value that can be used as an example or demo client ID | `*password`, `implicit`, `application`, `accessCode` | | `x-oauth2-clientsecret-example` | String | Specifies a value that can be used as an example or demo client secret | `*password`, `implicit`, `application`, `accessCode` | | `x-oauth2-credentials-placement` | String | Specifies where the client credentials (client ID and secret) are sent when calling the token endpoint. Use `header` to send them in the HTTP Basic `Authorization` header, or `body` to send them as `x-www-form-urlencoded` body parameters. Defaults to `header`. | `*password`, `application`, `accessCode` | | `x-oauth2-username-example` | String | Specifies a value that can be used as an example or demo client username | `password` | | `x-oauth2-password-example` | String | Specifies a value that can be used as an example or demo client password | `password` | | `x-allow-additional-oauth-fields` | Boolean | When enabled, allows additional properties return in OAuth 2.0 flows. | `password`, `implicit`, `application`, `accessCode` | | `x-additional-oauth-fields` | Object | Specifies an object of properties returned in OAuth 2.0 flow. | `password`, `implicit`, `application`, `accessCode` | | `x-default-scopes` | Array (string) | Specifies the default scopes to be used with the OAuth2 security scheme. These scopes are used when none are explicitly provided. | `password`, `implicit`, `application`, `accessCode` | | `x-revoke-token` | Object | Defines the token revocation settings for the OAuth2 scheme. The object may include: <br /> 1. `Url` (string): The endpoint to revoke the token. <br /> 2. `TokenType` (string): The type of token being revoked (For example, `Refresh` or `Access`). <br /> 3. `TokenTypeHint` (string, optional): A hint about the type of token submitted for revocation. | `password`, `implicit`, `application`, `accessCode` | :::note * The extension isn't applicable to flow `password` if `x-skip-client-authentication` is set to `true`. ::: ### Discriminator Value Extension OpenAPI makes use of a property `discriminator` to support polymorphism in custom types. As per OpenAPI, the value of this property must be the name of the parent model or the children models depending on which type the object represents. However, we allow our users to specify a custom discriminator value using the APIMatic's Discriminator Value extension. This value will override the default custom type name. #### Usage The extension is used through the `x-discriminator-value` property. | Property | Type | Purpose | | -------- | ---- | ------- | | `x-discriminator-value` | String | Custom discriminator value | For OpenAPI 1.2, the extension can be used inside the [Model Object](https://github.com/OAI/OpenAPI-Specification/blob/master/versions/1.2.md#527-model-object) while for 2.0, it can be used inside the [Definitions Object](https://github.com/OAI/OpenAPI-Specification/blob/master/versions/2.0.md#definitionsObject). In case of OpenAPI 3.x, the extension can be used inside the [Discriminator Object](https://github.com/OAI/OpenAPI-Specification/blob/master/versions/3.0.0.md#discriminatorObject). All of this is illustrated in the examples below: <Tabs defaultValue="1.2" values={[ {label: 'OpenAPI 1.2', value: '1.2'}, {label: 'OpenAPI 2.0', value: '2.0'}, {label: 'OpenAPI 3.x', value: '3.0'}, ]}> <TabItem value="1.2"> ```json "Pet": { "id": "Pet", "required": [ "name", "petType" ], "properties": { "name": { "type": "string" }, "petType": { "type": "string" } }, "subTypes": ["Cat"], "discriminator": "petType", "x-discriminator-value": "GenericPet" } ``` </TabItem> <TabItem value="2.0"> ```json "Pet": { "type": "object", "required": [ "name", "petType" ], "properties": { "name": { "type": "string" }, "petType": { "type": "string" } }, "discriminator": "petType", "x-discriminator-value": "GenericPet" } ``` </TabItem> <TabItem value="3.0"> ```json "Pet": { "title": "Pet", "required": [ "name", "petType" ], "type": "object", "properties": { "name": { "type": "string" }, "petType": { "type": "string" } }, "discriminator": { "propertyName": "petType", "x-discriminator-value": "GenericPet" } } ``` </TabItem> </Tabs> ### Enumeration Extensions We currently provide two extensions to let you enhance the models we generate from your enumerations. These are: | Extension | Type | Description | Applicable to OpenAPI/Swagger Objects | | --------- | ---- | ----------- | ----------------------------- | | `x-enum-elements` | Enum Element Object | Provide additional meta-data for your enumerations by assigning a unique name for each element of your enum as well as specify a brief description for each | [Parameter Object](https://github.com/OAI/OpenAPI-Specification/blob/master/versions/2.0.md#parameterObject), [Items Object](https://github.com/OAI/OpenAPI-Specification/blob/master/versions/2.0.md#items-object), [Header Object](https://github.com/OAI/OpenAPI-Specification/blob/master/versions/2.0.md#header-object), `Schema Object` ([v2](https://github.com/OAI/OpenAPI-Specification/blob/master/versions/2.0.md#schema-object), [v3](https://github.com/OAI/OpenAPI-Specification/blob/master/versions/3.0.0.md#schemaObject)) | | `x-enum-model-name` | String | Specify a custom name for the enumeration model to be generated | [Parameter Object](https://github.com/OAI/OpenAPI-Specification/blob/master/versions/2.0.md#parameterObject) when `in` isn't set to `body`. For other objects, use `title` for this purpose | #### Usage The following example demonstrates the usage of both extensions in a Parameter Object: ```json { "name": "numbers", "in": "query", "required": true, "type": "string", "enum": [ "1", "2", "3", "4" ], "x-enum-elements": [ { "name": "One", "description": "First element" }, { "name": "Two", "description": "Second element" }, { "name": "Three", "description": "Third element" }, { "name": "Four", "description": "Fourth element" } ], "x-enum-model-name": "Number Elements" } ``` ### Datetime Extensions You can specify various date-time formats using our editor, the details of which are available at [Datetime Formats](/web-dashboard-retired). OpenAPI supports only one of these formats that is, Rfc3339. To let you make use of other datetime formats, we provide custom formats which you can specify through the `format` property at the time of defining a type. As per OAS ([v2](https://github.com/OAI/OpenAPI-Specification/blob/master/versions/2.0.md#data-types), [v3](https://github.com/OAI/OpenAPI-Specification/blob/master/versions/3.0.0.md#dataTypes)), the `format` property is an open string-valued property, and can have any value to support documentation needs. Taking advantage of the above, we make the following formats available to help you finely define the date-time type: | Name | Description | | ---- | ----------- | | `date-time` | Supported by OpenAPI/Swagger by default. Represents datetime Rfc3339 format | | `date-time-rfc1123` | Helps represent datetime that uses Rfc1123 format | | `unix-timestamp` | Helps represent datetime using Unix or Epoch time | ### Dynamic Response Extension APIMatic supports type `Dynamic` for success responses where type schema isn't known or can't be easily defined. To use this type inside any version of Swagger, you can use our extension `x-is-dynamic` inside the response schema as follows: ```json { "responses": { "201": { "description": "Successful operation", "schema": { "type": "object", "x-is-dynamic": true } } } } ``` ### Exception Model Name Extension We auto-generate [exceptions models](/web-dashboard-retired) from the error response schema definitions to provide better support for handling API errors in generated code. By default, the models generated this way use the original schema's name/title and have a `_Error` postfix attached to them. You can, however, choose to override the auto-generated name with one of your own using our `x-exception-model-name` extension in OpenAPI's `Schema Object` ([v2](https://github.com/OAI/OpenAPI-Specification/blob/master/versions/2.0.md#schema-object), [v3](https://github.com/OAI/OpenAPI-Specification/blob/master/versions/3.0.0.md#schemaObject)). | Name | Type | Description | | ---- | ---- | ----------- | | `x-exception-model-name` | String | When set, this name will override the default name assigned to an auto-generated exception model. | **Example**: ```json { "paths": { "/pets": { "get": { "operationId": "getPets", ..................... "responses": { "400": { "description": "Unexpected error", "content": { "application/json": { "schema": { "$ref": "#/components/schemas/BadRequest" } } } } } } } }, "components": { "schemas": { "BadRequest": { "x-exception-model-name": "ErrorResponse", "type": "object", "properties": { "code": { "type": "string" }, "message": { "type": "string" } } } } } } ``` In the above example, the exception model imported into APIMatic will be named `ErrorResponse` instead of `BadRequest_Error`. ### Example Extensions Swagger 2.0 doesn't have support for parameter level examples. If you need to specify examples for the [Parameter Object](https://github.com/OAI/OpenAPI-Specification/blob/master/versions/2.0.md#parameterObject), you can do so by using our extension described below: | Extension | Type | Description | | --------- | ---- | ----------- | | `x-example` | Any | Example value for the parameter | ```json { "name": "param1", "in": "query", "required": false, "type": "string", "x-example": "example value for param1" } ``` ### API Metadata Extensions The Info Object in OpenAPI ([v2](https://github.com/OAI/OpenAPI-Specification/blob/master/versions/2.0.md#infoObject), [v3](https://github.com/OAI/OpenAPI-Specification/blob/master/versions/3.0.0.md#infoObject)) allows providing metadata about the API. We also offer some extensions that lets our users specify additional information about their API using this section. | Extension | Type | Description | | --------- | ---- | ----------- | | `x-image-uri` | String | An absolute URL that points to a display image for the API | #### Example ```json "info": { "version": "1.1", "title": "Swagger Petstore", "x-image-uri": "http://example.com/image.png" } ``` ### API Filtering Roles Extension APIMatic supports role-based API filtering. If you choose to filter your API by roles, the resulting portal will only contain documentation for those endpoints available to the specific one or more roles. It works by matching endpoint-level tags with tags associated with specific roles. Information about the endpoint level tags comes from `tags` supported in OpenAPI at Operation level. However, to help specify information about available roles in the API, we support an extension called `x-roles` in the root OpenAPI object. See an example of it below: #### Example Usage ```yml info: version: 1.0.0 title: Swagger Petstore x-roles: - name: private-role id: "2" tags: - pets description: private role ``` In below case, role with id `2` will have access to operations with `tags` containing "pet" but not those tagged as `store`. ```yml /pet: post: tags: - "pet" summary: "Add a new pet to the store" ............... /store/inventory: get: tags: - "store" summary: "Returns pet inventories by status" description: "Returns a map of status codes to quantities" operationId: "getInventory" ............. ``` Details of the properties available within this extension are given below: | Property | Type | Purpose | | -------- | ---- | ------- | | name | String | Name of the role. | | id | String | Unique identifier of the role. | | description | String | Provides more details about the role. | | tags | array[String] | List of String-valued tags associated with the role. | ### Applied Authentication Options Extension You can extend the security information you apply globally or at operation level by adding additional metadata that can help provide more details about the security being applied. This metadata can be added using our extension `x-security-options-meta` which is applicable at the root OpenAPI/Swagger Object ([v2](https://github.com/OAI/OpenAPI-Specification/blob/main/versions/2.0.md#swagger-object), [v3](https://github.com/OAI/OpenAPI-Specification/blob/main/versions/3.0.0.md#oasObject)) and the Operation Object ([v2](https://github.com/OAI/OpenAPI-Specification/blob/master/versions/2.0.md#operationObject), [v3](https://github.com/OAI/OpenAPI-Specification/blob/master/versions/3.0.0.md#operationObject)). Details of the properties available within this extension are given below: | Property | Type | Purpose | | -------- | ---- | ------- | | name | String | A user-friendly name for the security option. | | description | String | Provides more details about the security option. | #### Example Usage ```yml security: - {} - apiKey: [] x-security-options-meta: - name: No Authentication description: Authentication can be skipped. This will allow limited functionality, however. - name: API Key description: Pass the API key provided to you in your account settings. This will allow you full access to functionality. ``` :::warning The number of items inside the extension must match the number of options in the `security` property else the extension data will be considered invalid or incomplete. ::: ### Webhook Group Extension The `x-webhooks` extension, defined at the root OpenAPI Object (v3.x only), enables you to specify webhook groups for handling incoming event notifications from external services. This extension introduces advanced capabilities such as event-based discrimination and payload signature verification, helping you organize, secure, and manage webhook interactions within your API. It provides a structured way to group and configure webhooks, making complex event handling more consistent and reusable. The `x-webhooks` extension contains one or more named webhook groups. Each group name acts as a key, with its configuration as the value. ```yaml x-webhooks: groupName1: # First webhook group description: ... discriminator: ... payloadVerification: ... groupName2: # Second webhook group description: ... discriminator: ... ``` #### Webhook Group Structure In the webhook group structure, each webhook group maps onto a Webhook Handler in SDK, which is responsible for handling and configuring related webhooks. | Property | Type | Required | Description | |--------------------|--------------------|----------|--------------------------------------------| | description | String | Optional | A human-readable description of the webhook group. | | discriminator | [Discriminator](#discriminator-structure) | Optional | Defines webhook routing logic. | | PayloadVerification | [PayloadVerification](#payload-verification-structure) | Optional | Defines request authenticity validation. | #### Discriminator Structure | Property | Type | Required | Description | |-----------------|--------|----------|--------------------------------------------------------------------| | `propertyPointer` | String | Yes | [JSON Pointer](https://datatracker.ietf.org/doc/html/rfc6901) (request-body only) is used to point discriminator property in the root request body. | | `mapping` | Object | Optional | Maps event type values (keys) to webhook identifiers. | #### Payload Verification Structure | Property | Type | Required | Description | |------------------------|--------------------------------------------|------------------------------|-------------------------------------------------------------------------------------------------------------------------------------------------------------------------------------------------------------------------------------------------------------------------------| | signatureHeader | String | Yes | Name of the header containing the signature. | | description | String | Optional | Human-readable description of the verification configuration. | | algorithm | Enum (`HMAC-SHA256`, `HMAC-SHA512`) | Yes | Algorithm to use for verification. | | | digestEncoding | Enum (`hex`, `base64`, `base64url`) | Optional (default = `hex`) | Encoding used for the digest. | | messageTemplate | String | Optional(default=`{$request.body}`) | Template describing the message to sign. Supports placeholders:<br />• `{$request.body}` → raw request body<br />• `{$method}` → HTTP method<br />• `{$request.header.<HeaderName>}` → specific header value<br />• `{$request.body#/property}` → JSON pointer into request body. Default: `{$request.body}`. | | signatureValueTemplate | String | Optional(default=`{digest}`) | Template describing the signature value format. Supports `{digest}` placeholder:<br />• `"{digest}"` → plain digest<br />• `"v0={digest}"` → prefixed<br />• `"sha256={digest}"` → prefixed with algorithm name<br />• `"complex={digest}"` → arbitrary prefix. Default: `{digest}`. | ### Using the x-webhook-group Extension To associate a webhook with a webhook group, include the x-webhook-group extension inside your webhook definition. This ensures the webhook inherits routing and verification logic from the referenced group. #### Example Usage ```yaml x-webhooks: rides: description: Ride and driver lifecycle events discriminator: propertyPointer: "$request.body#/event_type" mapping: ride.status.updated: rideStatusUpdated driver.assigned: driverAssigned payloadVerification: signatureHeader: X-Signature algorithm: HMAC-SHA256 messageTemplate: "{$request.body}" signatureValueTemplate: "sha256={digest}" ``` ```yaml webhooks: rideStatusUpdated: post: summary: Ride status updated x-webhook-group: rides # ← associate with webhook group requestBody: content: application/json: schema: type: object properties: event_type: # ← propertyPointer points here type: string example: ride.status.updated status: type: string example: completed ``` ### Callback Group Extension The `x-callbacks` extension, defined at the root OpenAPI Object (v3.x only), enables you to specify callback groups for handling outgoing asynchronous requests (callbacks) to client-provided endpoints. Its structure mirrors the `x-webhooks` extension, providing advanced capabilities such as event-based discrimination and payload signature verification, ensuring consistent and secure callback handling The `x-callbacks` extension contains one or more named callback groups. Each group name acts as a key, with its configuration as the value. ```yaml x-callbacks: groupA: # First callback group description: ... discriminator: ... payloadVerification: ... groupB: # Second callback group description: ... discriminator: ... payloadVerification: ... ``` #### Callback Group Structure The callback group structure follows the same design as the [Webhook Group Structure](#webhook-group-structure). #### Using the `x-callback-group` Extension To associate a callback with a callback group, include the x-callback-group extension inside your callback definition. This ensures the callback inherits routing and verification logic from the referenced group. #### Example Usage ```yaml x-callbacks: rideUpdates: description: Callback group for ride status updates discriminator: propertyPointer: 'request.body#/event_type' mapping: ride.status.updated: rideStatusUpdatedCallback payloadVerification: description: HMAC verifier for ride callbacks algorithm: HMAC-SHA256 digestEncoding: hex signatureHeader: X-Signature messageTemplate: "{$request.body}" signatureValueTemplate: "v0={digest}" ``` ```yaml paths: /rides: post: requestBody: content: application/json: schema: type: object properties: callback_url: type: string - callback_url callbacks: rideStatusUpdatedCallback: '{$request.body#/callback_url}': post: x-callback-group: rideUpdates # ← associate with callback group requestBody: content: application/json: schema: type: object properties: event_type: type: string example: ride.status.updated # ← propertyPointer applies here status: type: string enum: - accepted - completed - cancelled ``` ## Response Mapping Object Response Mapping Object is designed as a discriminated union with Type as the discriminator. Currently, two types are supported: ### Simple Matches the current behavior i.e response from endpoint is treated as the result or error. ```json { "Type": "Simple" } ``` ### Field-Based Data is extracted from a nested-field in the response's JSON object. Additionally, an error field can also be specified. Each element of the DataField or ErrorField corresponds to one level of nesting and implies the name of the field to be accessed for the data. ```json { "Type": "FieldBased", "DataField": ["nested", "data"], "ErrorField": ["error"] } ``` ## Error Templates Error templates are custom-templated messages that can be provided for overriding default exception messages thrown in SDKs for error responses. They can be defined using a map like structure as shown below: ```json "errorTemplates": { "401": "Response returned an error with status code {$statusCode}.", "402": "Error occurred: {$response.body#/errors/0/reason}", "5XX": "Internal server error, Code: {$statusCode}.", //this error message will be thrown for all error responses with status codes belonging to the 5XX range. "0": "An error occurred. Code: {$statusCode}" //this error message will be thrown for all error responses that are not covered explicitly in the error templates. } ``` Here, - **Key of an error template:** Should be a valid HTTP error status code (400 - 599) or range (for example, 4XX, 5XX). The key can be set to 0 to represent any undeclared error codes. - **Value of an error template:** The exception message that the SDK must return in case of an error response belonging to the range specified in the template key. The error message defined here has support for templates that are replaced by real data at runtime. More details about the required syntax for the message can be found in the [next section](#error-template-message-syntax). ### Error Template Message Syntax The error template message is capable of supporting template expressions that hold placeholders which are replaced with actual data at runtime. A template expression must start and end with curly braces `{}`. The available placeholders that can be used are listed below: | Placeholder | Details | | ----------- | ------- | | `$statusCode` | This is replaced by the actual response's status code at runtime for example, for an error response 401, the SDK exception message with a provided error template of `Response returned an error with status code {$statusCode}.` will become `Response returned an error with status code 401.` | | `$response.header.headerKey` | This is replaced with the content of the response header whose name's specified in place of the `headerKey` part of the placeholder for example, for a response with header `X-Cache` set to `Hit`, the SDK exception message with a provided error template like `Could not fetch response data. Cache: {$response.header.X-Cache}` will become `Could not fetch response data. Cache: Hit`. | | `$response.body#JsonPointer` | This placeholder is replaced with the content of the response body. `#JsonPointer` is an **optional** segment of the placeholder to help retrieve a specific part of the JSON response body using [JSON pointer syntax](https://www.rfc-editor.org/rfc/rfc6901). If the value is non-primitive, it will be serialized first for example, for an error response with body `{"error": {"reason": "Unauthorized"}}`, the SDK exception message for provided error template like `Response returned with error: {$response.body#error/reason}` will become `Response returned with error: Unauthorized`. | ### Pagination Extension To simplify SDK generation for paginated APIs, we support a custom `x-pagination` extension that allows us to interpret and handle pagination strategies consistently. You can define this extension alongside the `schema` object inside the response `content`. It helps us identify the pagination strategy in use and automatically generate logic to handle pagination on behalf of the SDK user. This extension supports four common pagination types: `offset`, `page`, `cursor`, and `link`. Each entry in the `x-pagination` array corresponds to one strategy used by the endpoint. | Property | Type | Required For | Description | |----------|------|--------------|-------------| | `type` | Enum (`offset`, `page`, `cursor`, `link`) | All | Specifies the pagination strategy used by the API. | | `input` | String | `offset`, `page` or `cursor` | A JSON pointer (custom syntax) to indicate where the pagination input value (For example, `offset`, `cursor`) is expected in the request. | | `result` | String | All | A JSON pointer that tells us where to find the data records in the response. | | `output` | String | `cursor` | A JSON pointer to extract the new cursor value from the response body or headers. | | `next` | String | `link` | A JSON pointer that identifies the location of the `next` link in the response body or headers. | | `limit` | String | Optional | A JSON pointer to the page-size (limit) parameter in the request. Applicable to `offset` and `page` pagination. Must reference an integer value. | | `totalItems` | String | Optional | A JSON pointer to the total number of available items in the response. Applicable to `offset` pagination. Must reference an integer value. | | `totalPages` | String | Optional | A JSON pointer to the total number of available pages in the response. Applicable to `page` pagination. Must reference an integer value. | | `hasMore` | String | Optional | A JSON pointer to a Boolean value in the response that indicates whether more results are available. Applicable to `offset`, `page`, and `cursor` pagination. | We support referencing request parameters (for example, `$request.query#/offset`, `$request.headers#/cursor`) and response values (for example, `$response.body#/data`, `$response.headers#/next`) using custom pointers, which follow a simplified [JSON pointer-like](https://datatracker.ietf.org/doc/html/rfc6901) syntax. Header references use the same `#/` separator as query and body references. For example, `$request.headers#/cursor` (not `$request.headers.cursor`). The optional `totalItems`, `totalPages`, and `hasMore` properties always reference values in the response, using either `$response.body#/...` or `$response.headers#/...`. `totalItems` and `totalPages` must point to an integer value, and `hasMore` must point to a Boolean value. The optional `limit` property references the page-size parameter in the request, using the same format as `input` (for example, `$request.query#/limit` or `$request.path#/page_size`), and must point to an integer value. It lets pagination detect the last page: when a page returns fewer items than the requested `limit`, the current page is the last one and pagination can stop without issuing an extra request. Below are different pagination types with JSON examples. #### Pagination Types and Examples ##### Offset Pagination This strategy uses an offset query parameter to skip records. The data items are located in the data field of the response body. This example also declares the page-size parameter (`limit`) and exposes the optional total item count (`totalItems`) and a flag indicating whether more results are available (`hasMore`). ```json { "get": { "responses": { "200": { "content": { "application/json": { "schema": { "$ref": "#/components/schemas/PaymentResponse" }, "x-pagination": [ { "type": "offset", "input": "$request.query#/offset", "limit": "$request.query#/limit", "result": "$response.body#/data", "totalItems": "$response.body#/total", "hasMore": "$response.headers#/x-has-more" } ] } } } } } } ``` ##### Page-Based Pagination This approach reads the current page number from a request header and expects the response body to contain the paginated items directly. It also declares the page-size parameter (`limit`) and exposes the optional total page count (`totalPages`) and a flag indicating whether more results are available (`hasMore`). ```json { "get": { "responses": { "200": { "content": { "application/json": { "schema": { "$ref": "#/components/schemas/PaymentResponse" }, "x-pagination": [ { "type": "page", "input": "$request.headers#/page", "limit": "$request.query#/page_size", "result": "$response.body", "totalPages": "$response.headers#/x-total-pages", "hasMore": "$response.body#/has_more" } ] } } } } } } ``` ##### Cursor-Based Pagination This type uses a `cursor token` for paging through items. It reads the current cursor from the request headers and expects the new cursor in the response headers. It also exposes an optional flag indicating whether more results are available (`hasMore`). ```json { "get": { "responses": { "200": { "content": { "application/json": { "schema": { "$ref": "#/components/schemas/PaymentResponse" }, "x-pagination": [ { "type": "cursor", "input": "$request.headers#/cursor", "output": "$response.headers#/cursor", "result": "$response.body", "hasMore": "$response.body#/has_more" } ] } } } } } } ``` ##### Link-Based Pagination Link pagination relies on a full `next` URL provided in the response headers, which is used to fetch the next set of results. The data is returned in the response body. ```json { "get": { "responses": { "200": { "content": { "application/json": { "schema": { "$ref": "#/components/schemas/PaymentResponse" }, "x-pagination": [ { "type": "link", "next": "$response.headers#/next", "result": "$response.body" } ] } } } } } } ``` ### SSE Sentinel Extension Some [Server-Sent Events streams](/generate-sdks/sdk-features/server-sent-events-streaming) mark their end by sending a final frame carrying a fixed sentinel value (for example, `[DONE]`) instead of just closing the connection. The `x-sse-sentinel` extension lets you declare that terminator on a `text/event-stream` response so the generated SDK ends the stream cleanly when the frame arrives. Define it alongside the `schema` object inside the `text/event-stream` entry of the response `content`. Its value is the exact string a frame's `data` payload must equal to be treated as the terminator. Quote the value in YAML when it contains characters that YAML treats specially (for example, the `[` and `]` in `[DONE]`), so it's parsed as a string rather than a flow sequence. | Property | Type | Description | |----------|------|-------------| | `x-sse-sentinel` | String | The exact `data` payload that marks the end of the stream. The matching frame ends iteration; it's not yielded to the consumer and isn't decoded against the response schema, so it need not match the payload type. | ```json { "post": { "responses": { "200": { "content": { "text/event-stream": { "schema": { "$ref": "#/components/schemas/CreateChatCompletionStreamResponse" }, "x-sse-sentinel": "[DONE]" } } } } } } ``` --- # OpenAPI Test Case Extensions Source: https://docs.apimatic.io/specification-extensions/swagger-test-cases-extensions/ The OpenAPI description format (most commonly known as Swagger) allows its users to extend their specification for an API at various points by making use of [vendor extensions](https://swagger.io/docs/specification/openapi-extensions/). This allows them to add any additional data that can better describe the API. By convention, these extension properties are always prefixed by `x-` and must have a valid JSON value. APIMatic utilizes this feature to provide users with extensions that lets them extend their API specification in order to configure and enhance the output from APIMatic products that suits their needs better. This document focuses on extensions that allow users to specify test data in their OpenAPI/Swagger API specification which APIMatic can then utilize to automatically generate valid test cases in each language upon SDK generation. Other extensions available are documented here: - [OpenAPI CodeGen Extensions](swagger-codegen-extensions.md) - [OpenAPI Server Configuration Extensions](swagger-server-configuration-extensions.md) ![Cover](/images/swagger-test-cases-extensions/cover.PNG) The test data extensions that APIMatic offers are based on the Gavel specification. ## Gavel Specification Gavel is a tool from `Apiary.io` that is used to validate HTTP API calls based on comparisons between expected and real requests/response JSON objects. For our purposes, we have made use of only the `HTTP Request` and `Expected HTTP Response` JSON objects present in the gavel specification. ### HTTP Request This helps you define the details about an HTTP request that will be sent. | Property | Type | Explanation | | -------- | ---- | ----------- | | method | `string` | This refers to the HTTP methods used for sending the request. Valid values include `GET`, `POST`, `DELETE`, `PATCH`, `PUT` | | uri | `string` | Uniform resource identifier used to locate and identify a resource. May contain query parameters `(/pets?pet-id=1)` and template parameters `(/pets/{pet-id})`. | | headers | `Map[string, string]` | Key-value pairs containing information for request headers like the `Content-Type`, `Accept`, etc. Key should be the header name while the value would be the header value. | | body | `string` | The request body can contain input parameters depending on the `Content-Type` specified in the headers. This is not applicable in case of the HTTP method `GET`. | **Example:** ```json { "method": "GET", "uri": "/ip", "headers": { "user-agent": "curl/7.24.0 (x86_64-apple-darwin12.0) libcurl/7.24.0 OpenSSL/0.9.8x zlib/1.2.5", "host": "httpbin.org", "accept": "*/*" }, "body": "" } ``` ### Expected HTTP Response This helps you define the expected response for the HTTP request you sent using details of the [previous section](#http-request). | Property | Type | Explanation | | -------- | ---- | ----------- | | statusCode | `string` | The expected HTTP status code of the response e.g. `200`. | | headers | `Map[string, string]` | Key-value pairs containing information for request headers like the `Content-Type`, `Accept`, etc. Key should be the header name while the value would be the expected value of the header. | | body | `string` | The expected body data of the response. | **Example:** ```json { "statusCode": "200", "headers": { "content-type": "application/json", "date": "Wed, 03 Jul 2013 13:30:53 GMT", "server": "gunicorn/0.17.4", "content-length": "30", "connection": "keep-alive" }, "body": "{\n \"origin\": \"94.113.241.2\"\n}" } ``` ## Specifying Test Cases Using Gavel Specification To specify one or more test cases based on gavel specification in OpenAPI/Swagger would require the use of our `x-unitTests` extension in the `Operation Object` ([v2](https://github.com/OAI/OpenAPI-Specification/blob/master/versions/2.0.md#operationObject), [v3](https://github.com/OAI/OpenAPI-Specification/blob/master/versions/3.0.0.md#operationObject)). This extension is an array of objects where each object is comprised of the following: | Property | Type | Explanation | | -------- | ---- | ----------- | | request | [`HTTP Request Object`](#http-request) | **Required** This is where you define the input test data for your operation. | | expectedResponse | [`Expected HTTP Response Object`](#expected-http-response) | **Required** This is where you define the response specific test data corresponding to the request data defined under the `request` property. | APIMatic will take this array of test cases within each operation and convert them to test cases in the preferred programming language. For any test case, if the real response from the operation is different from that specified then the test case will fail. In this way the two objects help specify test data for test cases. **Example:** A `POST` operation containing one query parameter `pet-id` that retrieves the information of a pet (e.g. its name) based on its `pet-id` can be tested with a test case using the following specification: ```json "post": { "operationId": "findPets", "parameters": [ { "name": "pet-id", "in": "query" }], "x-unitTests": [ { "request": { "method": "GET", "uri": "/pets?pet-id=1" }, "expectedResponse": { "statusCode": "200", "headers": { "content-type": "application/json" }, "body": { "name": "Dolly" } } } ] } ``` :::note If the `request` object contains parameters within `body` (invalid for `GET` method) then the `Content-Type` MUST be present in the `request` `headers` property. ::: ### Extended Gavel Specification We have extended the Gavel specification with some configuration flags to fine-tune test case generation in APIMatic. These are optional flags that will assume default values if they are not explicitly specified. #### Configuration Flags in Unit Test Object | Flags | Type | Default Value | Explanation | | ----- | ---- | -------------- | ------------- | | x-testName | `string` | Operation `name` | Specifies the name of the test case to be generated. | | x-testDescription | `string` | Operation `description` | Describes what the test case does. | | x-testShouldPass | `boolean` | `true` | Should this test pass? If `false`, the test would be required to fail to pass. | | x-testEnabled | `boolean` | `true` | Is this test enabled? Disabled tests are not generated and are not validated. Tests can be disabled in case they are outdated after an operation description is updated. | **Example:** ```json "x-unitTests":[ { "request":{ "method":"GET", "uri":"/pets?pet-id=1" }, "expectedResponse":{ "statusCode":"200", "headers": { "content-type": "application/json" }, "body":" {\"name\":\"Dolly\"}" }, "x-testName":"getPetInfo", "x-testEnabled":"true", "x-shouldPass":"true", "x-testDescription":"Get pet information from its id" } ] ``` #### Configuration Flags in HTTP Expected Response Object These flags can be specified along with the [Expected Response Object](#expected-http-response): | Flags | Type | Default Value | Explanation | | ----- | ---- | ------------- | ------------ | | x-allowExtraHeaders | `boolean` | `true` | Specifies whether other headers than those specified in `headers` object within the `expectedResponse` are allowed or not. | | x-bodyMatchMode | Enum [`string`] | `NONE` | Valid values are `NONE`, `RAW`, `KEYS`, `KEYSANDVALUES`, `NATIVE`. Specifies how `body` in the `expectedResponse` is compared to the actual response body. More information on the Match modes can be found at [Body Match Modes](testing/defining-test-case.md#body-match-mode). | | x-arrayOrderedMatching | `boolean` | `false` | If `true`, testing of arrays will include order checking of elements as well. | | x-arrayCheckCount | `boolean` | `false` | If `true`, the arrays will be tested to see if they are equal in length. If both `x-arrayOrderedMatching` and `x-arrayCheckCount` are `true`, arrays will be strictly checked for equality i.e. their order as well as size must match. | **Example:** ```json "x-unitTests": [ { "request": { "method": "GET", "uri": "/pets?pet-id=1" }, "expectedResponse": { "statusCode": "200", "headers": { "content-type": "application/json" }, "body": " {\"name\":\"Dolly\"}", "x-bodyMatchMode": "KEYS", "x-allowExtraHeaders": "true" } } ] ``` ## Inline Test Data Specification To specify test values for security parameters or operation parameters you can also use the `x-testValue` extension property. ### Security Scheme Object You can use the `x-testValue` within the `Security Scheme Object` to specify a test value for the particular security parameter e.g. you can specify a test API key as follows: ```json "apikey": { "type": "apiKey", "name": "apikey", "in": "query", "x-testValue":"4d883edc9e6eba86bf1cc2dd4024d612" } ``` :::note The alternative to this would be to specify this value within gavel specification (within the Request uri if the apikey is in query or within the Request headers if the apikey is in headers) ::: Basic authentication generally requires a username and a password. To specify test values for these parameters you can declare `x-testValue` as an array of type `BasicAuthTestValue Object`. `BasicAuthTestValue Object` consists of two properties: | Property | Type | Details | | -------- | ---- | ------- | | name | String | Name of the parameter e.g. username | | value | String | A test value for that parameter | #### Example ```json "basicAuth": { "type": "basic", "x-testValue":[{ "name":"username", "value":"user123" }, { "name":"password", "value":"pass123" }] } ``` ### Operation Parameters We can also specify inline test values for operation parameters using `x-testValue` as follows: ```json "get": { "operationId": "findPets", "parameters": [ { "name": "pet-id", "in": "query", "description": "", "required": true, "x-testValue": "1" } ] } ``` :::note In case a parameter test value is specified in both the gavel specification and in inline specification of parameters the value in the gavel specification will be given preference. ::: --- # OpenAPI Server Configuration Extensions Source: https://docs.apimatic.io/specification-extensions/swagger-server-configuration-extensions/ OpenAPI/Swagger (v2.0, v3.x) facilitates third-party vendors to implement tool specific extensions. These extensions allow customizing behaviors beyond simple API definitions. We've enabled a similar category of extensions that help you customize APIMatic code generation engine as per your requirements. The current documentation targets the extensions available for you to specify server configuration information. You can view details on other available APIMatic extensions for OpenAPI at: 1) [OpenAPI CodeGen Extensions](specification-extensions/swagger-codegen-extensions.md) 2) [OpenAPI TestCase Extensions](specification-extensions/swagger-test-cases-extensions.md) APIMatic also provides a similar extension for API Blueprint whose details can be viewed at [API Blueprint Extensions](specification-extensions/blueprint-extensions.md). All the mentioned extensions are supported by both the **Import API** operation, as well as by our Code Generation as a Service API. ## Server Configuration Server configurations can be used to create multiple environments, multiple servers that can be used with specific endpoints and server urls with template parameters. You can view more details on this at [Server Configuration](/web-dashboard-retired). ## OpenAPI Extensions for Specifying Server Configuration APIMatic offers you OpenAPI vendor extensions that you can use to specify server configuration information within your OpenAPI/Swagger API definition file. When you import this file, we will extract server configuration information from this extension. The alternate way to specify this information is by using the APIMatic editor once you have imported your API definition file. ### Server Configuration Extension This extension must be used within the "info" object by using the property `x-server-configuration`. Details about this object can be viewed at Info Object [v2](https://github.com/OAI/OpenAPI-Specification/blob/master/versions/2.0.md#infoObject), [v3](https://github.com/OAI/OpenAPI-Specification/blob/master/versions/3.0.0.md#infoObject). ```json { "openapi": "3.0.0", "info": { ..., "x-server-configuration": { ... } }, ... } ``` The fields available are: | Name | Type | Details | | ---- | ---- | ------- | | **default-environment** | String | Environment to be used by default | | **default-server** | String | Server to be used by default | | **environments** | [[Environment Object](#environment-object)] | List of environments available | | **parameters** | [[Parameter Object](#parameter-object)] | List of template parameters | #### Server Configuration Object ##### Example ```json { "x-server-configuration": { "default-environment": "production", "default-server": "default", "environments": [ { "name": "production", "servers": [ { "name": "default", "url": "http://example.com/{templateParam}" } ] } ], "parameters": [ { "name": "templateParam", "description": "It is a template parameter", "schema": { "type": "string", "enum": [ "abc", "def", "ghi" ], "default": "abc" } } ] } } ``` :::caution OpenAPI 3.x Root Servers The Server Configuration extension will override any information specified in the `servers` property of the OpenAPI 3.x [root object](https://github.com/OAI/OpenAPI-Specification/blob/master/versions/3.0.0.md#openapi-object). ::: #### Environment Object The environment object is used to define a single environment. An environment consists of a set of servers with base URL values. The fields available in this object are: | Name | Type | Details | | ---- | ---- | ------- | | **name** | String | Name of the environment | | **description** | String | Details about the environment | | **disableTryItOut** | Boolean | Default: `false`. When set to `true`, the Try It Out button will be disabled on the API portal for this environment, preventing users from making live API calls against it. | | **servers** | [[Server Object](#server-object)] | A list of servers in a particular environment | ##### Example ```json { "name": "production", "description": "Production environment", "servers": [ { "name": "default", "url": "http://example.com/{templateParam}" } ] } ``` #### Server Object The user can specify multiple servers within an environment. A server comprises of a name and a url. The fields available in this object are: | Name | Type | Details | | ---- | ---- | ------- | | **name** | String | Name of the server | | **url** | String | Base URL for the server | ##### Example ```json { "name": "default", "url": "http://example.com/{templateParam}" } ``` #### Parameter Object Parameter Object helps define the template parameters that can be used inside urls. These parameters are defined using the Parameter Object [v2](https://github.com/OAI/OpenAPI-Specification/blob/master/versions/2.0.md#parameterObject), [v3](https://github.com/OAI/OpenAPI-Specification/blob/master/versions/3.0.0.md#parameterObject) with rules that apply for parameters in template. In addition to those, you must also specify a default value for the parameter using the `default` property. ##### Example ```json { "name": "templateParam", "description": "It is a template parameter", "schema": { "type": "string", "enum": [ "abc", "def", "ghi" ], "default": "abc" } } ``` :::caution Parameter Type The parameter can only be of the following types: `string`, `number`, `number` enum, `string` enum. ::: ### Endpoint Server Name Extension The base URL for a specific endpoint can be overridden by using the server name extension in the Operation Object [v2](https://github.com/OAI/OpenAPI-Specification/blob/master/versions/2.0.md#operationObject), [v3](https://github.com/OAI/OpenAPI-Specification/blob/master/versions/3.0.0.md#operationObject). The extension consists of the following single field: | Name | Type | Details | | ---- | ---- | ------- | | **x-server-name** | String | Name of the server | #### Example ```json { "get": { "description": "Get operation", "x-server-name": "default", "tags": [ "Examples" ], "operationId": "Example", "produces": [ "application/json" ], "parameters": [], "responses": { "200": { "description": "" } } } } ``` ## Conclusion In this way you can specify server configuration in your OpenAPI file using our APIMatic extensions. You will then not be required to manually add this information through the editor every time you import your OpenAPI file. --- # API Blueprint Extensions Source: https://docs.apimatic.io/specification-extensions/blueprint-extensions/ APIMatic allows you to specify additional metadata with API Blueprint that will let you configure APIMatic products (including API Transformer, CodeGen, etc.) to produce better results. Some of the extensions also enable you to utilize parameter types for resources that aren't natively available in API Blueprint. This documentation will cover all details related to these extensions. ## API Version Extension This extension allows you to specify your API's version which isn't supported in API Blueprint by default. ### How to Use the Extension? You can specify the API version in API Blueprint's [Metadata section](https://apiblueprint.org/documentation/specification.html#def-metadata-section) using the `VERSION` property as follows: ```txt FORMAT: 1A HOST: http://api.datumbox.com/ VERSION: 2.0.0 ``` ## CodeGen Settings Extension These extensions allow customizing the behaviour of APIMatic's Code Generation Engine. You can control the naming conventions, configuration stores and have your custom code branding. These settings are referred by us as the Code Generation Settings and you can find more details on these at [Code Generation Settings](/generate-sdks/customize-sdks/codegen-settings/codegen-settings-overview). Instead of having to import your API Blueprint into APIMatic and then using the Editor UI to specify these settings, you can now utilize these extensions to specify them in your API definition file. A similar extension is also available in OpenAPI/Swagger whose details can be viewed at [OpenAPI/Swagger CodeGen Extensions](specification-extensions/swagger-codegen-extensions.md) ### How to Use the Extension? We extended the API Blueprint [Metadata section](https://apiblueprint.org/documentation/specification.html#def-metadata-section) to specify additional properties. See example below: ```txt FORMAT: 1A HOST: http://api.datumbox.com/ GENERATEASYNCCODE: TRUE USEMETHODPREFIX: TRUE USEMODELPOSTFIX: TRUE USECONTROLLERPOSTFIX: TRUE USEENUMPOSTFIX: TRUE USECONSTRUCTORSFORCONFIG: TRUE IOSUSEAPPINFOPLIST: TRUE IOSGENERATECOREDATA: FALSE ANDROIDUSEAPPMANIFEST: TRUE COLLECTPARAMETERS: FALSE CSHARPDEFAULTNAMESPACE: ACME.CORP.API JAVADEFAULTNAMESPACE: com.acme.corp.api APPENDCONTENTHEADERS: TRUE BRANDLABEL: ACME CORP. USERAGENT: APIMATIC 2.0 ENABLEADDITIONALMODELPROPERTIES: FALSE APPLYCUSTOMIZATIONS: [ custom-f3a77d, custom-f3a77h ] # DatumBox Datumbox offers a Machine Learning platform composed of 14 classifiers and Natural Language processing functions. .............. ``` The various metadata parameters available and their details are given below: | Setting | Type | Purpose | | ------- | ---- | ------- | | GENERATEASYNCCODE | Boolean | When true, the CodeGen engine generates asynchronous C# and Java code. | | USEMETHODPREFIX | Boolean | When true, HTTP verbs are used as prefix for generated controller methods. | | USEMODELPOSTFIX | Boolean | When true, a postfix "Model" is appended to all classes generated from schemas. | | USECONTROLLERPOSTFIX | Boolean | When true, a postfix "Controller" is appended to all controllers generated from path groups. | | USEENUMPOSTFIX | Boolean | When true, a postfix `Enum` is appended to all enumerations lifted from `allowedValues`. | | USECONSTRUCTORSFORCONFIG | Boolean | When true, configuration values for example authentication credentials, are accepted as controller constructor parameters. Otherwise, these values generate variables in a Configuration class. | | IOSUSEAPPINFOPLIST | Boolean | When true, configuration values for example authentication credentials, are expected in app-info.plist file for the iOS SDK. When set, this setting ignores useConstructorsForConfig flag. | | IOSGENERATECOREDATA | Boolean | When true, iOS CoreData schema and classes are generated. | | ANDROIDUSEAPPMANIFEST | Boolean | When true, configuration values for example authentication credentials, are expected in AndroidManifest.xml file for the Android SDK. When set, this setting ignores useConstructorsForConfig flag. | | COLLECTPARAMETERS | Boolean | When true, operation parameters are expected to passed as a collection. For example in PHP, the generated method expects a Map containing parameters as Key-Value pairs. This is currently implemented for PHP, Python, GO, and Objective-C. When set, this is applied globally on all endpoints/resources. | | CSHARPDEFAULTNAMESPACE | String | A valid C# namespace value to be used as the default namespace. Leave empty or null to automatically generate. | | JAVADEFAULTNAMESPACE | String | A valid Java package name to be used as the base package name. Leave empty or null to automatically generate. This value is applied for both Java and Android code generation templates. | | APPENDCONTENTHEADERS | Boolean | When true, code generation engine automatically detects request and response schema and appends content headers for example "accept: application/json" and "content-type: application/json" headers for JSON serialization mode. | | ENABLEPHPCOMPOSERVERSIONSTRING | Boolean | When true, adds `version` component to `composer.json` file in PHP SDKs. This can cause [conflicts](https://github.com/composer/packagist/issues/587#issuecomment-142686483) with Git tag-based version publishing and should be used with care. | | PHPCOMPOSERPACKAGENAME | String | This will set the name in composer.json file for PHP SDKs. You must provide a string with the format your-vendor-name/package-name. | | BRANDLABEL | String | A string value to brand the generated files. For example: "Acme Corp." | | USERAGENT | String | A string value to use as user-agent in the API calls. This is useful for analytics and tracking purposes. For example: "SDK V1.1" | | ENABLEADDITIONALMODELPROPERTIES | Boolean | When true, additional or unknown properties in the response JSON are collected into a dictionary. | | GENERATEINTERFACES | Boolean | When true, interfaces for controller classes are generated in the generated SDKs | | NULLIFY404 | Boolean | When true, null response will be returned on the HTTP status code 404 | | VALIDATEREQUIREDPARAMETERS | Boolean | When true, required API endpoint parameters are validated to be not null | | TIMEOUT | Float | When true, the requests will timeout after the specified duration | | PROJECTNAME | String | The name of the project for the Generated SDKs | | USECOMMONSDKLIBRARY | Boolean | When true, a common library comprising of common classes is used by the generated SDKs | | ARRAYSERIALIZATION | String | Format of serialization of arrays in form and query parameters. Valid values are `Indexed`, `UnIndexed`, `Plain`, `CSV`, `TSV`, `PSV` | | APPLYCUSTOMIZATIONS | [String] | List of customer-specific customizations to apply. | ## Parameter Type Extensions ### Number Extensions One of the primitive type that Blueprint offers for resource parameters is `number`. However, Blueprint doesn't natively support numbers of precision types for example decimal/floating point numbers. APIMatic extension allows you to further categorize number types as Long, Precision, Integers. By default, the numbers in Blueprint will be considered as `Precision` during import. However, you can specify them as `Long` or `Integer` as follows: * To specify number parameters of type `Long`, use **{LONG}** in the description for your parameters e.g here `userId` will be treated as `Long`. ```markdown + Parameters + userId: 1 (required, number) - {LONG} User ID ``` * To specify number parameters of type `Integer` use **{INT}** in the description for your parameters for example, here `accountId` will be treated as `Integer` ```markdown + Parameters + accountId: 1 (required, number) - {INT} Account ID ``` ### DateTime Extensions In Blueprint if you want to have a parameter of type `date` you will need to use type `string` and declare the parameter as follows: ```markdown + dateparam: `2015-05-05T12:30:00` (optional, string) ``` During import, this parameter won't be treated any different from other parameters of type `string`. In order to utilize the APIMatic DateTime types (`Date`, `DateTime`) you can use the following extensions: * To specify a parameter as `DateTime` (that contains both date and time) use **`{DATETIME}`** in the description for the parameter e.g. ```markdown + datetimeparam: `2015-05-05T12:30:00` (optional, string) - {DATETIME} This is a datetime parameter ``` * To specify a parameter as `Date` (in which time is treated as null) use **{DATE}** in the description for the parameter e.g. ```markdown + dateparam: `2015-05-05` (optional, string) - {DATE} This is a date parameter ``` ### File Type Extension There is no native support in API Blueprint for parameters of type `File`. If your API makes use of parameters of type `File` and you intend to utilize APIMatic `File` type you can use our file type extension in API Blueprint. APIMatic will then automatically extract the type information from the extension during any of the conversions/imports. Just use **{FILE}** in the description for the parameter. In the following example, the parameter `toUpload` will be treated as a File parameter located in the Form data. ```markdown + Parameters + toUpload (string, required) - {FILE} File to upload. ``` For more details on the field types available in APIMatic, please visit [Field Types](/web-dashboard-retired) ### URI Parameter Extensions API Blueprint doesn't natively support complex type [URI parameters](https://apiblueprint.org/documentation/specification.html#uri-parameters-section) for example you can't have array URI parameters. We, however, allow you to specify array URI parameters by using the **{ARRAY}** extension in the parameter description. APIMatic will then treat these parameters as arrays for example here `arrayNumber` will be treated as an array of type `number` ```markdown + Parameters + arrayNumber: 1 (required, number) - {ARRAY} parameter is a number array ``` --- # APIMatic RAML Annotations Source: https://docs.apimatic.io/specification-extensions/raml-apimatic-annotations/ RAML `v1.0` supports [annotations](https://github.com/raml-org/raml-spec/blob/master/versions/raml-10/raml-10.md#annotations) that provide a mechanism to extend the API specification with metadata beyond the one supported by its official specification. APIMatic allows its users to extend their specification with annotations that can help configure output from APIMatic products such as API Transformer, Code Generation, Portal/Docs Generation etc. <!--truncate--> Before you can use annotations in your API specification, you must also add a declaration for them in the root-level `annotationTypes` node as per the [spec](https://github.com/raml-org/raml-spec/blob/master/versions/raml-10/raml-10.md#:~:text=Annotations%20used%20in%20an%20API%20specification%20MUST%20be%20declared%20in%20a%20root-level%20annotationTypes%20node). For each annotation that we provide, this document will also provide you details about the declaration to be added. The annotations offered by APIMatic are listed below: 1. [Role-Based Access Annotations](#role-based-access-annotations) 2. [File Input Annotation](#file-input-annotation) 3. [Unit Tests Annotation](#unit-tests-annotation) ## Role-Based Access Annotations APIMatic supports role-based API filtering. If you choose to filter your API by roles, the resulting portal will only contain documentation for those endpoints available to the specific role(s). It works by matching endpoint-level tags with tags associated with the available roles. Roles can be defined in the RAML specification using the `roles` annotation in the root RAML object while method-level tags can be added through the `x-tags` annotation. ### Annotation for Roles To describe the possible list of roles for an API, the `roles` annotation can be used. #### Annotation Type Declaration To apply this annotation, you will first have to declare it under the `annotationTypes` root node as follows: ```yml annotationTypes: roles: type: array items: type: object properties: id: required: true type: string name: required: false type: string description: required: false type: string x-tags: required: true type: array items: type: string ``` Details of the properties available within a particular role object are: | Property | Type | Purpose | | -------- | ---- | ------- | | name | string | Name of the role. | | id | string | Unique identifier of the role. | | description | string | Provides more details about the role. | | x-tags | List[string] | List of String-valued tags associated with the role. | #### Example Usage for Annotation An example of applying `roles` annotation at the root RAML object is: ```yml (roles): - name: private id: 2 description: private role x-tags: - pets ``` This means that role with id `2` will only have access to methods tagged as `pets`. ### Annotation for Method level tags Tags can be added to methods as a list of strings. #### Annotation Type Declaration To apply the `x-tags` annotation anywhere in your specification, you will first have to declare it under the `annotationTypes` root node as follows: ```yml annotationTypes: x-tags: type: array items: type: string ``` #### Example Usage for Annotation You can apply this annotation at method level as follows: ```yml /pet/{id}: get: (x-tags): - pets displayName: Get pet by id ``` ## File Input Annotation By default, file type request parameters are considered part of multipart/form-data in APIMatic. If, however, you are looking to send the file directly as part of the request body then this default behavior in APIMatic can be overridden by using the boolean `sendFileInBody` annotation at method level. ### Annotation Type Declaration To use this annotation, you will first have to declare it under the `annotationTypes` root node as follows: ```yml annotationTypes: sendFileInBody: type: boolean ``` ### Example Usage for Annotation The annotation can be applied at method level as shown below: ```yml /file: post: (sendFileInBody): true body: binary/octet-stream: ``` ## Unit Tests Annotation APIMatic [auto-generates test cases from your RAML specification](https://apimatic.io/blog/2017/04/from-raml-example-objects-to-test-cases/) if it contains sufficient examples data to create one. When you generate an SDK, the test cases are converted to language-specific unit-tests that can easily let you test your SDKs. However, if you are interested in writing test cases yourself with real test data and within your RAML specification, then you can make use of our unit tests annotation. This annotation lets you easily add multiple test cases against each of your RAML `v1.0` [methods](https://github.com/raml-org/raml-spec/blob/master/versions/raml-10/raml-10.md#methods) using the `(unitTests)` property. A detailed breakdown and usage examples for this annotation is given below. ### Specifying Unit Tests Using Gavel Specification The unit tests annotation makes use of Gavel specification to define the structure of a test case. Gavel is a tool from [Apiary](https://apiary.io) that is used to validate HTTP API calls based on comparisons between expected and real requests/response JSON objects. For our purposes, we have made use of only the `HTTP Request` and `Expected HTTP Response` JSON objects present in the gavel specification. Apart from these, we've extended the Gavel specification to add a few configuration options that are useful for test-case generation in APIMatic. #### Unit Test Object | Property | Type | Explanation | | -------- | ---- | ----------- | | request | [`HTTP Request Object`](#http-request-object) | **Required** This is where you define the request specific test data. | | expectedResponse | [`Expected HTTP Response Object`](#expected-http-response-object) | **Required** This is where you define the response specific test data corresponding to the request data defined under the `request` property. | A few optional configuration flags are also available: | Flags | Type | Default Value | Explanation | | ----- | ---- | -------------- | ------------- | | testName | `string` | RAML [Method](https://github.com/raml-org/raml-spec/blob/master/versions/raml-10/raml-10.md#methods) `displayName` | Specifies the name of the test case to be generated. | | testDescription | `string` | RAML [Method](https://github.com/raml-org/raml-spec/blob/master/versions/raml-10/raml-10.md#methods) `description` | Describes what the test case does. | | testShouldPass | `boolean` | `true` | Should this test pass? If `false`, the test would be required to fail in order to pass. | | testEnabled | `boolean` | `true` | Is this test enabled? Disabled tests are not generated and are not validated. Tests can be disabled in case they are outdated after an operation description is updated. | #### HTTP Request Object This object lets you describe your test request in more detail. | Property | Type | Explanation | |--------- | ---- | ----------- | | method | Enum[`string`] | **Required** This refers to the HTTP methods used for sending the request. Valid values include `GET`, `POST`, `DELETE`, `PATCH`, `PUT`. | | uri | `string` | **Required** Uniform resource identifier used to locate and identify a resource. May contain query parameters (`/pets?pet-id=1`) and template parameters (`/pets/{pet-id}`). | | headers | `object` | Key-value pairs containing information for request headers like the `Content-Type`, `Accept`, etc. Key should be the header name while the value would be the header test value. | | body | `string` | The Request body can contain input parameters depending on the `Content-Type` specified in the headers. This is not applicable in case of method `GET`. | #### Expected HTTP Response Object This object lets you describe your expected response for the test request defined in the [previous section](#http-request-object). | Property | Type | Explanation | | -------- | ---- | ----------- | | statusCode | `string` | **Required** The expected HTTP status code of the response e.g. `200`. | | headers | `object` | Key-value pairs containing information for request headers like the `Content-Type`, `Accept`, etc. Key should be the header name while the value would be the expected value of the header. | | body | `string` | The expected body data of the response. | Additionally, a few configuration flags are also available: | Flags | Type | Default Value | Explanation | | ----- | ---- | ------------- | ------------ | | allowExtraHeaders | `boolean` | `true` | Specifies whether headers other than those specified in the `headers` property of the [Expected HTTP Response](#expected-http-response-object) are allowed or not. | | bodyMatchMode | Enum [`string`] | `NONE` | Specifies how `body` in the [Expected HTTP Response](#expected-http-response-object) is compared to the actual response body. More information on the Match Modes can be found at [Body Match Modes](testing/defining-test-case.md#body-match-mode). Valid values are `NONE`,`RAW`, `KEYS`, `KEYSANDVALUES`, `NATIVE`. | | arrayOrderedMatching | `boolean` | `false` | If `true`, testing of arrays will include order checking of the array elements as well. | | arrayCheckCount | `boolean` | `false` | If `true`, the arrays will be tested to see if they are equal in length. If both `arrayOrderedMatching` and `arrayCheckCount` are true, arrays will be strictly checked for equality i.e. their order as well as size must match. | ### Annotation Type Declaration In order to define unit tests in Raml v1.0 specification, you first have to define its type under `annotationTypes` root node as follows. ```yml annotationTypes: unitTests: type: array items: type: object properties: testName: required: false type: string testShouldPass: required: false type: boolean testEnabled: required: false type: boolean testDescription: required: false type: string request: required: true type: object properties: method: required: true type: string enum: - GET - PUT - POST - DELETE - PATCH uri: required: true type: string body: required: false type: string headers: required: false type: object additionalProperties: true expectedResponse: required: true type: object properties: allowExtraHeaders: required: false type: boolean bodyMatchMode: required: false type: string enum: - NONE - NATIVE - KEYS - KEYSANDVALUES - RAW arrayOrderedMatching: required: false type: boolean arrayCheckCount: required: false type: boolean matchResponseSchema: required: false type: boolean statusCode: required: true type: string statusMessage: required: false type: string body: required: false type: string ``` ### Example Usage for Annotation The unit tests annotation can be applied on any RAML [Method](https://github.com/raml-org/raml-spec/blob/master/versions/raml-10/raml-10.md#methods) object using the `(unitTests)` property which is an array of [Unit Test](#unit-test-object) objects as shown below: ```yml /dummyResource: post: displayName: dummyName (unitTests): - request: method: POST uri: /message?id=4 headers: user-agent: >- curl/7.24.0 (x86_64-apple-darwin12.0) libcurl/7.24.0 OpenSSL/0.9.8x zlib/1.2.5 host: httpbin.org accept: '*/*' body: dummyBody expectedResponse: allowExtraHeaders: true bodyMatchMode: KEYS arrayOrderedMatching: false arrayCheckCount: false matchResponseSchema: true statusCode: '200' headers: content-type: application/json date: 'Wed, 03 Jul 1821 13:30:53 GMT' server: gunicorn/0.17.4 content-length: '30' connection: keep-alive body: | [{"from": "dFrom","to": ["d1","d2","d3"],"text": "description."}] testName: getPetInfo testEnabled: true shouldPass: true testDescription: Get pet information from its id ``` The information from these method/endpoint level unit tests is then converted to language-specific test cases upon SDK generation. --- # API Transformer Overview Source: https://docs.apimatic.io/api-transformer/overview-transformer/ You can convert API definition/specification files into any format of your choice from amongst more than 10 supported formats including **OpenAPI** (previously known as Swagger), **RAML** and **API Blueprint** (complete list available in the later sections). This allows you to fully utilize all tools and functions that come with each format and saves the extra cost of having to rewrite your API definitions all over again. ## How Does Transformer Work? The API specification document you input goes through the following steps internally while you're only performing a one step - transformation: 1. The API specification is imported. 2. The imported API definition is validated. 3. If the API passes validation, the API is converted/exported to desired format. :::note When an API definition passes through the import phase during transformation it's not added to the Dashboard as is the case when explicitly [importing an API](/web-dashboard-retired). ::: ## Configure Transformer You can fine-tune and customize the transformation process according to your needs. This includes the ability to configure both import and export stages of the transformation and much more. Please visit our related documentation on this topic [here](configuring-transformer.md). ## Supported Formats in API Transformer Refer to the lists below for detail on which versions and formats are supported for input and output of the Transformer: ### Supported Input Formats The API Transformer supports the following API specification formats as input and converts them into the selected [output format](#supported-output-formats): |API Specification Format | Version | File Format | |---------------------------|-----------------|------------------------------| |OpenAPI/Swagger |3.1<br />3.0<br />2.0<br />1.x|JSON/YAML<br />JSON/YAML<br />JSON/YAML<br />JSON| |RAML |1.0 <br /> 0.8 |YAML<br />YAML | |Postman Collection |2.0<br />1.0 |JSON<br />JSON | |Insomnia |3 |JSON/YAML | |HAR |1.2 |JSON | |API Blueprint |1A |Markdown | |WADL - W3C |2009 |XML | |WSDL - W3C |1.1 |XML | |Google Discovery |- |JSON | |I/O Docs - Mashery |- |JSON | |APIMATIC |- |JSON | #### Transforming an API Specification With Multiple Files If your API specification document is split up into multiple files for reusability purposes or any other reasons, we recommend that you create a ZIP file and add all relevant files to it. Then, upload this ZIP file when transforming. Ensure that all referenced files are part of the ZIP file and all relative paths to the files within the ZIP file are valid, to avoid any issues during the transformation, for example, if you are uploading a RAML ZIP file, ensure that all files referenced using `!include` or `$ref` are all present in the uploaded ZIP file. It's recommended that in a ZIP file, the main API specification file is present in the root directory. If that's not the case, Transformer will iterate the ZIP file contents and pick the first file that validates as a main file in one of the supported input formats. #### Transforming Multiple API Specifications If you wish to transform multiple API specifications to generate a single API specification in any format, then you need to [enable merging](/manage-apis/api-merging/) in the root directory, ZIP all files and then transform the ZIP file. It's very important to correctly structure the API specification documents when merging, to get desired results. When merging multiple API definitions for purpose of transforming the output, we **recommend** that you turn off strict validation meant specifically for Code Generation use-cases. This can be done by enabling the merge setting `SkipCodeGenValidation`. ### Supported Output Formats The API Transformer supports conversion of the provided [input API specification](#supported-input-formats) into the following formats: |API Specification Format | Version | File Format | |---------------------------|-----------------|------------------------------| |OpenAPI/Swagger |3.1<br />3.0<br />2.0<br />1.2|JSON/YAML<br />JSON/YAML<br />JSON/YAML<br />JSON| |RAML |1.0 <br /> 0.8 |YAML<br />YAML | |Postman Collection |2.0<br />1.0 |JSON<br />JSON | |Insomnia |3 |JSON/YAML | |API Blueprint |1A |Markdown | |WSDL - W3C |1.1 |XML | |WADL - W3C |2009 |XML | |GraphQL Schema |- |GraphQL | |APIMATIC |- |JSON | --- # Transforming API Specifications Source: https://docs.apimatic.io/api-transformer/transform-api-spec/ Depending on your environment, APIMatic offers the following ways to transform API definition files to a format of your choice if you have an API definition in one of the [supported formats](/api-transformer/overview-transformer#supported-input-formats): - [Web](#transform-api-via-web) - [API](#transform-api-definition-via-api) - [APIMatic CLI](#transform-api-via-apimatic-cli) ## Transformer Configuration Settings You can even customize your transformation by adding metadata and additional settings provided by APIMatic. For more detail on these settings, learn how to [Configure Transformer](/api-transformer/configuring-transformer) to improve your output. ## Transform API via Web :::warning The transformer is moving to our CLI The web-based transformation flow is being retired. To transform API definitions going forward, use the [APIMatic CLI](#transform-api-via-apimatic-cli) or the [Transformer API](#transform-api-definition-via-api). ::: 1. On the [APIMatic Dashboard](https://app.apimatic.io/dashboard), click on **Transform API**. ![APIMatic Transformer Dashboard](/images/transformer/dashboard-options.png) 2. You can either **Upload the API Specification** file (or .zip file for [API merging](/manage-apis/api-merging.md)) from your local system, or **Specify the URL** that points to the API specification file. In case of urls, make sure that the URL must be a publicly accessible link - that is, no localhost links or links hidden behind authentication. Select the desired **Export Format** from the dropdown menu and click on **Convert**. ![APIMatic Transformer Options](/images/transformer/transform-options.png) 3. APIMatic automatically performs validation on your specified file. The validation involves checks to ensure that the API definition is structurally correct and contains complete information to ensure comprehensiveness. There are 3 levels of validation messages that you may encounter: - **Errors:** Any syntax/semantic issues found in the API definition; for example, if a reference (`$ref`) in a JSON/YAML file has an invalid path that can't be resolved, API transformation **can't proceed** in case of an error. You will be required to fix the issues listed for your definition if that happens. - **Warnings:** Any unexpected behavior that may affect the output; for example, if the parameter example provided is invalid. Warnings won't **halt** API transformation, but it's recommended that you fix these issues so your API definition results in the best possible experience. - **Messages:** Recommendations or suggestions that can help enhance your API definition and its completeness. For example, messages can point out that an endpoint description or a parameter example is missing. Messages won't **halt** API transformation. Once the validation errors are resolved (if any), click **Proceed** to move to the next step. ![APIMatic Transformer Validation](/images/transformer/validation.png) 4. Once transformation is successful, the transformed file is automatically downloaded to your default download location with naming convention `<FileName>-<ExportFormatName>`. If it doesn't download, you may click on the download link provided. If your subscription plan allows, you can also proceed to generate an interactive developer experience portal for your API or view portals of our customers. Otherwise, click **Close**. ![APIMatic Transformer Successful](/images/transformer/successful-transformation.png) ## Transform API Definition via API You can use [APIMatic's API](pathname:///platform-api) in any supported language to build API Transformer into your CI/CD pipeline to automatically execute transformations every time changes are pushed. The transformed file is stored on the server for future accessibility. You can transform through a file on the system or uploaded on the server. You can also perform various functions like deleting a transformation, downloading the input file and getting logs for existing transformations. You can perform the following actions through the Transformer API endpoints: - [Transform via File](pathname:///platform-api#/http/api-endpoints/transformation/transform-via-file) - [Transform via URL](pathname:///platform-api#/http/api-endpoints/transformation/transform-via-url) - [Download Transformed File](pathname:///platform-api#/http/api-endpoints/transformation/download-transformed-file) ## Transform API via APIMatic CLI APIMatic CLI allows you to transform an API definition in [supported API specification formats](/api-transformer/overview-transformer/#supported-input-formats) through the terminal. To get a detailed insight, refer to our [Transform API via CLI Docs](/apimatic-cli/commands/#transform-api). --- # Configuring Transformer Source: https://docs.apimatic.io/api-transformer/configuring-transformer/ As explained [here](/api-transformer/overview-transformer/#how-does-transformer-work), an API specification transformation internally involves both import and export stages behind-the-scenes. Both these stages can be configured individually for which two major ways are described below: 1. [Using APIMatic Metadata Configuration Options](#using-apimatic-metadata-configuration-options). 2. [Using Format-Specific Vendor Extensions](#using-format-specific-vendor-extensions). ## Using APIMatic Metadata Configuration Options You can transform your API definition/specification along with the [APIMatic's Metadata file](manage-apis/apimatic-metadata.md) that will allow you to do the following: - [Configure the import stage](#configuring-import) of the transformation process. - [Configure the export/conversion stage](#configuring-export) of the transformation process. - [Merge API specifications together](#merge-and-transform) before transforming them. - [Filter the API specification document](#filter-before-you-transform) before transformation. - [Override parts of the API specification document](#override-parts-of-api-definition-before-you-transform) before transformation. ### Configuring Import You can control and customize how your file is imported during the transformation process, for example, you can configure the import process to use the schema keys instead of schema titles during OpenAPI import. #### Import Settings The import level configuration is performed by using import settings that are provided inside the APIMatic Metadata file [Import Settings Object](#import-settings-object). #### Import Settings Object The available properties in this object and their respective types are listed in the [Import Settings Object](/manage-apis/import-export-settings/#import-settings-object) reference. #### Example ```json { "ImportSettings": { "PreferJsonSchemaNameOverTitle": true, "AppendParentNameForClashes": true, "AllowModelTypesWithNoFields": true } } ``` ### Configuring Export You can control and customize how your input file is exported during the transformation process, for example, you can enable/disable export of vendor extensions when exporting to OpenAPI. #### Export Settings The export level configuration is performed by using export settings that are provided inside the APIMatic Metadata file [Export Settings Object](#export-settings-object). #### Export Settings Object The available properties and their respective types are listed in the [Export Settings Object](/manage-apis/import-export-settings/#export-settings-object) reference. #### Example ```json { "ExportSettings": { "ExportExtensions": true, "GenerateModelSamples": true } } ``` ### Merge and Transform If you have multiple API definitions that you wish to merge together and produce a single transformed file in a particular format, you can enable merging in the ZIP folder you upload. :::note Merging multiple definitions is different from handling multiple files of a single API definition, which is handled by the Transformer automatically. ::: To enable and further configure merging, you need to add a [Merge Configuration Object](#api-merging-settings) in the Metadata file. #### API Merging Settings The available merging configurations are listed [here](/manage-apis/api-merging/#merge-configuration-object). These configurations further contain a [Merge Settings Object](#merge-settings-object) to configure how any two APIs are merged together. #### Example ```json { "MergeConfiguration": { "MergeApis": true, "MergeOrderOfDirectories": ["SpecDirectory1", "SpecDirectory2"], "MergedApiName": "Merged API", "MergeSettings": { "ConflictStrategy": "KeepLeft", "SkipCodeGenValidation": true } } } ``` #### Merge Settings Object The Merge Settings Object allows configuration of the merge process. The settings available are listed [here](/manage-apis/api-merging/#merge-settings-object). When merging multiple API definitions for purpose of transforming the output, we **recommend** that you turn off strict validation meant specifically for Code Generation use-cases. This can be done by enabling the merge setting `SkipCodeGenValidation` as shown in the example in the previous section. ### Filter Before You Transform If you wish to remove certain endpoints (for privacy reasons or any other) and their related data from the API specification document without actually affecting the original document, you can enable filtering using filtering options in the Metadata file. For more details, please see relevant section [here](/manage-apis/apimatic-metadata/#filtering-out-parts-of-api-definition-with-metadata). ### Override Parts of API Definition Before You Transform If you are looking to override certain parts of the API definition before transforming it, you can take a look at some of the overrides available in the Metadata file [here](/manage-apis/apimatic-metadata/#overriding-parts-of-api-definition-with-metadata). ## Using Format-Specific Vendor Extensions We also support format-specific vendor extensions (for example, for OpenAPI/Swagger, RAML and API Blueprint) so you can fine-tune the transformation output from within your API specification file. For details, please refer to our detailed documentation on [Extensions](/specification-extensions/spec-extensions-overview/) specific to your API definition file. --- # Transformer FAQs and Troubleshooting Source: https://docs.apimatic.io/api-transformer/transformer-faqs/ ## FAQs ### What do you do with my data? Your data belongs entirely to you. We don't sell or otherwise do anything with your data to put your privacy at risk. ### I want to convert my API definition file to a more readable format. Which format is more suitable? API Blueprint is a format that uses Markdown which is considered a readable format and is supported widely by GitHub and other documentation renderers. ### Can I convert my API definition file into an XML schema (XSD) file? Transformer allows you to transform between API definition files and XSD isn't a valid API definition file. However, you can choose to convert your API definition file to WADL/WSDL which will contain XSD embedded inside it. You can extract XSD from it to accomplish your goal. ### Can I convert my API definition file into a JSON schema file? Transformer allows you to transform between API definition files and JSON schema isn't a valid API definition file. However, you can choose to convert your API definition file to OpenAPI formats that contains model definitions using a subset of JSON schema which you can extract and utilize for your purposes. ### My Postman Collection file uses environment variables. Is there any support for Postman environment files? Yes, simply upload a ZIP file that contains your Postman collection file as well as any relevant Postman environment files to get a better output for Postman Collections containing environment variables. ### I converted my API definition to WSDL in which XSD is embedded. Is there a way to get a multi-file output where XSD is separated from the actual WSDL files? Currently we only support a single file output. However, we're looking into supporting this in the future. ### My API is described using a OpenAPI/Swagger file. Now I want to make test calls to the API and view responses. Which format is best suited for this? You can convert your OpenAPI/Swagger file to a Postman Collection file which you can import directly into your Postman App. All your requests will already be populated. You can then simply make your API calls, change the inputs to vary the results and view all the responses in a friendly GUI. ### I want to be able to test my RESTful API using SoapUI. Which format should I be using? For a RESTful API, SoapUI has support for WADL as well as Swagger. You can choose to convert to any of these. ### I have a SOAP based API that I intend to make RESTful. Which format is recommended? We support conversion from WSDL that's designed to support SOAP based APIs. You have the option to bring in your WSDL API definition and convert it to any of the RESTful formats like Swagger, RAML, WADL. It all depends on what you intend to do with it. ### My OpenAPI/Swagger definition file contains extensive documentation for each of the components involved. Conversion to which format has minimal loss of documentation? The conversion process goes through our internal format during which some documentation may be lost. We're working on improving our support for that. However, much of your documentation should be preserved if you convert to API Blueprint (which is a clean documentation format), RAML, Postman depending on your needs. #### I have two OpenAPI definition files in my ZIP folder. When I import the ZIP file, I only see endpoints from the first OpenAPI file while the second OpenAPI file seems to have gotten ignored. What can I do to import both my OpenAPI documents? A typical transformation only supports transforming a single API definition file at a time. In case of a ZIP file, the first main API definition file located in the ZIP folder is picked up and transformed. If you wish to transform multiple API definition files you can either transform them separately or [enable merging in the ZIP folder](/manage-apis/api-merging/) which will first merge the API definitions together and then transform the merged API definition into the format of your choice. ## Troubleshooting ### I'm getting the error "We couldn't identify the API definition format from the given file...." What am I doing wrong? You may be seeing this error due to any of these common scenarios: * Your file wasn't in any of the supported formats listed at our [API Transformer page](http://apimatic.io/transformer). * You are trying to upload a **Blueprint Markdown file** but your file doesn't contain the required format and host information which helps our system distinguish your file from any normal Markdown file. Simply include these two lines at the start of your file and try converting again: ```markdown FORMAT: 1A HOST: http://hostname.com ``` You can see [Blueprint Metadata Section](https://github.com/apiaryio/api-blueprint/blob/master/API%20Blueprint%20Specification.md#def-metadata-section) for more details. * You are trying to upload a **JSON response data file** or a **JSON schema file** or an **XML data file** which aren't valid API definition files. Please ensure your file is in one of the supported formats listed at our [API Transformer page](http://apimatic.io/transformer). If however, you don't possess an API definition file, define an API entity on your [Dashboard](http://apimatic.io/dashboard). You will need to provide details like API name, API definition, etc. for which you can learn more about in our [documentation](/web-dashboard-retired). Once the API entity is created, go to the _Types_ section and import your JSON/XML file to load the models information. Then export this API entity to get an API definition file which you can then use for your conversions. * You are trying to upload an **XML schema file (XSD)** which isn't a valid API definition file. Please ensure your file is in one of the supported formats listed at our [API Transformer page](http://apimatic.io/transformer), for example, you can try embedding your XSD file into a WADL/WSDL file or upload a ZIP file that contains the WADL/WSDL file as well as any referenced XSD files. If however, you don't possess an API definition file, define an API entity on your [Dashboard](http://apimatic.io/dashboard). You will need to provide details like API name, API definition, etc for which you can learn more about in our [documentation](/web-dashboard-retired). Once the API entity is created, go to the _Types_ section and import your XSD file to load the models information. Then export this API entity to get an API definition file which you can then use for your conversions. * You tried uploading a **WSDL/WADL** file but faced this error. This could be due to invalid XML content. Please ensure that the content of your file validates against any XML validators and then try converting again. Also ensure that the root namespace of the file is valid. For WSDL, it should be `http://schemas.xmlsoap.org/wsdl/` and for WADL it should be `http://wadl.dev.java.net/2009/02`. :::note Support for WADL 2006 format is limited. It's recommended to use the WADL 2009 format instead. ::: * You tried uploading a **Swagger/OpenAPI file** without listing down the required swagger version. For `1.x` Swagger files, you need to use the `swaggerVersion` property, for version `2.0` use the `swagger` property and for `3.x.x` use `openapi`. Visit the respective specifications of these formats for more details. * You tried uploading a **RAML fragment file**, for example, a RAML library file. A RAML fragment file isn't a valid API definition file. A RAML file must be a valid root document in accordance with [RAML 0.8 root section](https://github.com/raml-org/raml-spec/blob/master/versions/raml-08/raml-08.md#root-section) or [RAML 1.0 root section](https://github.com/raml-org/raml-spec/blob/master/versions/raml-10/raml-10.md#the-root-of-the-document) depending on the version you are using. * You tried uploading a valid **RAML main file** without specifying the RAML version. A RAML file must contain the required comment line indicating the version; for example, for RAML 0.8 the comment line should be `#%RAML 0.8` whereas for RAML 1.0 it should be `#%RAML 1.0`. * You tried uploading an **API definition file that uses JSON format** (for example, Swagger, Postman, or Google Discovery) but faced this error. Please ensure that the content of the file contains valid JSON using any of the JSON validators available online and then try converting again. * You are trying to use the **URL obtained from exporting an API from your [Dashboard](http://apimatic.io/dashboard)** for your conversions, for example, urls starting with `https://www.apimatic.io/apientity/export/……` are obtained that way. You can't use this URL as it's not a publicly accessible link. Please download the file and then try converting by uploading it to Transformer. * The provided **URL requires some kind of authentication** and isn't a publicly accessible link. Please ensure this isn't the case and then try converting again. * You tried uploading a **RAR/7Zip file** which aren't supported formats. Try converting again by using a ZIP file that contains a file in one of the supported formats listed at our [API Transformer page](http://apimatic.io/transformer). ### I'm getting the error "Unable to resolve reference ..." / "Unable to load RAML Reference…." What should I do? The file you uploaded contains references using `$ref` or `!include` that couldn't be resolved. The common causes for this are: * The references involved external files that weren't provided. In such a case, please upload a ZIP file that contains the main API definition file as well as any externally referenced files. Ensure that the relative paths provided in your API definition file are accurate with respect to the file structure in the ZIP file. * The reference contains a URL that isn't publicly accessible. Please provide a valid URL that works. * The reference is internal (within the same file) but couldn't be resolved as the entity wasn't found; for example, if you get error for a reference like `"$ref": "#/definitions/DefinitionName"` it means that a model definition with the name `DefinitionName` wasn't defined under the root `definitions` property in your file. Provide this missing definition to avoid such errors. ### I am getting errors like "Reference to an undefined type found." What should I do? You can find documentation for this error [here](/rulesets/apimatic-preliminary-validation/only-predefined-type-as-type-reference/). Common causes of the error are: * It seems like you tried using a type for your parameter/model fields which wasn't a supported primitive type of that particular API definition format. In such a case, you need to explicitly define that particular type in the relevant section of the API definition file. For Swagger 1.x, such types must be defined under `models` root property, for Swagger 2.0 use `definitions` root property, for OpenAPI 3.x use `schemas` root property in the Components section, for RAML 1.0 use `types` root property while for RAML 0.8, Google Discovery, IO Docs Mashery use `schemas` root property. * API Blueprint doesn't complain if you use an undeclared type for a parameter or a request/response model. However, our tool requires you to declare these types under the [Data Structures section](https://apiblueprint.org/documentation/specification.html#def-data-structures) if they aren't [primitive types](https://apiblueprint.org/documentation/mson/specification.html#211-primitive-types) supported by API Blueprint itself. A common mistake is using `bool` instead of `boolean`. * `$ref` in Swagger 1.x can't refer to a [primitive type](https://github.com/OAI/OpenAPI-Specification/blob/master/versions/1.2.md#433-data-type-fields). It must point to a Model's id so `"$ref": "string"` is invalid since `string` is a primitive type. Use `type` instead. * Be sure to take care of the case of the name. A type may be declared with a different case compared to how it's being referenced. Ensure they're both the same and then try again; for example, a type declared as `definitionName` can't be referenced as `DefinitionName`. ### I'm getting the error "We don't support importing from an API documentation/reference. Please ensure your file is a raw API definition file and then try importing again." What should I do? It looks like you tried converting by uploading an HTML file or provided a URL that referred to a web page which was possibly some form of API documentation. This isn't supported as the URL/local file must point to a raw API definition file in the formats listed at our [API Transformer page](http://apimatic.io/transformer) and not its documentation/reference. Note that we do have limited support for extracting API definition file from some of the API documentation pages; for example, if you have a URL to a public Apiary documentation of an API like `https://apimatic.docs.apiary.io/` we will be able to convert using this. Additionally, some urls from Swagger UI hosted documentation, MuleSoft Anypoint documentation and Postman docs may also be supported in some cases. ### Why am I getting errors/warnings for invalid YAML due to 'Mapping values aren't allowed in this context.'? Swagger 2.0(YAML), OpenAPI(YAML) and RAML requires your files to contain valid YAML content. This error will occur if the YAML content in your file isn't valid. You can use tools like [YAML Lint](http://www.yamllint.com/) to validate your YAML files before transforming them. A few tips to avoid this error are: * Every nested item must be indented with two spaces inside the parent one; for example, a property `property2` nested inside `property1` must be declared as follows: ```yaml property1: property2: ``` * There must be a space between every property name and property value, for example: ```yaml # This is invalid property1:propertyValue # This is valid property1: propertyValue ``` In some cases, YAML doesn't complain if there is no space between property name and value, for example, in case of flow mappings. However, our tool requires you to use space in all cases (even flow mappings). ```yaml # This is invalid type: { collectionsTypes.mutableResource:{}} # This is valid type: { collectionsTypes.mutableResource: {}} ``` ### I'm getting the error "Error fetching API definition file from the URL provided....". What should I do? Please ensure that the URL you provided is publicly accessible, doesn't require any kind of authentication and points to a raw API definition file in one of the supported formats listed at our [API Transformer page](http://apimatic.io/transformer), for example, urls like `localhost:XXXX` won't work as they're only accessible on your system. ### Getting the error for my RAML file "Unable to load external libraries. Please either upload a ZIP File containing all relevant files, or upload by URL." What does this mean? Your main RAML file (or any fragment file) uses external libraries using the root `uses` property and these couldn't be loaded. The common causes for this is: * The library file doesn't exist at the path provided. If you provided your files using a URL then it may be that the relative URL of the library file doesn't exist or isn't accessible. Else you uploaded a single file or a ZIP file with missing files. Ensure that you upload a ZIP file in this case which contains all relevant files. * A RAML generally needs the `!include` tag for referencing external files. However, for referencing external libraries the `!include` tag must **NOT** be used. ### I converted by API definition to Postman and I seem to have lost any information on types and models. What should I do? Postman doesn't store information for your types. If you need to preserve such information, you can try converting to formats like Swagger, RAML,etc. that support data types(primitive and complex). ### I see that there is loss of some information when converting my API file from one format to another; for example, some of my descriptions are lost when converting from RAML 1.0 to OpenAPI 3.x. Why is this so? In the conversion process, there is generally some loss of information which could be due to the following reasons: * The particular feature may not be supported by the format you are trying to export to. Please check with the format's official specification to confirm it's indeed supported. * We map your file to our internal format during the conversion which is more geared towards our Code Generation engine. However, we're ever working on making it more generic and better suited for conversions. We try to accommodate as much information as possible to minimize this loss so if you feel that something is important but is getting missed out, you are welcome to [reach out](https://www.apimatic.io/contact) to us and let us know. We will try to add that as well. ### My API is described using WADL and contains multiple GET methods for the same route `/xyz`. When I convert this to Swagger, I can only see one of the methods in the output. The rest are lost. Is this a bug? No, it's not a bug. Swagger and RAML supports only one GET method, one POST method, and similar per resource. In the future we're looking into giving you the option to choose the method you want in the converted output out of all the methods in your original file. ### Why am I getting this error? "We couldn't load your API declaration files. Please provide base path information at the root of your file using the 'basePath' property so we can load your API declaration files. Alternatively, import/convert again by providing your file via a URL where the API declaration files are relatively located to the given URL." Unlike other Swagger formats, Swagger 1.x versions require your files to be structured into two different kind of files: A Resource Listing file and API declaration files. To avoid running into any issues you can do the following: * Provide a ZIP file that contains the resource listing file (in the root directory) and the API declaration files in a separate directory relative to this resource listing file. Do ensure that the paths to the API declaration files in the resource listing file are valid with respect to the file structure in the ZIP file. * At the time of transforming, provide a URL that points to the resource listing file. The API declaration files must exist relative to this URL. We will automatically try to load them from the paths listed in the resource listing file. * Upload a resource listing file that contains the `basePath` property in the root object that provides the base URL which can be used to load the API declaration files from the relative paths listed in the same resource listing file. * Convert by providing a single API declaration file (either by uploading it from your system or via URL). For more details on the file structure, please visit the specification [here](https://github.com/OAI/OpenAPI-Specification/blob/master/versions/1.2.md#42-file-structure). ### Why am I getting the error "Enumeration model has no fields which isn't allowed." for my API Blueprint file? The enum values are declared but the tool is still complaining. You can find documentation for this error [here](/rulesets/apimatic-preliminary-validation/atleast-one-enum-field/). Common causes of the error are: It looks like enums are used while defining URI parameters and that too without using the Members section. So for example the parameter definition may look like this: ```md + Parameters + id: 1 (enum[number]) - An unique identifier of the message. + 1 + 2 + 3 ``` The above will appear in Apiary editor as a list of values: ![Without Members](/images/transformer/without-members.PNG) However, the editor doesn't consider these values as enum values just yet. You need to define them under a Members section using the `Members` keyword for these to be treated as enum values. So for the above example, the markdown will now look like this: ```md + Parameters + id: 1 (enum[number]) - An unique identifier of the message. + Members + 1 + 2 + 3 ``` This should take away the error you were facing while converting your files. Also if you now see the Apiary editor, the list of values will be shown as a list of _possible_ values: ![With Members](/images/transformer/with-members.PNG) You can visit [URI Parameters Section](https://apiblueprint.org/documentation/specification.html#def-uriparameters-section) for more details on how to declare URI parameters in API Blueprint. ### I see some extra models in the converted file which weren't present in the original file. Why is that? Other than the models defined explicitly in the API definition by the user, we may create extra models in certain scenarios which are: 1. Any enum values declared inline for parameters/responses/model fields are loaded as models and may appear that way in case of certain conversions. 2. In certain cases where type information isn't provided but an example is included we infer models from the example; for example, we automatically generate a model from the Request Body example given for any API Blueprint action request if its schema isn't defined/indicated explicitly. 3. If error responses use any models we load them separately as exception models internally. You may see these models in the output if you convert to formats like APIMatic. 4. Any inline model declaration like the ones supported in RAML and OpenAPI are also loaded as explicit models. In all of the above cases, the names of the models are generally derived from the component name (for example, parameter name). Due to this, there is a chance that this derived model name may clash with other derived model names or with names of user defined models. We try to handle such clashes by appending a number at the end of the derived model so names like Model1, Model2, Model3 may appear in the output. If you are using inline models, we recommend that you either move such definitions to the global level and assign them a unique name or in case of OpenAPI use the property `title` to assign unique names to the inline models. If inline models aren't the root cause or it's not possible to modify the original specification document, we recommend that you use our metadata file [import configuration setting](/api-transformer/configuring-transformer/#import-settings-object) `AppendParentNameForClashes` to assign parent name to clashing model names instead of numbers as this can improve the output quality to some extent. You can learn more about our API Metadata file [here](/manage-apis/apimatic-metadata/). ### I used your Transformer to convert my WSDL file to OpenAPI format. However, when I try using the OpenAPI file to make calls to my API, the calls fail. Why is that happening? Our WSDL to OpenAPI conversion is designed to [facilitate migration of SOAP APIs to REST APIs](https://www.apimatic.io/blog/2018/12/api-transformer-recipes-facilitating-migration-from-soap-to-rest/). The conversion involves translating the SOAP API information into a REST API compatible information. In other words the converted output can't be used to work for your existing SOAP API. You will need structural changes on your API's end to make your API work as a REST API before you can make any API calls using the converted output. ### I converted my OpenAPI file to a Postman Collection and am seeing some dummy sample values for my responses that didn't exist in my OpenAPI file. Why is this happening? You are seeing dummy sample values because we auto-generate sample values when exporting to Postman Collections and Insomnia if your original specification document doesn't contain any examples of its own. To disable this feature, you can upload an [APIMatic Metadata file](/manage-apis/apimatic-metadata/) and set the `GenerateModelSamples` [export setting](/api-transformer/configuring-transformer/#export-settings-object) to `false`. --- # Context Plugins Overview Source: https://docs.apimatic.io/context-plugins/overview/ import { SquareDashedMousePointer } from 'lucide-react'; AI coding agents are good at writing code. They struggle with API integrations. The problem isn't code generation; it's context. When an agent draws on stale training data or scraped docs, it produces code that calls endpoints that don't exist, uses wrong SDK versions, or mishandles authentication. APIMatic context plugins solve this by giving AI coding agents deterministic, version-aware context grounded in your OpenAPI definition. The plugin delivers your current SDK, code samples, integration workflows, and documentation to the agent at the time it writes code, not from model memory. Developers get accurate, production-ready integrations without needing to read your docs or switch context. The result: developers go from your portal to a working integration in minutes, not hours. In production use, teams have seen a 63% reduction in implementation time and a 78% decrease in rework. ## How context plugins work You generate a context plugin from the APIMatic CLI, covering the SDKs you have published. The plugin delivers: - Your full API reference: endpoints, parameters, and request and response models - Authentication requirements for every endpoint - Versioned SDK code in the developer's language of choice - Integration workflows and code samples drawn from your portal documentation When a developer loads the plugin into their AI coding agent, such as Claude Code or Cursor, the agent gains task-aware, grounded context. It can suggest the correct endpoint, generate type-safe SDK calls, handle authentication properly, and surface real integration patterns, without the developer leaving their IDE. ## See it live <div className="features-grid"> <article className="feature-card"> <a href="https://developer.shell.com/product-catalog/shell-digital-payments/sdk#/net-standard-library/setting-up-sdks" className="feature-card-link" target="_blank" rel="noopener noreferrer"> <h3 className="feature-title"> <SquareDashedMousePointer/> Try out Shell's Context Plugins </h3> <p className="feature-description"> Install Shell's context plugin into Claude Code or Cursor, and watch your AI agent generate accurate Shell SDK integrations in seconds. </p> </a> </article> </div> <br/> ## Generate a context plugin Context plugins are generated with the [APIMatic CLI](/apimatic-cli/commands#plugin-commands). For each language you want the plugin to cover, [publish an SDK](/generate-sdks/sdk-publishing/sdk-publishing-overview) and include source code publishing, which pushes the SDK to GitHub. The plugin points AI agents at that GitHub repository for the SDK source code, so a language published only to a package registry can't be covered. Once your SDKs are published, generate the plugin: ```bash apimatic plugin generate ``` The CLI asks for an ID, a display name, and a version for the plugin, then writes it to `./plugin`. To share it with your developers, `apimatic plugin publish` prints the git commands that publish the plugin to a public GitHub repository, for you to review and run yourself. For the full list of flags and options, see [Plugin Commands](/apimatic-cli/commands#plugin-commands). --- # SDK Generation Overview Source: https://docs.apimatic.io/generate-sdks/overview-sdks/ Apart from a good developer experience, APIMatic offers SDK Generation for your APIs to help accelerate the API consumption process. You can seamlessly integrate code generation into your CI/CD pipelines so that every time your API is updated or versioned, the changes are reflected in an automatically generated SDK. This allows releasing APIs or microservices frequently without any breaking changes. APIMatic CodeGen Engine offers SDK generation in the following languages: - Python - .NET - Ruby - Java - PHP - TypeScript - Go To aid quicker API consumption, APIMatic-generated SDKs come with utility classes, authentication helpers and configuration files. They have strict language bindings, so developers can directly use language objects and functions to interact with the API. Moreover, the SDKs are designed following the latest [coding standards](sdk-coding-standards.md), and support all latest language [versions and dependencies](supported-sdk-version-dependencies.md). :::note To get complete detail on all the features that SDKs provide, go to the [SDK Features Docs](generate-sdks/sdk-features.md). ::: ## Customize your SDK APIMatic supports [custom code injection](/generate-sdks/customize-sdks/custom-code-injection), allowing you to add and maintain your own logic directly within generated SDK files. Your customizations are preserved across regenerations, so they aren't lost when you update your API specification and regenerate the SDK. Additionally, API providers can customize code generation using code generation settings, like generic code styling settings, asynchronous/synchronous code generation and advanced documentation generation. These settings can be specified via [CodeGen Settings through API Definition](../customize-sdks/codegen-settings/codegen-settings-overview/) ## How Does SDK Generation Work? The code generation process starts with an input API definition file. This file can be in any of the [supported API definition formats](api-transformer/overview-transformer.md#supported-input-formats) like OpenAPI, RAML or API Blueprint and more. ![APIMatic SDK Lifecycle](/images/sdks/sdk-lifecycle.png) ### Step 1: API Transformation This step transforms the input API definition file into APIMatic's representation format (a.k.a. APIMatic format). Transformation only takes place if you are generating SDKs from an existing API or importing your API, and the API definition in either case **isn't** in APIMatic format. The APIMatic format contains useful information for SDK generation that's not available in other API definition formats. ### Step 2: API Validation After the API definition is transformed into the APIMatic format, it's validated. Validation is a thorough process that involves checking for numerous discrepancies in the API definition like duplicate parameters or missing request body in GET endpoints, etc. This validation runs through basic API settings, server configurations, code generation settings, authentication settings, models, errors and endpoints. The API Validator automatically rectifies minor issues like duplicate property names and throws warnings to reflect any changes made. Major issues like invalid test case input result in errors that must be fixed in the API definition. The validation errors are returned in a JSON response object, for example as shown: ```json { "reason": "API validation Failed for Voice", "summary": { "errors": [ { "message": "The server template parameter <i><code>base_url</code></i> does not have a default value.", "hints": [], "filePath": null, "startLineNumber": 150, "linePositionStart": 23, "endLineNumber": 151, "linePositionEnd": 33 } ], "warnings": [] } } ``` ### Step 3: SDK Generation: The SDK Layout Once the API is validated and any issues are resolved, components of the API definition are looped over to generate code representations. While a basic SDK will cater to settings, endpoints and an abstraction layer, APIMatic goes an extra step by mapping your API completely into an SDK. Some important entity conversions from an API specification to an SDK are: - **Settings -> Configuration files**<br /> All API settings like environment configuration, server information, authentication parameters and more are consolidated in a configuration file in the SDK. - **Endpoints -> Functions**<br /> Each endpoint of your API maps onto an independent function in the SDK. Note that if you have configured the CodeGen setting for asynchronous code, the SDK will also contain an asynchronous method for each corresponding endpoint. The endpoints are logically grouped together in controller classes (explained below), and contain XML documentation for each parameter and method as provided in the endpoint description in the API definition. - **Groups -> Controller class files**<br /> If your API contains logically grouping for endpoints, the SDK will automatically group them accordingly into separate Controller classes. Each controller class will then contain all endpoints contained under the same logic as in your API. - **Models -> Model class files**<br /> The data input is converted into models. Most APIs accept data as either JSON or form-encoded strings. JSON keys are dynamic; once a new instance of the model is created, all values and types for each parameter are shown automatically, making it easier to just select what's required. So the user doesn't have to go through the documentation to find out about the parameters for each model. You can also configure the models to be immutable through the `EnableImmutableModels` CodeGen setting. - **Errors -> Exception class files**<br /> If there is an HTTP error, our SDKs raise an exception that can be handled via a unified exception class. Once a user calls a method, the SDK gives an option to handle `APIException` or `IOException`. Moreover, if there are any other custom exceptions in the API, they're also included in this Exception class (if you configure the `GenerateException` CodeGen setting). This means that the user doesn't have to explicitly go through the documentation to find all the ways the SDK will throw an error. Moreover, having the exceptions in a unified place means that exceptions will be handled for all languages in the same way. Apart from these core files, the following are generated: - **HTTP abstraction layer**: to wrap the HTTP client used by the SDK. - **Helper class files**: to abstract common code from the SDK. - **Client library interface**: to wrap the SDK and make it easier to use. This acts a single gateway for the library, and it holds the state of the SDK. The client acts as a factory for the controllers. - **Language/platform-dependent files**: for Ruby SDKs, gemspec, Gemfile and Rakefile are generated. These files specify SDK dependencies, test commands and other information required to publish the SDK on hosting services like RubyGems. ### Step 4: Documentation Generation Every generated SDK comes with a language-specific README.md file, as documentation goes hand-in-hand with the SDKs. Depending on your pricing plan, this README file might contain a very basic getting started guide, or comprehensive documentation for the entire SDK. In the latter case, dynamic screenshots specific to the provided API and platform are generated, and help walk a developer through getting started with the SDK. The README also contains complete class reference and code samples for the SDK and guide the user on: - Setting up environment (using tool specific IDEs) - Initializing the client - Creating the controller - Calling the endpoints and testing them ### Step 5: Packaging Once the SDK files are generated, you can opt to proceed with the following: - [Download the SDK](/generate-sdks/create-sdks/create-sdks-through-cli) as a Zip file - Publish the SDK to [GitHub or a package registry](generate-sdks/sdk-publishing/sdk-publishing-overview.md) - Generate an interactive [Developer Experience Portal](/cli-getting-started/portal-quickstart-dac) ## SDK Features The SDKs generated by APIMatic aren't just a mapping of the API onto the SDK. The SDKs contain additional functionality that adheres to the best coding practices to make the SDKs as robust and fault-tolerant as possible. This includes features like: - Immutable clients - Timeout and automatic retries on API call errors - Access to HTTP response data - Logging events in the API lifecycle - Support for sending and receiving XML in the API calls - Cancellable API calls for asynchronous endpoints - Multipart requests - Logging For complete detail on the latest SDK features, refer to our [SDK Features page](https://docs.apimatic.io/generate-sdks/sdk-features/). --- # Create SDK through API Source: https://docs.apimatic.io/generate-sdks/create-sdks/create-sdks-through-api/ You can generate SDKs in any language of your choice for your API definition file using [APIMatic's CodeGen API](pathname:///platform-api). This can be done either on files on your system (external), or API specifications imported into APIMatic as an API entity. :::note These endpoints require basic authentication. Make sure you have authenticated client credentials before calling these endpoints. ::: ## Generate SDKs via External Files APIMatic allows you to generate SDKs by importing your API specification file. You can either upload this file from your system or share the URL where the specification file is hosted. There are two different API endpoints for these two methods. Let's look at them in detail. ### Endpoint to generate SDK via file This endpoint executes code generation by specifying the path of your API specification file. - Go to the [Generate SDK via File](pathname:///platform-api#/http/api-endpoints/code-generation-external-apis/generate-sdk-via-file) endpoint. ![Generate SDK via File](/images/generate-sdks/generate-sdk-through-file.png) - Under *API Code Playground* -> *inputtedFile*, click on **Choose File**. - Select your API specification file and click on **Open**. - Select the desired code template from the **template** dropdown menu. - Click on **TRY IT OUT** to generate an SDK through APIMatic API. ### Endpoint to generate SDK via URL This endpoint executes code generation by specifying the URL of your API specification file. - Go to the [Generate SDK via URL](pathname:///platform-api#/http/api-endpoints/code-generation-external-apis/generate-sdk-via-url) endpoint. ![Generate SDK via URL](/images/generate-sdks/generate-sdk-through-url.png) - Under *API Code Playground* -> *url*, enter the URL where your API specification file is hosted. - Select the desired code template from the *template* dropdown menu. - When done, click on the **TRY IT OUT** button to generate SDK of your API. ## Download SDK To download your generated SDK: - Go to the [Download SDK](pathname:///platform-api#/http/api-endpoints/code-generation-external-apis/download-sdk) endpoint. ![Download SDK](/images/generate-sdks/download-sdk-file.png) - Enter the **codeGenID** under API Code Playground section. This codeGenId is the ID you received as a response of the generate endpoint. - When done, click on the **TRY IT OUT** button to get your SDK as a zip file. ## Generate SDKs via Imported APIs This endpoint generates SDK against a specific API using the API Entity Identifier. - Go to the [Generate SDK](pathname:///platform-api#/http/api-endpoints/code-generation-imported-apis/generate-sdk) endpoint. ![Generate SDK](/images/generate-sdks/generate-sdk.png) - Enter the unique API version identifier in the **apiEntityId** parameter. - Select the required platform template from the **Template** dropdown menu. - When done, click on the **TRY IT OUT** button to generate your SDK. ## Download SDK To download this generated SDK, you can use the Download SDK endpoint. - Go to the [Download SDK](pathname:///platform-api#/http/api-endpoints/code-generation-imported-apis/download-sdk) endpoint. ![Download SDK](/images/generate-sdks/download-sdk.png) - Enter the unique API entity identifier in the **apiEntityId** parameter. - Enter the unique code generation identifier in the **codeGenId**. This Id was sent as a response when you called the Generate SDK endpoint - Click on the **TRY IT OUT** button to get a zip file of your SDK. --- # Create SDK through APIMatic CLI Source: https://docs.apimatic.io/generate-sdks/create-sdks/create-sdks-through-cli/ APIMatic CLI allows automatic SDK generation for your APIs in multiple popular languages. You can use the `apimatic sdk generate` command to create an SDK for your API. ```bash $ apimatic sdk generate ``` The following command generates a *Python SDK* for an API defined in *filename.json*. It also downloads the SDK to your working directory as a .zip file. ```bash $ apimatic sdk generate --language=python --zip ``` The output of this command on successful execution is: ```bash ┌ Generate SDK │ ◇ SDK generated successfully. │ ● Generated SDK can be found at 'C:\sdk\python'. │ └ Succeeded ``` You can tweak this command as per your requirement. To find the list of languages supported by this command, run this command: ```bash $ apimatic sdk generate --help ``` It will show you what languages you can opt for to generate SDK. ```bash --language=<option> (required) Programming language for SDK generation <options: csharp|java|php|python|ruby|typescript|go> ``` --- # Custom Code Injection Source: https://docs.apimatic.io/generate-sdks/customize-sdks/custom-code-injection/ APIMatic supports custom code injection, allowing you to add and maintain your own logic directly within generated SDK files. When you regenerate the SDK after updating your API specification, APIMatic automatically reapplies your saved customizations, ensuring they're not overwritten during regeneration. :::note This feature requires the APIMatic CLI. For installation instructions, see [Installing APIMatic CLI](/apimatic-cli/intro-and-install/). ::: ## Workflow ### Step 1: Generate SDK with change tracking enabled ```bash apimatic sdk generate --language=typescript --track-changes ``` This creates the generated SDK and initializes the `sdk-source-tree` folder in the input directory. For TypeScript, the folder contains a `.typescript` file that stores the SDK source tree and is used in future regenerations to track and reapply your customizations. ![Input folder structure with sdk-source-tree](/images/generate-sdks/custom-code-injection/sdk-source-tree.png) ### Step 2: Add your customizations Add your custom logic to the generated SDK files where needed. This is where you personalize the SDK to fit your specific requirements, whether that's adding new files, extending existing ones, or including additional dependencies. See [When to customize your SDK with this workflow](#when-to-customize-your-sdk-with-this-workflow) for details. ### Step 3: Save your customizations ```bash apimatic sdk save-changes --language=typescript ``` This records your customizations so they can be applied again in future regenerations. ### Step 4: Regenerate SDK with customizations ```bash apimatic sdk generate --language=typescript ``` During regeneration, APIMatic reapplies your saved customizations from the `sdk-source-tree` to the newly generated SDK. ## When to customize your SDK with this workflow Custom code injection is ideal for adding logic that falls outside the scope of standard SDK generation. Some common use cases include: - [Introducing new utility files or custom flows](https://github.com/apimatic/sample-customized-typescript-sdk/pull/3). - [Adding a custom authentication provider](https://github.com/apimatic/sample-customized-typescript-sdk/pull/4). - [Modifying `package.json` to include additional dependencies](https://github.com/apimatic/sample-customized-typescript-sdk/pull/5). - Extending generated files with custom logic or behavior. For example, [API lifecycle hooks](https://github.com/apimatic/sample-customized-typescript-sdk/pull/6). - Injecting business logic or helper methods into generated models. - [Adding custom signature verifier to webhook manager](https://github.com/apimatic/sample-customized-typescript-sdk/pull/5). - [Adding unit tests to validate API calls](https://github.com/apimatic/sample-customized-typescript-sdk/pull/2). - [Adding new GitHub workflows](https://github.com/apimatic/sample-customized-typescript-sdk/pull/1). - Integrating with internal systems or third-party libraries. For a complete example with the customizations applied, see [Sample SDK Customizations with CLI Integration](#sample-sdk-customizations-with-cli-integration). For simpler customizations, consider updating your OpenAPI specification directly or using the features APIMatic offers: - [CodeGen Settings](/generate-sdks/customize-sdks/codegen-settings/codegen-settings-overview) - [Import Settings](/manage-apis/import-export-settings/#import-settings) - [OpenAPI Extensions](/specification-extensions/swagger-codegen-extensions) - [SDK Publishing](/generate-sdks/sdk-publishing/sdk-publishing-overview.md) ## Handle Merge Conflicts Sometimes the auto-generated SDK code can conflict with the customizations you've added. For example, suppose you update the introduction section in the generated `README.md` and later update the API description in your API specification. When the SDK is regenerated, both sets of changes affect the same section of `README.md` and result in a conflict. :::tip To reduce the chance of conflicts, avoid editing generated files directly. Instead, create separate files for your customizations and import or extend the generated code from there. This keeps your customizations safe, as APIMatic only overwrites the files it originally generated. ::: ### Resolving Conflicts When you regenerate the SDK, the APIMatic CLI has special handling to guide you through the resolution. First, it detects the conflict and reports it in the output: ![Conflicted file opened in VS Code](/images/generate-sdks/custom-code-injection/conflicts-in-sdk-generate-command.png) The CLI then prompts to either resolve the conflicts or abandon SDK generation. If you choose to resolve, it opens the conflicted files directly in your editor, showing the conflict markers. You can then resolve the conflicts by choosing to keep your customizations, accept the new generated code, or merge both together. ![Resolving merge conflicts in generated SDK files](/images/generate-sdks/custom-code-injection/resolve-conflicts.png) Once you have resolved all conflicts, the SDK is regenerated with your resolved changes integrated. The APIMatic CLI saves the resolution, so the same conflict won't occur in future regenerations. ### Conflicts in CI/CD Pipelines The conflict resolution flow is interactive and requires a terminal. If a conflict is detected during SDK generation in a CI/CD pipeline, the command fails with a non-zero exit code and no conflicts are resolved automatically. To fix this, run the `apimatic sdk generate` command locally in your terminal, resolve the conflicts interactively, and then use the updated build in your CI. Subsequent pipeline runs will use the saved resolution and won't encounter the same conflict again. ## Revert Customizations If you need to undo your saved customizations, you have several options depending on whether you want to preview, partially revert, or fully remove them. ### Previewing the SDK Without Customizations To see what the SDK looks like without your saved customizations applied, use the `--skip-changes` flag: ```bash apimatic sdk generate --language=typescript --skip-changes ``` This generates the SDK without reapplying any saved customizations. Your saved customizations aren't modified and will still be applied in future regenerations unless you remove them. ### Removing All Customizations To permanently remove all saved customizations for a specific language, delete the corresponding language file (for example `.typescript`) from the `sdk-source-tree` folder in your input directory. The next time you run `sdk generate` for that language, no customizations will be applied, and change tracking will need to be re-initialized with `--track-changes`. ### Reverting a Specific Customization To revert a particular customization rather than removing all of them, manually undo the change in the generated SDK files and then save the updated state using: ```bash apimatic sdk save-changes --language=typescript ``` This overwrites the previously saved customization with the current state of the SDK, so the reverted change will no longer be reapplied in future regenerations. ## Sample SDK Customizations with CLI Integration The following sample repositories demonstrate a complete end-to-end workflow for building, customizing, and publishing a TypeScript SDK using the APIMatic CLI. The [sample-build-with-sdk-source-tree](https://github.com/apimatic/sample-build-with-sdk-source-tree) repository contains the API specification and SDK customizations for a TypeScript SDK. It also includes a GitHub Actions workflow that publishes the updated SDK to the [sample-customized-typescript-sdk](https://github.com/apimatic/sample-customized-typescript-sdk) repository using the APIMatic CLI. The [sample-customized-typescript-sdk](https://github.com/apimatic/sample-customized-typescript-sdk) repository contains the generated TypeScript SDK with all customizations applied. It includes a GitHub Actions workflow that triggers when a customization is pushed to `main`, executes the `sdk save-changes` command to capture the new customizations, and pushes the updated source tree back to the build repository. You can view all the applied customizations in the [closed pull requests](https://github.com/apimatic/sample-customized-typescript-sdk/pulls?q=is%3Apr+is%3Aclosed). --- # Code Generation Settings Overview Source: https://docs.apimatic.io/generate-sdks/customize-sdks/codegen-settings/codegen-settings-overview/ APIMatic code generation feature allows you to effortlessly create API client libraries across multiple programming languages. Throughout the code generation process, you have the flexibility to configure different settings to customize these SDKs according to your specific requirements. This section offers a comprehensive overview of these CodeGen settings, their functionalities, and instructions on how to use them. :::note You can import your API definition file along with a metadata file [apimatic-metadata.json](manage-apis/apimatic-metadata.md) that will allow you to configure these settings. ::: ## Endpoint Settings | Setting | Description | | ------- | ------- | | [`Return Complete HTTP Response`](endpoint-settings.md#return-complete-http-response) | This setting returns complete HTTP response including headers and status code. | | [`Use HTTP Method Prefix`](endpoint-settings.md#use-http-method-prefix) | This setting allows to prefix the HTTP method `Get`, `Update`, or `Delete` to the name of the methods. | | [`Encode Template Parameters`](endpoint-settings.md#encode-template-parameters) | This setting encodes endpoint level parameters. | | [`Validate Required Parameters`](endpoint-settings.md#validate-required-parameters) | This setting validates required API endpoint parameters to be not null. | | [`Collapse Params to Array`](endpoint-settings.md#collapse-params-to-array) | This setting collapses more than 1 parameters into an options array. | | [`Use Endpoint Method Name`](endpoint-settings.md#use-endpoint-method-name) | Use the `MethodName` in the endpoint entity to name endpoints instead of the `Name` property. | | [`Nullify 404`](endpoint-settings.md#nullify-404) | This setting returns null response on the HTTP status code 404 instead of throwing an exception. | | [`Nullify Empty Responses`](endpoint-settings.md#nullify-empty-responses) | This setting enables the endpoints to return null when one or more responses doesn't specify any content. | | [`Lift Parameter Description from Custom Type`](endpoint-settings.md#lift-parameter-description-from-custom-type) | This setting adds a custom type's description as parameter description when a parameter referencing has missing description. | | [`Force Keywords Arguments in Ruby`](endpoint-settings.md#force-keyword-arguments-in-ruby) | This setting decides whether to use keyword arguments for required parameters or positional arguments. | | [`Map Error Types in Complete Response for PHP`](endpoint-settings.md#map-error-types-in-complete-response-for-php) | This setting decides whether to map error types in PHP SDKs while returning failure results in complete http responses. | ## Model Settings | Setting | Description | | ------- | ------- | | [`Extended Additional Properties Support`](model-settings.md#extended-additional-properties-support) | This setting allows to add additional properties of models that aren't part of the model description. | | [`Use Model Prefix`](model-settings.md#use-model-prefix) | This setting allows to postfix each model class with the word `Model`. | | [`Enable Keyword Arguments in Model Constructor in Ruby`](model-settings.md#enable-model-keyword-args-in-ruby) | This setting enables the keyword arguments for all properties in the constructor of models in Ruby SDKs. | | [`Skip Equality Methods in CSharp`](model-settings.md#skip-equality-methods-in-csharp) | This setting controls whether the .NET SDK generator creates `Equals` and `GetHashCode` implementations for models and related container types. | ## Enum Settings | Setting | Description | | ------- | ------- | | [`Generate Enums`](enum-settings.md#generate-enums) | This setting converts enums to native types. | | [`Use Enum Prefix`](enum-settings.md#use-enum-prefix) | This setting allows to postfix each enum class with the word "Enum". | ## HTTP Configuration | Setting | Description | | ------- | ------- | | [`Enable HTTP Cache`](http-configuration-settings.md#enable-http-cache) | This setting allows to enable/disable HTTP caching for idempotent endpoint methods. | | [`Append Content Headers`](http-configuration-settings.md/#append-content-headers) | Enable this setting to automatically determine the request and response content types and append appropriate "accept" and "content-type" headers. | | [`Allow Skipping SSL certificate Verification`](http-configuration-settings.md#allow-skipping-ssl-certificate-verification) | This setting creates a configuration option in SDKs to optionally skip certificate verification when establishing HTTPs connections. | ## SDK Interface Customization | Setting | Description | | ------- | ------- | | [`Project Name`](sdk-interface-customization.md#project-name) | This setting sets the name of the project for generated SDKs. | | [`C# Namespace`](sdk-interface-customization.md#c-namespace) | This setting uses the default value of root namespace in C# SDKs. | | [`Java Package Name`](sdk-interface-customization.md#java-package-name) | This setting sets the default value of the package name to be used in Java SDKs. | | [`PHP Namespace`](sdk-interface-customization.md#php-namespace) | This setting uses the root namespace for PHP SDKs. | | [`Use Controller Prefix`](sdk-interface-customization.md#use-controller-prefix) | Enable this setting to postfix each controller class with the word `Controller`. | | [`Controller Postfix`](sdk-interface-customization.md#controller-postfix) | This setting takes a value to postfix to the Endpoint Group names. | | [`Controller Namespace`](sdk-interface-customization.md#controller-namespace) | This setting specifies name of controller namespace in SDKs. | | [`Generate Interfaces`](sdk-interface-customization.md#generate-interfaces) | Enable this setting to generate interfaces for controller classes in the generated SDKs. | | [`Client Interface Name`](sdk-interface-customization.md#client-interface-name) | This setting sets the class name of the client library interface. | | [`Use Security Scheme Name For Single Auth`](sdk-interface-customization.md#use-security-scheme-name-for-single-auth) | Enable this setting to derive the auth interface name from the auth scheme name specified in the API definition. | | [`Do Not Split Words`](sdk-interface-customization.md#do-not-split-words) | This setting lists words that shouldn't be split, regardless of the capitalization. | | [`Synchronous Mode of Code`](sdk-interface-customization.md#synchronous-mode-of-code) | Enable this setting to generate asynchronous code and disable it for synchronous code. | | [`Enable Logging`](sdk-interface-customization.md#enable-logging) | Enable this setting to generate code in the SDKs for logging events in the API cycle using a library. | | [`Symbolize Hash Keys in Ruby`](sdk-interface-customization.md#symbolize-hash-keys-in-ruby) | Enable this setting to use symbols instead of strings for hash keys in Ruby SDKs. | ## Timeout and Retries | Setting | Description | | ------- | ------- | | [`Timeout`](timeout-and-retries-settings.md#timeout) | This setting specifies the duration (in seconds) after which requests would fail. | | [`Retry On Timeout`](timeout-and-retries-settings.md#retry-on-timeout) | Enable this setting to retry request on timeout. | | [`Request HTTP Methods to Retry`](timeout-and-retries-settings.md#request-http-methods-to-retry) | This setting specifies the HTTP methods to retry again. | | [`Status Codes to Retry`](timeout-and-retries-settings.md#status-codes-to-retry) | This setting specifies the HTTP status codes to invoke retry on. | | [`Maximum Retry Wait Limit`](timeout-and-retries-settings.md#maximum-retry-wait-time) | This setting sets the maximum wait time in seconds for overall retrying requests. | | [`Number of Retries`](timeout-and-retries-settings.md#number-of-retries) | This setting sets the number of retries to make for calling an idempotent endpoint after which the endpoint should fail. | | [`Retry Interval`](timeout-and-retries-settings.md#retry-interval) | This setting sets the retry time interval between endpoint calls. | | [`User Configurable Retries`](timeout-and-retries-settings.md#user-configurable-retries) | This setting decides if SDK users should be able to configure retries. | | [`Backoff Factor`](timeout-and-retries-settings.md#backoff-factor) | This setting adds an exponential backoff factor to increase interval between retries. | ## Serialization Settings | Setting | Description | | ------- | ------- | | [`Array Serialization`](serialization-settings.md#array-serialization) | This setting decides array serialization scheme for primitive types. | | [`Enable JSON Pass Through for Any`](serialization-settings.md#enable-json-pass-through-for-any) | This setting decides whether JSON should be passed through any type in the SDK. | ## User Agent Settings | Setting | Description | | ------- | ------- | | [`Enable Global User Agent`](user-agent-settings.md#enable-global-user-agent) | Use this setting to enable/disable sending the `UserAgent` field in the user-agent header. | | [`User Agent`](user-agent-settings.md#user-agent) | Use this setting to add the user agent to the header of the API calls to identify the sender of the request. | ## Code Branding Settings | Setting | Description | | ------- | ------- | | [`Brand Label`](code-branding-settings.md#brand-label) | Enable this setting to add a brand label to the header of the generated files. | | [`Short Copyright Notice`](code-branding-settings.md#short-copyright-notice) | Enable this setting to set a copyright notice to prepend to all code files. | ## SDK Docs Configuration | Setting | Description | | ------- | ------- | | [`Disable Docs`](docs-settings.md#disable-docs) | Use this setting to disable README file generation for SDKs including any other SDK documentation files. | | [`Generate Examples for Optional Fields`](docs-settings.md#generate-examples-for-optional-fields) | Use this setting to include optional fields during sample value generation. | | [`Is Latest Version`](docs-settings.md#is-latest-version) | Use this setting to hide version number from install commands and package repo links in the docs. | | [`Usage Example Endpoint`](docs-settings.md#usage-example-endpoint) | Use this setting to choose an endpoint to display its full usage example in the README file. | | [`Sort Resources`](docs-settings.md#sort-resources) | Use this setting to sort resources such as endpoints, endpoint groups, and models in the generated documentation. | | [`Configure Component Sorting`](docs-settings.md#configure-component-sorting) | Use this setting to independently configure sorting for endpoint groups, endpoints, webhook groups, webhook events, callback groups, callback events, and models. | ## Exception Settings | Setting | Description | | ------- | ------- | | [`Error Templates`](exception-settings.md#error-templates) | Enable this setting to customize the error messages using custom templates. | | [`Resolve Exception Property Collisions in CSharp`](exception-settings.md#resolve-exception-property-collisions-in-csharp) | This setting controls how the .NET SDK generator handles naming conflicts in generated exception models that overlap with `System.Exception` members. | ## Miscellaneous Settings | Setting | Description | | ------- | ------- | | [`Disable Linting`](miscellaneous-settings.md#disable-linting) | This setting allows to use generate files/dependencies for linting. | | [`Disable Multiple Auth`](miscellaneous-settings.md#disable-multiple-auth) | This setting allows you to disable multiple authentication support. | | [`Add Single Auth Deprecated Code`](miscellaneous-settings.md#add-single-auth-deprecated-code) | This setting allows you to remove all the deprecated code related to single authentication credentials setup from the SDKs. | | [`Use Java Properties Config`](miscellaneous-settings.md#use-java-properties-config) | This setting loads SDK configuration from Java properties file. | | [`License Text`](miscellaneous-settings.md#license-text) | This setting sets the license text to use in place of the standard MIT license. | | [`Store Timezone Information`](miscellaneous-settings.md#store-timezone-information) | This setting stores timezone information with date-time types. | | [`Apply Customizations`](miscellaneous-settings.md#apply-customizations) | This setting sets customer-specific customizations to be applied during SDK and docs generation. | | [`Enforce Standardized Casing`](miscellaneous-settings.md#enforce-standardized-casing) | This setting specifies whether to enforce standardized casing during SDK and docs generation. | --- # Endpoint Source: https://docs.apimatic.io/generate-sdks/customize-sdks/codegen-settings/endpoint-settings/ <head> <title>Endpoint | Code Generation Settings | APIMatic Documentation import Tabs from '@theme/Tabs'; import TabItem from '@theme/TabItem'; These CodeGen configurations manage the endpoints specific behavior in the generated SDKs. ## Return Complete HTTP Response Enable this setting to return complete HTTP response including headers and status code. #### Usage To use this feature, you need to specify a `Boolean` type. By default, its value is set to `false`. ```json "info": { ..., "x-codegen-settings": { "ReturnCompleteHttpResponse": false } } ``` #### Language Support | C# | Java | PHP | Python | Ruby | TS | Go | | ------------------ | ------------------ | ------------------ | ------------------ | ------------------ | ------------------ | ------------------ | | :heavy_check_mark: | :heavy_check_mark: | :heavy_check_mark: | :heavy_check_mark: | :heavy_check_mark: | :heavy_minus_sign: | :heavy_minus_sign: | :::note :heavy_minus_sign: shows that in TypeScript and Go, this behavior is inherently supported by default and can't be disabled. ::: #### Change in SDK Configuring this setting has the following effect on the generated SDK:
Value Change
true ``` csharp public ApiResponse GetData() ```
false (default) ``` csharp public Models.ServerResponse GetData() ```
Value Change
true ``` java public ApiResponse getData() ```
false (default) ``` java public ServerResponse getData() ```
Value Change
true ``` php public function getData(): ApiResponse ```
false (default) ``` php public function getData(): ServerResponse ```
Value Change
true ``` python def get_data(): """ Returns: ApiResponse: An object with the response value as well as other useful information such as status codes and headers. """ ```
false (default) ``` python def get_data(): """ Returns: ServerResponse: Response from the API. """ ```
Value Change
true ``` ruby # @return [ApiResponse] response instance that also includes other useful information such as status codes and headers. def get_data() ```
false (default) ``` ruby # @return [ServerResponse] response from the API call def get_data() ```
## Use HTTP Method Prefix You can enable this setting in case the endpoint names in your OpenAPI specification file haven't already been prefixed. Although, it's a recommended approach to prefix endpoint names while defining your OpenAPI specification. Enabling this setting will prefix the HTTP method verbs that's `Get`, `Update`, or `Delete` to the name of the methods. :::note This setting will have no effect on a method name that has already been prefixed. ::: #### Usage To use this feature, you need to specify a `Boolean` type. By default, this setting is set to `false`. ```json "info": { ..., "x-codegen-settings": { "UseHttpMethodPrefix": false } } ``` #### Language Support | C# | Java | PHP | Python | Ruby | TS | Go | | ------------------ | ------------------ | ------------------ | ------------------ | ------------------ | ------------------ | ------------------ | | :heavy_check_mark: | :heavy_check_mark: | :heavy_check_mark: | :heavy_check_mark: | :heavy_check_mark: | :heavy_check_mark: | :heavy_check_mark: | #### Change in SDK Configuring this setting has the following effect on the generated SDK:
Value Change
true ```csharp try { dynamic result = await echoController.CreateJsonEchoAsync(input); } catch (ApiException e){}; ```
false (default) ```csharp try { dynamic result = await echoController.JsonEchoAsync(input); } catch (ApiException e){}; ```
Value Change
true ```java // highlight-next-line echoController.createJsonEchoAsync(input).thenAccept(result -> { // TODO success callback handler }).exceptionally(exception -> { // TODO failure callback handler return null; }); ```
false (default) ```java // highlight-next-line echoController.jsonEchoAsync(input).thenAccept(result -> { // TODO success callback handler }).exceptionally(exception -> { // TODO failure callback handler return null; }); ```
Value Change
true ```php $result = $mEchoController->createJsonEcho($input); ```
false (default) ```php $result = $mEchoController->jsonEcho($input); ```
Value Change
true ```python result = echo_controller.create_json_echo(input) ```
false (default) ```python result = echo_controller.json_echo(input) ```
Value Change
true ```ruby result = echo_controller.create_json_echo(input) ```
false (default) ```ruby result = echo_controller.json_echo(input) ```
Value Change
true ```ts const { result, ...httpResponse } = await echoController.createJsonEcho(input); ```
false (default) ```ts const { result, ...httpResponse } = await echoController.jsonEcho(input); ```
Value Change
true ```go apiResponse, err := EchoController.CreateJsonEcho(input) ```
false (default) ```go apiResponse, err := EchoController.JsonEcho(input) ```
#### Change in API Docs
Value Change
true ![Use http method prefix enabled](/images/generate-sdks/codegen-settings/use-http-method-prefix-enabled.png)
false (default) ![Use http method prefix disabled](/images/generate-sdks/codegen-settings/use-http-method-prefix-disabled.png)
## Encode Template Parameters :::note Please note that this is an experimental setting and it might not work as intended at all times. Feel free to [contact our support](https://www.apimatic.io/contact/) if you run into an issue. ::: Enable this setting to encode endpoint level parameters. This change also be overridden at parameter level. #### Usage To use this feature, you need to specify a `Boolean` type. By default, its value is set to `true`. ```json "info": { ..., "x-codegen-settings": { "EncodeTemplateParameters": true } } ``` #### Language Support | C# | Java | PHP | Python | Ruby | TS | Go | | ------------------ | ------------------ | ------------------ | ------------------ | ------------------ | ------------------ | ------------------ | | :x: | :heavy_check_mark: | :x: | :heavy_check_mark: | :heavy_check_mark: | :heavy_check_mark: | :x: | ## Validate Required Parameters By enabling this setting, an exception will be thrown if you attempt to pass a null value to an API endpoint parameter that doesn't support null values. This behavior helps in investigating the SDK behavior and identifying any issues related to null values. :::note Default values for required parameters are ignored. ::: #### Usage To use this feature, you need to specify a `Boolean` type. By default, its value is set to `false`. ```json "info": { ..., "x-codegen-settings": { "ValidateRequiredParameters": false } } ``` #### Language Support | C# | Java | PHP | Python | Ruby | TS | Go | | ------------------ | ------------------ | ------------------ | ------------------ | ------------------ | ------------------ | ------------------ | | :heavy_check_mark: | :heavy_check_mark: | :heavy_check_mark: | :heavy_check_mark: | :heavy_check_mark: | :heavy_check_mark: | :heavy_minus_sign: | :::note :heavy_minus_sign: shows that in Go, this behavior is inherently supported by default and can't be disabled. ::: ## Collapse Params to Array Use this setting if you want to collapse endpoint parameters (more than 1) into an options array. This will simplify the interface of an endpoint that has a list of parameters, thus improving the overall look and feel of the generated SDKs and docs. :::caution This setting should only be used in very specific scenarios as it can hide type information from SDKs and Documentation. Please discuss your use case with the APIMatic team before enabling it. ::: #### Usage To use this feature, you need to specify a `Boolean` type. By default, its value is set to `false`. ```json "info": { ..., "x-codegen-settings": { "CollapseParamsToArray": false } } ``` #### Language Support | C# | Java | PHP | Python | Ruby | TS | Go | | ------------------ | ------------------ | ------------------ | ------------------ | ------------------ | ------------------ | ------------------ | | :heavy_check_mark: | :heavy_check_mark: | :heavy_check_mark: | :heavy_check_mark: | :heavy_check_mark: | :heavy_check_mark: | :heavy_check_mark: | #### Change in SDK Configuring this setting has the following effect on the generated SDK:
Value Change
true ```csharp public Models.ServerResponse PostData(Models.PostDataInput input) ```
false (default) ```csharp public Models.ServerResponse PostData(bool unSet, bool setToNull, string field, Models.MyData data) ```
Value Change
true ```java public ServerResponse postData(final PostDataInput input) ```
false (default) ```java public ServerResponse postData(final bool unSet, final bool setToNull, final string field, final MyData data) ```
Value Change
true ```php public function postData(array $options): ServerResponse ```
false (default) ```php public function postData(bool $mUnSet, bool $setToNull, string $field, MyData $data): ServerResponse ```
Value Change
true ```python def post_data(self, options=dict()) ```
false (default) ```python def post_data(self, un_set, set_to_null, field, data) ```
Value Change
true ```ruby def post_data(options = {}) ```
false (default) ```ruby def post_data(un_set, set_to_null, field, data) ```
Value Change
true ```ts async postData({ unSet, setToNull, field, data, }: { unSet: boolean, setToNull: boolean, field: string, data: MyData, }, requestOptions?: RequestOptions ): Promise> ```
false (default) ```ts async postData( unSet: boolean, setToNull: boolean, field: string, data: MyData, requestOptions?: RequestOptions ): Promise> ```
Value Change
true ```go type SendNumberInput struct { Number int Number1 *int } func (q *NumbersController) SendNumber( ctx context.Context, input SendNumberInput) ( models.ApiResponse[models.ServerResponse], error) ```
false (default) ```go func (q *NumbersController) SendNumber( ctx context.Context, number int, number1 *int) ( models.ApiResponse[models.ServerResponse], error) ```
## Use Endpoint Method Name Use the `MethodName` in the endpoint entity to name endpoints instead of the `Name` property. This feature is useful when you are unable to modify the API specification file, yet still want a different endpoint name reflected in the generated docs and SDKs than what has been originally mentioned in the specification file. `UseEndpointMethodName` has a global affect on the endpoint naming, meaning that once you enable this, it will be automatically reflected in all endpoints. You can use the `methodName` property in `x-operation-settings` to configure a string value for a method name at endpoint level. Refer to [Operation settings](https://docs.apimatic.io/specification-extensions/swagger-codegen-extensions/#operation-settings) for more details. :::note Please note that this is an experimental setting and we might remove support of this in the future. Feel free to [contact our support](https://www.apimatic.io/contact/) if you run into an issue. ::: #### Usage To use this feature, you need to specify a `Boolean` type. By default, its value is set to `false`. ```json "info": { ..., "x-codegen-settings": { "UseEndpointMethodName": false } } ``` #### Language Support | C# | Java | PHP | Python | Ruby | TS | Go | | ------------------ | ------------------ | ------------------ | ------------------ | ------------------ | ------------------ | ------------------ | | :heavy_check_mark: | :heavy_check_mark: | :heavy_check_mark: | :x: | :x: | :heavy_check_mark: | :heavy_check_mark: | ## Nullify 404 In certain APIs, the extensive use of the 404 status code is used to indicate the absence of a particular item. However, this can cause confusion as to whether it signifies an error or simply denotes a missing value. To address this confusion, we've incorporated both options in our SDKs. By default, when this setting is set to false, the SDK will adhere to the HTTP protocols and throw an exception. When the setting is enabled, the SDK returns null response on the HTTP status code 404 instead. #### Usage To use this feature, you need to specify a `Boolean` type. By default, its value is set to `false`. ```json "info": { ..., "x-codegen-settings": { "Nullify404": false } } ``` #### Language Support | C# | Java | PHP | Python | Ruby | TS | Go | | ------------------ | ------------------ | ------------------ | ------------------ | ------------------ | ------------------ | ------------------ | | :heavy_check_mark: | :heavy_check_mark: | :heavy_check_mark: | :heavy_check_mark: | :heavy_check_mark: | :x: | :x: | ## Nullify Empty Responses In certain APIs returning multiple responses, an empty payload can also be defined along with other non-empty responses. Check out the following example: ```yaml post: responses: "200": description: OK content: application/json: schema: $ref: "#/components/schemas/SuccessResponse" "201": description: Created ``` When the setting is enabled, SDKs will accept the empty responses as `null`, and non-empty response as `SuccessResponse` that's defined in `201` and `200` status codes in the above example. This setting is disabled by default which allows the endpoints in SDK to return only the `SuccessResponse` that's defined in the `200` status code in the above example. #### Usage To use this feature, you need to specify a `Boolean` type. By default, its value is set to `false`. ```json "info": { ..., "x-codegen-settings": { "NullifyEmptyResponses": true } } ``` #### Language Support | C# | Java | PHP | Python | Ruby | TS | Go | | ------------------ | ------------------ | ------------------ | ------------------ | ------------------ | ------------------ | ------------------ | | :heavy_check_mark: | :heavy_check_mark: | :heavy_check_mark: | :heavy_check_mark: | :heavy_check_mark: | :heavy_check_mark: | :heavy_check_mark: | ## Lift Parameter Description From Custom Type Enable this setting to use a custom type's description as parameter description when a parameter referencing has missing description. #### Usage To use this feature, you need to specify a `Boolean` type. By default, its value is set to `false`. ```json "info": { ..., "x-codegen-settings": { "LiftParameterDescriptionFromCustomType": false } } ``` #### Language Support | C# | Java | PHP | Python | Ruby | TS | Go | | ------------------ | ------------------ | ------------------ | ------------------ | ------------------ | ------------------ | ------------------ | | :heavy_check_mark: | :heavy_check_mark: | :heavy_check_mark: | :heavy_check_mark: | :heavy_check_mark: | :heavy_check_mark: | :heavy_check_mark: | #### Change in API Docs Here is a snippet from an OpenAPI specification file: ```json { "Name": "Boss", "BaseType": "Employee", "ImplementationType": "Structure", "Description": "", ... } ``` Here, `Employee` is a custom type defined as: ```json "CustomTypes": [ { "Name": "Employee", "Description": "This is a custom type defined for all employees", } ] ``` Here's how the API docs change according to how `LiftParameterDescriptionFromCustomType` is configured:
Value Change
true ![Lift parameter description enabled](/images/generate-sdks/codegen-settings/lift-parameter-description-from-custom-type-enabled.png)
false (default) ![Lift parameter description disabled](/images/generate-sdks/codegen-settings/lift-parameter-description-from-custom-type-disabled.png)
## Force Keyword Arguments in Ruby This setting determines whether to use keyword arguments or positional arguments for required parameters in Ruby SDKs. Enabling this setting means code generator will utilize keyword arguments, and if disabled, the code generator uses positional arguments. #### Usage To use this feature, you need to specify a `Boolean` type. By default, its value is set to `false`. ```json "info": { ..., "x-codegen-settings": { "ForceKeywordArgsInRuby": false } } ``` #### Language Support This setting only applies to **Ruby SDKs**. #### Change in SDK Configuring this setting has the following effect on the generated SDK:
Value Change
true ```ruby result = echo_controller.json_echo(input: input) ```
false (default) ```ruby result = echo_controller.json_echo(input) ```
## Map Error Types in Complete Response for PHP This setting determines whether to map error types in PHP SDKs while returning failure results in complete http responses. :::note This setting is only applicable when [`ReturnCompleteHttpResponse`](#return-complete-http-response) is also enabled. ::: #### Usage To use this feature, you need to specify a `Boolean` type. By default, its value is set to `false`. ```json "info": { ..., "x-codegen-settings": { "PhpMapErrorTypesInCompleteResponse": true } } ``` #### Language Support This setting only applies to **PHP SDKs**. #### Change in SDK Configuring this setting has the following effect on the usage of the generated SDK:
Value Change
true ```php $apiResponse = $client->getPaymentsApi()->getTransactions(); if ($apiResponse->isError()) { $error = $apiResponse->getResult(); if ($error instanceof CustomAlphaException) { echo "CustomAlphaException: $error"; } elseif ($error instanceof CustomBetaException) { echo "CustomBetaException: $error"; } } ```
false (default) ```php $apiResponse = $client->getPaymentsApi()->getTransactions(); if ($apiResponse->isError()) { $error = $apiResponse->getResult(); echo "Untyped raw response body: $error"; } ```
--- # Model Source: https://docs.apimatic.io/generate-sdks/customize-sdks/codegen-settings/model-settings/ Model | Code Generation Settings | APIMatic Documentation import Tabs from '@theme/Tabs'; import TabItem from '@theme/TabItem'; These CodeGen configurations manage the model-specific behavior in the generated SDKs. ## Extended Additional Properties Support In cases where your OpenAPI specification includes typed additional properties for models, enabling the Extended Additional Properties Support setting ensures that these properties are correctly handled in the generated SDKs. When this option is enabled, models will support typed additional properties, allowing you to define specific data types for additional fields instead of using a generic type. This feature ensures better alignment with OpenAPI specifications by enabling type safety for additional properties. It also improves consistency, reduces the risk of runtime errors, and provides more flexibility when working with models that include additional, user-defined properties. #### Usage To use this feature, you need to specify a `Boolean` value. By default, its value is set to `false`. ```json "info": { ..., "x-codegen-settings": { "ExtendedAdditionalPropertiesSupport": true } } ``` #### Language Support | C# | Java | PHP | Python | Ruby | TS | Go | | ------------------ | ------------------ | ------------------ | ------------------ | ------------------ | ------------------ | ------------------ | | :heavy_check_mark: | :heavy_check_mark: | :heavy_check_mark: | :heavy_check_mark: | :heavy_check_mark: | :heavy_check_mark: | :heavy_check_mark: | #### Change in SDK Configuring this setting has the following effect on the generated SDK:
Value Change
true ```csharp StudentResult body = new StudentResult { Email = "student616@oxford.ac.uk", ["Theory Of Automata"] = 82.1, ["Computational complexity"] = 72.5, ["Functional programming"] = 78.3, }; ```
false (default) ```csharp StudentResult body = new StudentResult { Email = "student616@oxford.ac.uk", }; ```
Value Change
true ```java StudentResult body = new StudentResult.Builder( "student616@oxford.ac.uk" ) .additionalProperty("Theory Of Automata", 82.1D) .additionalProperty("Computational complexity", 72.5D) .additionalProperty("Functional programming", 78.3D) .build(); ```
false (default) ```java StudentResult body = new StudentResult.Builder( "student616@oxford.ac.uk" ) .build(); ```
Value Change
true ```php $body = StudentResultBuilder::init( 'student616@oxford.ac.uk' ) ->additionalProperty('Theory Of Automata', 82.1) ->additionalProperty('Computational complexity', 72.5) ->additionalProperty('Functional programming', 78.3) ->build(); ```
false (default) ```php $body = StudentResultBuilder::init( 'student616@oxford.ac.uk' )->build(); ```
Value Change
true ```python body = StudentResult( email='student616@oxford.ac.uk', additional_properties={ 'Theory Of Automata': 82.1, 'Computational complexity': 72.5, 'Functional programming': 78.3 } ) ```
false (default) ```python body = StudentResult( email='student616@oxford.ac.uk' ) ```
Value Change
true ```ruby body = StudentResult.new( 'student616@oxford.ac.uk', { 'Theory Of Automata': 82.1, 'Computational complexity': 72.5, 'Functional programming': 78.3 } ) ```
false (default) ```ruby body = StudentResult.new( 'student616@oxford.ac.uk' ) ```
Value Change
true ```ts const body: StudentResult = { email: 'student616@oxford.ac.uk', additionalProperties: { 'Theory Of Automata': 82.1, 'Computational complexity': 72.5, 'Functional programming': 78.3 }, }; ```
false (default) ```ts const body: StudentResult = { email: 'student616@oxford.ac.uk', }; ```
Value Change
true ```go body := models.StudentResult{ Email: "student616@oxford.ac.uk", AdditionalProperties: map[string]float64{ "Theory Of Automata": float64(82.1), "Computational complexity": float64(72.5), "Functional programming": float64(78.3), }, } ```
false (default) ```go body := models.StudentResult{ Email: "student616@oxford.ac.uk", } ```
## Use Model Prefix Enabling this setting will postfix each model class with the word "Model." This setting is helpful in cases where in an OpenAPI specification, an API, endpoint, model, controller etc. might have the same name which can lead to confusion. So, to distinguish between them, you can use this setting to specify that it's a model. For example, a model *Person* becomes *PersonModel*. :::note Try to use this setting only if there's a chance of naming conflicts in your API specification file. ::: #### Usage To use this feature, you need to specify a `Boolean` value. By default, its value is set to `false`. ```json "info": { ..., "x-codegen-settings": { "UseModelPrefix": false } } ``` #### Language Support | C# | Java | PHP | Python | Ruby | TS | Go | | ------------------ | ------------------ | ------------------ | ------------------ | ------------------ | ------------------ | ------------------ | | :heavy_check_mark: | :heavy_check_mark: | :heavy_check_mark: | :heavy_check_mark: | :heavy_check_mark: | :heavy_check_mark: | :x: | #### Change in SDK Configuring this setting has the following effect on the generated SDK:
Value Change
true ```csharp PersonModel result = await responseTypesController.GetModelAsync(); ```
false (default) ```csharp Person result = await responseTypesController.GetModelAsync(); ```
Value Change
true ```java CompletableFuture queryEchoAsync( final Map queryParameters) ```
false (default) ```java CompletableFuture queryEchoAsync( final Map queryParameters) ```
Value Change
true ```php function sendDeleteBody(DeleteBodyModel $body): ServerResponseModel ```
false (default) ```php function sendDeleteBody(DeleteBody $body): ServerResponse ```
Value Change
true ```python from tester.models.person import PersonModel ```
false (default) ```python from tester.models.person import Person ```
Value Change
true ```ruby body = DeleteBodyModel.from_hash(APIHelper.json_deserialize( '{"name":" ","field":"QA"}', false)) ```
false (default) ```ruby body = DeleteBody.from_hash(APIHelper.json_deserialize( '{"name":" ","field":"QA"}', false)) ```
Value Change
true ```ts async queryEcho( queryParameters?: Record, requestOptions?: RequestOptions // highlight-next-line ): Promise> ```
false (default) ```ts async queryEcho( queryParameters?: Record, requestOptions?: RequestOptions // highlight-next-line ): Promise> ```
## Enable Model Keyword Args in Ruby This setting determines the usage of keyword arguments for properties in the constructor of models in Ruby SDKs. If enabled, then all parameters are expected to be provided in the argument name along with value during the model instantiation. If disabled, the model constructor expects positional arguments. #### Usage To use this feature, you need to specify a `Boolean` value. By default, its value is set to `false`. ```json "info": { ..., "x-codegen-settings": { "EnableModelKeywordArgsInRuby": true } } ``` #### Language Support This setting only applies to **Ruby SDKs**. #### Change in SDK Configuring this setting has the following effect on the generated SDK:
Value Change
true ```ruby class User def initialize(name:, email:) @name = name @email = email end end user = User.new(email: "bob@example.com", name: "Bob") ```
false (default) ```ruby class User def initialize(name, email) @name = name @email = email end end user = User.new("Alice", "alice@example.com") ```
## Skip Equality Methods in CSharp This setting controls whether the .NET SDK generator creates `Equals` and `GetHashCode` implementations for models and related container types. When enabled, the generator **doesn't** produce `Equals` and `GetHashCode` methods for: - Models - OneOf / AnyOf cases - Webhooks and Callbacks ParsingResult **Impact** - Prevents incorrect equality and hashing behavior on mutable models, which can otherwise result in invalid comparisons or objects becoming unreachable in hash-based collections such as `Dictionary` and `HashSet`. - Equality checks fall back to reference comparison unless explicitly implemented by the developer. - Any code relying on value-based equality (`Equals`, `==`, `Dictionary`, `HashSet`) may observe different behavior. #### Usage To use this feature, you need to specify a `Boolean` value. By default, its value is set to `false`. ```json "info": { ..., "x-codegen-settings": { "CSharpSkipEqualityMethods": true } } ``` #### Language Support This setting only applies to **.NET SDKs**. #### Change in SDK Configuring this setting has the following effect on the generated SDK:
Value Change
true ```csharp public class User { /// /// Initializes a new instance of the class. /// public User() { } ... // Skips public override bool Equals(object obj) { ... } ... } ```
false (default) ```csharp public class User { /// /// Initializes a new instance of the class. /// public User() { ... } ... // public override bool Equals(object obj) { ... } ... } ```
--- # Enum Source: https://docs.apimatic.io/generate-sdks/customize-sdks/codegen-settings/enum-settings/ Enum | Code Generation Settings | APIMatic Documentation import Tabs from '@theme/Tabs'; import TabItem from '@theme/TabItem'; These CodeGen settings provide you with control over the generated enums within the SDKs. ## Generate Enums This setting allows you to choose whether to include enums in the generated SDKs and docs or not. You can disable this setting to convert enums to native types. If you choose to disable this setting, APIMatic CodeGen will *not* generate any Enum related code. Which means, all enum related requests and responses will have to be maintained manually. #### Usage To use this feature, you need to specify a `Boolean` value. By default, its value is set to `true`. ```json "info": { ..., "x-codegen-settings": { "GenerateEnums": true } } ``` #### Language Support | C# | Java | PHP | Python | Ruby | TS | Go | | ------------------ | ------------------ | ------------------ | ------------------ | ------------------ | ------------------ | ------------------ | | :heavy_check_mark: | :heavy_check_mark: | :heavy_minus_sign: | :heavy_check_mark: | :heavy_check_mark: | :heavy_check_mark: | :heavy_minus_sign: | :::note :heavy_minus_sign: shows that in PHP and Go, this behavior is inherently supported by default and cannot be disabled. ::: #### Change in SDK Configuring this setting has the following effect on the generated SDK:
Value Change
true (default) ```csharp public Models.ServerResponse PostStringEnumArray( List days) ```
false ```csharp public Models.ServerResponse PostStringEnumArray(List days) ```
Value Change
true (default) ```java public ServerResponse postStringEnumArray(final List days) ```
false ```java public ServerResponse postStringEnumArray(final List days) ```
Value Change
true (default) ```python days = [ Days.SUNDAY, Days.MONDAY, Days.TUESDAY ] result = body_params_controller.send_string_enum_array(days) ```
false ```python days = [ 'Sunday', 'Monday', 'Tuesday' ] result = body_params_controller.send_string_enum_array(days) ```
Value Change
true (default) ```typescript async postStringEnumArray(days: Days[], requestOptions?: RequestOptions): Promise> ```
false ```typescript async postStringEnumArray(days: string[], requestOptions?: RequestOptions): Promise> ```
## Use Enum Prefix Enabling this setting will postfix each enum class with the word "Enum". This setting is helpful in cases where in an OpenAPI specification, an API, endpoint, model, controller etc. might have the same name which can lead to confusion. So, to distinguish between them, you can use this setting to specify that this is an enum class. For example, an enum *Days* becomes *DaysEnum*. #### Usage To use this feature, you need to specify a `Boolean` value. By default, its value is set to `true`. ```json "info": { ..., "x-codegen-settings": { "UseEnumPrefix": true } } ``` #### Language Support | C# | Java | PHP | Python | Ruby | TS | Go | | ------------------ | ------------------ | ------------------ | ------------------ | ------------------ | ------------------ | ------------------ | | :heavy_check_mark: | :heavy_check_mark: | :heavy_check_mark: | :heavy_check_mark: | :heavy_check_mark: | :heavy_check_mark: | :heavy_check_mark: | #### Change in SDK Configuring this setting has the following effect on the generated SDK:
Value Change
true (default) ``` csharp // highlight-start var suites = new List(); suites.Add(SuiteCodeEnum.Hearts); //highlight-end try { ServerResponse result = await queryParamController.IntegerEnumArrayAsync(suites); } catch (ApiException e){}; ```
false ``` csharp // highlight-start var suites = new List(); suites.Add(SuiteCode.Hearts); // highlight-end try { ServerResponse result = await queryParamController.IntegerEnumArrayAsync(suites); } catch (ApiException e){} ```
Value Change
true (default) ``` java // highlight-start List suites = new LinkedList<>(); suites.add(SuiteCodeEnum.HEARTS); // highlight-end queryParamController.integerEnumArrayAsync(suites).thenAccept(result -> { // TODO success callback handler }).exceptionally(exception -> { // TODO failure callback handler return null; }); ```
false ``` java // highlight-start List suites = new LinkedList<>(); suites.add(SuiteCode.HEARTS); // highlight-end queryParamController.integerEnumArrayAsync(suites).thenAccept(result -> { // TODO success callback handler }).exceptionally(exception -> { // TODO failure callback handler return null; }); ```
Value Change
true (default) ``` php // highlight-next-line $suites = [Models\SuiteCodeEnum::HEARTS]; $result = $queryParamController->integerEnumArray($suites); ```
false ``` php // highlight-next-line $suites = [Models\SuiteCode::HEARTS]; $result = $queryParamController->integerEnumArray($suites); ```
Value Change
true (default) ```python #highlight-next-line suites = [SuiteCodeEnum.HEARTS] result = query_param_controller.integer_enum_array(suites) ```
false ```python #highlight-next-line suites = [SuiteCode.HEARTS] result = query_param_controller.integer_enum_array(suites) ```
Value Change
true (default) ```ruby // highlight-next-line suites = [SuiteCodeEnum::HEARTS] result = query_param_controller.integer_enum_array(suites) ```
false ```ruby // highlight-next-line suites = [SuiteCode::HEARTS] result = query_param_controller.integer_enum_array(suites) ```
Value Change
true (default) ``` typescript const modelWorkingDays: DaysEnum[] = ['Thursday', 'Wednesday', 'Tuesday']; ```
false ``` typescript const modelWorkingDays: Days[] = ['Thursday', 'Wednesday', 'Tuesday']; ```
Value Change
true (default) ``` go days := []models.DaysEnum{ "Tuesday", "Saturday", "Wednesday" } ```
false ``` go days := []models.Days{ "Tuesday", "Saturday", "Wednesday" } ```
--- # HTTP Configuration Source: https://docs.apimatic.io/generate-sdks/customize-sdks/codegen-settings/http-configuration-settings/ HTTP Configuration | Code Generation Settings | APIMatic Documentation import Tabs from '@theme/Tabs'; import TabItem from '@theme/TabItem'; These CodeGen settings allow you to manage HTTP configurations in the generated SDKs. ## Enable HTTP Cache Use this setting to enable/disable HTTP caching for idempotent endpoint methods. :::note Please note that this setting is experimental and may not function properly at all times. Feel free to [contact our support](https://www.apimatic.io/contact/) if you run into an issue. ::: #### Usage To use this feature, you need to specify a `Boolean` type. By default, its value is set to `false`. ```json "info": { ..., "x-codegen-settings": { "EnableHttpCache": false } } ``` #### Language Support | C# | Java | PHP | Python | Ruby | TS | Go | | ------------------ | ------------------ | ------------------ | ------------------ | ------------------ | ------------------ | ------------------ | | :x: | :x: | :x: | :heavy_check_mark: | :heavy_check_mark: | :x: | :x: | ## Append Content Headers Enabling this setting will automatically determine the request and response content types and append appropriate `accept` and `content-type` headers. This affects the generated SDK as well as the HTTP documentation. For example, `accept: application/json` and `content-type: application/json` headers will be appended for JSON serialization mode. #### Usage To use this feature, you need to specify a `Boolean` type. By default, its value is set to `true`. ```json "info": { ..., "x-codegen-settings": { "AppendContentHeaders": true } } ``` #### Language Support | C# | Java | PHP | Python | Ruby | TS | Go | | ------------------ | ------------------ | ------------------ | ------------------ | ------------------ | ------------------ | ------------------ | | :heavy_check_mark: | :heavy_check_mark: | :heavy_check_mark: | :heavy_check_mark: | :heavy_check_mark: | :heavy_check_mark: | :heavy_check_mark: | #### Change in API Call You can see the change this setting has in the HTTP curl command:
Value Change
true (default) ```curl curl -X GET -G \ --url 'http://localhost:3000/response/date' \ // highlight-next-line -H 'Accept: application/json' \ -d 'array=true' ```
false ```curl curl -X GET -G \ --url 'http://localhost:3000/response/date' \ -d 'array=true' ```
## Allow Skipping SSL Certificate Verification This setting creates a configuration option in SDKs to optionally skip certificate verification when establishing HTTPs connections. :::caution Skipping verification of an SSL certificate isn't the recommended approach as it opens the possibility of security vulnerability. ::: #### Usage To use this feature, you need to specify a `Boolean` type. By default, its value is set to `false`. ```json "info": { ..., "x-codegen-settings": { "AllowSkippingSSLCertVerification": false } } ``` #### Language Support | C# | Java | PHP | Python | Ruby | TS | Go | | ------------------ | ------------------ | ------------------ | ------------------ | ------------------ | ------------------ | ------------------ | | :heavy_check_mark: | :heavy_check_mark: | :heavy_check_mark: | :heavy_check_mark: | :heavy_check_mark: | :x: | :x: | --- # SDK Interface Customization Source: https://docs.apimatic.io/generate-sdks/customize-sdks/codegen-settings/sdk-interface-customization/ SDK Interface Customization | Code Generation Settings | APIMatic Documentation import Tabs from '@theme/Tabs'; import TabItem from '@theme/TabItem'; These CodeGen settings allow control over the overall look and feel of the generated code. ## Project Name This setting sets the name of the generated SDK package. At times, this change is reflected as client name and sometimes as the interface name, depending on the selected language. #### Usage To use this feature, you need to specify a `String` value. By default, its value will be your **API name**. ```json "info": { ..., "x-codegen-settings": { "ProjectName": "MyProject" } } ``` #### Language Support | C# | Java | PHP | Python | Ruby | TS | Go | | ------------------ | ------------------ | ------------------ | ------------------ | ------------------ | ------------------ | ------------------ | | :heavy_check_mark: | :heavy_check_mark: | :heavy_check_mark: | :heavy_check_mark: | :heavy_check_mark: | :heavy_check_mark: | :heavy_check_mark: | #### Change in SDK Configuring this setting has the following effect on the generated SDK:
Value Change
Default ``` csharp // highlight-start Tester.Standard.TesterClient client = new Tester.Standard.TesterClient.Builder() .Environment(Tester.Standard.Environment.Testing) // highlight-end .Port("80") .Suites(SuiteCodeEnum.Hearts) .Build(); ```
Configured ``` csharp // highlight-start MyProject.Standard.MyProjectClient client = new MyProject.Standard.MyProjectClient.Builder() .Environment(MyProject.Standard.Environment.Testing) // highlight-end .Port("80") .Suites(SuiteCodeEnum.Hearts) .Build(); ```
Value Change
Default ``` java // highlight-next-line TesterClient client = new TesterClient.Builder() .httpClientConfig(configBuilder -> configBuilder .timeout(0)) .environment(Environment.TESTING) ```
Configured ``` java // highlight-next-line MyProjectClient client = new MyProjectClient.Builder() .httpClientConfig(configBuilder -> configBuilder .timeout(0)) .environment(Environment.TESTING) ```
Value Change
Default ``` php // highlight-next-line $client = TesterLib\TesterClientBuilder::init() ->environment('testing') ->port('80') ->suites(Models\SuiteCodeEnum::HEARTS) ```
Configured ``` php // highlight-next-line $client = MyProjectLib\MyProjectClientBuilder::init() ->environment('testing') ->port('80') ->suites(Models\SuiteCodeEnum::HEARTS); ```
Value Change
Default ```python #highlight-start from tester.tester_client import TesterClient from tester.configuration import Environment client = TesterClient( # highlight-end environment=Environment.TESTING, port = '80', suites = SuiteCodeEnum.HEARTS,) ```
Configured ```python #highlight-start from myproject.my_project_client import MyProjectClient from myproject.configuration import Environment client = MyProjectClient( #highlight-end environment=Environment.TESTING, port = '80', suites = SuiteCodeEnum.HEARTS,) ```
Value Change
Default ``` ruby // highlight-next-line client = Tester::Client.new( environment: Environment::TESTING, port: '80', suites: SuiteCodeEnum::HEARTS, ) ```
Configured ``` ruby // highlight-next-line client = MyProject::Client.new( environment: Environment::TESTING, port: '80', suites: SuiteCodeEnum::HEARTS, ) ```
Value Change
Default ``` go // highlight-next-line config := tester.ConfigurationFactory( tester.WithEnvironment("testing"), tester.WithPort("3000"), tester.WithSuites(4), ) client := tester.NewClient(config) ```
Configured ``` go // highlight-next-line config := myproject.ConfigurationFactory( myproject.WithEnvironment("testing"), myproject.WithPort("3000"), myproject.WithSuites(4), ) client := myproject.NewClient(config) ```
## C# Namespace Enable this setting to use the default value of root namespace in C# SDKs. #### Usage To use this feature, you need to specify a `String` value. By default, its value will be your **API name**. ```json "info": { ..., "x-codegen-settings": { "CSharpNamespace": "OrgNamespace" } } ``` #### Language Support This setting only applies to **C# SDKs**. #### Change in SDK Configuring this setting has the following effect on the generated SDK:
Value Change
Default ``` csharp // highlight-next-line Tester.Standard.TesterClient client = new Tester.Standard.TesterClient.Builder() .Environment(Tester.Standard.Environment.Testing) .Port("80") .Suites(SuiteCodeEnum.Hearts) .Build(); ```
Configured ``` csharp // highlight-next-line OrgNamespace.TesterClient client = new Root.TesterClient.Builder() .Environment(Root.Environment.Testing) .Port("80") .Suites(SuiteCodeEnum.Hearts) .Build(); ```
## Java Package Name The Java package name defines the root namespace under which all classes in the generated Java SDK will be organized. #### Configuration You can configure this setting using one of the following approaches: - **In the OpenAPI Specification** Use the `x-codegen-settings` extension and set the value under the `JavaDefaultPackageName` key. - **In the APIMATIC META File** Set the value under the `JavaPackageName` field in the `CodeGenSettings` section. :::note If the setting is defined in both places, the value specified in the **APIMatic Metadata File** takes precedence. ::: #### Usage To set a custom Java package name, provide a `String` value representing the desired root package. This helps organize the SDK structure according to your project's naming conventions and prevents potential naming conflicts. If no value is provided, a default package name is generated based on your API’s **Base URI**. For example, if the base URI is `apimatic.io`, the default package name would be `io.apimatic`. ```json "info": { ..., "x-codegen-settings": { "JavaDefaultPackageName": "Root" } } ``` ```json { ..., "CodeGenSettings": { "JavaPackageName": "Root" } } ``` #### Language Support This setting only applies to **Java SDKs**. #### Change in SDK Configuring this setting has the following effect on the generated SDK:
Value Change
Default ```java Object input = localhost3000.ApiHelper.deserialize("{\"key1\":\"val1\",\"key2\":\"val2\"}"); ```
Configured ```java Object input = Root.ApiHelper.deserialize("{\"key1\":\"val1\",\"key2\":\"val2\"}"); ```
## PHP Namespace Enable this setting to use the root namespace for PHP SDKs. #### Usage To use this feature, you need to specify a `String` value. By default, its value will be your **API name**. ```json "info": { ..., "x-codegen-settings": { "PHPNamespace": "Apimatic" } } ``` #### Language Support This setting only applies to **PHP SDKs**. #### Change in SDK Configuring this setting has the following effect on the generated SDK:
Value Change
Default ``` php // highlight-next-line $client = TesterLib\TesterClientBuilder::init() ->environment('testing') ->build(); ```
Configured ``` php // highlight-next-line $client = Apimatic\TesterClientBuilder::init() ->environment('testing') ->build(); ```
## Use Controller Prefix Enabling this setting will postfix each controller class with the word `Controller`. For example, a controller class *User* becomes *UserController*. If you want to add a custom prefix, you can enable this setting and use the [Controller Postfix](#controller-postfix) setting to set a string value. #### Usage To use this feature, you need to specify a `Boolean` type. By default, its value is set to `true`. ```json "info": { ..., "x-codegen-settings": { "UseControllerPrefix": true } } ``` #### Language Support | C# | Java | PHP | Python | Ruby | TS | Go | | ------------------ | ------------------ | ------------------ | ------------------ | ------------------ | ------------------ | ------------------ | | :heavy_check_mark: | :heavy_check_mark: | :heavy_check_mark: | :heavy_check_mark: | :heavy_check_mark: | :heavy_check_mark: | :heavy_check_mark: | #### Change in SDK Configuring this setting has the following effect on the generated SDK:
Value Change
true (default) ``` csharp try { // highlight-next-line await responseTypesController.GetContentTypeHeadersAsync(); } catch (ApiException e){}; ```
false ``` csharp try { // highlight-next-line await responseTypes.GetContentTypeHeadersAsync(); } catch (ApiException e){}; ```
Value Change
true (default) ``` java // highlight-next-line responseTypesController.getContentTypeHeadersAsync().thenAccept(result -> { // TODO success callback handler }).exceptionally(exception -> { // TODO failure callback handler return null; }); ```
false ``` java // highlight-next-line responseTypes.getContentTypeHeadersAsync().thenAccept(result -> { // TODO success callback handler }).exceptionally(exception -> { // TODO failure callback handler return null; }); ```
Value Change
true (default) ``` php $responseTypesController->getContentTypeHeaders(); ```
false ``` php $responseTypes->getContentTypeHeaders(); ```
Value Change
true (default) ``` python result = response_types_controller.get_content_type_headers() print(result) ```
false ``` python result = response_types.get_content_type_headers() print(result) ```
Value Change
true (default) ``` ruby response_types_controller.get_content_type_headers ```
false ``` ruby response_types.get_content_type_headers ```
Value Change
true (default) ``` ts const { result, ...httpResponse } = await responseTypesController.getContentTypeHeaders(); ```
false ``` ts const { result, ...httpResponse } = await responseTypes.getContentTypeHeaders(); ```
Value Change
true (default) ``` go resp, err := ResponseTypesController.GetContentTypeHeaders() ```
false ``` go resp, err := ResponseTypes.GetContentTypeHeaders() ```
## Controller Postfix :::note To use this feature, make sure you have enabled the [Use Controller Prefix](#use-controller-prefix) setting. ::: This setting adds a postfix to the Endpoint Group names. For example, an endpoint group is named `User`. For a given Controller Postfix value `Api`, the name of the endpoint group will become `UserApi`. If no value is provided, it will use the default value and become `UserController`. #### Usage To use this feature, you need to specify a `String` value that will be post-fixed with the endpoint group name. By default, its value is set to **Controller**. ```json "info": { ..., "x-codegen-settings": { "ControllerPostfix": "Api" } } ``` #### Language Support | C# | Java | PHP | Python | Ruby | TS | Go | | ------------------ | ------------------ | ------------------ | ------------------ | ------------------ | ------------------ | ------------------ | | :heavy_check_mark: | :heavy_check_mark: | :heavy_check_mark: | :heavy_check_mark: | :heavy_check_mark: | :heavy_check_mark: | :heavy_check_mark: | #### Change in SDK Configuring this setting has the following effect on the generated SDK:
Value Change
Default ``` csharp dynamic result = await echoController.JsonEchoAsync(input); ```
Configured ``` csharp dynamic result = await echoApi.JsonEchoAsync(input); ```
Value Change
Default ``` java // highlight-next-line echoController.jsonEchoAsync(input).thenAccept(result -> { // TODO success callback handler }).exceptionally(exception -> { // TODO failure callback handler return null; }); ```
Configured ``` java // highlight-next-line echoApi.jsonEchoAsync(input).thenAccept(result -> { // TODO success callback handler }).exceptionally(exception -> { // TODO failure callback handler return null; }); ```
Value Change
Default ``` php $result = $mEchoController->jsonEcho($input); ```
Configured ``` php $result = $mEchoApi->jsonEcho($input); ```
Value Change
Default ``` python result = echo_controller.json_echo(input) ```
Configured ``` python result = echo_api.json_echo(input) ```
Value Change
Default ``` ruby result = echo_controller.json_echo(input) ```
Configured ``` ruby result = echo_api.json_echo(input) ```
Value Change
Default ``` ts const { result, ...httpResponse } = await echoController.jsonEcho(input); ```
Configured ``` ts const { result, ...httpResponse } = await echoApi.jsonEcho(input); ```
Value Change
Default ``` go apiResponse, err := EchoController.JsonEcho(input) ```
Configured ``` go apiResponse, err := EchoApi.JsonEcho(input) ```
## Controller Namespace While you have the flexibility to name the controller classes, they must still be organized within the SDK. The controller namespace represents the specific location where the controllers are placed. You can use this setting to specify name of controller namespace in SDKs. It's recommended to update both the [controller postfix](#controller-postfix) and the corresponding controller namespace together. For example, in Java, you postfix a controller with `Api`, so you can use the Controller Namespace setting to place it within a controller namespace called `Apis`. #### Usage To use this feature, you need to specify a `String` value. By default, its value is set to **Controller**. ```json "info": { ..., "x-codegen-settings": { "ControllerNamespace": "Apis" } } ``` #### Language Support | C# | Java | PHP | Python | Ruby | TS | Go | | ------------------ | ------------------ | ------------------ | ------------------ | ------------------ | ------------------ | ------------------ | | :heavy_check_mark: | :heavy_check_mark: | :heavy_check_mark: | :heavy_check_mark: | :heavy_check_mark: | :heavy_check_mark: | :heavy_check_mark: | ## Generate Interfaces This setting generates interfaces for controller classes in the generated SDKs. This comes in handy if the SDK users want to write mock tests against the client code in their application. :::note Please note that this setting is experimental and may not work properly at all times. Feel free to [contact our support](https://www.apimatic.io/contact/) if you run into an issue. ::: #### Usage To use this feature, you need to specify a `Boolean` value. By default, its value is set to `false`. ```json "info": { ..., "x-codegen-settings": { "GenerateInterfaces": false } } ``` #### Language Support | C# | Java | PHP | Python | Ruby | TS | Go | | ------------------ | ------------------ | ------------------ | ------------------ | ------------------ | ------------------ | ------------------ | | :heavy_check_mark: | :heavy_check_mark: | :x: | :x: | :x: | :x: | :heavy_minus_sign: | :::note :heavy_minus_sign: shows that in Go, this behavior is inherently supported by default where needed and can't be disabled. ::: #### Change in SDK Configuring this setting has the following effect on the generated SDK:
Value Change
true ```csharp IBodyParamsController bodyParamsController = client.BodyParamsController; ```
false (default) ```csharp BodyParamsController bodyParamsController = client.BodyParamsController; ```
Value Change
true ```csharp public final class TesterClient implements TesterClientInterface { responseTypes = new DefaultResponseTypesController(globalConfig); formParams = new DefaultFormParamsController(globalConfig); bodyParams = new DefaultBodyParamsController(globalConfig); errorCodes = new DefaultErrorCodesController(globalConfig); } ```
false (default) ```java public final class TesterClient implements Configuration { responseTypes = new ResponseTypesController(globalConfig); formParams = new FormParamsController(globalConfig); bodyParams = new BodyParamsController(globalConfig); errorCodes = new ErrorCodesController(globalConfig); } ```
## Client Interface Name This setting sets the class name of the client library interface. If no value is provided, then default value will be a prefix of the set [Project name](#project-name). For example, if this setting isn't configured and your `ProjectName` is `Tester`, then the client interface name used throughout the SDK will be `TesterClient`. :::note Please note that this setting is currently in an experimental phase. We may or may not provide additional support or enhancements for it in the future. ::: #### Usage To use this feature, you need to specify a `String` value that will be used as a class name in SDKs. ```json "info": { ..., "x-codegen-settings": { "ClientInterfaceName": "Interface" } } ``` #### Language Support | C# | Java | PHP | Python | Ruby | TS | Go | | ------------------ | ------------------ | ------------------ | ------------------ | ------------------ | ------------------ | ------------------ | | :x: | :x: | :x: | :heavy_check_mark: | :x: | :x: | :x: | #### Change in SDK Configuring this setting has the following effect on the generated SDK:
Value Change
Default ```python #highlight-next-line from tester.tester_client import TesterClient from tester.configuration import Environment #highlight-next-line client = TesterClient( environment=Environment.TESTING, port = '80', suites = SuiteCodeEnum.HEARTS,) ```
Configured ```python #highlight-next-line from tester.interface import Interface from tester.configuration import Environment #highlight-next-line client = Interface( environment=Environment.TESTING, port = '80', suites = SuiteCodeEnum.HEARTS,) ```
## Use Security Scheme Name For Single Auth This setting is applicable to those API definitions that contain only 1 auth scheme. By enabling this setting, the authentication interface in the generated SDK client will rely on the scheme name defined in the API definition. #### Usage To use this setting, you need to specify a `Boolean` value. By default, its value is set to `false`. ```json "info": { ..., "x-codegen-settings": { "UseSecuritySchemeNameForSingleAuth": true } } ``` #### Language Support | C# | Java | PHP | Python | Ruby | TS | Go | | ------------------ | ------------------ | ------------------ | ------------------ | ------------------ | ------------------ | ------------------ | | :heavy_check_mark: | :heavy_check_mark: | :heavy_check_mark: | :heavy_check_mark: | :heavy_check_mark: | :heavy_check_mark: | :heavy_check_mark: | #### Change in SDK Configuring this setting has the following effect on the generated SDK with the authentication scheme for example Client Credentials Auth scheme, defined in OpenApi specification like: ```yaml components: securitySchemes: ccg_auth: # <---- arbitrary name type: oauth2 description: See http://developers.gettyimages.com/api/docs/v3/oauth2.html flows: clientCredentials: tokenUrl: https://api.gettyimages.com/oauth2/token/ scopes: {} ```
Value Change
true ``` csharp SdkClient client = new SdkClient.Builder() .CcgAuth( new CcgAuthModel.Builder( "clientId", "clientSecret" ).Build()) .Build(); ```
false (default) ``` csharp SdkClient client = new SdkClient.Builder() .ClientCredentialsAuth( new ClientCredentialsAuthModel.Builder( "clientId", "clientSecret" ).Build()) .Build(); ```
Value Change
true ``` java SDKClient client = new SDKClient.Builder() .ccgAuth(new CcgAuthModel.Builder( "clientId", "clientSecret" ) .build()) .build(); ```
false (default) ``` java SDKClient client = new SDKClient.Builder() .clientCredentialsAuth(new ClientCredentialsAuthModel.Builder( "clientId", "clientSecret" ) .build()) .build(); ```
Value Change
true ``` php $client = SDKClientBuilder::init() ->ccgAuthCredentials( CcgAuthCredentialsBuilder::init( 'clientId', 'clientSecret' ) ) ->build(); ```
false (default) ``` php $client = SDKClientBuilder::init() ->clientCredentialsAuthCredentials( ClientCredentialsAuthCredentialsBuilder::init( 'clientId', 'clientSecret' ) ) ->build(); ```
Value Change
true ``` python client = SDKClient( ccg_auth_credentials=CcgAuthCredentials( o_auth_client_id='clientId', o_auth_client_secret='clientSecret' ) ) ```
false (default) ``` python client = SDKClient( client_credentials_auth_credentials=ClientCredentialsAuthCredentials( o_auth_client_id='clientId', o_auth_client_secret='clientSecret' ) ) ```
Value Change
true ``` ruby client = SDKClient.new( ccg_auth_credentials: CcgAuthCredentials.new( o_auth_client_id: 'clientId', o_auth_client_secret: 'clientSecret' ) ) ```
false (default) ``` ruby client = SDKClient.new( client_credentials_auth_credentials: ClientCredentialsAuthCredentials.new( o_auth_client_id: 'clientId', o_auth_client_secret: 'clientSecret' ) ) ```
Value Change
true ``` ts const client = new SDKClient({ ccgAuthCredentials: { oAuthClientId: 'OAuthClientId', oAuthClientSecret: 'OAuthClientSecret', }, }); ```
false (default) ``` ts const client = new SDKClient({ clientCredentialsAuthCredentials: { oAuthClientId: 'OAuthClientId', oAuthClientSecret: 'OAuthClientSecret', }, }); ```
Value Change
true ``` go client := sdkclient.NewClient( sdkclient.CreateConfiguration( sdkclient.WithCcgAuthCredentials( sdkclient.NewCcgAuthCredentials( "clientId", "clientSecret", ), ), ), ) ```
false (default) ``` go client := sdkclient.NewClient( sdkclient.CreateConfiguration( sdkclient.WithClientCredentialsAuthCredentials( sdkclient.NewClientCredentialsAuthCredentials( "clientId", "clientSecret", ), ), ), ) ```
## Do-Not-Split-Words This setting allows you to specify a list of words that won't split when converting identifiers from API specification to language-specific identifiers. This behavior is valid irrespective of the capitalization of these words. This is useful for declaring brand names such as APIMatic. The order of words listed determines highest to lowest priority. For example, if you provide the words `apimatic` and `vmware` in your list, `APIMaticandVMWare` becomes `ApimaticAndVmware` or `apimatic_and_vmware` depending on the case used in the SDK language. :::note You can only list words with alphanumeric characters. ::: #### Usage To use this feature, you need to specify a `List`. ```json "info": { ..., "x-codegen-settings": { "DoNotSplitWords": ["apimatic", "vmware", "petId"] } } ``` #### Language Support | C# | Java | PHP | Python | Ruby | TS | Go | | ------------------ | ------------------ | ------------------ | ------------------ | ------------------ | ------------------ | ------------------ | | :heavy_check_mark: | :heavy_check_mark: | :heavy_check_mark: | :heavy_check_mark: | :heavy_check_mark: | :heavy_check_mark: | :heavy_check_mark: | #### Change in SDK For `"DoNotSplitWords": ["petId"]`, SDKs will change as follows:
Value Change
Default ```csharp public Models.Pet GetPetById(long petId) ```
Configured ```csharp public Models.Pet GetPetById(long petid) ```
Value Change
Default ```java public Pet getPetById(final long petId) ```
Configured ```java public Pet getPetById(final long petid) ```
Value Change
Default ```php public function getPetById(int $petId): Pet ```
Configured ```php public function getPetById(int $petid): Pet ```
Value Change
Default ```python def get_pet_by_id(self, pet_id) ```
Configured ```python def get_pet_by_id(self, petid) ```
Value Change
Default ```ruby def get_pet_by_id(pet_id) ```
Configured ```ruby def get_pet_by_id(petid) ```
Value Change
Default ```typescript async getPetById( petId: bigint, requestOptions?: RequestOptions ): Promise> ```
Configured ```typescript async getPetById( petid: bigint, requestOptions?: RequestOptions ): Promise> ```
Value Change
Default ```go func (p *PetController) GetPetById(petId int64) ( https.ApiResponse[models.Pet], error) ```
Configured ```go func (p *PetController) GetPetById(petid int64) ( https.ApiResponse[models.Pet], error) ```
## Synchronous Mode of Code This setting allows you to switch between synchronous and asynchronous generation of code. The best practice of code generation is to handle code asynchronously, so this setting is enabled by default. But, you have the option to disable it in case you want the APIMatic CodeGen to generate code synchronously. #### Usage To use this feature, you need to specify a `string`, either `Asynchronous` or `Synchronous`. By default, its value is set to `Asynchronous`. ```json "info": { ..., "x-codegen-settings": { "SynchronyMode": "Asynchronous" } } ``` #### Language Support | C# | Java | PHP | Python | Ruby | TS | Go | | ------------------ | ------------------ | ------------------ | ------------------ | ------------------ | ------------------ | ------------------ | | :heavy_check_mark: | :heavy_check_mark: | :x: | :x: | :x: | :heavy_minus_sign: | :heavy_minus_sign: | :::note :heavy_minus_sign: shows that in TypeScript and Go, this behavior is inherently supported by default and can't be disabled. ::: #### Change in SDK Configuring this setting has the following effect on the generated SDK:
Value Change
Asynchronous (default) ``` csharp EmployeeComp result = await responseTypesController.ReturnEmployeeModelAsync(); ```
Synchronous ``` csharp EmployeeComp result = responseTypesController.ReturnEmployeeModel(); ```
Value Change
Asynchronous (default) ``` java responseTypesController.returnEmployeeModelAsync().thenAccept(result -> { // TODO success callback handler System.out.println(result); }).exceptionally(exception -> { // TODO failure callback handler exception.printStackTrace(); return null; }); ```
Synchronous (default) ``` java try { EmployeeComp result = responseTypesController.returnEmployeeModel(); System.out.println(result); } catch (ApiException e) { e.printStackTrace(); } catch (IOException e) { e.printStackTrace(); } ```
## Enable Logging By enabling this setting, SDK code generation includes functionality for logging events in the API cycle using a designated library. #### Usage To use this feature, you need to specify a `Boolean` value. By default, its value is set to `false`. ```json "info": { ..., "x-codegen-settings": { "EnableLogging": false } } ``` #### Language Support | C# | Java | PHP | Python | Ruby | TS | Go | | ------------------ | ------------------ | ------------------ | ------------------ | ------------------ | ------------------ | ------------------ | | :heavy_check_mark: | :heavy_check_mark: | :heavy_check_mark: | :heavy_check_mark: | :heavy_check_mark: | :heavy_check_mark: | :heavy_check_mark: | #### Change in SDK Configuring this setting has the following effect on the generated SDK:
Value Change
true ``` csharp SdkClient client = new SdkClient.Builder() .LoggingConfig(config => config .LogLevel(LogLevel.Information) .RequestConfig(reqConfig => reqConfig .Body(true) .IncludeHeaders("Content-Type", "Content-Encoding")) .ResponseConfig(respConfig => respConfig .Headers(true) .ExcludeHeaders("X-Powered-By")) ) .Build(); ```
false (default) ``` csharp SdkClient client = new SdkClient.Builder() .Build(); ```
Value Change
true ``` java SDKClient client = new SDKClient.Builder() .loggingConfig(builder -> builder .level(Level.DEBUG) .requestConfig(reqConfig -> reqConfig .body(true) .includeHeaders("Content-Type", "Content-Encoding")) .responseConfig(resConfig -> resConfig .headers(true) .excludeHeaders("X-Powered-By"))) .build(); ```
false (default) ``` java SDKClient client = new SDKClient.Builder() .build(); ```
Value Change
true ``` php $client = SdkClientBuilder::init() ->loggingConfiguration( LoggingConfigurationBuilder::init() ->level(LogLevel::INFO) ->requestConfiguration( RequestLoggingConfigurationBuilder::init() ->body(true) ->includeHeaders('Content-Type', 'Content-Encoding') ) ->responseConfiguration( ResponseLoggingConfigurationBuilder::init() ->headers(true) ->excludeHeaders('X-Powered-By') ) ) ->build(); ```
false (default) ``` php $client = SdkClientBuilder::init() ->build(); ```
Value Change
true ``` python client = SDKClient( logging_configuration=LoggingConfiguration( log_level=logging.INFO, request_logging_config=RequestLoggingConfiguration( log_body=True, headers_to_include=['Content-Type', 'Content-Encoding'] ), response_logging_config=ResponseLoggingConfiguration( log_headers=True, headers_to_exclude=['X-Powered-By'] ) ) ) ```
false (default) ``` python client = SDKClient() ```
Value Change
true ``` ruby client = SDKClient.new( logging_configuration: LoggingConfiguration.new( log_level: Logger::INFO, request_logging_config: RequestLoggingConfiguration.new( log_body: true, headers_to_include: %w[Content-Type Content-Encoding] ), response_logging_config: ResponseLoggingConfiguration.new( log_headers: true, headers_to_exclude: ['X-Powered-By'] ) ) ) ```
false (default) ``` ruby client = SDKClient.new ```
Value Change
true ``` ts const client = new SDKClient({ logging: { logLevel: LogLevel.Debug, logRequest: { logBody: true, headersToInclude: ["Content-Type", "Content-Encoding"] }, logResponse: { logHeaders: true, headersToExclude: ["X-Powered-By"] } } }); ```
false (default) ``` ts const client = new SDKClient(); ```
Value Change
true ``` go config := CreateConfigurationFromEnvironment( WithLoggerConfiguration( WithLevel("info"), WithRequestConfiguration( WithRequestBody(true), WithIncludeRequestHeaders("Content-Type", "Content-Encoding"), ), WithResponseConfiguration( WithResponseHeaders(true), WithExcludeResponseHeaders("X-Powered-By"), ), ), ) client := NewClient(config) ```
false (default) ``` go config := CreateConfigurationFromEnvironment() client := NewClient(config) ```
## Symbolize Hash Keys in Ruby Enable this setting to use symbols instead of strings for hash keys in Ruby SDKs. #### Usage To use this feature, you need to specify a `Boolean` type. By default, its value is set to `false`. ```json "info": { ..., "x-codegen-settings": { "SymbolizeHashKeysInRuby": true } } ``` #### Language Support This setting only applies to **Ruby SDKs**. --- # Timeout and Retries Source: https://docs.apimatic.io/generate-sdks/customize-sdks/codegen-settings/timeout-and-retries-settings/ Timeout & Retries | Code Generation Settings | APIMatic Documentation import Tabs from '@theme/Tabs'; import TabItem from '@theme/TabItem'; These CodeGen settings allow control over retries and exponential backoff of API calls from the generated code. ## Timeout This setting defines the duration (in seconds) after which requests will time out. #### Usage To configure this feature, specify a `Float` value. The default value is `0`, indicating no timeout. ```json "info": { ..., "x-codegen-settings": { "Timeout": 0.5 } } ``` #### Language Support | C# | Java | PHP | Python | Ruby | TS | Go | | ------------------ | ------------------ | ------------------ | ------------------ | ------------------ | ------------------ | ------------------ | | :heavy_check_mark: | :heavy_check_mark: | :heavy_check_mark: | :heavy_check_mark: | :heavy_check_mark: | :heavy_check_mark: | :heavy_check_mark: | ## Retry On Timeout Enable this setting to retry request on timeout. :::note This setting needs to be enabled to use the subsequent settings on this page. ::: #### Usage To use this feature, you need to specify a `Boolean` type. By default, its value is set to `true`. ```json "info": { ..., "x-codegen-settings": { "RetryOnTimeout": true } } ``` #### Language Support | C# | Java | PHP | Python | Ruby | TS | Go | | ------------------ | ------------------ | ------------------ | ------------------ | ------------------ | ------------------ | ------------------ | | :heavy_check_mark: | :heavy_check_mark: | :heavy_check_mark: | :heavy_minus_sign: | :heavy_minus_sign: | :heavy_check_mark: | :heavy_check_mark: | :::note :heavy_minus_sign: shows that in Python and Ruby, this behavior is inherently supported by default and cannot be disabled. ::: ## Request HTTP Methods to Retry Use this setting to specify the HTTP methods to retry again. Allowed HTTP verbs are `GET` and `PUT`. #### Usage To use this feature, you need to specify a list of HTTP verbs `IList`. By default, the list contains

`[ "GET", "PUT" ]` values. ```json "info": { ..., "x-codegen-settings": { "RequestMethodsToRetry": [ "GET", "PUT"] } } ``` #### Language Support | C# | Java | PHP | Python | Ruby | TS | Go | | ------------------ | ------------------ | ------------------ | ------------------ | ------------------ | ------------------ | ------------------ | | :heavy_check_mark: | :heavy_check_mark: | :heavy_check_mark: | :heavy_check_mark: | :heavy_check_mark: | :heavy_check_mark: | :heavy_check_mark: | ## Status Codes to Retry Use this setting to specify the HTTP status codes to invoke retry on. Allowed HTTP codes are: "408, 413, 429, 500, 502, 503, 504, 521, 522, 524". #### Usage To use this feature, you need to specify a list of integers `IList`. By default, the list contains

`{ 408, 413, 429, 500, 502, 503, 504, 521, 522, 524 }` values. ```json "info": { ..., "x-codegen-settings": { "StatusCodesToRetry": [413, 503, 504] } } ``` :::note Only the HTTP codes provided in the list will be retried. ::: #### Language Support | C# | Java | PHP | Python | Ruby | TS | Go | | ------------------ | ------------------ | ------------------ | ------------------ | ------------------ | ------------------ | ------------------ | | :heavy_check_mark: | :heavy_check_mark: | :heavy_check_mark: | :heavy_check_mark: | :heavy_check_mark: | :heavy_check_mark: | :heavy_check_mark: | ## Maximum Retry Wait Time Use this setting to set the maximum wait time in seconds for overall retrying requests. #### Usage To use this feature, you need to specify an `Integer` value that represents the wait time in seconds. ```json "info": { ..., "x-codegen-settings": { "BackoffMax": 120 } } ``` #### Language Support | C# | Java | PHP | Python | Ruby | TS | Go | | ------------------ | ------------------ | ------------------ | ------------------ | ------------------ | ------------------ | ------------------ | | :heavy_check_mark: | :heavy_check_mark: | :heavy_check_mark: | :x: | :x: | :heavy_check_mark: | :heavy_check_mark: | ## Number of Retries Use this setting to set the number of retries to make for calling an idempotent endpoint after which the endpoint call should fail. #### Usage To use this feature, you need to specify an `Integer` value that represents the number of retries. By default, its value is set to `0`. ```json "info": { ..., "x-codegen-settings": { "Retries": 3 } } ``` #### Language Support | C# | Java | PHP | Python | Ruby | TS | Go | | ------------------ | ------------------ | ------------------ | ------------------ | ------------------ | ------------------ | ------------------ | | :heavy_check_mark: | :heavy_check_mark: | :heavy_check_mark: | :heavy_check_mark: | :heavy_check_mark: | :heavy_check_mark: | :heavy_check_mark: | ## Retry Interval Use this setting to set the retry time interval between endpoint calls. #### Usage To use this feature, you need to specify a `Float` value that represents the time interval. By default, its value is set to `1.0`. ```json "info": { ..., "x-codegen-settings": { "RetryInterval": 1.5 } } ``` #### Language Support | C# | Java | PHP | Python | Ruby | TS | Go | | ------------------ | ------------------ | ------------------ | ------------------ | ------------------ | ------------------ | ------------------ | | :heavy_check_mark: | :heavy_check_mark: | :heavy_check_mark: | :heavy_check_mark: | :heavy_check_mark: | :heavy_check_mark: | :heavy_check_mark: | ## User Configurable Retries Use this setting to decide if your SDK users should be able to configure retries by themselves. Set this setting to true to enable configurable retries and false to disable them. #### Usage To use this feature, you need to specify a `Boolean` value. By default, its value is set to `true`. ```json "info": { ..., "x-codegen-settings": { "UserConfigurableRetries": true } } ``` #### Language Support | C# | Java | PHP | Python | Ruby | TS | Go | | ------------------ | ------------------ | ------------------ | ------------------ | ------------------ | ------------------ | ------------------ | | :heavy_check_mark: | :x: | :x: | :x: | :x: | :heavy_check_mark: | :heavy_check_mark: | #### Change in SDK When this setting is enabled, your SDK users will be able to configure timeout and retries in their client as follows: ```typescript const client = new Client({ timeout: 60, httpClientOptions: { retryConfig: { maxNumberOfRetries: 3, retryOnTimeout: true, retryInterval: 1, httpStatusCodesToRetry: [408, 413, 429, 500, 502, 503, 504, 521, 522, 524], httpMethodsToRetry: ['GET', 'PUT'] } } }); ``` ## Backoff Factor Use this setting to add an exponential backoff factor to increase interval between retries. #### Usage To use this feature, you need to specify a `Float` value. By default, its value is set to `2`. ```json "info": { ..., "x-codegen-settings": { "BackOffFactor": 1.5 } } ``` #### Language Support | C# | Java | PHP | Python | Ruby | TS | Go | | ------------------ | ------------------ | ------------------ | ------------------ | ------------------ | ------------------ | ------------------ | | :heavy_check_mark: | :heavy_check_mark: | :heavy_check_mark: | :heavy_check_mark: | :heavy_check_mark: | :heavy_check_mark: | :heavy_check_mark: | --- # Serialization Source: https://docs.apimatic.io/generate-sdks/customize-sdks/codegen-settings/serialization-settings/ Serialization | Code Generation Settings | APIMatic Documentation import Details from '@theme/Details'; import Tabs from '@theme/Tabs'; import TabItem from '@theme/TabItem'; The following CodeGen settings allow you to configure serialization and deserialization of values in APIMatic generated SDKs. ## Array Serialization This setting adds array serialization scheme for primitive types (applicable to form and query params). Allowed values are: `Indexed`, `UnIndexed`, `Plain`, `CSV`, `TSV`, `PSV`. There are different ways of representing variable assignments in these formats: | **Value** | **Details** | | --------- | ----------- | | Indexed | This type of variable assignment includes an index, denoted by square brackets, to indicate which element of an array should be assigned the specified value. For example, `variableName[0]=value1` assigns the value `value1` to the first element of the `variableName` array. | | UnIndexed | This type of variable assignment does not include an index and is used to add a new value to the end of an array. For example, `variableName[]=value1` would append `value1` to the end of the `variableName` array. | | Plain | This type of variable assignment is used for non-array variables and assigns a single value to the variable. Multiple assignments can be separated by `&`. For example, `variableName=value1&variableName=value2` assigns the values `value1` and `value2` to the `variableName` variable. | | CSV | This type of variable assignment is similar to the Plain type, but multiple values are separated by commas without any variable names. For example, `variableName=value1,value2` assigns the values `value1` and `value2` to the `variableName` variable. | | TSV | This type of variable assignment is similar to the CSV type, but the values are separated by tab `\t` character. For example, `variableName=value1\tvalue2` assigns the values `value1` and `value2` to the `variableName` variable. | | PSV | This type of variable assignment is similar to the CSV type, but the values are separated by pipe | character. For example, variableName=value1|value2 assigns the values `value1` and `value2` to the `variableName` variable. | #### Usage To use this feature, you need to specify an `ArraySerialization` value. By default, its value is set to `Indexed`. ```json "info": { ..., "x-codegen-settings": { "ArraySerialization": "Indexed" } } ``` #### Language Support | C# | Java | PHP | Python | Ruby | TS | Go | | ------------------ | ------------------ | ------------------ | ------------------ | ------------------ | ------------------ | ------------------ | | :heavy_check_mark: | :heavy_check_mark: | :heavy_check_mark: | :heavy_check_mark: | :heavy_check_mark: | :heavy_check_mark: | :heavy_check_mark: | ## Enable JSON Pass Through for Any Use this setting to decide whether JSON should be passed through any type in the SDK. #### Usage To use this feature, you need to specify a `Boolean` value. By default, its value is set to `false`. ```json "info": { ..., "x-codegen-settings": { "EnableJsonPassThroughForAny": false } } ``` #### Language Support | C# | Java | PHP | Python | Ruby | TS | Go | | ------------------ | ------------------ | ------------------ | ------------------ | ------------------ | ------------------ | ------------------ | | :heavy_check_mark: | :heavy_check_mark: | :heavy_check_mark: | :heavy_check_mark: | :heavy_check_mark: | :heavy_check_mark: | :x: | #### Change in SDK Configuring this setting has the following effect on the generated SDK:
Value Change
true ```csharp JsonObject body = JsonObject.FromJsonString("{\"key1\":\"val1\",\"key2\":\"val2\"}"); ServerResponse result = await controller.SendSchemaasBodyAsync(body); ```
false (default) ```csharp object body = ApiHelper.JsonDeserialize("{\"key1\":\"val1\",\"key2\":\"val2\"}"); ServerResponse result = await controller.SendSchemaasBodyAsync(body); ```
Value Change
true ```java JsonObject body = JsonObject.fromJsonString("{\"key1\":\"val1\",\"key2\":\"val2\"}"); jsonObjController.sendSchemaasBodyAsync(body).thenAccept(result -> { // TODO success callback handler System.out.println(result); }).exceptionally(exception -> { // TODO failure callback handler exception.printStackTrace(); return null; }); ```
false (default) ```java Object body = ApiHelper.deserialize("{\"key1\":\"val1\",\"key2\":\"val2\"}"); jsonObjController.sendSchemaasBodyAsync(body).thenAccept(result -> { // TODO success callback handler System.out.println(result); }).exceptionally(exception -> { // TODO failure callback handler exception.printStackTrace(); return null; }); ```
Value Change
true ```php $body = '{"key1":"val1","key2":"val2"}'; $result = $jsonObjController->sendSchemaasBody($body); ```
false (default) ```php $body =[ "key1" => "val1", "key2" => "val2" ]; $result = $jsonObjController->sendSchemaasBody($body); ```
Value Change
true ```python def send_schemaas_body(self, body): """ Args: body (dict): This will be sent in body """ # Here the body should be a dictionary type body = {"key1":"val1","key2":"val2"} ```
false (default) ```python def send_schemaas_body(self, body): """ Args: body (object): This will be sent in body """ # Here the body can have any value: body = 'Any Value' ```
Value Change
true ```ruby # Send Schema as Body # @param [Hash] body Required parameter: Example: # @return [ServerResponse] response from the API call def send_schemaas_body(body) // Here body should be a Hash type: body = { 'key1' => 'val1', 'key2' => 'val2' } ```
false (default) ```ruby # Send Schema as Body # @param [Object] body Required parameter: Example: # @return [ServerResponse] response from the API call def send_schemaas_body(body) // Here the body can have any value: body = 'Any Value' ```
Value Change
true ```ts async sendSchemaasBody(body: Record): Promise> // Here the body should be a Record: const body = { 'key1': 'val1', 'key2': 'val2' }; ```
false (default) ```ts async sendSchemaasBody(body: unknown): Promise> // Here the body can have any value: const body = 'Any Value'; ```
--- # User Agent Source: https://docs.apimatic.io/generate-sdks/customize-sdks/codegen-settings/user-agent-settings/ User Agent | Code Generation Settings | APIMatic Documentation import Tabs from '@theme/Tabs'; import TabItem from '@theme/TabItem'; The following settings allow you to provide custom configuration of user agent. ## Enable Global User Agent Use this setting to enable/disable sending the UserAgent field in the user-agent header. :::note Disabling this setting will not prevent the user agent from being sent if it has been explicitly set as an additional header or included in the endpoint parameters as a header parameter. ::: #### Usage To use this feature, you need to specify a `Boolean` value. By default, its value is set to `true`. ```json "info": { ..., "x-codegen-settings": { "EnableGlobalUserAgent": true } } ``` #### Language Support | C# | Java | PHP | Python | Ruby | TS | Go | | ------------------ | ------------------ | ------------------ | ------------------ | ------------------ | ------------------ | ------------------ | | :heavy_check_mark: | :heavy_check_mark: | :heavy_check_mark: | :heavy_check_mark: | :heavy_check_mark: | :heavy_check_mark: | :heavy_check_mark: | ## User Agent This setting adds the user agent to the header of the API calls to identify the sender of the request. You can add the following placeholder parameters in this setting: - `{language}`: Refers to the SDK language name e.g. Java, PHP, etc. - `{version}`: Refers to the [version of API](https://docs.apimatic.io/define-apis/basic-settings/#version) specified in the OpenAPI specification. - `{engine}`: Refers to the runtime engine name. - `{engine-version}`: Refers to the runtime engine version. - `{os-info}`: Refers to the OS where the SDK is being operated. #### Usage To use this feature, you need to specify a `String` value. If no value is provided, the default value

`APIMATIC 3.0` will be used. ```json "info": { ..., "x-codegen-settings": { "UserAgent": "{language} SDK, Version: {version}, on OS {os-info}" } } ``` #### Language Support | C# | Java | PHP | Python | Ruby | TS | Go | | ------------------ | ------------------ | ------------------ | ------------------ | ------------------ | ------------------ | ------------------ | | :heavy_check_mark: | :heavy_check_mark: | :heavy_check_mark: | :heavy_check_mark: | :heavy_check_mark: | :heavy_check_mark: | :heavy_check_mark: | --- # Code Branding Source: https://docs.apimatic.io/generate-sdks/customize-sdks/codegen-settings/code-branding-settings/ Code Branding | Code Generation Settings | APIMatic Documentation import Tabs from '@theme/Tabs'; import TabItem from '@theme/TabItem'; These CodeGen settings allow white-labeling and personalization of SDKs. ## Brand Label This setting is used to specify the company name that the code generator should associate with your SDK. The brand name provided is utilized within the copyright notice included in every SDK package. :::note If you're creating a fully white-labeled SDK where all attribution to APIMatic should be omitted from the source files, this setting isn't applicable as the attribution information is already removed. ::: Configuring this option will add the specified brand label to the header of the generated files. #### Usage To use this feature, you need to specify a `String` value to be used as a label. ```json "info": { ..., "x-codegen-settings": { "BrandLabel": "Tech Corp" } } ``` #### Language Support | C# | Java | PHP | Python | Ruby | TS | Go | | ------------------ | ------------------ | ------------------ | ------------------ | ------------------ | ------------------ | ------------------ | | :heavy_check_mark: | :heavy_check_mark: | :heavy_check_mark: | :heavy_check_mark: | :heavy_check_mark: | :heavy_check_mark: | :heavy_check_mark: | #### Change in SDK This setting controls the appended message that appears at the start of every file.
Value Change
Default ``` csharp ```
Configured ``` csharp ```
Value Change
Default ``` java ```
Configured ``` java ```
Value Change
Default ``` php /* * PetStore * * This file was automatically generated by APIMATIC v3.0 ( https://www.apimatic.io ). */ ```
Configured ``` php /* * PetStore * * This file was automatically generated for Tech Corp by APIMATIC v3.0 ( https://www.apimatic.io ). */ ```
Value Change
Default ``` python """ PetStore This file was automatically generated by APIMATIC v3.0 ( https://www.apimatic.io ). """ ```
Configured ``` python """ PetStore This file was automatically generated for Tech Corp by APIMATIC v3.0 ( https://www.apimatic.io ). """ ```
Value Change
Default ``` ts /** * PetStore * * This file was automatically generated by APIMATIC v3.0 ( https://www.apimatic.io ). */ ```
Configured ``` ts /** * PetStore * * This file was automatically generated for Tech Corp by APIMATIC v3.0 ( https://www.apimatic.io ). */ ```
Value Change
Default ``` go /* Package swaggerpetstore This file was automatically generated by APIMATIC v3.0 ( https://www.apimatic.io ). */ ```
Configured ``` go /* Package swaggerpetstore This file was automatically generated for Tech Corp by APIMATIC v3.0 ( https://www.apimatic.io ). */ ```
## Short Copyright Notice Use this setting to set a copyright notice to prepend to all code files. :::note This setting is only applicable to white labelled SDKs. ::: #### Usage To use this feature, you need to specify a `String` value. If no value is provided, APIMatic CodeGen will use the MIT copyright notice instead. ```json "info": { ..., "x-codegen-settings": { "ShortCopyrightNotice": "Copyright text here..." } } ``` #### Language Support | C# | Java | PHP | Python | Ruby | TS | Go | | ------------------ | ------------------ | ------------------ | ------------------ | ------------------ | ------------------ | ------------------ | | :heavy_check_mark: | :heavy_check_mark: | :heavy_check_mark: | :heavy_check_mark: | :heavy_check_mark: | :heavy_check_mark: | :heavy_check_mark: | --- # SDK Docs Configuration Source: https://docs.apimatic.io/generate-sdks/customize-sdks/codegen-settings/docs-settings/ SDK Docs | Code Generation Settings | APIMatic Documentation import Tabs from '@theme/Tabs'; import TabItem from '@theme/TabItem'; The following settings help you configure SDK docs. ## Disable Docs Use this setting to disable README file generation for SDKs including any other SDK documentation files. #### Usage To use this feature, you need to specify a `Boolean` value. By default, its value is set to `false`. ```json "info": { ..., "x-codegen-settings": { "DisableDocs": false } } ``` #### Language Support | C# | Java | PHP | Python | Ruby | TS | Go | | ------------------ | ------------------ | ------------------ | ------------------ | ------------------ | ------------------ | ------------------ | | :heavy_check_mark: | :heavy_check_mark: | :heavy_check_mark: | :heavy_check_mark: | :heavy_check_mark: | :heavy_check_mark: | :heavy_check_mark: | ## Generate Examples for Optional Fields By default, Docs Generation ignores optional fields when generating examples. Enable this setting to include optional fields during sample value generation in docs. #### Usage To use this feature, you need to specify a `Boolean` value. By default, its value is set to `false`. ```json "info": { ..., "x-codegen-settings": { "GenerateExamplesForOptionalFields": false } } ``` #### Language Support | C# | Java | PHP | Python | Ruby | TS | Go | | ------------------ | ------------------ | ------------------ | ------------------ | ------------------ | ------------------ | ------------------ | | :heavy_check_mark: | :heavy_check_mark: | :heavy_check_mark: | :heavy_check_mark: | :heavy_check_mark: | :heavy_check_mark: | :heavy_check_mark: | ## Is Latest Version In the documentation, we mention the specific version number of the SDK being installed. However, if you require a generic document that doesn't reference a specific version, this setting allows you to transform those specific version references into generic ones. This way, you can avoid having to update the document with each release of the SDK. Enable this setting to hide version number from install commands and package repo links in the docs. #### Usage To use this feature, you need to specify a `Boolean` value. By default, its value is set to `false`. ```json "info": { ..., "x-codegen-settings": { "IsLatestVersion": false } } ``` #### Language Support | C# | Java | PHP | Python | Ruby | TS | Go | | ------------------ | ------------------ | ------------------ | ------------------ | ------------------ | ------------------ | ------------------ | | :heavy_check_mark: | :x: | :heavy_check_mark: | :heavy_check_mark: | :heavy_check_mark: | :heavy_check_mark: | :heavy_check_mark: | #### Change in Docs When package publishing is enabled, the Is Latest Version setting will affect the package installation command mentioned in the README file.
Value Change
true Run the following command from your project directory to install the package from npm: ```typescript npm install container ```
false (default) Run the following command from your project directory to install the package from npm: ```typescript npm install container@2.0.1 ```
## Usage Example Endpoint Use this setting to choose an endpoint to display its full usage example in the README file. You can specify `Description`, `EndpointGroupName`, and `EndpointName`. #### Usage To use this feature, you need to specify a `UsageExampleEndpoint` value as shown below. ```json "info": { ..., "x-codegen-settings": { "UsageExampleEndpoint": { "Description": "Endpoint decsription here", "EndpointGroupName": "Calculator", "EndpointName": "OperationGet" } } } ``` #### Language Support | C# | Java | PHP | Python | Ruby | TS | Go | | ------------------ | ------------------ | ------------------ | ------------------ | ------------------ | ------------------ | ------------------ | | :heavy_check_mark: | :heavy_check_mark: | :heavy_check_mark: | :heavy_check_mark: | :heavy_check_mark: | :heavy_check_mark: | :heavy_check_mark: | #### Change in Docs Configuring this setting adds a section **Make Calls with the API Client** in the *Readme.md* file of all SDKs. This section contains full file code sample for the endpoint configured in this CodeGen setting. ## Sort Resources Enabling this setting sorts resources such as endpoints, endpoint groups, and models in the generated documentation. This applies to both README files generated with SDKs as well as DX portal-based documentation. :::note This setting will override whatever order resources are listed in the OpenAPI specification file. ::: #### Usage To use this feature, you need to specify a `Boolean` value. By default, its value is set to `false`. ```json "info": { ..., "x-codegen-settings": { "SortResources": false } } ``` #### Language Support | C# | Java | PHP | Python | Ruby | TS | Go | | ------------------ | ------------------ | ------------------ | ------------------ | ------------------ | ------------------ | ------------------ | | :heavy_check_mark: | :heavy_check_mark: | :heavy_check_mark: | :heavy_check_mark: | :heavy_check_mark: | :heavy_check_mark: | :heavy_check_mark: | #### Changes in API Docs
Value Change
true ![Sort resources enabled](/images/generate-sdks/codegen-settings/sort-resources-enabled.png)
false (default) ![Sort resources disabled](/images/generate-sdks/codegen-settings/sort-resources-disabled.png)
## Configure Component Sorting This setting provides per-component sorting control for generated SDK documentation. It replaces the single `SortResources` Boolean toggle with a structured configuration object, allowing you to independently sort endpoint groups, endpoints, webhook groups, webhook events, callback groups, callback events, and models. :::note When `ConfigureComponentSorting` is specified, it takes precedence over the `SortResources` setting for the component types it covers. ::: #### Usage To use this feature, you need to specify an object value with the desired sorting configuration. All fields are optional and default to their respective default values if omitted. ```json "info": { ..., "x-codegen-settings": { "ConfigureComponentSorting": { "SortEndpointGroups": true, "EndpointSorting": "HttpMethod", "SortWebhookGroups": true, "SortCallbackGroups": true, "WebhookEventsSorting": "HttpMethod", "CallbackEventsSorting": "HttpMethod", "SortModels": true } } } ``` #### Configuration Details | Field | Type | Description | Default | |---|---|---|---| | `SortEndpointGroups` | `Boolean` | Sort endpoint groups alphabetically | `false` | | `EndpointSorting` | `String` | Sort endpoints: `"None"`, `"Alphabetical"`, or `"HttpMethod"` | `"None"` | | `SortWebhookGroups` | `Boolean` | Sort webhook groups alphabetically | `false` | | `WebhookEventsSorting` | `String` | Sort webhook events: `"None"`, `"Alphabetical"`, or `"HttpMethod"` | `"None"` | | `SortCallbackGroups` | `Boolean` | Sort callback groups alphabetically | `false` | | `CallbackEventsSorting` | `String` | Sort callback events: `"None"`, `"Alphabetical"`, or `"HttpMethod"` | `"None"` | | `SortModels` | `Boolean` | Sort models alphabetically | `false` | For the `EndpointSorting`, `WebhookEventsSorting`, and `CallbackEventsSorting` fields, the following values are supported: - `"None"`: No sorting applied (preserves the order from the API specification) - `"Alphabetical"`: Sort alphabetically by name - `"HttpMethod"`: Sort by HTTP method (GET, POST, PUT, DELETE, etc.), then alphabetically #### Language Support | C# | Java | PHP | Python | Ruby | TS | Go | | ------------------ | ------------------ | ------------------ | ------------------ | ------------------ | ------------------ | ------------------ | | :heavy_check_mark: | :heavy_check_mark: | :heavy_check_mark: | :heavy_check_mark: | :heavy_check_mark: | :heavy_check_mark: | :heavy_check_mark: | #### Changes in API Docs
Value Change
Configured (see Usage Details) ![Resources before sorting](/images/changelog/ConfigureComponentSorting/after_sorting.png)
(default) ![Resources before sorting](/images/changelog/ConfigureComponentSorting/before_sorting.png)
--- # Exception Source: https://docs.apimatic.io/generate-sdks/customize-sdks/codegen-settings/exception-settings/ Exception | Code Generation Settings | APIMatic Documentation import Tabs from '@theme/Tabs'; import TabItem from '@theme/TabItem'; These CodeGen configurations allow you to control exceptions thrown in APIMatic generated SDKs. ## Error Templates This setting allows the configuration of error messages using custom templates that can be provided for overriding default exception messages thrown in SDKs for error responses. #### Usage To use this feature, you need to specify a `Map` value, where keys would be error codes or ranges and values would be template error messages. By default, its value is set to `null`. ```json "info": { ... "x-codegen-settings": { "ErrorTemplates": { "401": "Failed to authorize, Code: {$statusCode}.", "5XX": "Internal server error, Code: {$statusCode}.", "0": "An error occurred. Code: {$statusCode}" } } } ``` #### Language Support | C# | Java | PHP | Python | Ruby | TS | Go | | ------------------ | ------------------ | ------------------ | ------------------ | ------------------ | ------------------ | ------------------ | | :heavy_check_mark: | :heavy_check_mark: | :heavy_check_mark: | :heavy_check_mark: | :heavy_check_mark: | :heavy_check_mark: | :heavy_check_mark: | #### Change in SDK Configuring this setting will affect the error messages thrown on error codes for all SDKs. This behavior is documented in detail [here](/generate-sdks/sdk-features/dynamic-error-messages) ## Resolve Exception Property Collisions in CSharp This setting controls how the .NET SDK generator handles naming conflicts in generated exception models that overlap with `System.Exception` members. When enabled, the generator resolves conflicts by post fixing properties instead of overriding base exception members. Conflicting properties include: `Message`, `ResponseCode`, `StackTrace`, `Source`, `Data`, `HelpLink`, `HttpContext`, `InnerException`, `HResult`, `TargetSite`. **Impact** - Conflicting exception property names may be changed (for example: `Message` → `MessageProperty`). - Existing code that accesses the original property names may need to be updated. - Prevents hiding base exception members and eliminates related compiler warnings. #### Usage To use this feature, you need to specify a `Boolean` value. By default, its value is set to `false`. ```json "info": { ..., "x-codegen-settings": { "CSharpResolveExceptionPropertyCollisions": true } } ``` #### Language Support This setting only applies to **.NET SDKs**. #### Change in SDK Configuring this setting has the following effect on the generated SDK:
Value Change
true ```csharp /// /// Error. /// public class Error : ApiException { /// /// The human-readable, unique name of the error. /// [JsonProperty("name")] public string Name { get; set; } /// /// The message that describes the error. /// [JsonProperty("message")] public string MessageProperty { get; set; } ... } ```
false (default) ```csharp /// /// Error. /// public class Error : ApiException { /// /// The human-readable, unique name of the error. /// [JsonProperty("name")] public string Name { get; set; } /// /// The message that describes the error. /// [JsonProperty("message")] public new string Message { get; set; } ... } ```
--- # Miscellaneous Source: https://docs.apimatic.io/generate-sdks/customize-sdks/codegen-settings/miscellaneous-settings/ Miscellaneous | Code Generation Settings | APIMatic Documentation import Tabs from '@theme/Tabs'; import TabItem from '@theme/TabItem'; This section contains a collection of code generation settings that don't fit into any specific category but are still crucial for fine-tuning and customizing your developer experience. ## Disable Linting APIMatic-generated SDKs are designed to successfully pass lint tests. These SDK packages include the settings and commands necessary for running lint tests, allowing you to independently verify our claim. But you also have the option to disable this feature. This setting allows you to disable generation of the files and commands that are used for lint testing. #### Usage To use this feature, you need to specify a `Boolean` value. By default, its value is set to `false`. ```json "info": { ..., "x-codegen-settings": { "DisableLinting": false } } ``` #### Language Support | C# | Java | PHP | Python | Ruby | TS | Go | | ------------------ | ------------------ | ------------------ | ------------------ | ------------------ | ------------------ | ------------------ | | :x: | :x: | :heavy_check_mark: | :x: | :heavy_check_mark: | :heavy_check_mark: | :x: | ## Disable Multiple Auth :::caution Disabling multiple authentication isn't the recommended approach as it only applies the first security schema from your OpenAPI specification file to your SDKs and DOCs. ::: APIMatic-generated SDKs are equipped with multiple authentication support. If you happen to have multiple security schemes defined in your API specifications and used it to generate SDKs before the release of the [Multiple Authentication Schemes feature](/changelog/introducing-multiple-authentication/), you might find breaking changes in your SDKs if you try to regenerate after the release of the feature. This setting allows you to disable multiple authentication support. So you can continue using only the first security scheme from your API specification. However, we recommend you should stick with the newly improved multiple-authentication flow of your SDKs because this flag will be deprecated eventually. #### Usage To disable this feature, specify a `Boolean` value. By default, its value is set to `false`. ```json "info": { ..., "x-codegen-settings": { "DisableMultipleAuth": true } } ``` #### Language Support | C# | Java | PHP | Python | Ruby | TS | Go | | ------------------ | ------------------ | ------------------ | ------------------ | ------------------ | ------------------ | ------------------ | | :heavy_check_mark: | :heavy_check_mark: | :heavy_check_mark: | :heavy_check_mark: | :heavy_check_mark: | :heavy_check_mark: | :heavy_check_mark: | ## Add Single Auth Deprecated Code If your API definition uses a single security scheme, then the APIMatic generated SDKs will contain the deprecated code to set up a client with authentication credentials. Since, our SDKs are now equipped with an improved flow to set authentication credentials for your client. The deprecated older flow is only kept in the SDKs to avoid breaking changes for our existing customers. So, if you are new to the APIMatic or looking to exclude the deprecated code from your SDKs, this setting allows you to remove all the deprecated code related to single authentication credentials setup from the SDKs. #### Usage To remove the deprecated code, you need to specify a `Boolean` value. By default, its value is set to `true`. ```json "info": { ..., "x-codegen-settings": { "AddSingleAuthDeprecatedCode": true } } ``` #### Language Support | C# | Java | PHP | Python | Ruby | TS | Go | | ------------------ | ------------------ | ------------------ | ------------------ | ------------------ | ------------------ | ------------------ | | :heavy_check_mark: | :heavy_check_mark: | :heavy_check_mark: | :heavy_check_mark: | :heavy_check_mark: | :heavy_check_mark: | :heavy_minus_sign: | :::note The symbol :heavy_minus_sign: shows that the setting isn't applicable. ::: #### Change in SDK Configuring this setting has the following effect on the generated SDK:
Value Change
true (default) ```ts const client = new Client({ basicAuthUsername: "Username", // Deprecated basicAuthPassword: "Password", // Deprecated basicAuthCredentials: { username: "Username", password: "Password", }, }); ```
false ```ts const client = new Client({ basicAuthCredentials: { username: "Username", password: "Password", }, }); ```
Value Change
true (default) ```java SdkClient client = new SdkClient.Builder() .basicAuthCredentials("Username", "Password") // Deprecated .basicAuthCredentials( new BasicAuthModel.Builder( "Username", "Password" ) .build()) .build(); ```
false ```java SdkClient client = new SdkClient.Builder() .basicAuthCredentials( new BasicAuthModel.Builder( "Username", "Password" ) .build()) .build(); ```
Value Change
true (default) ```python client = SdkClient( basic_auth_user_name='BasicAuthUserName', # Deprecated basic_auth_password='BasicAuthPassword', # Deprecated basic_auth_credentials=BasicAuthCredentials( username='Username', password='Password' ) ) ```
false ```python client = SdkClient( basic_auth_credentials=BasicAuthCredentials( username='Username', password='Password' ) ) ```
Value Change
true (default) ```php $client = SdkClientBuilder::init() ->basicAuthUserName('BasicAuthUserName') // Deprecated ->basicAuthPassword('BasicAuthPassword') // Deprecated ->basicAuthCredentials( BasicAuthCredentialsBuilder::init( 'Username', 'Password' ) ) ->build(); ```
false ```php $client = SdkClientBuilder::init() ->basicAuthCredentials( BasicAuthCredentialsBuilder::init( 'Username', 'Password' ) ) ->build(); ```
Value Change
true (default) ```csharp SdkClient client = new SdkClient.Builder() .BasicAuthCredentials("BasicAuthUserName", "BasicAuthPassword") // Deprecated .BasicAuthCredentials( new BasicAuthModel.Builder( "Username", "Password" ) .Build()) .Build(); ```
false ```csharp SdkClient client = new SdkClient.Builder() .BasicAuthCredentials( new BasicAuthModel.Builder( "Username", "Password" ) .Build()) .Build(); ```
Value Change
true (default) ```ruby client = Sdk::Client.new( basic_auth_user_name: 'BasicAuthUserName', # Deprecated basic_auth_password: 'BasicAuthPassword', # Deprecated basic_auth_credentials: BasicAuthCredentials.new( username: 'Username', password: 'Password' ) ) ```
false ```ruby client = Sdk::Client.new( basic_auth_credentials: BasicAuthCredentials.new( username: 'Username', password: 'Password' ) ) ```
## Use Java Properties Config You can initialize a Java SDK to load SDK configuration directly from the properties file. To use this feature, set this setting to `true`. :::note This is an experimental setting so it might not work in all cases. Please [contact our support](https://www.apimatic.io/contact/) if you run into an issue. ::: #### Usage To use this feature, you need to specify a `Boolean` type. By default, its value is set to `false`. ```json "info": { ..., "x-codegen-settings": { "JavaUsePropertiesConfig": false } } ``` #### Language Support This setting only applies to **Java SDKs**. ## License Text This setting sets the license text to use in place of the standard MIT license. This text will go in the license file that's shipped with the SDK package. #### Usage To use this feature, you need to specify a `String` value. If no value is provided, APIMatic Code Generator will add the standard MIT license inside the SDK. ```json "info": { ..., "x-codegen-settings": { "LicenseText": "License text here..." } } ``` #### Language Support | C# | Java | PHP | Python | Ruby | TS | Go | | ------------------ | ------------------ | ------------------ | ------------------ | ------------------ | ------------------ | ------------------ | | :heavy_check_mark: | :heavy_check_mark: | :heavy_check_mark: | :heavy_check_mark: | :heavy_check_mark: | :heavy_check_mark: | :x: | ## Store Timezone Information Enable this setting to store timezone information with date-time types. If disabled, SDKs will attempt to convert all date-time values to UTC. #### Usage To use this feature, you need to specify a `Boolean` value. By default, its value is set to `false`. ```json "info": { ..., "x-codegen-settings": { "StoreTimezoneInformation": false } } ``` #### Language Support | C# | Java | PHP | Python | Ruby | TS | Go | | ------------------ | ------------------ | ------------------ | ------------------ | ------------------ | ------------------ | ------------------ | | :heavy_check_mark: | :heavy_check_mark: | :x: | :x: | :x: | :x: | :x: | #### Change in SDK Configuring this setting has the following effect on the generated SDK:
Value Change
true ```csharp // highlight-next-line DateTimeOffset datetime = DateTime.ParseExact( "2023-03-13T12:52:32.123Z", "yyyy'-'MM'-'dd'T'HH':'mm':'ss.FFFFFFFK", provider: CultureInfo.InvariantCulture, DateTimeStyles.RoundtripKind); ```
false (default) ``` csharp // highlight-next-line DateTime datetime = DateTime.ParseExact( "2023-03-13T12:52:32.123Z", "yyyy'-'MM'-'dd'T'HH':'mm':'ss.FFFFFFFK", provider: CultureInfo.InvariantCulture, DateTimeStyles.RoundtripKind); ```
Value Change
true ```java ZonedDateTime datetime = DateTimeHelper.fromRfc8601DateTime("2023-03-13T12:52:32.123Z"); ```
false (default) ```java LocalDateTime datetime = DateTimeHelper.fromRfc8601DateTime("2023-03-13T12:52:32.123Z"); ```
## Apply Customizations This setting sets customer-specific customizations to be applied during SDK and documentation generation. Each customization is a customer-specific key. It triggers specific customization in CodeGen and dependent projects. These keys are provided by the [APIMatic support team](mailto:support@apimatic.io) where necessary. #### Usage To use this feature, you need to specify a set of keys in a list of string `List`. ```json "info": { ..., "x-codegen-settings": { "ApplyCustomizations": [ "custom-abc", "custom-xyz" ] } } ``` #### Language Support | C# | Java | PHP | Python | Ruby | TS | Go | | ------------------ | ------------------ | ------------------ | ------------------ | ------------------ | ------------------ | ------------------ | | :heavy_check_mark: | :heavy_check_mark: | :heavy_check_mark: | :heavy_check_mark: | :heavy_check_mark: | :heavy_check_mark: | :x: | ## Enforce Standardized Casing Use this setting to enforce standardized casing during SDK and docs generation. #### Usage To use this feature, you need to specify a `Boolean` value. By default, its value is set to `false`. ```json "info": { ..., "x-codegen-settings": { "EnforceStandardizedCasing": false } } ``` #### Language Support | C# | Java | PHP | Python | Ruby | TS | Go | | ------------------ | ------------------ | ------------------ | ------------------ | ------------------ | ------------------ | ------------------ | | :heavy_check_mark: | :heavy_check_mark: | :heavy_check_mark: | :heavy_check_mark: | :heavy_check_mark: | :heavy_check_mark: | :heavy_check_mark: | --- # SDK Publishing Overview Source: https://docs.apimatic.io/generate-sdks/sdk-publishing/sdk-publishing-overview/ The next step after [generating SDKs](/generate-sdks/overview-sdks/) is distributing them to Developers. The most convenient method for developers to consume third-party libraries in their applications is via Package Managers like npm or pip. This is why it’s important to make your SDKs available on popular Package Managers. To ensure your library can be easily accessed through a Package Manager, you'll need to publish it to a Package Registry or Repository. These registries act as centralized databases that Package Managers rely on to locate and retrieve libraries. For instance, if you're using npm as your Package Manager, your library needs to be published to the npm registry. Publishing a package to a Package Registry usually involves building the source code and using a Command Line tool to push it to a Package Registry. This requires knowledge of the build process for the desired language as well as knowledge of the publishing process for the relevant Package Registry. If you are maintaining SDKs in multiple programming languages, this can become a challenge. APIMatic makes the process of publishing SDKs trivial by providing an interface that takes care of generating, building, and publishing SDKs so you don't need any platform specific knowledge to distribute your SDKs. APIMatic also publishes your SDKs to GitHub so developers can track code changes and communicate issues to you. ## How Publishing Works Whether you're shipping packages to a Package Registry or pushing source code to GitHub, publishing an SDK with APIMatic takes the same two steps: 1. **Set it up once in the Publishing Center.** Create a *publishing profile* that holds your package and source code metadata, and add the credentials APIMatic needs for each package registry and for GitHub. See [Setup Publishing Profiles](/generate-sdks/sdk-publishing/setup-publishing-profiles). 2. **Publish from the CLI.** Once the profile exists, run [`apimatic sdk publish`](/apimatic-cli/commands/#publish-an-sdk) from your terminal or CI/CD pipeline every time you want to ship a version. See [Publish Via CLI](/generate-sdks/sdk-publishing/publish-via-cli). The **Publishing Center** in the dashboard is where you manage publishing profiles, manage credentials, and monitor publishing logs. The publishing runs themselves are triggered through the CLI, which makes them straightforward to automate in a CI/CD pipeline. The setup process is trivial and can be completed in 15 minutes for all programming languages supported by APIMatic. :::note Looking for the old dashboard flow? The previous, fully UI-driven walkthroughs are preserved at [SDK Publishing Tutorial (Legacy Dashboard)](/generate-sdks/sdk-publishing/configure-sdk-publishing-legacy-dashboard) for package publishing and [Publishing SDKs to GitHub (Legacy Dashboard)](/generate-sdks/publish-sdk-to-github-legacy-dashboard) for source code publishing. ::: ## Supported Package Registries The following Package Registries are currently supported: - npm - Packagist - RubyGems - PyPI - NuGet - Maven Central --- # Setup Publishing Profiles Source: https://docs.apimatic.io/generate-sdks/sdk-publishing/setup-publishing-profiles/ Setting up a publishing profile is the first of the two steps in [SDK publishing](/generate-sdks/sdk-publishing/sdk-publishing-overview). It's a one-time setup in the **Publishing Center**: you describe your packages once, add the credentials for the platforms you publish to, and then [publish from the CLI](/generate-sdks/sdk-publishing/publish-via-cli) as often as you like. The same profile covers both publishing targets, so you only need to do this once whether you publish packages to a registry, push source code to GitHub, or both. :::note Looking for the old dashboard flow? The previous, fully UI-driven walkthroughs are preserved at [SDK Publishing Tutorial (Legacy Dashboard)](/generate-sdks/sdk-publishing/configure-sdk-publishing-legacy-dashboard) for package publishing and [Publishing SDKs to GitHub (Legacy Dashboard)](/generate-sdks/publish-sdk-to-github-legacy-dashboard) for source code publishing. ::: ## Open the Publishing Center - On the [APIMatic dashboard](https://app.apimatic.io), click **Publishing Center** in the navigation menu on the left, then click **SDK Publishing Settings**. This takes you to a wizard that walks you through setting up a publishing profile for your API. ![SDK Publishing Settings under Publishing Center](/images/sdk-publishing/new-dashboard/publishing-center-sidebar.png) - Where you land depends on whether you've set up publishing before. The first time, you go straight to the publishing profile wizard covered below. Once you have at least one publishing profile, you land on the Publishing Center instead, and you can reopen the wizard from **Publish Settings** in the sidebar. ## What a Publishing Profile Holds The following information is required to publish SDKs: 1. **Credentials** for each platform you publish to. Package registry credentials must have permission to create and update packages. GitHub credentials must have permission to create and update repositories. 2. **Package configurations** that include metadata such as the name of the package, a brief description of what it does, and its authors. APIMatic aggregates this information into an entity called a **Publishing Profile**. ## Create Reusable Configurations for Testing and Release SDK Versions You may want to do a test run before you announce your SDK release to the world. This could involve publishing your package under a different name, under a different organization, or using a test account. *Publishing Profiles* allow you to do this by creating reusable configurations for test and release versions of your SDKs. This makes release management convenient; from your list of saved configurations, pass the profile ID of the correct configuration to the CLI depending on whether you want to publish a test or release version of your SDK. ## Create a Publishing Profile Follow the steps listed below to create a Publishing Profile: - Provide a descriptive name for your Publishing Profile and click **Save & Next**. ![Create a new publishing profile](/images/sdk-publishing/create-new-publishing-profile.png) - Provide *General Information* about your SDK Packages and click **Save & Next**. The information you provide here is used to pre-populate metadata about each programming language you want to publish SDKs for. ![General information about publishing profile](/images/sdk-publishing/general-info-publishing-profile.png) - Review and update *Package Settings* and *Source Code Settings* for each language. You can skip any languages that you don't want to include; you can set these up later. Some fields are pre-filled based on the *General Information* you provided in the previous step. You also need to provide credentials for package registries and GitHub so APIMatic can publish your SDKs to them. More on credentials in the next section. ![Setup SDK package settings](/images/sdk-publishing/setup-sdk-package-settings.png) ![Setup SDK source settings](/images/github/source-settings.png) - Click **Save** to save these configurations. :::note Publishing source code only If you only want to publish the SDK source to GitHub, *Disable Package Publishing* to skip publishing to a package registry, and fill in the *Source Code Settings* alone. ::: ## Manage Integrations with Package Registries and GitHub APIMatic integrates with popular package registries and GitHub so you can publish SDKs conveniently. Each platform requires a distinct set of credentials for authentication and authorization, which typically includes usernames and API keys. You can create different sets of credentials for each platform, which lets you publish the same SDKs through different accounts (for testing or release) by choosing the appropriate credentials. Once created, credentials can be reused across the platform to publish all your SDKs. ### Create Package Registry Credentials - To create credentials, navigate to the **Credentials** menu item from the sidebar. ![Credentials menu](/images/sdk-publishing/credentials-menu.png) - Click the **+ Add Credential** button and follow the provided instructions to create the required credentials for your desired platform. ![Create new credentials](/images/sdk-publishing/create-new-credentials.png) ### Create a GitHub Credential - Navigate to the **Credentials** menu item from the sidebar and select git. - Click the **Add Credential** button and follow the provided instructions to create the required GitHub credential. Authenticate with GitHub, and APIMatic can then push SDKs to either an existing repository or a new repository of your choice. ![Create new GitHub credentials](/images/github/git-credentials.png) :::note Frequently Asked Questions **What branch does APIMatic publish to?**
When you publish your SDK to GitHub with APIMatic, you can choose any name you like for the branch. **Can I make changes to the code in my GitHub repository?**
Yes. APIMatic purges existing files before committing an updated SDK, so anything you commit manually is overwritten on the next publish. To keep your changes, use [custom code injection](/generate-sdks/customize-sdks/custom-code-injection/): you save your customizations with the APIMatic CLI, and APIMatic reapplies them each time the SDK is regenerated. This covers new files as well as edits inside generated files. ::: ## Next Step With the profile and its credentials saved, you're ready to ship a version. See [Publish Via CLI](/generate-sdks/sdk-publishing/publish-via-cli). --- # Publish Via CLI Source: https://docs.apimatic.io/generate-sdks/sdk-publishing/publish-via-cli/ Publishing is the second of the two steps in [SDK publishing](/generate-sdks/sdk-publishing/sdk-publishing-overview). Once a [publishing profile](/generate-sdks/sdk-publishing/setup-publishing-profiles) and its credentials are in place, every release is published from your terminal with the [APIMatic CLI](/apimatic-cli/intro-and-install). This is also what you wire into a CI/CD workflow so that every release publishes the same way. :::note Looking for the old dashboard flow? The previous, fully UI-driven walkthroughs are preserved at [SDK Publishing Tutorial (Legacy Dashboard)](/generate-sdks/sdk-publishing/configure-sdk-publishing-legacy-dashboard) for package publishing and [Publishing SDKs to GitHub (Legacy Dashboard)](/generate-sdks/publish-sdk-to-github-legacy-dashboard) for source code publishing. ::: ## Before You Start - [Install the APIMatic CLI](/apimatic-cli/intro-and-install) and authenticate with your APIMatic account. - Create a [publishing profile](/generate-sdks/sdk-publishing/setup-publishing-profiles) with the credentials for the platforms you publish to. ## Find Your Profile ID Run the following command to list all publishing profiles associated with your account and retrieve the profile ID: ```bash apimatic publishing profile list ``` The output lists each profile's name, ID, and enabled languages. ## Publish an SDK Run the following without any flags for a step-by-step interactive experience that prompts you for each value: ```bash apimatic sdk publish ``` ## Publishing in CI/CD Use the `sdk publish` command with your profile ID, target language, version, and publish type. The version must follow the semantic version format `MAJOR.MINOR.PATCH`, for example `1.0.1`. ### Publish to a Package Registry Pass `--publish-type=package` to build the SDK and push it to the package registry configured in your publishing profile: ```bash apimatic sdk publish --profile-id=a1b2c3d4e5f6a1b2c3d4e5f6 --language=typescript --version=1.0.0 --publish-type=package ``` ### Publish to GitHub Pass `--publish-type=sourcecode` to push the generated SDK to the GitHub repository configured in your publishing profile. The version is also used to create a tag in your repository: ```bash apimatic sdk publish --profile-id=a1b2c3d4e5f6a1b2c3d4e5f6 --language=typescript --version=1.0.0 --publish-type=sourcecode ``` ### Publish to Both Pass `--publish-type` twice to publish to a package registry and GitHub in a single command: ```bash apimatic sdk publish --profile-id=a1b2c3d4e5f6a1b2c3d4e5f6 --language=typescript --version=1.0.0 --publish-type=package --publish-type=sourcecode ``` ### Dry Run Use `--dry-run` to only generate the SDK locally and review the output before publishing: ```bash apimatic sdk publish --dry-run --profile-id=a1b2c3d4e5f6a1b2c3d4e5f6 --language=python --version=1.0.0 --publish-type=package ``` For the full list of flags and options, see [Publish an SDK](/apimatic-cli/commands/#publish-an-sdk). ## Monitor Publishing Runs Publishing can take a few minutes. While the CLI reports progress in your terminal, the Publishing Center in the dashboard keeps the record of every publishing run. - You can track the publishing status of each individual SDK while it's being published. The status is updated dynamically as publishing progresses. ![Track publishing status](/images/sdk-publishing/track-publishing-status.png) - After publishing completes, the status of all initiated publishing attempts is updated to reflect either success or failure. ![SDK publishing completed](/images/sdk-publishing/sdk-publishing-completed.png) If publishing succeeds, the Actions column links you to the result: the **Package** button opens the published package on the relevant package registry, and the **Source** button opens the published SDK on GitHub. The Actions column also contains a *Logs* button, which lets you view the publishing logs listing the commands that were executed to publish your SDKs along with their output. ![View published SDK on package manager](/images/sdk-publishing/published-sdk-on-package-manager.png) ![View published SDK on GitHub](/images/github/deployed-github.png) --- # Consume SDK via Project Reference Source: https://docs.apimatic.io/generate-sdks/consume-sdk-through-project-reference/ import Tabs from '@theme/Tabs'; import TabItem from '@theme/TabItem'; Follow the steps mentioned below to use SDK as a project reference. **Installation:** The following section explains how to use a C# client library in a new project. :::note This section explains how to consume an SDK in **Visual Studio 2022**. ::: - To start a new project, right click on the current solution from the solution explorer and choose **Add** -> **New Project**. ![Add a new project in Visual Studio](/images/consume-sdk/create-new-csharp-project.png) - Next, choose **Console Application**. ![Create a new Console Application in Visual Studio](/images/consume-sdk/select-console-csharp-app.png) - Provide **TestConsoleProject** as the project name and click on the **Next** button. ![Create test console project](/images/consume-sdk/test-console-csharp-project.png) - Select the target framework for your console application and click on the **Create** button. ![Select target framework](/images/consume-sdk/select-csharp-framework.png) - The new console project is the entry point for the execution. This requires you to set this new *TestConsoleProject* as the start-up project. To do this, right-click on the *TestConsoleProject* and choose **Set as StartUp Project** form the context menu. ![Adding a project reference](/images/consume-sdk/set-as-startup-csharp-project.png) - In order to use the generated library in the new project, first you need to add a project reference to the *TestConsoleProject*. Right click on the **Dependencies** node in the solution explorer and click on **Add Project Reference...**. ![Adding a project reference](/images/consume-sdk/add-project-reference-csharp.png) - On the window displayed, check the client project checkbox and click **OK**. ![Creating a project reference](/images/consume-sdk/add-apimatic-client-library-reference-csharp.png) Once the `TestConsoleProject` is created, a file named *Program.cs* will be visible in the solution explorer with an empty `Main` method. Here, you can add code to initialize the client library and acquire the instance of a Controller class. ![Adding a project reference](/images/consume-sdk/write-csharp-client-code.png) **Test the SDK:** The generated SDK also contains one or more tests in the *Tests* project. In order to invoke these test cases, you need `NUnit 3.0 Test Adapter Extension` for Visual Studio. Once the SDK is complied, the test cases should appear in the *Test Explorer* window. Here, you can click **Run All** to execute these test cases. The generated code uses a few Maven dependencies that are already added in the *pom.xml* file and will be installed automatically. :::note The following section explains how to consume a Java SDK in **Eclipse**. ::: **Installation:** The following section explains how to use the Java client library in a new project. - To start a new project, go to the menu command **File** > **New** > **Project**. ![Add a new project in Eclipse](/images/consume-sdk/create-new-java-project.png) - Next, choose **Maven** > **Maven Project** and click **Next**. ![Create a new Maven Project - Step 1](/images/consume-sdk/select-maven-java-project.png) - Here, make sure to use the current workspace by choosing **Use default Workspace location** and click **Next**. ![Create a new Maven Project - Step 2](/images/consume-sdk/use-default-java-workspace.png) - Select the **quick start** project type to create a simple project with an existing class and a `main` method. To do this, choose **maven-archetype-quickstart** item from the list and click **Next**. ![Create a new Maven Project - Step 3](/images/consume-sdk/select-apache-maven-quickstart-project.png) - Lastly, provide a **Group Id** and **Artifact Id** and click **Finish**. ![Create a new Maven Project - Step 4](/images/consume-sdk/java-project-groupid-and-artifactid.png) - The created Maven project manages its dependencies using its *pom.xml* file. In order to add a dependency on the Java client library, open the *pom.xml* file through *Package Explorer*. Here, switch to the **Dependencies** tab and click the **Add** button. ![Adding dependency to the client library - Step 1](/images/consume-sdk/java-pom-dependencies.png) - The **Add** button opens a dialog where you need to specify the details of your client library in `Group Id`, `Artifact Id` and `Version` fields. Add these details and click **OK**. Save the *pom.xml* file. ![Adding dependency to the client library - Step 2](/images/consume-sdk/add-new-java-dependencies.png) Once the console app is created, a file named *App.java* will be visible in the *Package Explorer* with a `main` method. Here, you can add code to initialize the client library and instantiate a *Controller* class. **Test the SDK:** The generated code and the server can be tested using automatically generated test cases. `JUnit` is used as the testing framework and test runner. To run these tests in Eclipse, do the following: - Select the project from the package explorer. - Go to **Run** -> **Run as** -> **JUnit Test** or use **Alt + Shift + X** followed by **T** to run the Tests. **Installation:** :::note The following section explains how to use a Python SDK in **PyCharm**. ::: - Open up a Python IDE like *PyCharm*. ![Open project in PyCharm - Step 1](/images/consume-sdk/open-project-pycharm-python.png) - Click on **Open** in PyCharm to browse to your generated SDK directory and then click **OK**. ![Open project in PyCharm - Step 2](/images/consume-sdk/browse-project-python.png) - The project files will be displayed in the side bar as follows: ![Open project in PyCharm - Step 3](/images/consume-sdk/python-project.png) - Create a new directory by right clicking on the solution name and name this directory as *test*. ![Add a new project in PyCharm - Step 1](/images/consume-sdk/add-new-project-python.png) - Add a python file to this project and name it *testSDK*. ![Add a new project in PyCharm - Step 3](/images/consume-sdk/add-new-file-python.png) - In your python file, you will be asked to import the generated python library using the following code lines: ```python from apimatic.apimaticc_client import ApimaticClient ``` ![Add a new project in PyCharm - Step 5](/images/consume-sdk/import-generated-library-python.png) After this you can write code to instantiate an API client object, get a controller object and make API calls. - To run the file within your test project, right click on your Python file inside your Test project and click on **Run**. ![Run Test Project - Step 1](/images/consume-sdk/run-test-project-python.png) **Test the SDK:** You can test the generated SDK and the server with test cases. `unittest` is used as the testing framework and `pytest` is used as the test runner. You can run the tests as follows: - Navigate to the root directory of the SDK and run the following commands: ``` pip install -r test-requirements.txt ``` ``` pytest ``` **Installation:** :::note The following section explains how to use an APIMatic generated ruby gem in a new Rails project using **RubyMine™**. ::: - Close any existing projects in *RubyMine™* by selecting **File** -> **Close Project**. Next, click on **Create New Project** to create a new project from scratch. ![Create a new project in RubyMine - Step 1](/images/consume-sdk/create-new-project-ruby.png) - Next, provide *TestApp* as the project name, choose *Rails Application* as the project type, and make sure that the correct Ruby SDK is being used (>= 2.6 and < 3.1) and click **OK**. ![Create a new Rails Application in RubyMine - Step 2](/images/consume-sdk/test-rails-app-ruby.png) - In order to use the generated gem in the new project, you need to add a gem reference. Locate the *Gemfile* in the Project Explorer window under the *TestApp* project node. The file contains references to all gems being used in the project. Here, add the reference to the library gem. ```ruby gem 'apimatic_calculator', '1.1.0' ``` ![Add new reference to the Gemfile](/images/consume-sdk/add-reference-to-library-gem-ruby.png) - Once the **TestApp** project is created, a folder named *controllers* will be visible in the *Project Explorer* under the following path: *TestApp* > *app* > *controllers*. Right click on this folder and select **New** -> **Run Rails Generator...**. ![Run Rails Generator on Controllers Folder](/images/consume-sdk/run-rails-generator-ruby.png) - This opens a window where the generator names are displayed. Here, select the **controller** template. ![Create a new Controller](/images/consume-sdk/select-controller-template-ruby.png) - Next, add a **Controller name** and included **Actions**. Click **OK**. ![Add a new Controller](/images/consume-sdk/add-controller-name-ruby.png) - A new controller class named `HelloController` will be created in a file named *hello_controller.rb* containing a method named `Index`. In this method, add code for initialization and a sample for its usage. ![Initialize the library](/images/consume-sdk/initialize-library-ruby.png) **Test the SDK:** To run the automatically generated tests, navigate to the root directory of the SDK in your terminal and execute the following command: ``` rake ``` **Installation:** :::note This section explains how to consume a PHP SDK in **PhpStorm**. ::: - Open an IDE for PHP like *PhpStorm*. ![Open project in PHPStorm - Step 1](/images/consume-sdk/create-new-project-php.png) - Click on **Open** in PhpStorm to browse to your generated SDK directory and then click **OK**. ![Open project in PHPStorm - Step 2](/images/consume-sdk/open-project-php.png) - Create a new directory by right clicking on the solution name. ![Add a new project in PHPStorm - Step 1](/images/consume-sdk/create-new-directory-php.png) - Name this directory as *test*. ![Add a new project in PHPStorm - Step 2](/images/consume-sdk/test-directory-php.png) - Add a PHP file to this project and name it *testSDK*. ![Add a new project in PHPStorm - Step 3](/images/consume-sdk/add-test-file-php.png) - Depending on your project setup, you might need to include composer's autoloader in your PHP code to enable auto loading of classes. ```php require_once "vendor/autoload.php"; ``` :::note It is important that the path inside `require_once` correctly points to the file *autoload.php* inside the vendor directory created during dependency installations. ![Add a new project in PHPStorm - Step 5](/images/consume-sdk/include-composer-autoload-php.png) ::: After this you can add code to initialize the client library and acquire the instance of a Controller class. To run your project you must set the *Interpreter* for your project. This *Interpreter* is the PHP engine installed on your computer. - Open **Settings** from **File** menu. ![Run Test Project - Step 1](/images/consume-sdk/open-project-settings-php.png) - Select **PHP** from within **Languages & Frameworks**. Browse for Interpreters near the *Interpreter* option and choose your interpreter. ![Run Test Project - Step 3](/images/consume-sdk/browse-interpreters-php.png) - Once the interpreter is selected, click **OK**. ![Run Test Project - Step 4](/images/consume-sdk/choose-interpreter-php.png) - To run your project, right click on your PHP file inside your Test project and click on **Run**. ![Run Test Project - Step 5](/images/consume-sdk/run-test-project-php.png) **Test the SDK:** Unit tests in this SDK can be run using `PHPUnit`. - First install the dependencies using composer including the `require-dev` dependencies. - Run the following command from terminal to execute tests. ```bash vendor\bin\phpunit --verbose ``` - If you have installed PHPUnit globally, run tests using the following command instead. ```bash phpunit --verbose ``` You can change the PHPUnit test configuration in the *phpunit.xml* file. **Installation:** The following section explains how to use the generated library in a new project. :::note The following section explains how to use an APIMatic generated TypeScript SDK using **Visual Studio Code**. ::: - Open a JavaScript editor like Visual Studio Code. - Click on **File** and select **Open Folder**. Select an empty folder of your project, the folder will become visible in the sidebar on the left. ![Open Folder](/images/consume-sdk/open-folder-typescript.png) - To initialize the Node project, click on **Terminal** and select the **New Terminal** option. Execute the following command in the terminal: ```bash npm init --y ``` ![Initialize the Node Project](/images/consume-sdk/initialize-node-project.png) - Run the following command in the terminal to add dependencies of the client library in your current project. ```bash npm install --save ../path/to/calculatorSdk ``` **Installation:** The following section explains how to use a Go client library in a new project. - Add the following lines to your application's `go.mod` file to reference the SDK in your project: ```bash replace calculator => "../path/to/calculatorSdk" require calculator v0.0.0 ``` - Resolve the dependencies in the updated `go.mod` file, using the `go get` command. --- # Test Generation Overview Source: https://docs.apimatic.io/testing/overview/ You can define test cases for your endpoints using our online API Editor. At the time of SDK generation, in a particular language, the test cases are automatically generated for that language. Furthermore, we generate CI configuration files that build the SDKs and invoke test cases seamlessly. :::note The currently supported languages for test cases generation are: ::: ## Test Validation The test cases you define are also validated at the time of code generation. Some examples of where test validation may fail could be if your test case name is invalid (contains unaccepted characters or is too long, etc.), you may have entered invalid HTTP codes or the input parameter value may not be valid for the parameter type. In all such cases and many others, proper errors/ warnings are displayed to the user. ## Customizable Test Generation Settings Moreover, you can even customize your test cases and how they're generated by adding metadata and additional settings to your API so that your API definition is a complete package. For more detail on these settings, learn how to [Configure Test Generation Settings](/web-dashboard-retired) for your API specification. --- # Defining Test Case Source: https://docs.apimatic.io/testing/defining-test-case/ --- date: 2016-09-19T13:16:06+05:00 title: Defining a Test Case description: A guide to describing a test case using API editor. weight: 820 --- This documentation will walk you through the steps to define your first test case for an API. - You are required to first [define your API](/web-dashboard-retired). You can even [Configure Test Generation Settings](/web-dashboard-retired) for your API. We will use the same API for this tutorial: ![Calculator API](/images/defining-your-first-test-case/1.png) - Click on **Edit** to go to the API definition. You will see a sidebar similar to this: ![Sidebar](/images/defining-your-first-test-case/2.png) - There are currently no test cases listed under the **Test Cases** menu. - Before we create the test case, you need to know that in the endpoint you defined, you have 3 parameters involved: ![Endpoint parameters](/images/defining-your-first-test-case/3.png) | Name | Description | | --------- | -------------------------------------------------------------------------------------------------------------------------------- | | operation | Specifies the operation you want to perform on the input values. The valid values defined are `SUM`, `ADD`, `SUBTRACT`, `DIVIDE` | | x | First operand | | y | Second operand | - If we want to test the `Calculate` endpoint via a test case to check whether it returns the correct value on `SUM` operation, (for example, 2+4 must return 6) then the test parameters with their respective values will be: | Name | Value | | --------- | ----- | | operation | SUM | | x | 2 | | y | 4 | ## Step 1: Create Test Case In order to create a test case for `Calculate` endpoint, navigate to this endpoint from **Endpoints** menu and scroll down to where you can view a list of already created and enabled/disabled test cases (if any). Clicking on **Create Test Case** will help create the new test case. ![Create Test Case](/images/defining-your-first-test-case/4.png) You will be taken to a new page where you can then define your test case. ![Test Case Editor](/images/defining-your-first-test-case/5.png) ## Step 2: Describe Test Case ![Describe Test Case](/images/defining-your-first-test-case/6.png) ### Name This is the unique name that you can specify for your test case. ### Description This is where you can describe what your test case does. | Flag | Description | | --------------- | ----------------------------------------------------------------------------------------------------------------------------------------------------------------------- | | **Enable Test** | Toggling this will enable or disable the test. If the test case isn't enabled, it won't be generated during code generation | ### Calculate Endpoint Test Case Example As can be seen from above figure, the details for the Calculate endpoint test case are as follows: - `Name` specified is “TestSum” - `Description` specified is “Check if the endpoint returns correct sum for any two inputs” - `Enable Test` is set to true ## Step 3: Define Input Parameters ![Test Input Parameters](/images/defining-your-first-test-case/7.png) The input parameters consists of Name Value pairs defining values for parameters of the endpoint that the test case belongs to. ### Name The Name of the input parameter MUST correspond to the name of an endpoint parameter specified within definition of that endpoint. ### Value

The Value MUST correspond with the type of the endpoint parameter.

| Flag | Description | | ----------- | ------------------------------------------------------------------------------------------------------------------------------------------------------------------------------------------------------------------------ | | **Is Null** | If this flag is enabled or a required parameter isn't provided an input value, the input parameter is given a null or zero value according to the type of the input. | Some examples of name value pairs are as below: | Name | Value | | ---------------- | ------------------------------------------ | | someInteger | `1231` | | someString | `Hello, world!` | | someIntegerArray | `[1,2,3,4,5]` | | someBoolean | `true` | | someModel | `{"name":"Bob","age":22,"uploadCount":12}` | | someEnumeration | `[123,22,125]` | :::note If the endpoint has optional query parameters enabled then such type of parameters can be provided within the input parameters by preceding the Name with asterisk (\*). Similarly, if the endpoint has optional field parameters enabled then such type of parameters can be provided within the input parameters by preceding the Name with a plus sign (+). ::: ### Calculate Endpoint Test Case Example As already discussed, the Calculate endpoint contains 3 parameters. Their names will already be listed in the **Name** of the parameters. You need to just specify their values and decide whether to disable/enable **Is Null** flag. ![Test Input Parameters](/images/defining-your-first-test-case/8.png) In the above, we specified the values for the parameters. We've disabled the **Is Null** for all the parameters as we don't want them to take null values as input. ## Step 4: Specify Header Status ![Header Status](/images/defining-your-first-test-case/9.png) This section lets you set header status code for the expected response. ### Status Code

This refers to the expected status code of the response. The expected status can be given an exact value such as "200" or a range of values such as "20X."

As an example, a value of "20X" will match any status between 200 - 208 (inclusive) which are all valid HTTP status codes. Other possible HTTP status ranges are "30X," "4XX," and "41X." Note that only valid HTTP code values within each range will be checked. ### Calculate Endpoint Test Case Example We expect the status code to be 200 if the operation is successful, hence we input the value 200. ## Step 5: Specify Expected Headers ![Expected Headers](/images/defining-your-first-test-case/10.png)

If the expected headers are specified the response is tested to see if it contains these headers.

Just like with input parameters, we need to specify “Name-Value” pairs to specify header values. | Flag | Description | | ----------------------- | ------------------------------------------------------------------------------------------------------------------------------------------------------------------------------------------------------------------------------------------------------------------------------------------------------------------------------------------------------------------------------- | | **Check Value** | The test case will check the values of all expected headers. This flag, if enabled, won't only check the presence of a header in the response with the same name as mentioned in the **Name** field but will also check that the value of that response header is the same as specified in the expected header value. | | **Allow Extra Headers** | If this flag is disabled, it will cause the test case to fail if the response contains other headers than those listed in the expected headers list. | ### Calculate Endpoint Test Case Example ![Expected Headers](/images/defining-your-first-test-case/11.png) For our Calculate endpoint test case, we will keep the expected headers empty. ## Step 6: Specify Expected Body ![Expected Body](/images/defining-your-first-test-case/12.png) The expected body helps verify if the response body matches with the one specified. ### Expected Body

Whatever you expect the response to be, you input that into the Expected Body box.

This could be as simple as a number, some string or can be complex like an array or some valid JSON, etc. There are two flags related to testing arrays: | Flag | Description | | --------------------- | -------------------------------------------------------------------------------------------------------------------------------------------------------------------------------------- | | **Check array order** | If enabled, this will involve ensuring that the response body contains the array elements in the same order as the expected body. | | **Check array count** | If enabled, this will ensure that the response body contains the same number of elements in the array as does the expected body. | :::note If both the flags are enabled then the arrays will be strictly checked for equality, that is, their order as well as matching lengths. ::: ### Body Match Mode This is a dropdown menu which enlists various modes supported by APIMatic for body matching. What modes are applicable will depend on the response type of the endpoint. The modes are: | Match Mode | Valid for Types | Description | | --------------- | --------------------------------------------------------------------------------- | ----------------------------------------------------------------------------------------------------------------------------------------------------------------------------------------------------------------------------------------------------------------------------------------------------------------------------------------------------------------------- | | `NONE` | All | The expected body is ignored and the response body isn't tested. | | `NATIVE` | Number, Long, Precision, Boolean and DateTime | Tests the response body as a primitive type using a simple equality test. Response must match exactly except in case of arrays where array ordering and strictness can be controlled via other options. | | `KEYS` | Enumerations and Arrays of Number, Long, Precision, Boolean and DateTime types | Checks whether the response body contains the same keys as those specified in the expected body. The keys provided can be a subset of the response being received. If any key is absent in the response body, the test fails. The test generated will perform deep checking which means if the response object contains nested objects, their keys will also be tested. | | `KEYSANDVALUES` | Models, Dynamic and Arrays of Number, Long, Precision, Boolean and DateTime types | Same as the KEYS mode except values are tested as well. The values must match. Since the deep comparison is performed, nested objects must also contain the correct values. In case of nested arrays, their ordering and strictness depends on the provided options. | | `RAW` | All | The response body is compared with the expected body via simple string checking. In case of Binary response, byte-by-byte comparison is performed. The expected body takes a URI path to a remote file to compare with the Binary response, which must be valid URI path. | #### Example 1 of Body Match Modes “KEYS,” “KEYSANDVALUES”: Expected body: ```json { "name": "bob", "address": { "city": "ABC" } } ``` Response body: ```json { "name": "bob", "age": 100, "alive": true, "address": { "city": "ABC", "postcode": "21333" } } ``` - This will pass for both `KEYS` and `KEYSANDVALUES` mode. :::note Response body that passes `KEYSANDVALUES` mode for a given expected body will also pass `KEYS` mode. ::: #### Example 2 of Body Match Modes “KEYS,” “KEYSANDVALUES”: Expected body: ```json { "name": "xxxx", "address": { "city": "aaaaa" } } ``` Response body: ```json { "name": "bob", "age": 100, "alive": true, "address": { "city": "ABC", "postcode": "21333" } } ``` - This passes for `KEYS` mode. - This fails for `KEYSANDVALUES` mode. #### Example 3 of Body Match Modes “KEYS,” “KEYSANDVALUES” and Array flags: Expected body: ```json { "name": "bob", "workingDays": ["Tuesday", "Monday"] } ``` Response body: ```json { "name": "bob", "age": 100, "alive": true, "workingDays": ["Monday", "Tuesday", "Wednesday"] } ``` - This passed for `KEYS` and `KEYSANDVALUES` mode only if both `ExpectedArrayCheckCount` and `ExpectedArrayOrderedMatching` are `false`. #### Example 4 of Body Match Modes “KEYS,” “KEYSANDVALUES” and Array flags: Expected body: ```json [ { "name": "alice" }, { "name": "bob" } ] ``` Response body: ```json [ { "name": "frank", "age": 100, "alive": true }, { "name": "alice", "age": 70, "alive": true }, { "name": "bob", "age": 90, "alive": false } ] ``` - This passed for `KEYS` and `KEYSANDVALUES` mode only if both `ExpectedArrayCheckCount` and `ExpectedArrayOrderedMatching` are `false`. :::note Each object from the expected body is checked for presence in response body. Note that two objects from expected body may match the same object from response body if they're subsets of that object. ::: #### Example 5 of Body Match Modes “KEYS,” “KEYSANDVALUES” and Array flags: Expected body: ```json [ { "name": "bob" }, { "name": "alice" } ] ``` Response body: ```json [ { "name": "alice", "age": 70, "alive": true }, { "name": "bob", "age": 90, "alive": false } ] ``` - This passed for `KEYS` and `KEYSANDVALUES` mode if ExpectedArrayCheckCount is `true` or `false`. - This fails for `KEYSANDVALUES` mode if `ExpectedArrayOrderedMatching` is `true`. :::note In case of an object array, the elements will be compared using the subset method, that is, either `KEYSANDVALUES` or `KEYS`. For primitives, simple equality comparison is used. ::: ### Calculate Endpoint Test Case Example ![Expected Body](/images/defining-your-first-test-case/13.png) We expect the result of 2+3 as 5 hence the **Expected body** is given as “5.” The body matching should perform a simple string comparison between the body of the response and **Expected Body** to check if it contains the number “5.” This behavior matches with the mode `NATIVE` hence the mode chosen in `NATIVE`. ## Step 7: Save your Test Case Just click on “Save Test Case” present on top of the sticky header (or at the top of the Test Settings page) and your test case along with all the settings will be saved. ![Save Test Case](/images/defining-your-first-test-case/14.png) Congratulations! You have now successfully defined your first test case for your endpoint. To learn more on how to generate and run these test cases please refer to the [Run Your First Test Case](testing/running-test-case.md) --- # Running a Test Case Source: https://docs.apimatic.io/testing/running-test-case/ Now that you have successfully defined test cases, we will now guide you on how to run these test cases in order to test your endpoints. ## Generate your SDK Click on the box as shown in the figure below to generate your code. ![Screenshot](/images/run-your-first-test-case/1.png) Choose the platform of your choice: ![Screenshot](/images/run-your-first-test-case/2.png) For our example we will be choosing the Windows platform to generate a Portable Class Library in C#. ![Screenshot](/images/run-your-first-test-case/3.png) Once the code generation is successful download the Zip file. ![Screenshot](/images/run-your-first-test-case/4.png) You will see a **Calculator-CSharp** zip file. Extract its files in the same folder. ![Screenshot](/images/run-your-first-test-case/5.png) You will have something similar inside the extracted folder: ![Screenshot](/images/run-your-first-test-case/6.png) Open the **Calculator.sln** file in Visual Studio. ## Run the Test Case Using NUnit in Visual Studio In order to run the test case in Visual Studio you need to have NUnit 3.0 installed. Rebuild your solution and open **Test Explorer**. ![Screenshot](/images/run-your-first-test-case/7.png) If the build was successful, you will see our test case **TestTestSum** listed in the Test Explorer. ![Screenshot](/images/run-your-first-test-case/8.png) Click on **Run All** to run the test. You will see the statistics displayed about the number of tests that passed or failed and the time taken, etc. ![Screenshot](/images/run-your-first-test-case/9.png) Congratulations! You successfully ran your first test case! --- # Testing Frameworks Source: https://docs.apimatic.io/testing/testing-frameworks/ Below, we will highlight some of the testing frameworks available per language. You can utilize these when making use of the test generation feature. ## C\# For C#, you can either generate a Portable Class Library (PCL) or a Universal Windows Platform (UWP) library at the time of SDK generation. The Portable Class Library (PCL) can run on range of platforms such as Windows, Silverlight and Windows Phone. In order to run the test cases generated along with the library, you require a testing framework. One such framework is “NUnit” whose current release version is 3.0. If you use Visual Studio you can easily install it using the Extension Manager. ![NUnit](/images/testing-frameworks/1.png) After a successful build of the generated solution in Visual Studio, you can run the tests from the Test Explorer and a generated report will tell you various statistics including the number of tests that passed or failed. ![Test Explorer](/images/testing-frameworks/2.png) The Universal Windows Platform (UWP) library also supports many of the Windows platforms including but not limited to Windows 10, Windows 10 Mobile, Xbox One etc. The unit testing framework you can use for running the test cases generated along with this library is MSTest. Just like NUnit, MSTest also allows the tests to be run from within Visual Studio. ## Android You can generate a gradle based Android library from your API definition. You can then use it inside an IDE like Android Studio (that comes with Gradle) or a command line based gradle build system. An Android library compiles into an Android Archive (AAR) file that you can use as a dependency for an Android app module. The generated tests are defined as JUnit tests. JUnit is the most popular and widely-used unit testing framework for Java. You can navigate from within Android Studio to run these generated tests which internally makes use of the Android JUnit runner. The tests are instrumented tests that run on the emulator/hardware. ## Java The generated Java SDK is actually a java library which can be used with JRE7. You can use an IDE like Eclipse equipped with Maven to utilize this library e.g. this Java library can be added as a dependency for a Java project. To run the generated tests you require a testing framework. For Java, the most widely used framework is JUnit which not only acts as a framework but also as a runner. Inside Eclipse, you would need to select the library project and then choose to run the JUnit tests. ![JUnit](/images/testing-frameworks/3.png) This will run all the tests present in the “tests” directory and display relevant statistics. ![JUnit](/images/testing-frameworks/4.png) ## Objective C Generation of SDK for IOS will generate a Cocoa Touch Static Library which is a static library in Objective-C. The advantage of generating a static library is that it supports iOS versions as old as iOS 6. You can run the generated tests from within an IDE like “xCode”. It provides its users with capabilities for extensive software testing. It consists of a built-in test framework called “XCTest” which allows for smooth running of the generated tests. ## PHP When you generate an SDK for PHP you will obtain a PHP library that is based on PHP version 5.3 or greater and also requires Composer dependency manager. You can use this library as a dependency in your project. The test cases generated during SDK generation can be run using a testing framework like PHPUnit. ## Python SDK generation in Python results in a Python package compatible with Python 2.7.x and Python 3.x, which uses PIP as the dependency manager. A famous testing framework is “unittest” which is python’s xUnit style framework. It is a test module that comes bundled with the Python standard library. “nose” extends “unittest” to make testing easier as it provides automatic test discovery. For our generated SDK, “unittest” is used as the testing framework and “nose” is used as the test runner. Invoking a simple command “nosetests” on the SDK will help run the tests. ## Ruby SDK generation in Ruby results in a Ruby Gem based on Ruby version 2.0.0 or greater. The tests automatically generated can be run using a testing framework like Test::Unit that includes the appropriate test runners. ## NodeJS SDK Generation in NodeJS creates a Node based library which can be included in the project. Dependencies need to be resolved by using npm. The SDK already comes with a **package.json** file which contains information about all the dependencies. Running `npm install` from the command line will resolve all dependencies. For tests, Mocha is used as the testing framework. Mocha is coupled with Chai as the assertion library for tests. Mocha acts as the test runner for test cases generated with the SDK. Tests can easily be run from the command line by typing `mocha --recursive` from the SDK's root folder. ## Go SDK Generation in Go creates a Go client library which can be included in the project. For tests, the native Go package `testing` is used as the testing framework. Tests can easily be run from the command line by running `go test` from the SDK's test folder. --- # Configure Test Case Generation Settings Source: https://docs.apimatic.io/testing/configure-test-case-generation/ You can import your API definition file along with a [Metadata file](manage-apis/apimatic-metadata.md) that will allow you to configure test case generation for your API. Details on the available test case generation settings in the UI can be viewed [here](/web-dashboard-retired). The same configurations can be made using the Metadata file [Test Generation Settings Object](#test-generation-settings-object) as follows: **Example** ```json { "TestGenSettings": { "Configuration": {}, "TestTimeout": 30, "PrecisionDelta": 0.01 } } ``` ## Test Generation Settings Object **Name** : TestGenSettings The available properties and their respective types are as follows: | Setting | Type | Purpose | | ------- | ---- | ------- | | TestTimeout | Integer | Number of seconds after which the test should timeout. | | PrecisionDelta | Float | Number of decimal places to cover when comparing precision types in test. For example, a precision delta of 0.1 would mean that all precisions will be compared to 1 decimal place only. | | Environment | String | Environment to use when running tests. The name of the environment must exactly match with the name of a pre-defined environment in the API definition. | | Configuration | [Configuration Parameters Object](#configuration-parameters-object) | The configuration parameters allows you to provide initialization values for Configuration file for use in the test environment. | ### Configuration Parameters Object The configuration parameters object allows you to provide initialization values in the form of key-value pairs for the Configuration file which will be used in the test environment, for example, you may specify a new URL for `baseUri` parameter. This can be useful if you require to test your endpoint responses from a sandbox environment instead of a real environment (which would otherwise make use of `baseUri` described in the API Description). Similarly, you can also define values for test authentication parameters within these configuration parameters. #### Example ``` "Configuration": { "baseUri": "http://example.com", "apikey": "972938472934234" } ``` --- # Troubleshooting Tests Source: https://docs.apimatic.io/testing/test-faq/ Here are answers to some frequently asked questions regarding the test generation feature: 1. **I am getting the error "The test input for parameter (parameter Name) in test case (Testcase Name) is invalid". What should I do?** Please verify that the value you have specified for this parameter is indeed a valid value for the type of the parameter you defined in the endpoint definition. E.g. if your parameter is defined to be a `Number` and the test value you are giving it is a string then the validation will fail and you will get this error. 2. **I am getting the error "Test input (parameter Name) does not correspond to an endpoint parameter in test case (Testcase Name)". What should I do?** Please ensure that the endpoint for which you are defining the test case indeed contains a definition of a parameter with that name. If not, please define that parameter in the endpoint definition and then try again. 3. **I am getting the warning "Query params/ Field params are provided in test (Testcase Name) when endpoint does not allow it". What is causing this warning?** You seem to have defined some query parameters or field parameters in your input parameters of the test case even though you did not enable the use of these parameters in your endpoint definition. Please enable the Query parameters using the **Allow dynamic query params** and enable the Field parameters using the **Allow dynamic form fields** in the endpoint definition. 4. **I am getting the error "Body match mode (Mode Name) is not allowed for response of type (Type Name) in test case (Test Case Name) ". What should I do?** A particular body match mode may not be applicable to responses of certain types. In such a case you will encounter this error. To refer to the modes available for a particular response type, please refer to [Step 6: Specify Expected Body](testing/defining-test-case.md#step-6-specify-expected-body). --- # SDK Features Overview Source: https://docs.apimatic.io/generate-sdks/sdk-features/ APIMatic offers SDK Generation for your APIs to help accelerate the API consumption process. These SDKs generated aren't just a mapping of the API onto the SDK. They contain additional functionality that adheres to the best coding practices to make the SDKs as robust and fault-tolerant as possible. The features and their description are shown in the table below: | Feature | Description | |--------------------------------------------------------------| ----------- | | Access to HTTP Response Data | SDKs created can now also return the HTTP response information like response headers, status code and body on API calls. | | Additional Model Properties | APIMatic CodeGen allows adding additional properties to models, enhancing the flexibility and customization of the generated SDKs. For more details on this feature, refer to [Additional Model Properties](sdk-features/additional-model-properties.md). | | Array Serialization Formats | This feature supports various array serialization formats, enabling developers to handle arrays in different ways as per their API requirements. For more details on this feature, refer to [Array Serialization Formats](sdk-features/array-serialization-formats.md). | | Async Operations | For languages that support asynchronous operations, SDKs provide asynchronous methods to call endpoints to fully utilize the potential of async programming paradigm. | | Auto Refresh OAuth 2.0 Tokens | This feature allows the SDK to automatically refresh OAuth 2.0 tokens, ensuring seamless authentication without manual intervention. For more details on this feature, refer to [Auto Refresh OAuth 2.0 Tokens](sdk-features/auto-refresh-oauth-2-tokens.md). | | Client Initialization from Environment | This feature enables automatic client initialization using environment variables, allowing developers to configure SDK settings without hardcoded values. This simplifies deployment across different environments. For more details on this feature, refer to [Client Initialization from Environment](sdk-features/client-initialization-from-environment.md). | | Code Samples and Usage Examples for Every Endpoint and Model | All SDKs have detailed documentation on all endpoints and models. The documentation provides code samples for the endpoints by dynamically populating dummy data needed for an endpoint call. | | Code Style Compliant SDKs | All SDKs follow coding style conventions and best practices making the SDKs code consistent, reliable and maintainable. | | Configurable HTTP Clients | Developers can provide their own instance of the HTTP client during client initialization. This gives them the ability to override default configurations used by our SDKs. For more details on this feature, refer to [Configurable HTTP Clients](sdk-features/configurable-http-clients.md). | | Custom Error Messages | APIMatic CodeGen allows defining custom errors against 4XX - 5XX HTTP response codes. You can use this feature to define meaningful information to failed calls. For more details on this feature, refer to [Custom Error Messages](sdk-features/custom-error-messages.md). | | Deprecating API Endpoints | An endpoint that's marked as deprecated will result in a compiler warning or a notice logged to the console when the endpoint method is called by the SDK user. This feature helps developers identify and migrate from deprecated endpoints using clear messages and compiler warnings. For more details on this feature, refer to [Deprecating API Endpoints](sdk-features/deprecating-api-endpoints.md). | | Dynamic Error Messages | Dynamic error messages allow you to define template messages that are populated with data at runtime. Through this feature, users can figure out the exact reason behind the failed call and debug accordingly. For more details on this feature, refer to [Dynamic Error Messages](sdk-features/dynamic-error-messages.md). | | Extendable Interfaces | SDKs can be configured to generate interfaces for controller classes. These interfaces can be used to extend the functionality of the SDKs. | | Getting Started ReadMe's with all SDKs | All SDKs come bundled with a comprehensive ReadMe that contains information about environments, configuration, authentication and code samples to initialize the client. Also a step by step guide on setting up the SDK in a popular IDE has been given. | | Handle Cancellation of API calls | SDKs support cancellation of API calls during the API call execution. | | Immutable Client | Client classes of all the SDKs are designed using the immutable design pattern. This gives developers the assurity that once the client has been instantiated, no method call would mutate its state. | | Inheritance and Polymorphism with AllOf | This feature supports the AllOf constructs in API specifications, providing flexibility in combining multiple schema definitions. For more details on this feature, refer to [Inheritance and Polymorphism with AllOf](sdk-features/inheritance-and-polymorphism-with-all-of.md). | | Logging | APIMatic CodeGen includes logging capabilities to help developers debug and monitor the SDKs behavior. This feature provides detailed logs of API requests and responses. For more details on this feature, refer to [Logging](sdk-features/logging.md). | | Multiple Authentication | This feature supports multiple authentication methods, allowing developers to implement various authentication schemes in their SDKs. For more details on this feature, refer to [Multiple Authentication](sdk-features/multiple-authentication.md). | | Multipart Requests | You can send JSON-encoded data in a multipart request by setting the encoding of the parameter as JSON in your API definition. | | OAuth Support and Utility Methods | All SDKs support popular OAuth 2.0 flows and provide utility methods to generate or refresh access tokens. For more details on this feature, refer to [OAuth 2.0 Support](sdk-features/oauth-2-support.md). | | OneOf and AnyOf | This feature supports the OneOf and AnyOf constructs in API specifications, providing flexibility in handling different data types. For more details on this feature, refer to [OneOf and AnyOf](sdk-features/oneOf-and-anyOf.md). | | Optional and Nullable Properties | APIMatic CodeGen supports optional and nullable Properties, allowing developers to handle optional data in their API requests and responses. For more details on this feature, refer to [Optional and Nullable Properties](sdk-features/optional-nullable-properties.md). | | Pagination | APIMatic CodeGen supports pagination, allowing developers to handle paginated data in their API responses. For more details on this feature, refer to [Pagination](sdk-features/pagination.md).| | Proxy configuration support | APIMatic CodeGen supports proxy configuration, enabling developers to route API requests through a proxy server. For more details on this feature, refer to [Proxy Configuration Support](sdk-features/proxy-configuration-support.md).| | Request Parameter Collections | This feature enables the SDK to collect parameters for endpoints, simplifying the process of making API calls with multiple parameters. For more details on this feature, refer to [Request Parameter Collections](sdk-features/request-parameter-collections.md). | | Retries with Exponential Backoff | If an API call fails due to network problems, it's retried with an exponentially increasing wait time up to a maximum retry count specified by the user. This is particularly helpful during temporary network outages. For more details on this feature, refer to [Retries with Exponential Backoff](sdk-features/retries-with-exponential-backoff.md).| | Schema Constraints | Generated models carry OpenAPI schema constraints as declarative .NET validation attributes, so you can validate requests and responses using standard .NET validation. For more details on this feature, refer to [Schema Constraints](sdk-features/schema-constraints.md). | | Server-Sent Events (SSE) Streaming | APIMatic CodeGen supports streaming API responses over Server-Sent Events, exposing them as a typed, async-iterable stream that yields decoded events as they arrive. For more details on this feature, refer to [Server-Sent Events (SSE) Streaming](sdk-features/server-sent-events-streaming.md). | | Thread Safe Operations | SDKs are designed to handle concurrent API calls in a thread safe manner. | | Webhooks and Callbacks | APIMatic CodeGen supports webhooks and callbacks functionality, enabling developers to handle real-time notifications and event-driven API interactions. For more details on this feature, refer to [Webhooks and Callbacks](sdk-features/webhooks-and-callbacks.md). | --- # Additional Model Properties Source: https://docs.apimatic.io/generate-sdks/sdk-features/additional-model-properties/ import Tabs from '@theme/Tabs'; import TabItem from '@theme/TabItem'; APIMatic SDKs provide support for the JSON Schema `additionalProperties` keyword, which controls how additional properties(those not defined in `properties` or `patternProperties`) are handled. This enables SDKs to handle dynamic or unpredictable data structures in API requests and responses. ### Configure Additional Model Properties To leverage additional properties in your SDKs, enable the [`ExtendedAdditionalPropertiesSupport`](/generate-sdks/customize-sdks/codegen-settings/model-settings/#extended-additional-properties-support) Code Generation setting while generating your SDKs. Additional properties can be defined in OpenAPI definitions using the `additionalProperties` keyword, as demonstrated below: ```yaml components: schemas: StudentResult: type: object required: - email properties: email: type: string format: email additionalProperties: type: number ``` In this example, the **StudentResult** model defines a required **email** property of type **string**. Additionally, it supports any number of **additionalProperties** where keys are **strings**, and values are **number**. ### Usage in SDK After configuring your API definition, the generated SDK will expose these additional properties with type safety. For instance: #### SDK Request Examples Here’s how an object of type **StudentResult** can be initialized: ```ts const body: StudentResult = { email: 'student616@oxford.ac.uk', additionalProperties: { 'Theory Of Automata': 82.1, 'Computational complexity': 72.5, 'Functional programming': 78.3 }, }; ``` ```java StudentResult body = new StudentResult.Builder( "student616@oxford.ac.uk" ) .additionalProperty("Theory Of Automata", 82.1D) .additionalProperty("Computational complexity", 72.5D) .additionalProperty("Functional programming", 78.3D) .build(); ``` ```python body = StudentResult( email='student616@oxford.ac.uk', additional_properties={ 'Theory Of Automata': 82.1, 'Computational complexity': 72.5, 'Functional programming': 78.3 } ) ``` ```php $body = StudentResultBuilder::init( 'student616@oxford.ac.uk' ) ->additionalProperty('Theory Of Automata', 82.1) ->additionalProperty('Computational complexity', 72.5) ->additionalProperty('Functional programming', 78.3) ->build(); ``` ```csharp StudentResult body = new StudentResult { Email = "student616@oxford.ac.uk", ["Theory Of Automata"] = 82.1, ["Computational complexity"] = 72.5, ["Functional programming"] = 78.3, }; ``` ```ruby body = StudentResult.new( 'student616@oxford.ac.uk', { 'Theory Of Automata': 82.1, 'Computational complexity': 72.5, 'Functional programming': 78.3 } ) ``` ```go body := models.StudentResult{ Email: "student616@oxford.ac.uk", AdditionalProperties: map[string]float64{ "Theory Of Automata": float64(82.1), "Computational complexity": float64(72.5), "Functional programming": float64(78.3), }, } ``` #### SDK Response Examples Here’s a sample JSON response representing a **StudentResult** object: ```json { "email": "student616@oxford.ac.uk", "Theory Of Automata": 82.1, "Computational complexity": 72.5, "Continuous mathematics": "87", // invalid additional property "Functional programming": 78.3 } ``` During deserialization, the **"Continuous mathematics"** property will be ignored due to a type mismatch, while the **"Functional programming"** property will be correctly deserialized. The **"Functional programming"** property can be printed to the console as follows: ```ts // Printing the value of `Functional programming` AdditionalProperty console.log(response.result.additionalProperties['Functional programming']); // Output: 78.3 ``` ```java // Printing the value of `Functional programming` AdditionalProperty System.out.println(response.getAdditionalProperty("Functional programming")); // Output: 78.3 ``` ```python # Printing the value of `Functional programming` AdditionalProperty print(response.additional_properties.get('Functional programming')) # Output: 78.3 ``` ```php // Printing the value of `Functional programming` AdditionalProperty var_dump($response->findAdditionalProperty('Functional programming')); // Output: 78.3 ``` ```csharp // Printing the value of `Functional programming` AdditionalProperty Console.WriteLine(response["Functional programming"]); // Output: 78.3 ``` ```ruby # Printing the value of `Functional programming` AdditionalProperty puts response.additional_properties["Functional programming"] # Output: 78.3 ``` ```go // Printing the value of `Functional programming` AdditionalProperty fmt.Println(response.Data.AdditionalProperties["Functional programming"]) // Output: 78.3 ``` ### Real-World Use Cases **Flexible Data Structures:** Handle unknown or optional fields returned in API responses, such as metadata or custom attributes. **Extensible Models:** Support user-defined properties in API requests while ensuring consistency and type correctness. --- # Array Serialization Formats Source: https://docs.apimatic.io/generate-sdks/sdk-features/array-serialization-formats/ import Tabs from '@theme/Tabs'; import TabItem from '@theme/TabItem'; APIs implement various array serialization schemes based on their specific use cases. To ensure broad compatibility, APIMatic supports six array serialization methods for query and form parameters: Indexed, UnIndexed, Plain, CSV, PSV, and TSV. ### Configure Array Serialization To leverage this feature, use the [`ArraySerialization`](/generate-sdks/customize-sdks/codegen-settings/serialization-settings/#array-serialization) CodeGen setting to define your preferred array serialization format. The default format is **Indexed**: ```yaml "info": { ..., "x-codegen-settings": { "ArraySerialization": "Indexed" } } ``` ### Serialization Formats and Examples The following formats are supported for form and query parameters: Indexed array serialization includes an explicit index for each value. ```yaml businessAsset[0]=1&businessAsset[1]=2 ``` UnIndexed format appends new values to an array without specifying their positions. ```yaml businessAsset[]=1&businessAsset[]=2 ``` Plain format represents values as repeated variable assignments. ```yaml businessAsset=1&businessAsset=2 ``` CSV format separates array elements with commas and is applicable *only to query parameters*. ```yaml businessAsset=1,2 ``` PSV format separates array elements with pipes and is applicable *only to query parameters*. ```yaml businessAsset=1|2 ``` TSV format separates array elements with tabs and is applicable *only to query parameters*. ```yaml businessAsset=1\t2 ``` ### Usage in SDK Array serialization can be utilized during request construction or deserialization within SDKs generated using APIMatic. Here’s a usage example: ```ts const businessAsset: number[] = [ 1, 2 ]; async function makeApiCall() { try { const { result, ...httpResponse } = await controller.getArraySerializedInQuery(businessAsset); } catch (error) { if (error instanceof ApiError) { const errors = error.result; } } }; makeApiCall(); ``` ```java List businessAsset = Arrays.asList( 1, 2 ); controller.getArraySerializedInQueryAsync(businessAsset).thenAccept(result -> { System.out.println(result); }).exceptionally(exception -> { exception.printStackTrace(); return null; }); ``` ```python businessAsset = [ 1, 2 ] try: result = controller.get_array_serialized_in_query(businessAsset) print(result) except APIException as e: print(e) ``` ```php $businessAsset = [ 1, 2 ]; try { $result = $client->getController()->getArraySerializedInQuery($businessAsset); var_dump($result); } catch (ApiException $e) { echo 'Caught ApiException: ', $e->getMessage(), "\n"; } ``` ```csharp List businessAsset = ApiHelper.JsonDeserialize>("[1,2]"); Standard.Models.ServerResponse result = null; try { result = await this.controller.GetArraySerializedInQueryAsync(businessAsset); } catch (ApiException) { } ``` ```ruby businessAsset = [ 1, 2 ] begin result = client.controller.get_array_serialized_in_query(businessAsset) puts result rescue APIException => e puts "Caught APIException: #{e.message}" end ``` ```go businessAsset := []int{ 1, 2, } apiResponse, err := controller.GetArraySerializedInQuery(ctx, businessAsset) if err != nil { log.Fatalln(err) } else { fmt.Println(apiResponse.Data) fmt.Println(apiResponse.Response.StatusCode) } ``` --- # Auto-Refresh OAuth 2.0 Tokens Source: https://docs.apimatic.io/generate-sdks/sdk-features/auto-refresh-oauth-2-tokens/ import Tabs from '@theme/Tabs'; import TabItem from '@theme/TabItem'; APIMatic's SDKs support automated Auth-Token retrieval and refresh for APIs using OAuth 2.0 Grant Types. This feature enables the SDK to automatically fetch or refresh the auth-token before making any API call that requires it. By simply configuring OAuth 2.0 grant type credentials in the SDK client, users can eliminate the need for manual token management, ensuring smoother and more efficient API interactions. :::note This feature is currently limited to **OAuth 2.0 Client Credentials Grant** type. ::: ### Key Use Cases - Maintaining seamless API access for long-lived client applications. - Reducing the risk of authentication failures due to expired tokens. - Enhancing user experience by avoiding manual token refresh procedures. ### Configure Auth Token Auto-Refreshing in Your OpenAPI Definition To enable token auto-refreshing, ensure that your OpenAPI definition includes: 1. A Security Scheme (e.g., OAuth2 with refresh token flow). 2. Detailed configuration for token endpoints, including refresh token URLs and parameters. ``` yaml components: securitySchemes: OAuth2: type: oauth2 flows: refreshToken: tokenUrl: https://example.com/oauth/token scopes: read: Grants read access write: Grants write access security: - OAuth2: - read - write ``` ### SDK Examples ```ts const client = new SDKClient({ clientCredentialsAuthCredentials: { oAuthClientId: 'OAuthClientId', oAuthClientSecret: 'OAuthClientSecret', oAuthTokenProvider: (lastOAuthToken: OAuthToken | undefined, authManager: ClientCredentialsAuthManager) => { // Add the callback handler to provide a new OAuth token // It will be triggered whenever the lastOAuthToken is undefined or expired var token = loadTokenFromDatabase(); if (token === undefined) { return authManager.fetchToken(); } return token; }, oAuthOnTokenUpdate: (token: OAuthToken) => { // Add the callback handler to perform operations like save to DB or file etc. // It will be triggered whenever the token gets updated saveTokenToDatabase(token); } }, }); ``` ```java SDKClient client = new SDKClient.Builder() .clientCredentialsAuth(new ClientCredentialsAuthModel.Builder( "OAuthClientId", "OAuthClientSecret" ) .oAuthTokenProvider((lastOAuthToken, credentialsManager) -> { // Add the callback handler to provide a new OAuth token // It will be triggered whenever the lastOAuthToken is null or expired OAuthToken token = loadTokenFromDatabase(); if (token == null) { return credentialsManager.fetchToken(); } return token; }) .oAuthOnTokenUpdate(oAuthToken -> { // Add the callback handler to perform operations like save to DB or file etc. // It will be triggered whenever the token gets updated saveTokenToDatabase(oAuthToken); }) .build()) .build(); ``` ```python def _o_auth_token_provider(last_oauth_token, auth_manager): # Add the callback handler to provide a new OAuth token # It will be triggered whenever the last provided o_auth_token is null or expired o_auth_token = load_token_from_database() if o_auth_token is None: o_auth_token = auth_manager.fetch_token() return o_auth_token client = SDKClient( client_credentials_auth_credentials=ClientCredentialsAuthCredentials( o_auth_client_id='OAuthClientId', o_auth_client_secret='OAuthClientSecret', o_auth_scopes=[ OAuthScopeEnum.READ_SCOPE, OAuthScopeEnum.WRITE_SCOPE ], o_auth_token_provider=_o_auth_token_provider, o_auth_on_token_update=(lambda o_auth_token: # Add the callback handler to perform operations like save to DB or file etc. # It will be triggered whenever the token gets updated save_token_to_database(o_auth_token)) ) ) ``` ``` csharp SdkClient client = new SdkClient.Builder() .ClientCredentialsAuth( new ClientCredentialsAuthModel.Builder( "OAuthClientId", "OAuthClientSecret" ) .oAuthTokenProvider(async (token, credentialsManager) => { // Add the callback handler to provide a new OAuth token // It will be triggered whenever the lastOAuthToken is undefined or expired return LoadTokenFromDatabase() ?? await FetchTokenAsync() }) .oAuthOnTokenUpdate(token -> { // It will be triggered whenever the token gets updated SaveTokenToDatabase(token); }) .Build()) .Build(); ``` ``` go client := Sdkclient.NewClient( Sdkclient.CreateConfiguration( Sdkclient.WithClientCredentialsAuthCredentials( Sdkclient.NewClientCredentialsAuthCredentials( "OAuthClientId", "OAuthClientSecret", ). WithOAuthOnTokenUpdate(func(oAuthToken models.OAuthToken) { // Add the callback handler to perform operations like save to DB or file etc. // It will be triggered whenever the token gets updated saveTokenToDatabase(oAuthToken) }). WithOAuthTokenProvider(func(lastOAuthToken models.OAuthToken, authManager ClientCredentialsAuthManager) models.OAuthToken { // Add the callback function handler to provide a new OAuth token // It will be triggered whenever the lastOAuthToken is undefined or expired oAuthToken := loadTokenFromDatabase() if oAuthToken.AccessToken == "" { if token, err := authManager.FetchToken(context.TODO()); err == nil { return token } } return oAuthToken }), ), ), ) ``` ```php $client = SdkClientBuilder::init() ->clientCredentialsAuthCredentials( ClientCredentialsAuthCredentialsBuilder::init( 'OAuthClientId', 'OAuthClientSecret' ) ->oAuthTokenProvider( function (?OAuthToken $lastOAuthToken, ClientCredentialsAuthManager $authManager): OAuthToken { // Add the callback handler to provide a new OAuth token. // It will be triggered whenever the lastOAuthToken is null or expired. return $this->loadTokenFromDatabase() ?? $authManager->fetchToken(); } ) ->oAuthOnTokenUpdate( function (OAuthToken $oAuthToken): void { // Add the callback handler to perform operations like save to DB or file etc. // It will be triggered whenever the token gets updated. $this->saveTokenToDatabase($oAuthToken); } ) ) ->build(); ``` ```ruby def _o_auth_token_provider(last_oauth_token, auth_manager) # Add the callback handler to provide a new OAuth token # It will be triggered whenever the last provided o_auth_token is null or expired o_auth_token = load_token_from_database() o_auth_token = auth_manager.fetch_token() if o_auth_token is nil? return o_auth_token end client = SDKClient.new( client_credentials_auth_credentials: ClientCredentialsAuthCredentials.new( o_auth_client_id: 'OAuthClientId', o_auth_client_secret: 'OAuthClientSecret', o_auth_token_provider: _o_auth_token_provider, o_auth_on_token_update: Proc.new { | o_auth_token | # Add the callback handler to perform operations like save to DB or file etc. # It will be triggered whenever the token gets updated save_token_to_database(o_auth_token) } ) ) ``` ### Best Practices - Ensure refresh tokens are stored securely to prevent unauthorized access. - Validate the scope and permissions of the refreshed token. --- # Client Initialization from Environment Variables Source: https://docs.apimatic.io/generate-sdks/sdk-features/client-initialization-from-environment/ import Tabs from '@theme/Tabs'; import TabItem from '@theme/TabItem'; APIMatic's SDKs support initializing clients directly from environment variables, allowing you to configure SDK settings automatically without hardcoded values. This enables seamless environment-specific deployments, secure credential management, and runtime configuration changes without modifying your code. The .NET SDK supports client initialization directly from `IConfigurationSection`, leveraging .NET's built-in configuration system. This allows developers to define SDK settings through multiple configuration sources such as configuration files, environment variables, user secrets, and command-line arguments. The SDK integrates seamlessly with your existing .NET configuration setup (for example, `appsettings.json` or any other provider). If you don't have configuration set up yet, you can use `ConfigurationBuilder` as shown in the [examples below](#basic-client-initialization) to easily configure and utilize the configuration system. ** The `FromConfiguration` Method ** The `FromConfiguration` method has been added to both `Client` and `Client.Builder` classes. It accepts an `IConfigurationSection` and returns a configured client instance or a client builder instance. ** Basic Client Initialization ** ```csharp using Sdk.Standard; using Microsoft.Extensions.Configuration; namespace ConsoleApp; // Build the IConfiguration using .NET conventions (JSON, environment, etc.) var configuration = new ConfigurationBuilder() .AddJsonFile("config.json") .AddEnvironmentVariables() // [optional] read environment variables .Build(); // Instantiate your SDK and configure it from IConfiguration var client = SdkClient .FromConfiguration(configuration.GetSection("SdkConfig")); ``` ** Advanced Client Initialization with Builder Pattern ** ```csharp using Sdk.Standard; using Microsoft.Extensions.Configuration; using Environment = Tester.Standard.Environment; namespace ConsoleApp; // Build the IConfiguration using .NET conventions (JSON, environment, etc.) var configuration = new ConfigurationBuilder() .AddJsonFile("config.json") .AddEnvironmentVariables() // [optional] read environment variables .Build(); // Instantiate your SDK builder and configure it from IConfiguration with overrides var client = Sdk.Builder .FromConfiguration(configuration.GetSection("SdkConfig")) .Environment(Environment.Testing) .HttpClientConfig(c => c.Timeout(TimeSpan.FromSeconds(60))) .Build(); ``` > **Note:** You can also override configurations loaded from the `IConfigurationSection` if needed by using the builder methods on `Client.Builder`. ** JSON Configuration Structure ** Here's an example of how your `config.json` file should be structured to work with the above code samples: ```json { "SdkConfig": { "Environment": "testing", "Port": "port", "HttpClientConfig": { "Timeout": "00:01:00", "NumberOfRetries": 3, "BackoffFactor": 2, "RetryInterval": 1, "MaximumRetryWaitTime": "00:02:00", "StatusCodesToRetry": [408, 413], "RequestMethodsToRetry": ["GET", "PUT", "DELETE"], "ProxyConfiguration": { "Address": "http://localhost:3000", "Port": 8080, "Tunnel": false, "User": "username", "Pass": "password" } } } } ``` ** Environment Variables Configuration ** You can also configure individual settings using environment variables. .NET's configuration system uses double underscores (`__`) to represent nested configuration sections. Here are some examples: ```bash # Set the environment SdkConfig__Environment=production # Set number of retries SdkConfig__HttpClientConfig__NumberOfRetries=5 # Configure proxy settings SdkConfig__HttpClientConfig__ProxyConfiguration__Port=8080 ``` ** Configuration Precedence ** When using environment variables, their precedence depends on the order in which you add configuration providers to the `ConfigurationBuilder`. Providers added later override values from earlier providers. Our Python SDK supports environment driven client initialization to simplify the SDK client setup and enhance developer experience. ** The `from_environment` Method ** The `from_environment()` method is available in SDK Client class. It reads configuration from the process environment and, if provided/available, from a `.env` file. You can also pass keyword arguments to override any values resolved from the environment. ** Basic Client Initialization ** ```python from sdk_client import SdkClient # Initialize the client from environment variables client = SdkClient.from_environment() ``` You can also specify a custom `.env` file path: ```python client = SdkClient.from_environment(dotenv_path="/path/to/.env") ``` ** Advanced Client Initialization with Overrides ** You can override environment-resolved values by passing keyword arguments. Arguments take precedence over environment variables: ```python from sdk_client import SdkClient client = SdkClient.from_environment( dotenv_path="/path/to/.env", timeout=60, max_retries=3, backoff_factor=2, retry_statuses=[408, 413], retry_methods=["GET", "PUT", "DELETE"], ) ``` ** Example `.env` File ** Here's an example of how your `config.json` file should be structured to work with the above code samples: ``` ENVIRONMENT=testing PORT=80 TIMEOUT=60 MAX_RETRIES=3 BACKOFF_FACTOR=2 RETRY_STATUSES=408,413 RETRY_METHODS=GET,PUT,DELETE # Proxy Configuration PROXY_ADDRESS=http://localhost:3000 PROXY_PORT=8080 PROXY_USERNAME=username PROXY_PASSWORD=password ``` ** Configuration Precedence ** * Explicit keyword arguments passed to from_environment() override environment variables. * Environment variables (including those loaded from .env) override the SDK’s built-in default values. * If an environment variable isn't defined, the default SDK configuration value will be used. ** Ruby Client Initialization from Environment ** Our Ruby SDK supports environment driven client initialization to simplify the SDK client setup and enhance developer experience. ** The `from_env` Method ** The `from_env` method has been added to `Client`. It gives an option to override any values loaded from the environment and return a configured client instance. ** Basic Client Initialization ** ```ruby # Create client from environment client = Client.from_env ``` ```ruby # Override client from environment client = Client.from_env( environment: Environment::TESTING, timeout: 30 ) ``` ** Example `.env` File ** Here's an example of how your `.env` file should be structured to automatically load `.env` file variables into ENV so that it can work with the above code samples seamlessly: ```bash # Set the environment Environment=production # Set number of retries MAX_RETRIES=5 # Configure proxy settings PROXY_PORT=8080 ``` TypeScript SDKs support configuration-driven and environment-driven client initialization to simplify setup across Node.js and browser environments. ** Methods ** - `Client.fromJsonConfig(jsonString)`: Initialize from JSON configuration content. - `Client.fromEnvironment(env?)`: Initialize from environment variables. Defaults to `process.env` in Node.js; accepts an object in browsers. ** Configuration-Based TS Client Initialization ** ```ts import * as path from 'path'; import * as fs from 'fs'; import { Client } from 'your-package-name'; // Provide absolute path for the configuration file const absolutePath = path.resolve('./config.json'); // Read the configuration file content const fileContent = fs.readFileSync(absolutePath, 'utf-8'); // Initialize client from JSON configuration content const client = Client.fromJsonConfig(fileContent); ``` ```ts import { Client } from 'your-package-name'; // Read the configuration file content const configModule = await import('./config.json', { assert: { type: 'json' } }); // Initialize client from JSON configuration content const client = Client.fromJsonConfig(JSON.stringify(configModule.default)); ``` Check out the following sample JSON configuration that can be imported to initialize the API client. Please note that the complete JSON configuration sample file can be found in your SDKs' `doc/` directory. ```json { "environment": "production", "httpClientOptions": { "timeout": 30000, "retryConfig": { "maxNumberOfRetries": 3 }, "proxySettings": { "address": "https://my.proxy.address", "port": 8080 } } } ``` ** Environment-Based TS Client Initialization ** ```ts import * as dotenv from 'dotenv'; import * as path from 'path'; import * as fs from 'fs'; import { Client } from 'your-package-name'; // Optional - Provide absolute path for the .env file const absolutePath = path.resolve('./.env'); if (fs.existsSync(absolutePath)) { // Load environment variables from .env file dotenv.config({ path: absolutePath, override: true }); } // Initialize client using environment variables const client = Client.fromEnvironment(process.env); ``` The browser environments might not support loading from `.env` files, so the `Client.fromEnvironment` function also supports importing environment variables directly like: ```ts import { Client } from 'your-package-name'; const client = Client.fromEnvironment({ TIMEOUT: '30000', ENVIRONMENT: 'production', MAX_NUMBER_OF_RETRIES: '3', PROXY_ADDRESS: 'https://my.proxy.address', PROXY_PORT: '8080' }); ``` Check out the following sample `.env` configuration that can be imported to initialize the API client. Please note that the complete list of environment variable names can be found in your SDKs' `doc/` directory. ```env # Basic Configuration TIMEOUT=30000 ENVIRONMENT=production # Retry Configuration MAX_NUMBER_OF_RETRIES=3 # Proxy Settings PROXY_ADDRESS=https://my.proxy.address PROXY_PORT=8080 ``` ** Configuration Precedence ** - Explicit JSON Config passed to `fromJsonConfig` overrides SDK defaults. - Explicit object passed to `fromEnvironment` like `process.env` overrides SDK defaults. - If any value isn't provided, the SDK’s built-in default is used. - Client's configuration can be further overwritten using `withConfiguration` function call on its instance. --- # Configurable Http Clients Source: https://docs.apimatic.io/generate-sdks/sdk-features/configurable-http-clients/ import Tabs from '@theme/Tabs'; import TabItem from '@theme/TabItem'; To make an API call, each SDK uses an HttpClient particular to that language or framework. Developers can provide their own configured instance of the HTTP client during client initialization. This gives them the ability to override default configurations used by our SDKs. ## Inject A Custom Http Client To configure the HTTP client, initialize the client instance with a custom `HttpClient`. This enables you to set up logging, retries, timeouts, or other advanced configurations tailored to your application's specific needs. ### **SDK Usage Example** Default headers can be useful for testing, custom authentication schemes, compliance, etc. For example, let's say we want to add an `Authorization` header for authorization and a `Custom-Header` for compliance or monitoring. Below are some examples that use a custom HTTP client to configure this before passing it into the SDK client. The Java SDK allows you to provide your own `okhttp3.OkHttpClient` instances. ```java import com.mycompany.myapi.MyApiClient; import com.mycompany.myapi.Environment; import okhttp3.OkHttpClient; import okhttp3.Request; OkHttpClient httpClient = new OkHttpClient.Builder() .addInterceptor(chain -> { Request original = chain.request(); Request.Builder requestBuilder = original.newBuilder() .header("Authorization", "Bearer your-access-token") .header("Custom-Header", "CustomValue"); Request request = requestBuilder.build(); return chain.proceed(request); }) .build(); MyApiClient client = new MyApiClient.Builder() .httpClientConfig(configBuilder -> configBuilder .httpClientInstance(httpClient)) .environment(Environment.PRODUCTION) .build(); ``` The Python SDK now supports interface-driven client injection for cases where you need to override the timeout property, or alternatively, you can directly use a plain `requests.Session` instance for simpler customization. Your custom HTTP client must expose two properties as per the contract: - session: an instance of [`requests.Session`](https://requests.readthedocs.io/en/latest/user/advanced/#session-objects) from the `requests` library. - timeout: a numeric value defining the default timeout in seconds. ```python class CustomHttpClient(HttpClientProvider): def __init__(self, timeout=10): self._session = requests.Session() self._session.headers.update({ "Authorization": "Bearer your-access-token", "Custom-Header": "CustomValue", }) self._timeout = timeout @property def timeout(self) -> float: return self._timeout @property def session(self) -> Session: return self._session client = Myapi( http_client_instance=CustomHttpClient() ) ``` The .NET SDK accepts an instance of [`HTTPClient` from `System.Net.Http`](https://learn.microsoft.com/en-us/dotnet/api/system.net.http.httpclient?view=netstandard-2.0). ```csharp var httpClient = new HttpClient(); httpClient.DefaultRequestHeaders.Add("Authorization", "Bearer your-access-token"); httpClient.DefaultRequestHeaders.Add("Custom-Header", "CustomValue"); var client = new MyApiClient.Builder() .HttpClientConfig(builder => { builder.HttpClientInstance(httpClient); }) .Build(); ``` The Go SDK accepts any implementation of the `http.RoundTripper` interface. ```go import ( "myapi" "net/http" ) // CustomTransport wraps another RoundTripper to add custom headers. type CustomTransport struct { BaseTransport http.RoundTripper } // RoundTrip adds headers to the outgoing request. func (t *CustomTransport) RoundTrip(req *http.Request) (*http.Response, error) { // Make a copy of the request to avoid mutating the original reqClone := req.Clone(req.Context()) // Add custom headers reqClone.Header.Set("Authorization", "Bearer your-access-token") reqClone.Header.Set("Custom-Header", "CustomValue") // Use the underlying transport to make the request return t.BaseTransport.RoundTrip(reqClone) } func main() { customTransport := &CustomTransport{ BaseTransport: http.DefaultTransport, } client := myapi.NewClient( myapi.CreateConfiguration( myapi.WithHttpConfiguration( myapi.CreateHttpConfiguration( myapi.WithTimeout(0), myapi.WithTransport(customTransport), ), ), myapi.WithEnvironment(myapi.PRODUCTION), ), ) } ``` The Ruby SDK allows you to use an existing `faraday` adapter of your choice or create your own custom one. ```ruby require 'faraday' require 'myapi' include MyApi class CustomHttpClientAdapter < Faraday::Adapter::NetHttp def call(env) env[:request_headers]['Authorization'] = 'Bearer your-access-token' env[:request_headers]['Custom-Header'] = 'CustomValue' super end end Faraday::Adapter.register_middleware(custom_net_http: CustomHttpClientAdapter) client = MyApi::Client.new( environment: Environment::PRODUCTION, adapter: :custom_net_http ) ``` --- # Custom Error Messages Source: https://docs.apimatic.io/generate-sdks/sdk-features/custom-error-messages/ Custom Error Messages feature allows you to customize error responses of HTTP requests by providing a static string against HTTP error codes. Through this feature, you can add meaningful information to a failed API call. For example, instead of a `400 Bad Request` error response, you can customize it to say `400 Bad request due to invalid request message framing`. :::note These are static messages. To define dynamic messages that provide more meaningful information at runtime, please see the [Dynamic Error Messages](dynamic-error-messages.md) feature. ::: ### Configure Custom Error Messages Error messages are customized through the [description](https://github.com/OAI/OpenAPI-Specification/blob/main/versions/3.1.0.md#response-object) field of an OAS response object. You can customize HTTP response codes through this field in your OpenAPI specification as shown below. - The following example shows how to customize an error message against an HTTP error code. ```json title="OpenAPI v3.0" "responses": { "412": { "description": "Precondition to make the request failed" } } ``` :::note This feature doesn't support defining a custom response for an entire code range. Please see [Configure Response Messages for an Error Group](dynamic-error-messages.md#configure-error-messages-for-error-range) in Dynamic Error Messages. ::: - The following example shows how you can add a custom type in addition to customizing messages of error status codes. ```json title="OpenAPI v3.0" "responses": { "412": { "description": "Precondition to make the request failed", "content": { "application/json": { "schema": { "$ref": "#/components/schemas/NestedModelException" } } } } } ``` :::note Please note that the custom type you mention here, i.e. `NestedModelException` in this case, should already be defined in the custom types. Otherwise your API specification file will not pass [validation](https://docs.apimatic.io/rulesets/apimatic-codegen-validation/overview/). ::: After configuring a custom error response as follows: ```json title="OpenAPI v3.0" "responses": { "404": { "description": "Call failed because the accessed page is not found." } } ``` Once you have configured custom error messages, you can catch the response in the API call. ```csharp try { petsController.CreatePet(pet); } catch (ApiException exception) { // Printing the error message Console.WriteLine(exception.Message); } ``` APIMatic generated SDK will surface the following message every time an API call fails with 404 error code: ``` ApiException: Call failed because the accessed page is not found. ``` --- # Deprecating API Endpoints Source: https://docs.apimatic.io/generate-sdks/sdk-features/deprecating-api-endpoints/ import Tabs from '@theme/Tabs'; import TabItem from '@theme/TabItem'; Deprecating API endpoints without clear warnings can lead to broken integrations. APIMatic makes the deprecation process very simple by notifying developers when they use deprecated methods and educate them on the recommended alternatives. ### Key Benefits - **Deprecation Warnings**: Deprecated endpoints trigger compiler warnings or runtime notices. - **Detailed Deprecation Info**: SDKs display the deprecation reason, affected version, and suggested alternatives. - **Backward Compatibility:** Deprecated endpoints remain functional to avoid breaking existing implementations while encouraging updates. ### Mark endpoints deprecated in your OpenAPI Definition The [`x-deprecation-details`](../../../specification-extensions/swagger-codegen-extensions/#deprecation-details) OpenAPI extension allows API authors to provide deprecation details such as the reason, the version in which a method was deprecated, and alternative options. Below is an example demonstrating how to mark an endpoint as deprecated using this extension: ```yaml openapi: 3.0.3 info: title: Product Management API description: API for managing products in an inventory system. version: 1.0.0 servers: - url: https://api.example.com/v1 paths: /products/legacy: get: summary: Retrieve all products (Deprecated) description: | This endpoint is used for retrieving all products. operationId: getAllProductsLegacy deprecated: true x-deprecation-details: message: |- **This endpoint is deprecated.** Use the `/products` endpoint for enhanced filtering and pagination capabilities. deprecatedInVersion: '2.0' responses: '200': description: A list of products. content: application/json: schema: type: array items: $ref: '#/components/schemas/Product' '410': description: This endpoint is no longer available. components: schemas: Product: type: object properties: productName: type: string description: The name of the product. quantity: type: integer description: Quantity of the product in stock. required: - productName ``` ### Usage in SDKs Once the OpenAPI definition is updated, SDKs for supported languages will incorporate the deprecation details. ```ts /** * This endpoint is used for retrieving all products. * * * @return Response from the API call * @deprecated This method is deprecated since version 2.0. * **This endpoint is deprecated.** Use the `/products` endpoint for enhanced filtering and pagination capabilities. */ async getAllProductsLegacy( requestOptions?: RequestOptions ): Promise> { ... req.deprecated( 'ApiController.getAllProductsLegacy', 'This method is deprecated since version 2.0. **This endpoint is deprecated.** \\n Use the `/products` endpoint for enhanced filtering and pagination capabilities.' ); ... } ``` ```java /** * This endpoint is used for retrieving all products. * @deprecated * **This endpoint is deprecated.** Use the `/products` endpoint for enhanced filtering and pagination capabilities. This method was deprecated in version 2.0. * @return Returns the List of Product response from the API call * @throws ApiException Represents error response from the server. * @throws IOException Signals that an I/O exception of some sort has occurred. */ @Deprecated public List getAllProductsLegacy() throws ApiException, IOException { ... } ``` ```python @deprecated( deprecated_in='2.0', details='**This endpoint is deprecated.** \n ' ' Use the `/products` endpoint for enhanced filtering and pa' 'gination capabilities.' ) def get_all_products_legacy(self): """Does a GET request to /products/legacy. This endpoint is used for retrieving all products. Returns: List[Product]: Response from the API. A list of products. Raises: APIException: When an error occurs while fetching the data from the remote API. This exception includes the HTTP Response code, an error message, and the HTTP body that was received in the request. """ ``` ```php /** * This endpoint is used for retrieving all products. * * * @deprecated 2.0 **This endpoint is deprecated.** * Use the `/products` endpoint for enhanced filtering and pagination * capabilities. * * @return Product[] Response from the API call * * @throws ApiException Thrown if API call fails */ public function getAllProductsLegacy(): array { ... } ``` ```csharp /// /// This endpoint is used for retrieving all products. /// /// cancellationToken. /// Returns the List of Models.Product response from the API call. [Obsolete("**This endpoint is deprecated.** \n Use the `/products` endpoint for enhanced filtering and pagination capabilities. This method was deprecated in version 2.0.")] public async Task> GetAllProductsLegacyAsync(CancellationToken cancellationToken = default) { ... } ``` ```ruby # This endpoint is used for retrieving all products. # @return [Array[Product]] response from the API call. def get_all_products_legacy warn "Endpoint get_all_products_legacy in APIController is deprecated si'\ 'nce version 2.0. **This endpoint is deprecat'\ 'ed.** \n Use the `/products` endpoint for enhanced filteri'\ 'ng and pagination capabilities." ... end ``` ```go // GetAllProductsLegacy takes context as parameters and // returns an models.ApiResponse with []models.Product data and // an error if there was an issue with the request or response. // Deprecated: **This endpoint is deprecated.** // Use the `/products` endpoint for enhanced filtering and pagination capabilities. // This method was deprecated in version : 2.0. // This endpoint is used for retrieving all products. func (a *APIController) GetAllProductsLegacy(ctx context.Context) ( models.ApiResponse[[]models.Product], error) { ... } ``` #### Compiler or Runtime Warnings for Deprecated Endpoints Here are examples of compiler or runtime warnings generated for the example in the respective languages. These warnings or messages typically appear during the build process or when the deprecated methods are invoked. ```ts // TypeScript generates a warning when using deprecated methods like this: let products = await api.getAllProductsLegacy(); // Warning: 'getAllProductsLegacy' is deprecated. This method is deprecated since version 2.0. **This endpoint is deprecated.** // Use the `/products` endpoint for enhanced filtering and pagination capabilities. This method was deprecated in version 2.0. ``` ```java // Java produces a compiler warning if you call a deprecated method, // unless the warning is suppressed with `@SuppressWarnings("deprecation")`. List products = api.getAllProductsLegacy(); // Warning: getAllProductsLegacy() in APIController has been deprecated. ``` ```python # The `deprecated` library (commonly used for marking methods as deprecated in Python) # produces a runtime warning when the method is called: api.get_all_products_legacy() # WARNING: Call to deprecated method (or function) get_all_products_legacy. # **This endpoint is deprecated.** Use the `/products` endpoint for enhanced filtering and pagination capabilities. ``` ```php // PHP typically logs a warning if the `@deprecated` tag is documented // and a custom static analysis tool or IDE detects it. // A runtime error like this can appear based on tool configuration: $products = $api->getAllProductsLegacy(); // Warning: Call to deprecated function: getAllProductsLegacy() ``` ```csharp // .NET marks the method with `[Obsolete]` which shows a warning during compile time: var products = await api.GetAllProductsLegacyAsync(); // Warning: 'APIController.GetAllProductsLegacyAsync(CancellationToken)' is obsolete: 'This endpoint is deprecated. Use the `/products` endpoint for enhanced filtering and pagination capabilities.' ``` ```ruby # Ruby produces runtime warnings if the `warn` or similar deprecation notices are manually triggered in the method: api.get_all_products_legacy # WARNING: This endpoint is deprecated. Use the `/products` endpoint for enhanced filtering and pagination capabilities. ``` ```go // Go does not have built-in support for deprecation warnings, but static analysis tools like `golint` // can generate warnings based on the comment `// Deprecated:`: api.GetAllProductsLegacy(ctx) // Warning from linting tool: // GetAllProductsLegacy is deprecated: Use the `/products` endpoint for enhanced filtering and pagination capabilities. This method was deprecated in version : 2.0. ``` These warnings rely on language-specific tools or built-in annotation mechanisms to indicate deprecation during development or runtime. --- # Dynamic Error Messages Source: https://docs.apimatic.io/generate-sdks/sdk-features/dynamic-error-messages/ While [Custom Error Messages](custom-error-messages.md) feature allows users to define static string against HTTP responses, it doesn't support a way to provide any information from the exception at runtime. For this purpose, we have introduced Dynamic Error Messages feature that allows you to define templated messages that populate placeholders at runtime. ### Configure Dynamic Error Messages Error templates are customized using a map structure that you can edit in the your OpenAPI specification file. These are configured at either endpoint level or globally; the syntax of both is shown below: ```json title="OpenAPI v3.0" // At endpoint level "/pets": { "post": { ... "responses": { "400": { "description": "Static error message" } }, "x-operation-settings": { "ErrorTemplates": { "401": "Error message - {placeholder1} - {placeholder2}", "403": "Error message - {placeholder1} - {placeholder3}", "0": "Error message - {placeholder4}" } } } } // Globally for all endpoints "x-codegen-settings": { "ErrorTemplates": { "404": "Error message - {placeholder}" } } ``` In this map, - **Error code**: Must be a valid HTTP error status code. (4XX - 5XX) - **Error message**: The string you want as an error message. - **Placeholder**: Placeholder that is replaced by data from an exception at runtime. - **0**: Runs in case of any undeclared error codes. For example, here's an HTTP response header: ``` 200 OK Connection: Keep-Alive Content-Type: text/html Server: Apache ``` And its HTTP response body: ``` json { "category": "AUTHENTICATION_ERROR", "description": "UNAUTHORIZED", "detail": "The request could not be authorized." } ``` From this response, you can use the properties `connection`, `server`, `category` and `detail` etc. as placeholders inside your message template to define dynamic HTTP error response. The available placeholders that can be used are listed below: | Source | Placeholder | Details | Example | | --------------- | ---------------------- | -------------------------------------------------------------------------------------------------------| --------------------- | | Status code | $statusCode | Use this placeholder to add the status response code at runtime. | `{$statusCode}` | | Response header | $response.header.header_key | Use this placeholder to add a key from response header. | `{$response.header.Content-Type}` | | Response body | $response.body#/json_pointer | Use this placeholder to add a parameter from the response body. | `{$response.body#/detail}` | You can use any of these placeholders or a combination of them while defining error templates. :::info To populate these placeholders at runtime, we have extended the [runtime expressions feature](https://github.com/OAI/OpenAPI-Specification/blob/main/versions/3.1.0.md#runtime-expressions) of OpenAPI specification that allows defining values based on objects of an HTTP message. ::: For example, here's how you can configure dynamic error message in your API specification: ```json title="OpenAPI v3.0" "ErrorTemplates": { "401": "Response returned of status code - {$statusCode}, content type - {$response.header.Content-Type} and category - {$reponse.body#/category}" } ``` Once you have configured dynamic error messages, you can catch the response in the API call. ```csharp try { petsController.CreatePet(pet); } catch (ApiException exception) { // Printing the error message Console.WriteLine(exception.Message); } ``` Through this configured message, SDK will surface the following error message: ``` Response returned of status code - 401, content type - text/html and category - AUTHENTICATION_ERROR. ``` For more details on how these error templates work, please refer to [Error Templates in OpenAPI CodeGen Extensions](https://docs.apimatic.io/specification-extensions/swagger-codegen-extensions/#error-templates). ## Use Cases The following scenarios cover multiple use cases of customizing error response messages. ### Configure Single Error Message Here's a simple configuration to customize an error message against one error code and its behavior. ```json title="OpenAPI v3.0" "ErrorTemplates": { "403": "Response returned an error because {$response.body#/details}." } ``` **Behavior**: - If the returned status code is `403`, then the error message will be customized to: ``` Response returned an error because client is forbidden from accessing the server. ``` - In the case where the above mentioned placeholders are used incorrectly or the placeholder could not be resolved(for example when the response body JSON does *not* contain the specified property), then the returned response will be: ``` Response returned an error because . ``` - In the case where only one HTTP code is configured, if the returned code is anything other than 403, then the returned response will be: ``` HTTP Response Not OK. ``` ### Configure Multiple Error Messages Here's how you can configure multiple error messages at once. ```json title="OpenAPI v3.0" "ErrorTemplates": { "400": "Response returned an error with status code {$statusCode}.", "402": "Response returned an error of category {$response.body#/category} - {$response.body#/detail}" } ``` **Behavior**: - If the error code is `400`, then the error response will be: ``` Response returned an error with status code 400. ``` - If the error code is `402`, then the error response will be: ``` Response returned an error of category INVALID_PAYMENT - This call requires payment details. ``` - In this case where only selective codes are customized, if the returned error code is anything other than 400 or 402, then the error response will be: ``` HTTP Response Not OK. ``` ### Configure Default Error Message Here's how you can configure a default case that runs in case the returned error response is undeclared. ```json title="OpenAPI v3.0" "ErrorTemplates": { "400": "Response returned an error with status code {$statusCode}.", "402": "Response returned an error of category {$response.body#/category} - {$response.body#/detail}", "0": "Response returned an error with status code {$statusCode}" } ``` **Behavior**: - In this case, if the returned HTTP code is either `400` or `402`, then the respective messages will be displayed. - In case the returned response is neither of these configured HTTP codes, then the returned response will be the message configured under `0` key. ### Configure Error Messages for Error Range To configure error messages for an entire error range (either 4XX or 5XX), you can mention the range instead of error status code in the `ErrorTemplates`. ```json title="OpenAPI v3.0" "ErrorTemplates": { "4XX": "Response returned an error of category {$response.body#/category} and content type {$response.header.Content-Type}.", "5XX": "Response returned an error with status code {$statusCode} and details: {$response.body#/detail}." } ``` **Behavior**: - If the returned error code falls in the range 400 - 499, then the returned message will be: ``` Response returned an error of category INVALID_PAYMENT and content type application/json. ``` - If the returned error code falls in the range 500 - 599, then the returned message will be: ``` Response returned an error with status code 501 and details: The request functionality is not supported. ## Priority of Customized Error Messages If both Custom Error Messages and Dynamic Error Messages have been configured, then the following priority decides which error message will be displayed: 1. Highest priority will go to **error template customized at endpoint level**. 2. Next is **error response description customized at endpoint level**. 3. Last is **error templates customized at global level**. For example, here's an OpenAPI specification file that has Custom Error Messages and Dynamic Error Messages configured: ```json title="OpenAPI v3.0" "/pets": { "post": { ... "responses": { "400": { "description": "Call failed due to bad request." }, "403": { "description": "Access is forbidden." } }, "x-operation-settings": { "ErrorTemplates": { "400": "Response returned an error with {$statusCode} - {$response.body#/detail}", "401": "Response returned an error of {$response.body#/category} and content type {$response.header.Content-Type}" } } } } ... "x-codegen-settings": { "ErrorTemplates": { "400": "Response returned an error with {$statusCode}", "403": "Response returned an error because {$response.body#/detail}", "404": "Response returned an error of category {$response.body#/category}", "0": "Response returned an error because {$response.body#/detail}" } } ``` In this scenario: - In case of error `400`, message configured under `x-operation-settings` will take precendence. - In case of error `403`, message configured under error `responses` will take precedence. - In case of error `405`, message configured for `0` in `x-codegen-settings` will be executed. --- # Inheritance and Polymorphism with AllOf Source: https://docs.apimatic.io/generate-sdks/sdk-features/inheritance-and-polymorphism-with-all-of/ import Tabs from '@theme/Tabs'; import TabItem from '@theme/TabItem'; APIMatic's SDKs support `allOf` types defined in OpenAPI specifications. This feature allows you to define schemas that inherit from multiple definitions, ensuring that an object adheres to all specified schemas simultaneously. This approach promotes modular and reusable schema definitions. ### Configure AllOf in your OpenAPI Definition Here is an example of an `allOf` type where discriminator is `position` defined in OpenAPI definition: ``` yaml components: schemas: User: type: object properties: position: type: string name: type: string email: type: string format: email discriminator: propertyName: position mapping: Empl: Employee Adm: Admin User: User Admin: allOf: - $ref: '#/components/schemas/User' - type: object properties: permissions: type: array items: type: string Employee: allOf: - $ref: '#/components/schemas/User' - type: object properties: role: type: string ``` In the above example: - The `User` schema defines common properties. - The `Admin` schema extends the `User` schema and adds `permissions`. - The `Employee` schema extends the `User` schema and adds `role`. ### Model Definitions in SDKs :::note - If `allOf` is used **with** a discriminator, the SDK handles type resolution for polymorphic schemas. - If `allOf` is used **without** a discriminator, the SDK merges all referenced properties into a single structure. ::: Here is how inheritance and polymorphism affects the models in APIMatic SDKs when the `allOf` construct is used. ```ts export interface User { name?: string; email?: string; } export interface Admin extends User { permissions?: string[]; } export interface Employee extends User { role?: string; } ``` ```java public class User { private String name; private String email; } public class Admin extends User { private List permissions; } public class Employee extends User { private String role; } ``` ```python class User(object): def __init__(self, name=None, email=None): class Admin(User): def __init__(self, name=None, email=None, permissions=None): super(Admin, self).__init__(name, email) class Employee(User): def __init__(self, name=None, email=None, role=None): super(Employee, self).__init__(name, email) ``` ``` csharp public class User { public string Name { get; set; } public string Email { get; set; } } public class Admin : User { public List Permissions { get; set; } } public class Employee : User { public string Role { get; set; } } ``` ``` go type User struct { Name *string `json:"name,omitempty"` Email *string `json:"email,omitempty"` } type Admin struct { User Permissions []string `json:"permissions,omitempty"` } type Employee struct { User Role string `json:"role,omitempty"` } ``` ```php class User { /** * @var string|null */ private $name; /** * @var string|null */ private $email; } class Admin extends User { /** * @var string[]|null */ private $permissions; } class Employee extends User { /** * @var string|null */ private $role; } ``` ```ruby class User < BaseModel # @return [String] attr_accessor :name # @return [String] attr_accessor :email class Admin < User # @return [Array[String]] attr_accessor :permissions class Employee < User # @return [String] attr_accessor :role ``` Any endpoint that takes in an argument of type `User` will also be compatible with types `Admin` and `Employee`. Take the following example of an endpoint `CreateUser` that takes in the argument of type `User`. ```ts async () => { const admin: Admin = { name: 'Alice', email: 'alice@example.com', permissions: ['read', 'write'] }; await apiController.createUser(admin); const employee: Employee = { name: 'Bob', email: 'bob@example.com', role: 'Manager' }; await apiController.createUser(employee); }; ``` ```java Admin admin = new Admin.Builder() .name("Alice") .email("alice@example.com") .permissions(Collections.singletonList("read", "write")) .build(); apiController.createUser(admin); Employee employee = new Employee.Builder() .name("Bob") .email("bob@example.com") .role("Manager") .build(); apiController.createUser(employee); ``` ```python admin = Admin(name="Alice", email="alice@example.com", permissions=["read", "write"]) api_controller.create_user(admin) employee = Employee(name="Bob", email="bob@example.com", role="Manager") api_controller.create_user(employee) ``` ``` csharp Admin admin = new Admin { Name = "Alice", Email = "alice@example.com", Permissions = new List { "read", "write" } }; apiController.CreateUser(admin); Employee employee = new Employee { Name = "Bob", Email = "bob@example.com", Role = "Manager" }; apiController.CreateUser(employee); ``` ``` go admin := Admin{ User: User{ Name: "Alice", Email: "alice@example.com" }, Permissions: []string{"read", "write"} } apiController.CreateUser(admin); employee := Employee{ User: User{ Name: "Bob", Email: "bob@example.com" }, Role: "Manager" } apiController.CreateUser(employee); ``` ```php $admin = AdminBuilder::init() ->name("Alice") ->email("alice@example.com") ->permissions(["read", "write"]) ->build(); $client->getApiController()->createUser($admin); $employee = EmployeeBuilder::init() ->name("Bob") ->email("bob@example.com") ->role("Manager") ->build(); $client->getApiController()->createUser($employee); ``` ```ruby admin = Admin.new(name: "Alice", email: "alice@example.com", permissions: ["read", "write"]) api_controller.create_user(admin) employee = Employee.new(name: "Bob", email: "bob@example.com", role: "Manager") api_controller.create_user(employee) ``` ### Key Benefits - **Re-usability**: Promotes schema reuse by allowing composition. - **Clarity**: Simplifies schema definitions by breaking down complex models into smaller components. --- # Logging Source: https://docs.apimatic.io/generate-sdks/sdk-features/logging/ import Tabs from '@theme/Tabs'; import TabItem from '@theme/TabItem'; APIMatic's SDKs enable developers to conveniently log SDK activities using their preferred loggers. This capability is a vital tool for debugging and optimizing SDK performance in both production and development environments. ### Key Benefits - **Enhanced Debugging**: Easily track API calls, responses, and errors within the SDK, simplifying the process of identifying and resolving issues. - **Comprehensive Monitoring**: Monitor SDK performance and behavior through detailed logs, ensuring smoother integration and maintenance. - **Cross-Language Consistency**: Consistent logging support across PHP, Ruby, C#, and Python ensures a unified experience for developers working in multiple ecosystems. - **Customizable Logging Levels**: Control the granularity of logs to suit development, testing, or production environments. - **Sensitive Data Masking**: Automatically masks sensitive headers in logs, ensuring secure handling of confidential information. ### How to Configure Logging 1. **Enable Logging**: - Generate an SDK with the `EnableLogging` [CodeGen Setting](../customize-sdks/codegen-settings/sdk-interface-customization.md#enable-logging) set to `true`. 2. **Specify Log Levels**: - Choose the desired log level (for example, `DEBUG`, `INFO`, `ERROR`). - Update the SDK configuration to include the selected log level. 3. **Configure logging**: - **Request Logging Options** - **Log Body**: Controls the logging of the request body. - **Log Headers**: Controls the logging of request headers. - **Exclude Headers**: Excludes specified headers from the log output. - **Include Headers**: Includes only specified headers in the log output. - **Unmask Headers**: Logs specified headers without masking, revealing their actual values. - **Include Query in Path**: Determines whether to include query parameters in the logged request path. - **Response Logging Options** - **Log Body**: Controls the logging of the response body. - **Log Headers**: Controls the logging of response headers. - **Exclude Headers**: Excludes specified headers from the log output. - **Include Headers**: Includes only specified headers in the log output. - **Unmask Headers**: Logs specified headers without masking, revealing their actual values. ```ts const client = new SDKClient({ logging: { logLevel: LogLevel.Debug, maskSensitiveHeaders: true, logRequest: { logBody: true, logHeaders: true, includeQueryInPath: true, headersToInclude: ["Content-Type", "Content-Encoding"] }, logResponse: { logHeaders: true, headersToExclude: ["X-Powered-By"] } } }); ``` ```java SDKClient client = new SDKClient.Builder() .loggingConfig(builder -> builder .level(Level.DEBUG) .maskSensitiveHeaders(true) .requestConfig(reqConfig -> reqConfig .body(true) .headers(true) .includeQueryInPath(true) .includeHeaders("Content-Type", "Content-Encoding")) .responseConfig(resConfig -> resConfig .headers(true) .excludeHeaders("X-Powered-By"))) .build(); ``` ```python client = SDKClient( logging_configuration=LoggingConfiguration( log_level=logging.INFO, mask_sensitive_headers=True, request_logging_config=RequestLoggingConfiguration( log_body=True, log_headers=True, include_query_in_path=True, headers_to_include=['Content-Type', 'Content-Encoding'] ), response_logging_config=ResponseLoggingConfiguration( log_headers=True, headers_to_exclude=['X-Powered-By'] ) ) ) ``` ```csharp SdkClient client = new SdkClient.Builder() .LoggingConfig(config => config .LogLevel(LogLevel.Information) .MaskSensitiveHeaders(true) .RequestConfig(reqConfig => reqConfig .Body(true) .Headers(true) .IncludeQueryInPath(true) .IncludeHeaders("Content-Type", "Content-Encoding")) .ResponseConfig(respConfig => respConfig .Headers(true) .ExcludeHeaders("X-Powered-By")) ) .Build(); ``` ``` go config := CreateConfigurationFromEnvironment( WithLoggerConfiguration( WithLevel("info"), WithMaskSensitiveHeaders(true), WithRequestConfiguration( WithRequestBody(true), WithRequestHeaders(true), WithIncludeQueryInPath(true), WithIncludeRequestHeaders("Content-Type", "Content-Encoding"), ), WithResponseConfiguration( WithResponseHeaders(true), WithExcludeResponseHeaders("X-Powered-By"), ), ), ) client := NewClient(config) ``` ```php $client = SdkClientBuilder::init() ->loggingConfiguration( LoggingConfigurationBuilder::init() ->level(LogLevel::INFO) ->maskSensitiveHeaders(true) ->requestConfiguration( RequestLoggingConfigurationBuilder::init() ->body(true) ->headers(true) ->includeQueryInPath(true) ->includeHeaders('Content-Type', 'Content-Encoding') ) ->responseConfiguration( ResponseLoggingConfigurationBuilder::init() ->headers(true) ->excludeHeaders('X-Powered-By') ) ) ->build(); ``` ```ruby client = SDKClient.new( logging_configuration: LoggingConfiguration.new( log_level: Logger::INFO, mask_sensitive_headers: true, request_logging_config: RequestLoggingConfiguration.new( log_body: true, log_headers: true, include_query_in_path: true, headers_to_include: %w[Content-Type Content-Encoding] ), response_logging_config: ResponseLoggingConfiguration.new( log_headers: true, headers_to_exclude: ['X-Powered-By'] ) ) ) ``` ### Use Cases - **Error Diagnosis**: Quickly identify and troubleshoot errors in API calls. - **Performance Monitoring**: Analyze response times and performance metrics for API operations. - **Compliance Tracking**: Maintain logs for audit trails and compliance purposes. - **Development Insights**: Gain detailed insights into SDK usage during development. --- # Multiple Authentication Source: https://docs.apimatic.io/generate-sdks/sdk-features/multiple-authentication/ import Tabs from '@theme/Tabs'; import TabItem from '@theme/TabItem'; APIMatic's SDKs support multiple authentication mechanisms within a single API, enabling different endpoints to use distinct authentication schemes. This capability allows APIs to implement granular access control and security requirements. ## Configure multiple Authentication schemes in your OpenAPI Definition Multiple Authentication schemes can be configured in an OpenAPI definition as follows: ``` yaml components: securitySchemes: basicAuth: type: http scheme: basic apiToken: type: apiKey name: token in: header ``` The above definition specifies two different security schemes. These security schemes can either be applied to the whole API globally or to an individual endpoint. You can follow the [OpenApi documentation](https://spec.openapis.org/oas/v3.1.0.html#security-scheme-object) to learn more about applying security schemes to your OpenAPI definition. ### Authentication Scheme Combinations OpenAPI definitions supports two types of authentication combinations: **OR Case** ```yaml security: - basicAuth: [] apiToken: [] ``` In this example, a particular endpoint can be accessed using either `basicAuth` OR `apiToken`. **AND Case** ```yaml security: - basicAuth: [] - apiToken: [] ``` In this example, a particular endpoint requires both `basicAuth` AND `apiToken`. ## SDK Examples With Multiple Authentication scheme support, SDKs can apply more than one security scheme to any request and distinguish between `AND` or `OR` combinations of security definitions. When an endpoint method is invoked, the SDK checks whether the required authentication credentials are present in the client configuration. If credentials are missing, an `AuthValidationException` is thrown, as shown below: ``` AuthValidationException: The following authentication credentials were required: -> Missing required auth credential: token -> Missing required auth credential: api-key ``` This validation prevents unnecessary network calls, saving costs, and enables developers to provide relevant error messages to application users. This is what the client initialization code looks like for an SDK with multiple Authentication schemes defined in the OpenAPI definition. ```ts const client = new Client({ basicAuthCredentials: { username: "Username", password: "Password", }, apiKeyCredentials: { token: "Token", }, }); ``` ```java SdkClient client = new SdkClient.Builder() .basicAuthCredentials( new BasicAuthModel.Builder( "Username", "Password" ) .build()) .apiKeyCredentials( new ApiKeyModel.Builder( "Token" ) .build()) .build(); ``` ```python client = SdkClient( basic_auth_credentials=BasicAuthCredentials( username='Username', password='Password' ), api_key_credentials=ApiKeyCredentials( token='Token' ) ) ``` ```php $client = SdkClientBuilder::init() ->basicAuthCredentials( BasicAuthCredentialsBuilder::init( 'Username', 'Password' ) ) ->apiKeyCredentials( ApiKeyCredentialsBuilder::init( 'Token' ) ) ->build(); ``` ```csharp SdkClient client = new SdkClient.Builder() .BasicAuthCredentials( new BasicAuthModel.Builder( "Username", "Password" ) .Build()) .ApiKeyCredentials( new ApiKeyModel.Builder( "Token" ) .Build()) .Build(); ``` ```ruby client = Sdk::Client.new( basic_auth_credentials: BasicAuthCredentials.new( username: 'Username', password: 'Password' ), api_key_credentials: ApiKeyCredentials.new( token: 'Token', ) ) ``` ```go config := CreateConfigurationFromEnvironment( WithBasicAuthCredentials( NewBasicAuthCredentials("Username", "Password"), ), WithApiKeyCredentials( NewApiKeyCredentials("Token", "Key"), ), ) client := NewClient(config) ``` --- # OAuth 2.0 Support Source: https://docs.apimatic.io/generate-sdks/sdk-features/oauth-2-support/ import Tabs from '@theme/Tabs'; import TabItem from '@theme/TabItem'; All the SDKs support popular OAuth 2.0 flows and provide utility methods to generate or refresh access tokens. The SDK handles request authentication for the user while the user only needs to provide the required credentials once during client initialization. In this article, the words "flow" or "grant" refer to the OAuth 2.0 Grant Types as defined [here](https://oauth.net/2/grant-types/). For details on configuring supported OAuth 2.0 flows in your API specification, please refer to [the OpenAPI documentation](https://swagger.io/docs/specification/v3_0/authentication/oauth2/). After configuring your OpenAPI specification and generating the SDK, read below to see how you can use the SDKs to authorize API calls. The currently supported flows include: 1. [Client Credentials Grant](#client-credentials-grant) 2. [Resource Owner Password Credentials Grant(a.k.a Password Grant)](#resource-owner-password-credentials-grant) 3. [Authorization Code Grant](#authorization-code-grant) ## Client Credentials Grant The Client Credentials Grant flow supports: - [Automatic Token Refresh](./auto-refresh-oauth-2-tokens.md) - Callback for Token Expiry or Token Update Events ### Client Initialization You can initialize the client as shown below. ```csharp SdkClient client = new SdkClient.Builder() .OAuthCCGCredentials( new OAuthCCGModel.Builder( "OAuthClientId", "OAuthClientSecret" ) .Build()) .Build(); ``` ```java SdkClient client = new SdkClient.Builder() .clientCredentialsAuth(new ClientCredentialsAuthModel.Builder( "OAuthClientId", "OAuthClientSecret" ) .build()) .build(); ``` ```python from sdk.http.auth.o_auth_2 import ClientCredentialsAuthCredentials from sdk.sdk_client import SdkClient client = SdkClient( client_credentials_auth_credentials=ClientCredentialsAuthCredentials( o_auth_client_id='OAuthClientId', o_auth_client_secret='OAuthClientSecret' ) ) ``` ```ruby require 'sdk' include Sdk client = Client.new( client_credentials_auth_credentials: ClientCredentialsAuthCredentials.new( o_auth_client_id: 'OAuthClientId', o_auth_client_secret: 'OAuthClientSecret' ) ) ``` ```ts const client = new Client({ clientCredentialsAuthCredentials: { oAuthClientId: 'OAuthClientId', oAuthClientSecret: 'OAuthClientSecret', }, }); ``` ```php $client = SdkClientBuilder::init() ->clientCredentialsAuthCredentials( ClientCredentialsAuthCredentialsBuilder::init( 'OAuthClientId', 'OAuthClientSecret' ) ) ->build(); ``` ```go import ( "sdk" ) // ... client := sdk.NewClient( sdk.CreateConfiguration( sdk.WithClientCredentialsAuthCredentials( sdk.NewClientCredentialsAuthCredentials( "OAuthClientId", "OAuthClientSecret", ), ), ), ) ``` This will fetch the OAuth token automatically when any of the endpoints, requiring *OAuth 2.0 Client Credentials Grant* authentication, are called. If you wish to configure this token-fetching behavior, see [Setting Tokens Automatically](#setting-tokens-automatically). ## Resource Owner Password Credentials Grant ### Client Initialization You can initialize the client as shown below. ```csharp SdkClient client = new SdkClient.Builder() .OAuthROPCGCredentials( new OAuthROPCGModel.Builder( "OAuthClientId", "OAuthClientSecret", "OAuthUsername", "OAuthPassword" ) .Build()) .Build(); ``` With the Resource Owner Password Credentials Grant, your application must [get a token](#setting-tokens-explicitly) before it can execute an endpoint call. ```java SdkClient client = new SdkClient.Builder() .resourceOwnerAuth(new ResourceOwnerAuthModel.Builder( "OAuthClientId", "OAuthClientSecret", "OAuthUsername", "OAuthPassword" ) .build()) .build(); ``` With the Resource Owner Password Credentials Grant, your application must [get a token](#setting-tokens-explicitly) before it can execute an endpoint call. ```python from sdk.models.o_auth_scope_enum import OAuthScopeEnum from sdk.http.auth.o_auth_2 import ResourceOwnerAuthCredentials from sdk.sdk_client import SdkClient client = SdkClient( resource_owner_auth_credentials=ResourceOwnerAuthCredentials( o_auth_client_id="OAuthClientId", o_auth_client_secret="OAuthClientSecret", o_auth_username="OAuthUsername", o_auth_password="OAuthPassword" ), ) ``` With the Resource Owner Password Credentials Grant, your application must [get a token](#setting-tokens-explicitly) before it can execute an endpoint call. ```ruby require 'sdk' include Sdk client = Client.new( resource_owner_auth_credentials: ResourceOwnerAuthCredentials.new( o_auth_client_id: 'OAuthClientId', o_auth_client_secret: 'OAuthClientSecret', o_auth_username: 'OAuthUsername', o_auth_password: 'OAuthPassword' ), ) ``` With the Resource Owner Password Credentials Grant, your application must [get a token](#setting-tokens-explicitly) before it can execute an endpoint call. ```ts const client = new Client({ resourceOwnerAuthCredentials: { oAuthClientId: 'OAuthClientId', oAuthClientSecret: 'OAuthClientSecret', oAuthUsername: 'OAuthUsername', oAuthPassword: 'OAuthPassword', } }); ``` This will fetch the OAuth token automatically when any of the endpoints, requiring *OAuth 2.0 Resource Owner Password Credentials Grant* authentication, are called. If you wish to configure this token-fetching behavior, see [Setting Tokens Automatically](#setting-tokens-automatically). ```php $client = SdkClientBuilder::init() ->resourceOwnerAuthCredentials( ResourceOwnerAuthCredentialsBuilder::init( 'OAuthClientId', 'OAuthClientSecret', 'OAuthUsername', 'OAuthPassword' ) ) ->build(); ``` This will fetch the OAuth token automatically when any of the endpoints, requiring *OAuth 2.0 Resource Owner Password Credentials Grant* authentication, are called. If you wish to configure this token-fetching behavior, see [Setting Tokens Automatically](#setting-tokens-automatically). ```go client := sdk.NewClient( sdk.CreateConfiguration( sdk.WithResourceOwnerAuthCredentials( sdk.NewResourceOwnerAuthCredentials( "OAuthClientId", "OAuthClientSecret", "OAuthUsername", "OAuthPassword", ), ), ), ) ``` With the Resource Owner Password Credentials Grant, your application must [get a token](#setting-tokens-explicitly) before it can execute an endpoint call. ## Authorization Code Grant ### 1\. Client Initialization ```csharp SdkClient client = new SdkClient.Builder() .OAuthACGCredentials( new OAuthACGModel.Builder( "OAuthClientId", "OAuthClientSecret", "OAuthRedirectUri" ) .OAuthScopes( new List { OAuthScopeOAuthACGEnum.ReadScope, }) .Build()) .Build(); ``` ```java SdkClient client = new SdkClient.Builder() .authorizationCodeAuth(new AuthorizationCodeAuthModel.Builder( "OAuthClientId", "OAuthClientSecret", "OAuthRedirectUri" ) .oAuthScopes(Arrays.asList( OAuthScopeEnum.READ_SCOPE, OAuthScopeEnum.WRITE_SCOPE )) .build()) .build(); ``` ```python from sdk.models.o_auth_token import OAuthToken from sdk.models.o_auth_scope_enum import OAuthScopeEnum from sdk.exceptions.api_exception import APIException from sdk.http.auth.o_auth_2 import AuthorizationCodeAuthCredentials from sdk.configuration import Environment from sdk.sdk_client import SdkClient client = SdkClient( authorization_code_auth_credentials=AuthorizationCodeAuthCredentials( o_auth_client_id='OAuthClientId', o_auth_client_secret='OAuthClientSecret', o_auth_redirect_uri='OAuthRedirectUri', o_auth_scopes=[ OAuthScopeEnum.READ_SCOPE, OAuthScopeEnum.WRITE_SCOPE ] ) ) ``` ```ruby require 'sdk' include Sdk client = Client.new( authorization_code_auth_credentials: AuthorizationCodeAuthCredentials.new( o_auth_client_id: 'OAuthClientId', o_auth_client_secret: 'OAuthClientSecret', o_auth_redirect_uri: 'OAuthRedirectUri', o_auth_scopes: [ OAuthScopeEnum::READ_SCOPE, OAuthScopeEnum::WRITE_SCOPE ] ), ) ``` ```ts const client = new Client({ authorizationCodeAuthCredentials: { oAuthClientId: 'OAuthClientId', oAuthClientSecret: 'OAuthClientSecret', oAuthRedirectUri: 'OAuthRedirectUri', oAuthScopes: [ OAuthScopeEnum.ReadScope, OAuthScopeEnum.WriteScope ] }, }); ``` ```php $client = SdkClient::init() ->authorizationCodeAuthCredentials( AuthorizationCodeAuthCredentialsBuilder::init( 'OAuthClientId', 'OAuthClientSecret', 'OAuthRedirectUri' ) ->oAuthScopes( [ OAuthScopeEnum::READ_SCOPE, OAuthScopeEnum::WRITE_SCOPE ] ) ) ->build(); ``` ```go client := sdk.NewClient( sdk.CreateConfiguration( sdk.WithAuthorizationCodeAuthCredentials( sdk.NewAuthorizationCodeAuthCredentials( "OAuthClientId", "OAuthClientSecret", "OAuthRedirectUri", ). WithOAuthScopes([]models.OAuthScopeEnum{ models.OAuthScopeEnum_READSCOPE, models.OAuthScopeEnum_WRITESCOPE, }), ), ), ) ``` Your application must obtain user authorization before it can execute an endpoint call. This authorization includes the following steps: ### 2\. Obtain user consent To obtain user's consent, you must redirect the user to the authorization page. The `BuildAuthorizationUrl()` method creates the URL to the authorization page. You must have initialized the client with scopes for which you need permission to access. ```csharp string authUrl = await client.AuthorizationCodeAuth.BuildAuthorizationUrl(); ``` You might want to send additional query parameters in the URL. For example, you might want a `state` parameter to correlate requests and responses or a `prompt` parameter for re-prompting user consent every time access is requested. ```csharp string authUrl = await Client.AuthorizationCodeAuth.BuildAuthorizationUrl( state: "random_state_string", additionalParameters: new Dictionary { ["prompt"] = "consent" } ); ``` To obtain user's consent, you must redirect the user to the authorization page. The `buildAuthorizationUrl()` method creates the URL to the authorization page. You must have initialized the client with scopes for which you need permission to access. ```java String authUrl = client.getAuthorizationCodeAuth().buildAuthorizationUrl(); ``` You might want to send additional query parameters in the URL. For example, you might want a `state` parameter to correlate requests and responses or a `prompt` parameter for re-prompting user consent every time access is requested. ```java String state = "random_state_string"; Map additionalParams = new HashMap<>(); additionalParams.put("prompt", "consent"); String authUrl = client.getAuthorizationCodeAuth().buildAuthorizationUrl(state, additionalParams); ``` To obtain user's consent, you must redirect the user to the authorization page. The `get_authorization_url()` method creates the URL to the authorization page. You must have initialized the client with scopes for which you need permission to access. ```python auth_url = client.http_acg.get_authorization_url() ``` You might want to send additional query parameters in the URL. For example, you might want a `state` parameter to correlate requests and responses or a `prompt` parameter for re-prompting user consent every time access is requested. ```python auth_url = client.http_acg.get_authorization_url( state="random_state_string", additional_params={"prompt": "consent"} ) ``` To obtain user's consent, you must redirect the user to the authorization page. The `get_authorization_url` method creates the URL to the authorization page. You must have initialized the client with scopes for which you need permission to access. ```ruby auth_url = client.http_acg.get_authorization_url ``` You might want to send additional query parameters in the URL. For example, you might want a `state` parameter to correlate requests and responses or a `prompt` parameter for re-prompting user consent every time access is requested. ```ruby auth_url = client.http_acg.get_authorization_url( state: 'random_state_string', additional_params: { prompt: 'consent' } ) ``` To obtain user's consent, you must redirect the user to the authorization page. The `buildAuthorizationUrl()` method creates the URL to the authorization page. You must have initialized the client with scopes for which you need permission to access. ```ts const authUrl = client.authorizationCodeAuthManager?.buildAuthorizationUrl(); ``` You might want to send additional query parameters in the URL. For example, you might want a `state` parameter to correlate requests and responses or a `prompt` parameter for re-prompting user consent every time access is requested. ```ts const authUrl = client.authorizationCodeAuthManager?.buildAuthorizationUrl( 'random_state_string', { prompt: 'consent' } ); ``` To obtain user's consent, you must redirect the user to the authorization page. The `buildAuthorizationUrl()` method creates the URL to the authorization page. You must have initialized the client with scopes for which you need permission to access. ```php $authUrl = $client->getAuthorizationCodeAuth()->buildAuthorizationUrl(); ``` You might want to send additional query parameters in the URL. For example, you might want a `state` parameter to correlate requests and responses or a `prompt` parameter for re-prompting user consent every time access is requested. ```php $authUrl = $client->getAuthorizationCodeAuth()->buildAuthorizationUrl( 'random_state_string', ['prompt' => 'consent'] ); ``` To obtain user's consent, you must redirect the user to the authorization page. The `BuildAuthorizationURL()` function creates the URL to the authorization page. You must have initialized the client with scopes for which you need permission to access. ```go state := "random_state_string" url := client.AuthorizationCodeAuthManager().BuildAuthorizationURL(&state) ``` ### 3\. Handle the OAuth server response Once the user responds to the consent request, the OAuth 2.0 server redirects the user to the redirect URI specified in the client initialization step. If the user approves the request, the authorization code will be sent as the `code` query string: ``` https://example.com/oauth/callback?code=XXXXXXXXXXXXXXXXXXXXXXXXX ``` If the user doesn't approve the request, the response contains an `error` query string: ``` https://example.com/oauth/callback?error=access_denied ``` ### 4\. Authorize the client using the code After receiving the authorization code, it can be exchanged for an *access token*. The access token is an object containing information for authorizing client requests and refreshing the token itself. ```csharp var authCode = GetAuthCodeFromRedirectUri() var authManager = client.OAuthACG; try { OAuthToken token = authManager.FetchToken(authCode); // re-initialize the client with OAuth token client = client.ToBuilder() .OAuthACGCredentials( client.OAuthACGModel.ToBuilder() .OAuthToken(token) .Build()) .Build(); } catch (ApiException e) { // TODO Handle exception } ``` ```java String authorizationCode = getAuthCodeFromRedirectUri() try { OAuthToken token = client.getAuthorizationCodeAuth().fetchToken(authorizationCode); // re-instantiate the client with oauth token client = client.newBuilder() .authorizationCodeAuth(client.getAuthorizationCodeAuthModel().toBuilder() .oAuthToken(token) .build()) .build(); } catch (Throwable e) { // TODO Handle exception } ``` ```python auth_code = get_auth_code_from_redirect_uri() try: token: OAuthToken = client.http_acg.fetch_token(auth_code) # re-initialize the client with OAuth token client = SdkClient( config=client.config.clone_with( resource_owner_auth_credentials=( client.config.resource_owner_auth_credentials.clone_with( o_auth_token=token ) ) ) ) except OAuthProviderException as ex: # handle exception pass except APIException as ex: # handle exception pass ``` ```ruby auth_code = get_auth_code_from_redirect_uri begin # re-initialize the client with OAuth token client = Client.new(config: client.config.clone_with( authorization_code_auth_credentials: client.config.authorization_code_auth_credentials.clone_with( o_auth_token: client.http_acg.fetch_token(auth_code) ) )) rescue OAuthProviderException, APIException => ex puts "#{ex.class} occurred: #{ex.message}" end ``` ```ts const authorizationCode = getAuthCodeFromRedirectUri(); try { const token = await client.authorizationCodeAuthManager?.fetchToken(authorizationCode); if (token) { client = client.withConfiguration({ authorizationCodeAuthCredentials: { oAuthClientId: 'OAuthClientId', oAuthClientSecret: 'OAuthClientSecret', oAuthRedirectUri: 'OAuthRedirectUri', oAuthScopes: [ OAuthScopeEnum.ReadScope, OAuthScopeEnum.WriteScope ], oAuthToken: token } }); } } catch(error) { // handle ApiError or OAuthProviderError if needed } ``` ```php try { $authorizationCode = self::getAuthCodeFromRedirectUri(); $token = $client->getAuthorizationCodeAuth()->fetchToken($authorizationCode); // re-build the client with oauth token $client = $client ->toBuilder() ->authorizationCodeAuthCredentials( $client->getAuthorizationCodeAuthCredentialsBuilder()->oAuthToken($token) ) ->build(); } catch (ApiException $e) { // handle exception } ``` ```go authCode := getAuthCodeFromRedirectUri() oAuthToken, err := client.AuthorizationCodeAuthManager().FetchToken(ctx, authCode) if err != nil { log.Fatalln(err) } else { // Printing the token fmt.Println(oAuthToken) } // Creating a new client with the token client = client.CloneWithConfiguration( sdk.WithAuthorizationCodeAuthCredentials( client.Configuration().AuthorizationCodeAuthCredentials(). WithOAuthToken(oAuthToken), ), ) ``` Additionally, you need to [manage access token lifetime](#setting-tokens-explicitly). The SDK provides some utilities to help you. ## Setting Tokens Automatically You can optionally specify callbacks that run whenever the OAuth token is expired/undefined or updated. The following examples use [Client Credentials Grant](#client-credentials-grant). *Note: the names of variables, functions, etc. will differ depending on your API specification.* ```csharp SdkClient client = new SdkClient.Builder() .OAuthCCGCredentials( new OAuthCCGModel.Builder( "OAuthClientId", "OAuthClientSecret" ) .OAuthTokenProvider(async (credentialsManager, token) => { // Add the callback handler to provide a new OAuth token // It will be triggered whenever the token is undefined or expired return LoadTokenFromDatabase() ?? await credentialsManager.FetchTokenAsync(); }) .OAuthOnTokenUpdate(token => { // It will be triggered whenever the token gets updated SaveTokenToDatabase(token); }) .Build()) .Build(); ``` ```java SdkClient client = new SdkClient.Builder() .clientCredentialsAuth(new ClientCredentialsAuthModel.Builder( "OAuthClientId", "OAuthClientSecret" ) .oAuthTokenProvider((lastOAuthToken, credentialsManager) -> { // Add the callback handler to provide a new OAuth token // It will be triggered whenever the lastOAuthToken is undefined or expired OAuthToken oAuthToken = loadTokenFromDatabase(); if (oAuthToken != null && !credentialsManager.isTokenExpired(oAuthToken)) { return oAuthToken; } return credentialsManager.fetchToken(); }) .oAuthOnTokenUpdate(oAuthToken -> { // Add the callback handler to perform operations like save to DB or file etc. // It will be triggered whenever the token gets updated saveTokenToDatabase(oAuthToken); }) .build()) .build(); ``` ```python from sdk.http.auth.o_auth_2 import ClientCredentialsAuthCredentials, OAuth2 from sdk.models.o_auth_token import OAuthToken from sdk.sdk_client import SdkClient def o_auth_token_provider(last_oauth_token: OAuthToken, auth_manager: OAuth2): # Add the callback handler to provide a new OAuth token # It will be triggered whenever the last provided o_auth_token is null or expired o_auth_token = load_token_from_database() if o_auth_token is None: o_auth_token = auth_manager.fetch_token() return o_auth_token def o_auth_on_token_update(o_auth_token: OAuthToken): # Add the callback handler to perform operations like save to DB or file etc. # It will be triggered whenever the token gets updated save_token_to_database(o_auth_token) client = SdkClient( client_credentials_auth_credentials=ClientCredentialsAuthCredentials( o_auth_client_id='OAuthClientId', o_auth_client_secret='OAuthClientSecret', o_auth_on_token_update=o_auth_on_token_update, o_auth_token_provider=o_auth_token_provider ) ) ``` ```ruby client = Client.new( client_credentials_auth_credentials: ClientCredentialsAuthCredentials.new( o_auth_client_id: 'OAuthClientId', o_auth_client_secret: 'OAuthClientSecret', o_auth_token_provider: -> (last_oauth_token, auth_manager){ # Add the callback handler to provide a new OAuth token # It will be triggered whenever the last provided o_auth_token is null or expired o_auth_token = load_token_from_database o_auth_token = auth_manager.fetch_token if o_auth_token.nil? o_auth_token }, o_auth_on_token_update: -> (o_auth_token){ # Add the callback handler to perform operations like save to DB or file etc. # It will be triggered whenever the token gets updated save_token_to_database(o_auth_token) } ), ) ``` ```ts const client = new Client({ clientCredentialsAuthCredentials: { oAuthClientId: 'OAuthClientId', oAuthClientSecret: 'OAuthClientSecret', oAuthTokenProvider: (lastOAuthToken: OAuthToken | undefined, authManager: ClientCredentialsAuthManager) => { // Add the callback handler to provide a new OAuth token // It will be triggered whenever the lastOAuthToken is undefined or expired return loadTokenFromDatabase() ?? authManager.fetchToken(); }, oAuthOnTokenUpdate: (token: OAuthToken) => { // Add the callback handler to perform operations like save to DB or file etc. // It will be triggered whenever the token gets updated saveTokenToDatabase(token); } } }); ``` ```php $client = SdkClientBuilder::init() ->clientCredentialsAuthCredentials( ClientCredentialsAuthCredentialsBuilder::init( 'OAuthClientId', 'OAuthClientSecret' ) ) ->oAuthTokenProvider( function (?OAuthToken $lastOAuthToken, ClientCredentialsAuthManager $authManager): OAuthToken { // Add the callback handler to provide a new OAuth token. // It will be triggered whenever the lastOAuthToken is null or expired. return $this->loadTokenFromDatabase() ?? $authManager->fetchToken(); } ) ->oAuthOnTokenUpdate( function (OAuthToken $oAuthToken): void { // Add the callback handler to perform operations like save to DB or file etc. // It will be triggered whenever the token gets updated. $this->saveTokenToDatabase($oAuthToken); } ) ->build(); ``` ```go import ( "sdk" "sdk/models" ) // ... client := sdk.NewClient( sdk.CreateConfiguration( sdk.WithClientCredentialsAuthCredentials( sdk.NewClientCredentialsAuthCredentials( "OAuthClientId", "OAuthClientSecret", ). WithOAuthTokenProvider(func(lastOAuthToken models.OAuthToken, authManager sdk.ClientCredentialsAuthManager) models.OAuthToken { // Add the callback function handler to provide a new OAuth token // It will be triggered whenever the lastOAuthToken is undefined or expired oAuthToken, err := loadTokenFromDatabase() if err != nil { if token, err := authManager.FetchToken(context.TODO()); err == nil { return token } } return oAuthToken }). WithOAuthOnTokenUpdate(func(oAuthToken models.OAuthToken) { // Add the callback handler to perform operations like save to DB or file etc. // It will be triggered whenever the token gets updated saveTokenToDatabase(oAuthToken) }), ), ), ) ``` If needed, your application can also provide an OAuthToken manually. See [Setting Tokens Explicitly](#setting-tokens-explicitly). ## Setting Tokens Explicitly There are a few operations you may need to do when managing access tokens. The SDK provides utilities to help you. The following examples use [Resource Owner Password Credentials Grant](#resource-owner-password-credentials-grant). *Note: the names of variables, functions, etc. will differ depending on your API specification.* ### Fetching the token After initializing the client, get the auth manager for a particular auth scheme. In this example, it would be the `OAuthROPCGCredentials` property. The `FetchToken()` method will exchange the user's credentials for an *access token*. The access token is an object containing information for authorizing client requests and refreshing the token itself. ```csharp var authManager = client.OAuthROPCGCredentials; try { OAuthToken token = authManager.FetchToken(); // re-initialize the client with OAuth token client = client.ToBuilder() .OAuthROPCGCredentials( client.OAuthROPCGModel.ToBuilder() .OAuthToken(token) .Build()) .Build(); } catch (ApiException e) { // TODO Handle exception } ``` After initializing the client, get the auth manager for a particular auth scheme. In this example, use the `.getResourceOwnerAuth()` method to get it. The `fetchToken()` method will exchange the user's credentials for an *access token*. The access token is an object containing information for authorizing client requests and refreshing the token itself. ```java try { OAuthToken token = client.getResourceOwnerAuth().fetchToken(); // re-instantiate the client with oauth token client = client.newBuilder() .resourceOwnerAuth(client.getResourceOwnerAuthModel().toBuilder() .oAuthToken(token) .build()) .build(); } catch (Throwable e) { // TODO Handle exception } ``` After initializing the client, get the auth manager for a particular auth scheme. In this example, use the `http_ropcg` attribute to get it. The `fetch_token()` method will exchange the user's credentials for an *access token*. The access token is an object containing information for authorizing client requests and refreshing the token itself. ```python from sdk.exceptions.o_auth_provider_exception import OAuthProviderException from sdk.exceptions.api_exception import APIException from sdk.http.auth.o_auth_2 import OAuth2 from sdk.sdk_client import SdkClient from sdk.models.o_auth_token import OAuthToken # client initialization here... try: auth_manager: OAuth2 = client.http_ropcg token: OAuthToken = auth_manager.fetch_token() # re-initialize the client with OAuth token client = SdkClient( config=client.config.clone_with( resource_owner_auth_credentials=( client.config.resource_owner_auth_credentials.clone_with( o_auth_token=token ) ) ) ) except OAuthProviderException as ex: # handle exception pass except APIException as ex: # handle exception pass ``` After initializing the client, get the auth manager for a particular auth scheme. In this example, use the `http_ropcg` attribute to get it. The `fetch_token` method will exchange the user's credentials for an *access token*. The access token is an object containing information for authorizing client requests and refreshing the token itself. ```ruby begin # re-initialize the client with OAuth token client = Client.new( config: client.config.clone_with( resource_owner_auth_credentials: client.config.resource_owner_auth_credentials.clone_with( o_auth_token: client.http_ropcg.fetch_token ) ) ) rescue OAuthProviderException, APIException => ex puts "#{ex.class} occurred: #{ex.message}" end ``` After initializing the client, get the auth manager for a particular auth scheme. In this example, use the `resourceOwnerAuthManager` property to get it. The `fetchToken()` method will exchange the user's credentials for an *access token*. The access token is an object containing information for authorizing client requests and refreshing the token itself. ```ts try { const token = await client.resourceOwnerAuthManager?.fetchToken(); if (token) { client = client.withConfiguration({ resourceOwnerAuthCredentials: { oAuthClientId: 'OAuthClientId', oAuthClientSecret: 'OAuthClientSecret', oAuthUsername: 'OAuthUsername', oAuthPassword: 'OAuthPassword', oAuthToken: token } }); } } catch (error) { console.log("Fetch token error"); // handle ApiError or OAuthProviderError if needed } ``` After initializing the client, get the auth manager for a particular auth scheme. In this example, use the `getResourceOwnerAuth()` method to get it. The `fetchToken()` method will exchange the user's credentials for an *access token*. The access token is an object containing information for authorizing client requests and refreshing the token itself. ```php try { $token = $client->getResourceOwnerAuth()->fetchToken(); // re-build the client with oauth token $client = $client ->toBuilder() ->resourceOwnerAuthCredentials($client->getResourceOwnerAuthCredentialsBuilder()->oAuthToken($token)) ->build(); } catch (ApiException $e) { // handle exception } ``` After initializing the client, get the auth manager for a particular auth scheme. In this example, use the `ResourceOwnerAuthManager()` function to get it. The `FetchToken(ctx)` function will exchange the user's credentials for an *access token*. The access token is an object containing information for authorizing client requests and refreshing the token itself. ```go oAuthToken, err := client.ResourceOwnerAuthManager().FetchToken(ctx) if err != nil { log.Fatalln(err) } else { // Printing the token fmt.Println(oAuthToken) } // Creating a new client with the token client = client.CloneWithConfiguration( sdk.WithResourceOwnerAuthCredentials( client.Configuration().ResourceOwnerAuthCredentials(). WithOAuthToken(oAuthToken), ), ) ``` The client can now make authorized endpoint calls. It's recommended that you store the access token for reuse. ### Refreshing the token An access token may expire after sometime. If the API supports a refresh token flow, the SDK lets you refresh the token to extend its lifetime. ```csharp if (authManager.IsTokenExpired()) { try { OAuthToken token = authManager.RefreshToken(); // re-initialize the client with OAuth token client = client.ToBuilder() .OAuthROPCGCredentials( client.OAuthROPCGModel.ToBuilder() .OAuthToken(token) .Build()) .Build(); } catch (ApiException e) { // TODO Handle exception } } ``` If a token expires, an exception will be thrown before the next endpoint call requiring authentication. ```java if (client.getResourceOwnerAuth().isTokenExpired()) { try { OAuthToken token = client.getResourceOwnerAuth().refreshToken(); // re-instantiate the client with oauth token client = client.newBuilder() .resourceOwnerAuth(client.getResourceOwnerAuthModel().toBuilder() .oAuthToken(token) .build()) .build(); } catch (Throwable e) { // TODO Handle exception } } ``` If a token expires, an exception will be thrown before the next endpoint call requiring authentication. ```python if client.http_ropcg.is_token_expired(): try: token: OAuthToken = client.http_ropcg.refresh_token() # re-initialize the client with OAuth token client = SdkClient( config=client.config.clone_with( resource_owner_auth_credentials=( client.config.resource_owner_auth_credentials.clone_with( o_auth_token=token ) ) ) ) except OAuthProviderException as ex: print(ex) except APIException as ex: # handle exception pass ``` If a token expires, an exception will be thrown before the next endpoint call requiring authentication. ```ruby if client.http_ropcg.token_expired?(client.config.o_auth_token) begin # re-initialize the client with OAuth token client = Client.new(config: client.config.clone_with( resource_owner_auth_credentials: client.config.resource_owner_auth_credentials.clone_with( o_auth_token: client.http_ropcg.refresh_token ) )) rescue OAuthProviderException, APIException => ex puts "#{ex.class} occurred: #{ex.message}" end end ``` ```ts try { const token = await client.resourceOwnerAuthManager?.refreshToken(); if (token) { client = client.withConfiguration({ resourceOwnerAuthCredentials: { oAuthClientId: 'OAuthClientId', oAuthClientSecret: 'OAuthClientSecret', oAuthUsername: 'OAuthUsername', oAuthPassword: 'OAuthPassword', oAuthToken: token } }); } } catch (error) { console.log("Fetch token error"); // handle ApiError or OAuthProviderError if needed } ``` ```php if ($client->getResourceOwnerAuth()->isTokenExpired()) { try { $token = $client->getResourceOwnerAuth()->refreshToken(); // re-build the client with oauth token $client = $client ->toBuilder() ->resourceOwnerAuthCredentials($client->getResourceOwnerAuthCredentialsBuilder()->oAuthToken($token)) ->build(); } catch (ApiException $e) { // handle exception } } ``` ```go if client.ResourceOwnerAuthManager().OAuthTokenIsExpired() { oAuthToken, err := client.ResourceOwnerAuthManager().RefreshToken(ctx) if err != nil { log.Fatalln(err) } else { // Printing the token fmt.Println(oAuthToken) } // Creating a new client with the token client = client.CloneWithConfiguration( sdk.WithResourceOwnerAuthCredentials( client.Configuration().ResourceOwnerAuthCredentials(). WithOAuthToken(oAuthToken), ), ) } ``` --- # OneOf and AnyOf Source: https://docs.apimatic.io/generate-sdks/sdk-features/oneOf-and-anyOf/ import Tabs from '@theme/Tabs'; import TabItem from '@theme/TabItem'; APIMatic's SDKs fully support the `oneOf` and `anyOf` types defined in OpenAPI specifications, allowing users to define flexible request parameters and response payloads that can accept or return different types of data. By leveraging these union types, users can represent alternative schemas or dynamic data structures in their APIs. This capability enhances the accuracy and reliability of API integrations, ensuring that SDKs can seamlessly handle complex API behaviors with improved validation and flexibility. ### Configure OneOf and AnyOf in your OpenAPI Definition Here is an example of `OneOf` and `AnyOf` types defined in OpenAPI definition: ``` yaml paths: /users/create: post: summary: Create a new user operationId: createUser requestBody: required: true content: application/json: schema: anyOf: - $ref: '#/components/schemas/Accountant' - $ref: '#/components/schemas/Manager' responses: '201': description: User created successfully content: application/json: schema: oneOf: - $ref: '#/components/schemas/AccountantResponse' - $ref: '#/components/schemas/ManagerResponse' ... ``` The API call, shown in the OpenAPI format above, is a post-call that takes in either `Accountant` or `Manager` as request payload. ### SDK Example Here is how the parameter initialization would look like when calling the endpoint, ```ts const body: CreateUserBody = { accountId: 'A001', firstName: 'John', lastName: 'Doe', }; async () => { const { result, ...httpResponse } = await apiController.createUser(body); }; ``` ```java CreateUserBody accountantOrManager = CreateUserBody.fromAccountant( new Accountant.Builder( "A001", "John", "Doe" ) .build() ); CreateUserResponse result = await apiController.CreateUserAsync(accountantOrManager); ``` ```python body = Accountant( account_id='A001', first_name='John', last_name='Doe' ) response = client.user_controller.create_user(body) ``` ``` csharp CreateUserBody accountantOrManager = CreateUserBody.FromAccountant( new Accountant { AccountId = "A001", FirstName = "John", LastName = "Doe", } ); CreateUserResponse result = await apiController.CreateUserAsync(accountantOrManager); ``` ``` go accountantOrManager := models.CreateUserBodyContainer.     FromAccountant(models.Accountant{         accountId: "A001", firstName: "John", lastName: "Doe",     }) apiResponse, err := apiController.CreateUser(ctx, accountantOrManager) ``` ```php $accountantOrManager = AccountantBuilder::init( "A001", "John", "Doe" )->build(); $result = $client->getApiController()->createUser($accountantOrManager); ``` ```ruby body = Accountant.new( 'accountantId', 'john', 'doe' ) response = client.user.create_user(body) ``` In the code snippet above, the `CreateUser` method returns a response payload that can be either an `AccountantResponse` or a `ManagerResponse` instance. With the introduction of support for `OneOf` and `AnyOf`, the SDK explicitly validates that the response matches one of these specified types, ensuring more accurate and reliable response handling, as shown below: ```ts async () => { const { result, ...httpResponse } = await apiController.createUser(body); if (CreateUserResponse.isAccountantResponse(result)) { // Use the result narrowed down to AccountantResponse type. } else if (CreateUserResponse.isManagerResponse(result)) { // Use the result narrowed down to ManagerResponse type. } else { // Result is narrowed down to type 'never'. } }; ``` ```java apiController.createUserAsync().thenAccept(result -> { result.match(new CreateUserResponse.Cases() { @Override public Void accountantResponse(AccountantResponse accountantResponse) { System.out.println(accountantResponse); return null; } @Override public Void managerResponse(ManagerResponse managerResponse) { System.out.println(managerResponse); return null; } }); }).exceptionally(exception -> { // TODO failure callback handler exception.printStackTrace(); return null; }); ``` ```python return super().new_api_call_builder.response( ResponseHandler() .deserializer(lambda value: APIHelper.deserialize_union_type( UnionTypeLookUp.get('CreateUserResponse'), value)) ).execute() ``` ``` csharp CreateUserResponse result = await apiController.CreateUserAsync(accountantOrManager); result.Match( accountantResponse: @case => { Console.WriteLine(@case); return null; }, managerResponse: @case => { Console.WriteLine(@case); return null; }); ``` ``` go apiResponse, err := apiController.CreateUserAsync(ctx, accountantOrManager) if accountantResponse, isAccountantResponse := apiResponse.Data.AsAccountantResponse(); isAccountantResponse {         fmt.Println(accountantResponse) } else if managerResponse, isManagerResponse := apiResponse.Data.AsManagerResponse(); isManagerResponse {     fmt.Println(managerResponse) } ``` ```php /* @return AccountantResponse|ManagerResponse Response from the API call */ $result = $client->getApiController()->createUser($accountantOrManager); ``` ```ruby new_api_call_builder .response(new_response_handler .deserializer(proc do |response, should_symbolize| APIHelper.deserialize_union_type( UnionTypeLookUp.get(:CreateUserResponse), response, should_symbolize, true ) end)) .execute ``` ### Constraint-Aware anyOf Arms An `anyOf` can list multiple schemas that share the same base type but differ by the constraints applied to them, for example a string restricted by a length range and a pattern alongside an email-formatted string. In these cases, the SDK represents each schema as its own distinct arm of the union, so every variant is preserved and available to work with individually. When (de)serializing a value, the SDK selects the arm whose constraints the value satisfies. A value that meets the constraints of a more specific schema is routed to that arm, while any other value is routed to the remaining arm. This makes the handling of constrained union members precise and predictable. ```yaml responses: '200': description: OK content: application/json: schema: anyOf: - type: string minLength: 1 maxLength: 40 pattern: "^[a-z-]+$" - type: string format: email ``` For the definition above, the SDK generates a separate arm for each string schema. The endpoint returns the union as its response, and you read the value by checking each arm: ```csharp // The endpoint returns the union as its response. var result = await client.GetContactAsync(); // Read the value by checking each arm. if (result.TryGetEmailString(out var address)) { Console.WriteLine($"Email: {address}"); } else if (result.TryGetString(out var constrained)) { Console.WriteLine($"Constrained string: {constrained}"); } ``` During deserialization the SDK routes the value automatically. A value such as `"order-item"` satisfies the length and pattern constraints and is deserialized into the constrained arm, while a value such as `"user@example.com"` is deserialized into the email-formatted arm. :::note Constraint-aware `AnyOf` arm selection is enforced by the SDK and is currently available in the **C# v4 SDK (beta)**. ::: ### Validation Errors Validation errors with helpful messages will be thrown whenever an input with an invalid type is provided to an endpoint or invalid typed data is received via a response from the server. This will enforce type strictness and validation of requests and responses within the SDK. These exceptions will be thrown for: - **OneOf types**: When either more than one acceptable type matches or no type matches at all against the provided value. - **AnyOf types**: When no acceptable type matches at all against the provided value. --- # Optional and Nullable Properties Source: https://docs.apimatic.io/generate-sdks/sdk-features/optional-nullable-properties/ import Tabs from '@theme/Tabs'; import TabItem from '@theme/TabItem'; All APIMatic SDKs support both **optional** and **nullable** properties. This ensures accurate data serialization and deserialization, leading to better data integrity and API interactions. ### Key Benefits - **Fine-Grained Field Control:** Define fields as optional, nullable, or both, based on specific scenarios. - **Field-Based Operations**: Distinguish between missing and explicitly null values at runtime. - **Language Consistency:** Ensure consistent behavior across all supported SDK languages. ### Understanding the Behavior The table below shows how JSON can be mapped to the various combinations of **optional** and **nullable** values. | | Nullable = true | Nullable = false | | ---------------- | -------------------- | ----------------------------- | | **Optional = true** |
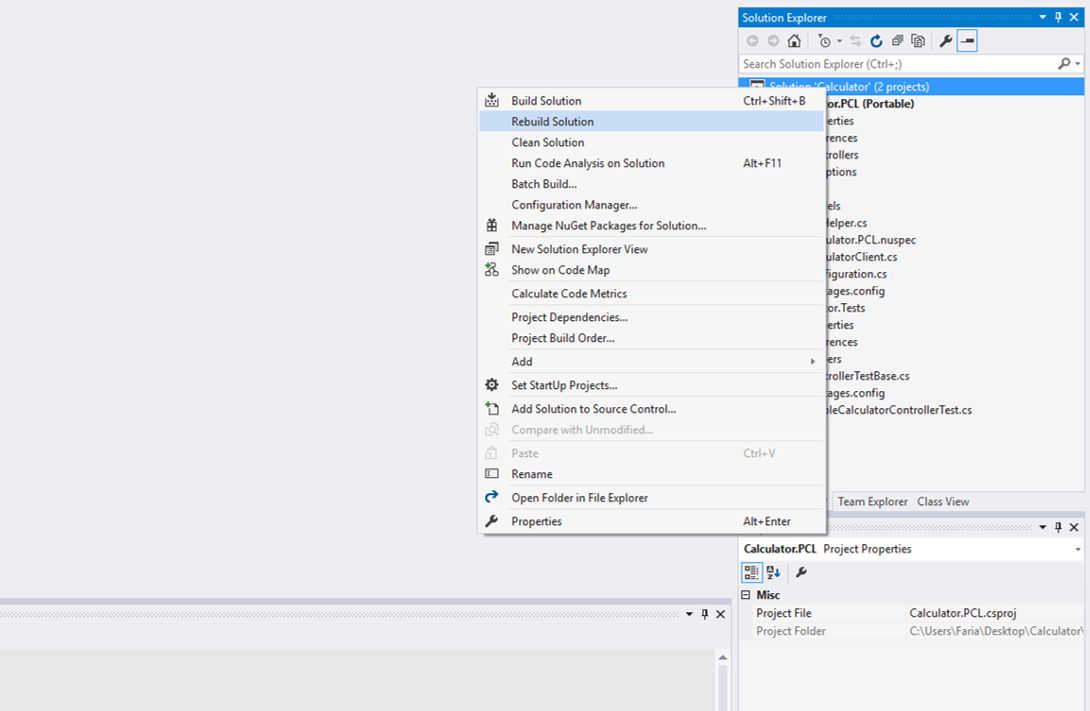
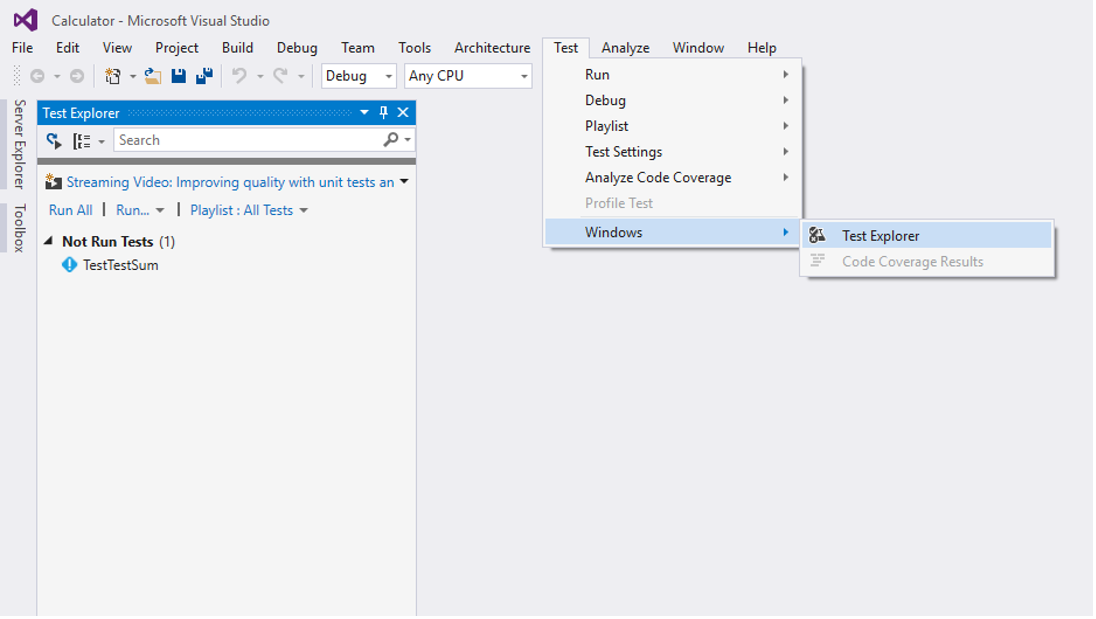
  • Key can be omitted
  • Key can have null as a value if set explicitly
  • Key can have a valid value
`{}`, `{"key":value}`, `{"key":null}` |
  • Key can be omitted
  • Key can't have null as a value
`{}`, `{"key":value}` | | **Optional = false** |
  • Key must be included
  • Key can have null as a value
`{"key":value}`, `{"key":null}` |
  • Key must be included
  • Key can't have null as a value
`{"key":value}` | ### Example OpenAPI Specification Below is the schema definition for a **Product** model, containing the fields **name** (*required*), **description** (*optional*), **quantity** (*required nullable*), and **notes** (*optional nullable*). ```yaml schemas: Product: type: object properties: name: type: string description: The name of the product. description: type: string description: A detailed description of the product. quantity: type: integer description: Quantity of the product in stock. nullable: true notes: type: string description: Optional notes about the product. nullable: true required: - name - quantity ``` Acceptable values for this **Product** model include: ```json { "name": "Laptop", "description": "A lightweight, powerful device", "quantity": 10, "notes": "This is a popular item." } ``` ```json { "name": "Tablet", "description": "A portable, touch-screen device", "quantity": null, "notes": null } ``` ```json { "name": "Monitor", "quantity": 15, "notes": "High resolution display" } ``` ```json { "name": "Smartphone", "quantity": 50 } ``` ### SDK Examples ```ts const apiController = new ApiController(client); const body: Product = { name: 'Laptop', quantity: 10, description: 'A lightweight, powerful device', notes: 'This is a popular item.', }; await apiController.createProduct(body); ``` ```java ApiController apiController = client.getApiController(); Product body = new Product.Builder( "Laptop", 10 ) .description("A lightweight, powerful device") .notes("This is a popular item.") .build(); apiController.createProductAsync(body); ``` ```python client_controller = client.client body = Product( product_name='Laptop', quantity=10, description='A lightweight, powerful device', notes='This is a popular item.' ) client_controller.create_product(body) ``` ```php $body = ProductBuilder::init( 'Laptop' ) ->description('A lightweight, powerful device') ->quantity(10) ->notes('This is a popular item.') ->build(); $client = ProductManagementApiClientBuilder::init()->build(); $client->getAPIController()->createProduct($body); ``` ```csharp ApiController apiController = client.ApiController; Product body = new Product { Name = "Laptop", Quantity = 10, Description = "A lightweight, powerful device", Notes = "This is a popular item.", }; await apiController.CreateProductAsync(body); ``` ```ruby body = Product.new( 'Laptop', 10, 'A lightweight, powerful device', 'This is a popular item.' ) client = ProductManagementApi::Client.new client.client.create_product(body) ``` ```go apiController := client.ApiController() ctx := context.Background() body := models.Product{ Name: "Laptop", Description: models.ToPointer("A lightweight, powerful device"), Quantity: models.ToPointer(10), Notes: models.NewOptional(models.ToPointer("This is a popular item.")), } apiController.CreateProduct(ctx, body) ``` :::note **OneOf** or **AnyOf** properties also support **optional** and **nullable** combinations. ::: --- # Pagination Source: https://docs.apimatic.io/generate-sdks/sdk-features/pagination/ import Tabs from '@theme/Tabs'; import TabItem from '@theme/TabItem'; Many APIs return large datasets split across multiple pages. APIMatic supports pagination in generated SDKs through a flexible configuration mechanism in the OpenAPI specification. Developers can use a simple and consistent SDK interface to navigate through paginated results, regardless of the underlying pagination style used by the API. ## Pagination Configuration in OpenAPI Pagination in APIMatic is configured using the [pagination OpenAPI extension](/specification-extensions/swagger-codegen-extensions#pagination-extension). This extension allows specifying how to send pagination inputs in the request and where to extract results or tokens from the response. All pagination configuration fields accept [JSON Pointers](https://datatracker.ietf.org/doc/html/rfc6901), enabling fine-grained customization of how request parameters and response structures are interpreted. ## Example Usage Once the OpenAPI pagination configuration is in place, the generated SDKs provide an easy-to-use interface for consuming paginated responses. The SDKs abstract away the logic of computing page tokens, building follow-up requests, and iterating over datasets. For asynchronous API calls, the endpoint function will return an instance of `PagedFlux`. ```java Integer page = 1; Integer size = 25; PagedFlux> result = controller.fetchDataAsync(page, size); // Iterating over items in all the pages. result.subscribe( item -> System.out.println(item), error -> _error.printStackTrace()); // Iterating over all the pages. result.pages().subscribe( pagedResponse -> { // Iterating over items in the current page. pagedResponse.getItems().forEach(item -> System.out.println(item)); // Extracting paged response body. System.out.println(pagedResponse.getResult()); // Extracting paged response headers. System.out.println(pagedResponse.getHeaders().asSimpleMap()); // Extracting paged response status code. System.out.println(pagedResponse.getStatusCode()); }, error -> _error.printStackTrace()); ``` In this example: * **result**: The paginated response from the endpoint, behaves as an `Flux` if subscribed directly. * **result.pages()**: An Flux for subscribing pages directly. Returns `Flux>`. * **pagedResponse.getItems()**: Returns the list of items in the current page. * **pagedResponse.getResult()**: The actual instance of the current page with type `Page`. * **pagedResponse.getHeaders()**: The Http headers returned along with each page. * **pagedResponse.getStatusCode()**: The Http status code returned along with each page. * **Error Handling**: Provides the error handler lambda function for errors like `ApiException` and `IOException`. Learn more about [Flux](https://projectreactor.io/docs/core/release/api/reactor/core/publisher/Flux.html). For synchronous API calls, the endpoint function will return an instance of `PagedIterable`. ```java Integer page = 1; Integer size = 25; PagedIterable> result = controller.fetchData(page, size); try { // Iterating over items in all the pages. for (PagedSupplier itemSupplier : result) { System.out.println(itemSupplier.get()); } } catch (ApiException | IOException e) { e.printStackTrace(); } try { // Iterating over all the pages. for (PagedSupplier> pageSupplier : result.pages()) { PagedResponse pagedResponse = pageSupplier.get(); // Iterating over items in the current page. pagedResponse.getItems().forEach(item -> System.out.println(item)); // Extracting paged response body. System.out.println(pagedResponse.getResult()); // Extracting paged response headers. System.out.println(pagedResponse.getHeaders().asSimpleMap()); // Extracting paged response status code. System.out.println(pagedResponse.getStatusCode()); } } catch (ApiException | IOException e) { e.printStackTrace(); } ``` In this example: * **result**: The paginated response from the endpoint, behaves as an `Iterable>` if used in a loop. * **itemSupplier.get()**: Returns the stored `Item` instance or throw an `ApiException` or `IOException`. * **result.pages()**: An iterator for traversing pages manually. Returns `Iterable>>`. * **pageSupplier.get()**: Returns the stored `PagedResponse` instance or throw an `ApiException` or `IOException`. * **pagedResponse.getItems()**: Returns the list of items in the current page. * **pagedResponse.getResult()**: The actual instance of the current page with type `Page`. * **pagedResponse.getHeaders()**: The Http headers returned along with each page. * **pagedResponse.getStatusCode()**: The Http status code returned along with each page. * **Error Handling**: Wrap pagination logic in `try-catch` blocks to catch and handle `ApiException` and `IOException`. For asynchronous API calls, the endpoint function will return an instance of `AsyncPageable`. ```csharp int? page = 1; int? size = 25; try { AsyncPageable> result = controller.FetchDataAsync( page, size ); // Iterating over items in all the pages. await foreach (var item in result) { Console.WriteLine(item); } // Iterating over all the pages. await foreach (var pagedResponse in result.GetPagesAsync()) { // Iterating over items in the current page. foreach (var item in pagedResponse.Items) { Console.WriteLine(item); } // Extracting paged response body. Console.WriteLine(pagedResponse.Data); // Extracting paged response headers. Console.WriteLine(pagedResponse.Headers); // Extracting paged response status code. Console.WriteLine(pagedResponse.StatusCode); } } catch (ApiException e) { // Handle exceptions such as API errors or connectivity issues. Console.WriteLine(e.Message); } ``` In this example: * **`result`**: The paginated response from the endpoint, behaves as an `IAsyncEnumerable` if iterated directly. * **`result.GetPagesAsync()`**: Returns an `IAsyncEnumerable>` to iterate over pages. * **`pagedResponse.Items`**: Returns the `IEnumerable` of items in the current page. * **`pagedResponse.Data`**: The actual instance of the current page with type `TPage`. * **`pagedResponse.Headers`**: The Http headers returned along with each page. * **`pagedResponse.StatusCode`**: The Http status code returned along with each page. * **Error Handling**: Wraps pagination logic in a `try-catch` block to catch `ApiException` and handle errors. For synchronous API calls, the endpoint function will return an instance of `Pageable`. ```csharp int? page = 1; int? size = 25; try { Pageable> result = controller.FetchData( page, size ); // Iterating over items in all the pages. foreach (var item in result) { Console.WriteLine(item); } // Iterating over all the pages. foreach (var pagedResponse in result.GetPagesAsync()) { // Iterating over items in the current page. foreach (var item in pagedResponse.Items) { Console.WriteLine(item); } // Extracting paged response body. Console.WriteLine(pagedResponse.Data); // Extracting paged response headers. Console.WriteLine(pagedResponse.Headers); // Extracting paged response status code. Console.WriteLine(pagedResponse.StatusCode); } } catch (ApiException e) { // Handle exceptions such as API errors or connectivity issues. Console.WriteLine(e.Message); } ``` In this example: * **`result`**: The paginated response from the endpoint, behaves as an `IEnumerable` when iterated. * **`result.GetPages()`**: Returns an `IEnumerable>` for iterating over full pages. * **`pagedResponse.Items`**: Returns the `IEnumerable` of items in the current page. * **`pagedResponse.Data`**: The actual instance of the current page with type `TPage`. * **`pagedResponse.Headers`**: The Http headers returned along with each page. * **`pagedResponse.StatusCode`**: The Http status code returned along with each page. * **Error Handling**: Wraps pagination logic in a `try-catch` block to catch `ApiException` and handle errors. ```python # Initial request to fetch the first page of orders with optional pagination inputs. result = client.orders.list_orders(page=1, size=25) # Iterate over all items across all pages transparently using the iterator interface. try: for item in result: # Iterates item-by-item across all paginated responses. print(item) except APIException as e: print(f"API error: {e}") # Alternatively, manually iterate page by page and then over items within each page. try: for page in result.pages(): # Iterates one API page at a time. print(page.body) # Accesses raw page body content. print(page.status_code) # Prints HTTP status code of the page. print(page.headers) # Prints HTTP headers of the page. for item in page.items(): # Iterates items within the current page. print(item) except APIException as e: print(f"API error: {e}") ``` In this example: * **result**: The paginated response from the endpoint, behaves as an iterator if used in a loop. * **result.pages()**: An iterator for traversing pages manually. * **page.body**: The full deserialized response body of the current page. * **page.status_code**: The Http status code returned along with each page. * **page.headers**: The Http headers returned along with each page. * **page.items()**: Returns the list of items in the current page. * **Error Handling**: Wrap pagination logic in `try` blocks to catch and handle `APIException`. ```ruby # Initial request to fetch the first page of orders with optional pagination inputs. result = client.transaction.list_orders( page: 1, size: 25 ) # Iterate over all items across all pages transparently using the iterator interface. begin result.each do |item| # Iterates item-by-item across all paginated responses. puts item end rescue APIException => e puts "API error: #{e}" end # Alternatively, manually iterate page by page and then over items within each page. begin result.pages.each do |page| # Iterates one API page at a time. puts page.data # Accesses raw page body content. puts page.status_code # Prints HTTP status code of the page. puts page.headers # Prints HTTP headers of the page. page.items.each do |item| # Iterates items within the current page. puts item end end rescue APIException => e puts "API error: #{e}" end ``` In this example: * **result**: The paginated response from the endpoint. It behaves as an enumerable, allowing direct iteration over all items across pages using `.each`. * **result.pages**: Returns an enumerable for traversing each page of the paginated response manually. * **page.data**: The full deserialized response body of the current page. * **page.status_code**: The Http status code returned for the current page. * **page.headers**: The Http headers returned for the current page. * **page.items**: Returns the list of items contained in the current page. * **Error Handling**: Wrap pagination logic in begin ... rescue blocks to catch and handle `APIException` errors gracefully. ```typescript const page = 1; const size = 25; const result = controller.fetchData(page, size); try { // Iterating over items in all the pages. for await (const item of result) { console.log(item); } // Iterating over all the pages. for await (const page of result.pages) { // Iterating over items in the current page. for (const item of page.items) { console.log(item); } // Extracting paged response body. console.log(page.body); // Extracting paged response headers. console.log(page.headers); // Extracting paged response status code. console.log(page.statusCode); } } catch (error) { console.log(error); } ``` In this example: * **result**: The paginated response from the endpoint. It behaves as an async iterable, allowing direct iteration over all items across pages using `for await...of`. * **result.pages**: Returns an async iterable for traversing each page of the paginated response manually. * **page.data**: The full deserialized response body of the current page. * **page.statusCode**: The Http status code returned for the current page. * **page.headers**: The Http headers returned for the current page. * **page.items**: Returns the list of items contained in the current page. * **Error Handling**: Wrap pagination logic in `try-catch` blocks to catch and handle `ApiError`. In .NET v4 SDKs, the endpoint function returns a `Pageable`. Iterated directly with `await foreach`, it yields every item across all pages, while its `AsPages()` method yields one page at a time. The two are alternative ways to consume the same result, so use one or the other. ```csharp var transactions = client.ListTransactions(pageSize: 25); try { // Iterate over every transaction across all pages. await foreach (var transaction in transactions) { Console.WriteLine(transaction.Id); } } catch (SdkException ex) { Console.WriteLine(ex.Error.ReadAsString()); } ``` The same result can also be consumed one page at a time, where each page is the deserialized response model exposing its items and any metadata the API returns: ```csharp var transactions = client.ListTransactions(pageSize: 25); try { // Iterate one page at a time, reading each page's items and metadata. await foreach (var page in transactions.AsPages()) { foreach (var transaction in page.Data) { Console.WriteLine(transaction.Id); } } } catch (SdkException ex) { Console.WriteLine(ex.Error.ReadAsString()); } ``` In this example: * **`transactions`**: The paginated response from the endpoint, behaves as an `IAsyncEnumerable` when iterated directly. * **`transactions.AsPages()`**: Returns an `IAsyncEnumerable` that yields each page as the deserialized response model, exposing its items and any metadata the API returns. * **Error Handling**: Wraps iteration in a `try-catch` block to catch `SdkException`. ## Page Meta Data When pagination is enabled for an SDK, each page of the API response will include metadata in addition to the actual response data. This metadata helps developers understand which request parameters were responsible for generating that specific page of results. To include this metadata, the response is wrapped in a PagedResponse type, which may take one of the following forms: 1. CursorPagedResponse 2. LinkPagedResponse 3. NumberPagedResponse 4. OffsetPagedResponse The following code samples illustrate how to retrieve metadata from each variant of PagedResponse, processing it page by page. ```java String cursor = "id_123"; Integer limit = 25; PagedFlux> result = controller.fetchDataAsync(cursor, limit); // Iterating over all the pages and extracting cursor value that's used to fetch each page. result.pages().subscribe( pagedResponse -> { System.out.println(pagedResponse.getNextCursor()); }); ``` In this example: * **pagedResponse.getNextCursor()**: The next cursor from the previous response used to fetch the current page. ```java Integer page = 1; Integer size = 25; PagedFlux> result = controller.fetchDataAsync(page, size); // Iterating over all the pages and extracting next link value that's used to fetch each page. result.pages().subscribe( pagedResponse -> { System.out.println(pagedResponse.getNextLink(); }); ``` In this example: * **pagedResponse.getNextLink()**: The next link from the previous response used to fetch the current page. ```java Integer page = 1; Integer size = 25; PagedFlux> result = controller.fetchDataAsync(page, size); // Iterating over all the pages and extracting page number of each page. result.pages().subscribe( pagedResponse -> { System.out.println(pagedResponse.getPageNumber()); }); ``` In this example: * **pagedResponse.getPageNumber()**: Page number used to fetch the current page. ```java Integer offset = 0; Integer limit = 25; PagedFlux> result = controller.fetchDataAsync(offset, limit); // Iterating over all the pages and extracting offset of the first item of each page. result.pages().subscribe( pagedResponse -> { System.out.println(pagedResponse.getOffset()); }); ``` In this example: * **pagedResponse.getOffset()**: Offset used to fetch the current page. ```csharp string cursor = "id_123"; int? limit = 25; AsyncPageable> result = controller.FetchDataAsync( cursor, limit ); // Iterating over all the pages and extracting cursor value that's used to fetch each page. await foreach (var pagedResponse in result.GetPagesAsync()) { Console.WriteLine(pagedResponse.NextCursor); } ``` In this example: * **`pagedResponse.NextCursor`**: The next cursor from the previous response used to fetch the current page. ```csharp int? page = 1; int? size = 25; AsyncPageable> result = controller.FetchDataAsync( page, size ); // Iterating over all the pages and extracting next link value that's used to fetch each page. await foreach (var pagedResponse in result.GetPagesAsync()) { Console.WriteLine(pagedResponse.NextLink); } ``` In this example: * **`pagedResponse.NextLink`**: The next link from the previous response used to fetch the current page. ```csharp int? page = 1; int? size = 25; AsyncPageable> result = controller.FetchDataAsync( page, size ); // Iterating over all the pages and extracting page number of each page. await foreach (var pagedResponse in result.GetPagesAsync()) { Console.WriteLine(pagedResponse.PageNumber); } ``` In this example: * **`pagedResponse.PageNumber`**: Page number used to fetch the current page. ```csharp int? offset = 0; int? limit = 25; AsyncPageable> result = controller.FetchDataAsync( offset, limit ); // Iterating over all the pages and extracting offset of the first item of each page. await foreach (var pagedResponse in result.GetPagesAsync()) { Console.WriteLine(pagedResponse.Offset); } ``` In this example: * **`pagedResponse.Offset`**: Offset used to fetch the current page. ```python result = client.orders.list_orders(cursor="id_123", limit=25) # Iterating over all the pages and extracting cursor value that's used to fetch each page. for page in result.pages(): print(page.next_cursor) ``` In this example: * **page.next_cursor**: The next cursor from the previous response used to fetch the current page. ```python result = client.orders.list_orders(page=1, size=25) # Iterating over all the pages and extracting next link value that's used to fetch each page. for page in result.pages(): print(page.next_link) ``` In this example: * **page.next_link**: The next link from the previous response used to fetch the current page. ```python result = client.orders.list_orders(page=1, size=25) # Iterating over all the pages and extracting page number of each page. for page in result.pages(): print(page.page_number) ``` In this example: * **page.page_number**: Page number used to fetch the current page. ```python result = client.orders.list_orders(offset=0, limit=25) # Iterating over all the pages and extracting offset of the first item of each page. for page in result.pages(): print(page.offset) ``` In this example: * **page.offset**: Offset used to fetch the current page. ```ruby result = client.orders.list_orders(cursor: 'id_123', limit: 25) # Iterating over all the pages and extracting cursor value that's used to fetch each page. result.pages.each do |page| puts page.next_cursor end ``` In this example: * **page.next_cursor**: The next cursor from the previous response used to fetch the current page. ```ruby result = client.orders.list_orders(page: 1, size: 25) # Iterating over all the pages and extracting next link value that's used to fetch each page. result.pages.each do |page| puts page.next_link end ``` In this example: * **page.next_link**: The next link from the previous response used to fetch the current page. ```ruby result = client.orders.list_orders(page: 1, size: 25) # Iterating over all the pages and extracting page number of each page. result.pages.each do |page| puts page.page_number end ``` In this example: * **page.page_number**: Page number used to fetch the current page. ```ruby result = client.orders.list_orders(offset: 0, limit: 25) # Iterating over all the pages and extracting offset of the first item of each page. result.pages.each do |page| puts page.offset end ``` In this example: * **page.offset**: Offset used to fetch the current page. ```typescript const page = 1; const size = 25; const result = controller.fetchData(page, size); // Iterating over all the pages and extracting cursor value that's used to fetch each page. for await (const page of result.pages) { console.log(page.nextCursor); } ``` In this example: * **page.nextCursor**: The next cursor from the previous response used to fetch the current page. ```typescript const page = 1; const size = 25; const result = controller.fetchData(page, size); // Iterating over all the pages and extracting next link value that's used to fetch each page. for await (const page of result.pages) { console.log(page.nextLink); } ``` In this example: * **page.nextLink**: The next link from the previous response used to fetch the current page. ```typescript const page = 1; const size = 25; const result = controller.fetchData(page, size); // Iterating over all the pages and extracting page number of each page. for await (const page of result.pages) { console.log(page.pageNumber); } ``` In this example: * **page.pageNumber**: Page number used to fetch the current page. ```typescript const page = 1; const size = 25; const result = controller.fetchData(page, size); // Iterating over all the pages and extracting offset of the first item of each page. for await (const page of result.pages) { console.log(page.offset); } ``` In this example: * **page.offset**: Offset used to fetch the current page. ## Benefits * **Uniform SDK Experience**: Same interface regardless of pagination strategy. * **No Extra Logic Needed**: No need to parse tokens or handle loop termination manually. * **OpenAPI-Driven**: Automatically applied based on `x-pagination` configuration. * **Customizability**: Flexible placement of input and output using JSON Pointers. --- # Proxy Configuration Support Source: https://docs.apimatic.io/generate-sdks/sdk-features/proxy-configuration-support/ import Tabs from '@theme/Tabs'; import TabItem from '@theme/TabItem'; APIMatic’s SDKs provide native proxy support to meet enterprise requirements for network traffic routing, security monitoring, and compliance. This implementation allows seamless integration with corporate proxy infrastructures without modifying generated code. ## Why Proxy Support Matters Enterprise environments typically mandate proxy usage for: - **Security**: Monitoring and filtering outgoing traffic - **Compliance**: Meeting regulatory requirements for data governance - **Authentication**: Corporate network access control - **Auditing**: Centralized logging of API traffic Without our built-in proxy support, you’d need to manually modify SDK code (breaking maintainability), implement complex network layer overrides, or configure system-wide proxy settings that lack granularity. ## Implementation Approach The proxy configuration leverages each language's native HTTP client capabilities for: - **Consistency** across all SDKs - **Maintainability** with no custom proxy handling code - **Performance** through optimal routing via native implementations - **Security** with proper credential handling and TLS support ## Proxy Settings | Parameter | Required | Description | | --------- | -------- | ----------------------------------------------------------------------- | | `address` | Yes | Full URL of the proxy server (example, `http://proxy.corp.example.com`) | | `port` | No | Port number used to connect to the proxy server | | `auth` | No | Credentials for proxy authentication (if required) | | `tunnel` | No | Enables HTTPS tunneling through proxy when `true` (default: `false`) | ## SDK Client Initialization ```php $client = SdkClientBuilder::init() ->proxyConfiguration( ProxyConfigurationBuilder::init('http://proxy.example.com') // Address (Required) ->port(8080) // Custom proxy port ->auth("username","password") // Provides credentials ->authMethod(CURLAUTH_BASIC) // Specifies the authentication method to use ->tunnel(false) // Enables Http tunneling ) ->build(); ``` Supported auth methods can be found here:([libcurl authentication documentation](https://curl.se/libcurl/c/CURLOPT_HTTPAUTH.html)): ```csharp var client = new SDKClient.Builder() .HttpClientConfig(config => config .Proxy( new ProxyConfigurationBuilder("http://localhost") // Address (Required) .Port(8080) // Custom proxy port .Tunnel(false) // Enables Http tunneling .Auth("user", "pass") // Provides credentials ) ) .Build(); ``` ```typescript const client = new Client({ httpClientOptions: { proxySettings: { address: 'http://localhost', port: 8080, auth: { username: 'admin', password: 'password123' } } } }); ``` :::note - The TypeScript SDKs don't include a tunnel option in the proxy configuration, it's automatically handled by the underlying HTTP client when required. - Proxy settings apply only in Node environments. If set in browsers, they're ignored and a warning is displayed. ::: ```ruby client = Client.new( proxy_settings: ProxySettings.new( address: 'http://localhost', port: 8080, username: 'admin', password: 'password123' ) ) ``` :::note The Ruby SDKs don't include a tunnel option in the proxy configuration, it's automatically handled by the underlying HTTP client when required. ::: ```python client = SdkClient( proxy_settings=ProxySettings( address='http://localhost', port=8080, username='admin', password='password123' ) ) ``` :::note The Python SDKs don't include a tunnel option in the proxy configuration, it's automatically handled by the underlying HTTP client when required. ::: ```java SdkClient client = new SdkClient.Builder() .httpClientConfig(configBuilder -> configBuilder .proxyConfig(new HttpProxyConfiguration .Builder("http://localhost", 8080) .auth("admin", "password123"))) .build(); ``` :::note The Java SDKs don't include a tunnel option in the proxy configuration, it's automatically handled by the underlying HTTP client when required. ::: --- # Request Parameter Collections Source: https://docs.apimatic.io/generate-sdks/sdk-features/request-parameter-collections/ import Tabs from '@theme/Tabs'; import TabItem from '@theme/TabItem'; Working with API Operations that have a large parameter list can be messy. Grouping the parameters of such Endpoints into a single structured collection such as a data model, map or dictionary can make the code cleaner and easier to read. APIMatic allows users to apply this approach to their SDKs, either globally or to specific Operations. ### Creating Request Parameter Collections To enable this feature globally for the entire SDK, set the `collectParameters` CodeGen setting to `true`. You can also configure it at the operation level by setting the `collectParameters` option under the [`x-operation-settings`](/specification-extensions/swagger-codegen-extensions/#codegen-settings:~:text=Purpose-,collectParameters,-Boolean) OpenAPI Extension as demonstrated below: ```yaml openapi: 3.0.3 info: title: Product Management API description: API for managing products in an inventory system. version: 1.0.0 paths: /products/filter: get: summary: Retrieve filtered products x-operation-settings: collectParameters: true parameters: - name: category in: query description: Product category to filter by required: true schema: type: string example: "Electronics" - name: price in: query description: Range of product prices required: true schema: type: string example: "100-500" ``` In this example, the `/products/filter` operation uses the **Collect Parameters** feature, which groups the **`category`** and **`priceRange`** parameters into a single collection for easier use. ### SDK Usage Examples ```ts const apiController = new ApiController(client); // Using a single collection for parameters in TypeScript const collect = { category: 'Electronics', price: '100-500' } await apiController.getFilteredProducts(collect) ``` ```java ApiController apiController = client.getApiController(); // Using a Model to pass parameters in Java GetFilteredProductsInput getFilteredProductsInput = new GetFilteredProductsInput.Builder( "Electronics", "100-500" ) .build(); apiController.getFilteredProductsAsync(getFilteredProductsInput); ``` ```python client_controller = client.client # Using a dictionary to pass parameters in Python collect = { 'category': 'Electronics', 'price_range': '100-500' } client_controller.get_filtered_products(collect) ``` ```php // Using an associative array in PHP $collect = [ 'category' => 'Electronics', 'price' => '100-500' ]; $client = ProductManagementApiClientBuilder::init()->build(); $client->getAPIController()->getFilteredProducts($collect); ``` ```csharp ApiController apiController = client.ApiController; // Using a Model to pass parameters in .NET GetFilteredProductsInput getFilteredProductsInput = new GetFilteredProductsInput { Category = "Electronics", Price = "100-500", }; await apiController.GetFilteredProductsAsync(getFilteredProductsInput); ``` ```ruby # Using a hash to pass parameters in Ruby collect = { 'category' => 'Electronics', 'price_range' => '100-500' } client = ProductManagementApi::Client.new client.client.get_filtered_products(collect) ``` ```go apiController := client.ApiController() ctx := context.Background() // Using a struct to pass parameters in Go collectedInput := productManagementApi.GetFilteredProductsInput{ Category: "Electronics", Price: "100-500", } apiController.GetFilteredProducts(ctx, collectedInput) ``` --- # Retries with Exponential Backoff Source: https://docs.apimatic.io/generate-sdks/sdk-features/retries-with-exponential-backoff/ import Tabs from '@theme/Tabs'; import TabItem from '@theme/TabItem'; APIMatic's SDKs provides retries with Exponential Backoff. It's a robust mechanism designed to handle transient failures when interacting with APIs. Transient failures, such as server overloads or temporary connectivity issues, are brief and irregular but can disrupt the communication between applications and APIs. This feature ensures that API requests are retried intelligently by gradually increasing the wait time between retries, thereby improving reliability without overwhelming the server. It addresses common issues like timeouts `(HTTP 408)`, server errors `(5XX)`, and rate-limiting `(HTTP 429)` scenarios. ## Key Benefits - **Enhanced Reliability**: Automatically recovers from transient failures, reducing the likelihood of dropped requests. - **Server-Friendly Behavior**: Exponential backoff prevents overloading the server by spacing out retry attempts progressively. - **Configurable Retry Logic**: Offers flexibility to define the number of retries, wait intervals, and maximum retry duration based on application requirements. ## How to Configure it in APIMatic's SDKs To enable retries with exponential backoff in your SDK configuration, follow these steps: 1. **Define Retry Conditions**: - Configure HTTP methods to retry (for example, GET and PUT). - Specify the HTTP status codes or exceptions that should trigger a retry, such as 408 (Request Timeout) HTTP Status code. :::note You can force retries for an endpoint, regardless of its idempotency, by setting **`forceRetries`** to true within the **`x-operation-settings`** endpoint extension in the OpenAPI specification file. For more details, refer to the [documentation](/specification-extensions/swagger-codegen-extensions/#operation-settings:~:text=an%20Operation%20object.-,forceRetries,-Boolean). ::: 2. **Set Retry Limits**: - Configure the number of retries (for example, 3 retries). - Optionally, set a maximum retry wait time to prevent indefinite retry loops (for example, 200 seconds). 3. **Set Retry Timeout and Intervals**: - Configure the timeout, which is the time interval the application waits for a response before declaring the call a failure (for example, 6 seconds). - Configure the retry interval, which is the time interval between API calls (for example, 2 seconds). 4. **Enable Exponential Backoff**: - Define a backoff factor (for example, 2) which specifies the factor to increase interval between retries. 5. **Integrate Retry Logic**: Apply the configuration during SDK initialization. ```ts const client = new Client({ ... httpClientOptions: { // sets the http client confiuration timeout: 6, // sets the timeout retryConfig: { httpMethodsToRetry: ["GET", "PUT"], // sets the http methods to retry httpStatusCodesToRetry: [408], // sets the http status code to retry maxNumberOfRetries: 3, // sets number of retries maximumRetryWaitTime: 200, // sets maximum retry wait time interval retryInterval: 2, // sets retry interval before declaring the call a failure backoffFactor: 2, // sets back off factor to 2 }, }, }); ``` ```java Client client = new Client.Builder() ... .httpClientConfig(configBuilder -> configBuilder // sets the http client confiuration .httpMethodsToRetry(new HashSet<>(Arrays.asList(HttpMethod.GET, HttpMethod.PUT))) // sets the http methods to retry .httpStatusCodesToRetry(new HashSet<>(408)) // sets the http status code to retry .numberOfRetries(3) // sets number of retries .maximumRetryWaitTime(200) // sets maximum retry wait time interval .timeout(6) // sets the timeout .retryInterval(2) // sets retry interval before declaring the call a failure .backOffFactor(2) // sets back off factor to 2 ) .build(); ``` ```python client = Client( ... retry_methods=['GET', 'PUT'], # sets the http methods to retry retry_statuses=[408], # sets the http status code to retry max_retries=3, # sets number of retries timeout=6, # sets the timeout backoff_factor=2 # sets back off factor to 2 ) ``` :::note To enable retries with backoff in the **.NET SDK**, you need to enable the `UserConfigurableRetries` CodeGen setting. For additional information about CodeGen settings, refer to the [CodeGen Settings Overview](/generate-sdks/customize-sdks/codegen-settings/codegen-settings-overview). This feature accepts a `Boolean` value and is disabled by default (`false`). ```json "info": { ..., "x-codegen-settings": { "UserConfigurableRetries": "true" } } ``` ::: ```csharp var client = new Client.Builder() ... .HttpClientConfig(config => config // sets the http client confiuration .RequestMethodsToRetry([HttpMethod.Get, HttpMethod.Put]) // sets the http methods to retry .StatusCodesToRetry([408]) // sets the http status code to retry .NumberOfRetries(3) // sets number of retries .MaximumRetryWaitTime(TimeSpan.FromSeconds(200)) // sets maximum retry wait time interval .Timeout(TimeSpan.FromSeconds(6)) // sets the timeout .RetryInterval(2) // sets retry interval before declaring the call a failure .BackoffFactor(2) // sets back off factor to 2 .Build() ) .Build(); ``` ``` go client := api.NewClient( ... api.CreateConfiguration( api.WithHttpConfiguration( api.CreateHttpConfiguration( api.WithTimeout(6), // sets the timeout api.WithRetryConfiguration(api.NewRetryConfiguration( api.WithRetryOnTimeout(true), // enable retries api.WithHttpMethodsToRetry([]string{"GET", "PUT"}), // sets the http methods to retry api.WithHttpStatusCodesToRetry([]int64{408}), // sets the http status code to retry api.WithMaxRetryAttempts(3), // sets number of retries api.WithMaximumRetryWaitTime(200), // sets maximum retry wait time interval api.WithRetryInterval(2), // sets retry interval before declaring the call a failure api.WithBackoffFactor(2), // sets back off factor to 2 )), ), ), ), ) ``` ```php $client = TesterClientBuilder::init() ... ->enableRetries(true) // enable retries ->httpMethodsToRetry(['GET', 'PUT']) // sets the http methods to retry ->httpStatusCodesToRetry([408]) // sets the http status code to retry ->numberOfRetries(3) // sets number of retries ->maximumRetryWaitTime(200) // sets maximum retry wait time interval ->timeout(6) // sets the timeout ->retryInterval(2) // sets retry interval before declaring the call a failure ->backOffFactor(2) // sets back off factor to 2 ->build(); ``` ```ruby client = API::Client.new( ... retry_methods: %i[get put], # sets the http methods to retry retry_statuses: [408], # sets the http status code to retry max_retries: 3, # sets number of retries timeout: 6, # sets the timeout retry_interval: 2, # sets retry interval before declaring the call a failure backoff_factor: 2, # sets back off factor to 2 ) ``` :::tip Default values of Timeout and Retries can be configured via [Timeout and Retries](/generate-sdks/customize-sdks/codegen-settings/timeout-and-retries-settings) CodeGen settings. ::: ## Use Cases - **Handling Temporary Server Downtime**: Automatically retry requests during brief outages until the service recovers. - **Dealing with Rate Limiting**: Adheres to Retry-After headers in HTTP 429 responses to avoid unnecessary retries. - **Managing Network Fluctuations**: Retries requests during temporary connectivity issues, improving reliability in unstable network environments. - **Batch Processing**: Ensures large data operations aren't interrupted by transient failures. ## Limitations - **Non-Idempotent Methods**: Retrying non-idempotent HTTP methods like POST may result in unintended side effects (for example, duplicate resource creation). - **Maximum Wait Time**: Exponential backoff can lead to longer delays in some scenarios, potentially impacting time-sensitive operations. --- # Schema Constraints Source: https://docs.apimatic.io/generate-sdks/sdk-features/schema-constraints/ APIMatic SDKs carry the validation constraints defined in your OpenAPI schemas onto the generated models as declarative attributes. Numeric bounds, string lengths, patterns, array rules, object property counts, and string formats are all expressed directly on the model, giving you a single, contract-driven source of truth that you can use to validate data before sending a request or after receiving a response. The attributes are declarative: the SDK decorates the models for you, and you decide when and where to run validation using standard .NET validation utilities. This keeps the models lightweight while letting you opt into as much or as little validation as your application needs. ## Constraints in Your OpenAPI Definition Constraints are the standard JSON Schema keywords you already use in your OpenAPI definition. For example: ```yaml components: schemas: User: type: object required: - name - age - roles properties: name: type: string minLength: 3 maxLength: 50 pattern: "^[A-Za-z ]+$" age: type: integer minimum: 18 maximum: 60 rating: type: number minimum: 0 maximum: 5 multipleOf: 0.1 roles: type: array minItems: 1 maxItems: 5 uniqueItems: true items: type: string ``` ## Constraint Attributes on Generated Models Each constraint is mapped to a corresponding attribute on the generated model property. Constraints covered by the .NET Base Class Library use the standard `System.ComponentModel.DataAnnotations` attributes, while the remaining constraints use attributes provided by the SDK under its `Core.Validation.Attributes` namespace. ```csharp using System.Collections.Generic; using System.ComponentModel.DataAnnotations; using System.Text.Json.Serialization; public record User { [JsonPropertyName("name")] [StringLength(50, MinimumLength = 3)] [RegularExpression("^[A-Za-z ]+$")] public required string Name { get; init; } [JsonPropertyName("age")] [Minimum(18)] [Maximum(60)] public required int Age { get; init; } [JsonIgnore(Condition = JsonIgnoreCondition.WhenWritingNull)] [JsonPropertyName("rating")] [Minimum(0.0)] [Maximum(5.0)] [MultipleOf(0.1)] public double? Rating { get; init; } [JsonPropertyName("roles")] [MinLength(1)] [MaxLength(5)] [UniqueItems] public required IReadOnlyList Roles { get; init; } } ``` The table below shows how each OpenAPI constraint maps to an attribute: | OpenAPI Keyword | Attribute | | --- | --- | | `minLength` / `maxLength` (string) | `[MinLength]` / `[MaxLength]`, or the combined `[StringLength]` | | `pattern` | `[RegularExpression]` | | `minItems` / `maxItems` (array) | `[MinLength]` / `[MaxLength]` | | `uniqueItems` | `[UniqueItems]` | | `minimum` / `maximum` | `[Minimum]` / `[Maximum]` | | `exclusiveMinimum` / `exclusiveMaximum` | `[ExclusiveMinimum]` / `[ExclusiveMaximum]` | | `multipleOf` | `[MultipleOf]` | | `minProperties` / `maxProperties` (object) | `[MinProperties]` / `[MaxProperties]` | | `format` (`email`, `hostname`, `json-pointer`) | `[Format(FormatKind.Email)]` and related values | The SDK-provided attributes live in the `Core.Validation.Attributes` namespace and behave like any other `ValidationAttribute`, so they integrate seamlessly with the standard .NET validation pipeline. ## Validating Models Because the attributes are declarative, validation runs whenever you choose to invoke it. Use `System.ComponentModel.DataAnnotations.Validator` to check an object against every constraint declared on its properties. To validate a request before sending it: ```csharp using System; using System.Collections.Generic; using System.ComponentModel.DataAnnotations; var user = new User { Name = "John Doe", Age = 30, Roles = new[] { "admin" }, }; var context = new ValidationContext(user); var results = new List(); // validateAllProperties: true checks every decorated property. bool isValid = Validator.TryValidateObject(user, context, results, validateAllProperties: true); if (!isValid) { foreach (var result in results) { Console.WriteLine(result.ErrorMessage); } } ``` You can validate a response the same way after it has been deserialized: ```csharp var response = await client.GetUserAsync(userId); var context = new ValidationContext(response); var results = new List(); Validator.TryValidateObject(response, context, results, validateAllProperties: true); ``` If you prefer validation to throw on the first violation instead of collecting results, use `Validator.ValidateObject`, which raises a `ValidationException` when a constraint isn't met. :::note Schema constraint attributes are currently available in the **C# v4 SDK (beta)**. Generated models carry the attributes automatically, and running validation is opt-in and fully under your control. ::: For union types whose members share a base type but differ by their constraints, see how the SDK selects the matching schema in [oneOf and anyOf](oneOf-and-anyOf.md). --- # Server-Sent Events (SSE) Streaming Source: https://docs.apimatic.io/generate-sdks/sdk-features/server-sent-events-streaming/ import Tabs from '@theme/Tabs'; import TabItem from '@theme/TabItem'; Some APIs stream their response incrementally over a long-lived connection using [Server-Sent Events (SSE)](https://developer.mozilla.org/en-US/docs/Web/API/Server-sent_events/Using_server-sent_events) instead of returning a single buffered body. Typical examples include chat-completion and other AI APIs that emit tokens as they're generated. APIMatic detects these operations from the API contract and generates an endpoint that returns a typed, async-iterable stream, so consumers can process events as they arrive using their language's natural async iteration loop. :::note SSE streaming is currently supported in **TypeScript** and **.NET (v4 beta)** SDKs. The generated interface follows the same model in both languages but adapts to each language's idioms, as shown in the examples below. ::: ## SSE Configuration in OpenAPI No special extension is required. An operation is treated as a streaming endpoint whenever its success response declares a `text/event-stream` media type. The schema associated with that media type describes the shape of each event's payload, and the generated SDK decodes every incoming frame into that type. ```yaml paths: /chat/completions: post: operationId: createChatCompletion responses: '200': description: OK content: text/event-stream: schema: $ref: '#/components/schemas/CreateChatCompletionStreamResponse' ``` Some streams signal their end by sending a fixed terminator frame (for example, a final `data: [DONE]`) instead of just closing the connection. When that's the case, declare the terminator value with the optional [`x-sse-sentinel` extension](/specification-extensions/swagger-codegen-extensions#sse-sentinel-extension) on the `text/event-stream` media type so the SDK ends the stream cleanly when that frame arrives. See [Ending the Stream on a Sentinel](#ending-the-stream-on-a-sentinel). ```yaml content: text/event-stream: schema: $ref: '#/components/schemas/CreateChatCompletionStreamResponse' x-sse-sentinel: "[DONE]" # Ends the stream on a data: [DONE] frame. ``` ## Example Usage For a streaming endpoint, the generated method returns a stream of decoded events of type `T`, where `T` is the schema associated with the `text/event-stream` response. The stream is single-use and lazy: it's consumed with the language's async iteration construct, and each iteration yields the next decoded event as it arrives over the wire. The endpoint method returns a `Promise>>`. The `result` property is the `SseStream`, a single-use `AsyncIterable`. ```typescript const body: CreateChatCompletionRequest = { messages: [{ role: 'user', content: 'Hello!' }], model: 'gpt-5.4', stream: true, }; try { const response = await chatController.createChatCompletion(body); // Asynchronously iterating over the server-sent events as they arrive. for await (const event of response.result) { console.log(event); } // Extracting response status code. console.log(response.statusCode); // Extracting response headers. console.log(response.headers); } catch (error) { console.log(error); } ``` In this example: * **response**: The `ApiResponse` returned by the endpoint. Its `result` property is the `SseStream`. * **response.result**: The `SseStream`. It behaves as an `AsyncIterable`, allowing direct iteration over decoded events using `for await...of`. * **event**: A single decoded event payload of type `T`. * **response.statusCode**: The HTTP status code returned when the stream was opened. * **response.headers**: The HTTP headers returned when the stream was opened. * **Error Handling**: Wrap the streaming logic in `try-catch` blocks to catch and handle `ApiError`, as well as the SSE-specific errors described below. Each streaming endpoint generates two variants. The throwing variant returns a `Task>` and throws on a non-success initial status. The result-based variant, suffixed with `AsResult`, returns a `Task, RawError>>` and never throws on the initial status. Both are iterated with `await foreach`. ```csharp var request = new CreateChatCompletionRequest { Messages = [new UserMessage { Content = "Hello!" }], Model = "gpt-5.4", Stream = true, }; // The throwing variant returns the stream directly and throws on a non-success status. IAsyncEnumerable stream = await client.CreateChatCompletion(request); // Asynchronously iterating over the server-sent events as they arrive. await foreach (var chunk in stream) { Console.WriteLine(chunk); } ``` To inspect the initial HTTP status and headers, or to handle a non-success status without exceptions, use the `AsResult` variant: ```csharp ApiResult, RawError> result = await client.CreateChatCompletionAsResult(request); // StatusCode and Headers reflect the initial HTTP response, when the stream was opened. Console.WriteLine(result.StatusCode); Console.WriteLine(result.Headers); if (result.TryGetResponse(out var stream)) { await foreach (var chunk in stream) { Console.WriteLine(chunk); } } ``` In this example: * **stream**: The streamed response, an `IAsyncEnumerable` of decoded events, iterated with `await foreach`. * **chunk**: A single decoded event payload of type `T`. * **result**: The `ApiResult, RawError>` returned by the `AsResult` variant. Use `TryGetResponse` / `TryGetError`, or `Match`, to branch on the outcome. * **`result.StatusCode`** and **`result.Headers`**: The HTTP status code and headers returned when the stream was opened. * **Error Handling**: The throwing variant throws on a non-success status; the `AsResult` variant surfaces it as a typed `RawError`. Enumeration can also throw the SSE-specific errors described below. ## Accessing Event Metadata :::note Access to raw SSE frame metadata is currently a TypeScript capability. In .NET, the stream yields decoded events directly, and streams that mix multiple event shapes are modeled as a `oneOf` union type. ::: SSE frames can carry metadata in addition to the payload: an `id`, an `event` name, and a `retry` reconnection hint. Iterating the stream directly yields only the decoded payloads; accessing this metadata is shown below. Iterate the stream via `withMetadata()`, which yields full `SseEvent` objects. ```typescript const response = await chatController.createChatCompletion(body); // Iterate full events, including `id`, `event` and `retry` metadata. for await (const event of response.result.withMetadata()) { console.log(event.data); // The decoded payload of type `T`. console.log(event.id); // The `id:` field value in effect for this event, if any. console.log(event.event); // The `event:` field value, if any. console.log(event.retry); // The `retry:` reconnection delay in milliseconds, if any. } ``` In this example: * **event.data**: The decoded event payload of type `T`. * **event.event**: The `event:` field value, if any. * **event.id**: The `id:` field value in effect for this event, if any. * **event.retry**: The `retry:` reconnection delay, in milliseconds, if any. ## Closing the Stream The stream is backed by a live HTTP connection. It's single-use and lazy, so the connection is held only while it's being consumed. Stopping consumption releases the connection. Breaking out of the iteration loop, or calling `close()` explicitly, aborts the underlying request. ```typescript const response = await chatController.createChatCompletion(body); for await (const event of response.result) { console.log(event); if (shouldStop(event)) { response.result.close(); // Aborts the connection and stops iteration. break; } } ``` Breaking out of the `await foreach` loop disposes the enumerator, which aborts the underlying connection. Passing a `CancellationToken` cancels it cooperatively. A stream that's never enumerated never opens a connection to release. ```csharp using var cts = new CancellationTokenSource(); var stream = await client.CreateChatCompletion(request, cts.Token); await foreach (var chunk in stream.WithCancellation(cts.Token)) { Console.WriteLine(chunk); if (ShouldStop(chunk)) { break; // Disposes the enumerator and aborts the connection. } } ``` ## Ending the Stream on a Sentinel When a response declares a terminator with the [`x-sse-sentinel` extension](/specification-extensions/swagger-codegen-extensions#sse-sentinel-extension), the SDK ends the stream as soon as a frame whose `data` payload equals that value arrives. No consumer code is needed: iteration completes on its own, and the sentinel frame is treated as a control signal, so it's not yielded or decoded against the response schema. Streams without a declared sentinel end when the server closes the connection. ```typescript const response = await chatController.createChatCompletion(body); // Completes cleanly when the server sends the `[DONE]` terminator frame. for await (const event of response.result) { console.log(event); // Only decoded events; never the `[DONE]` sentinel. } ``` ```csharp var stream = await client.CreateChatCompletion(request); // Completes cleanly when the server sends the `[DONE]` terminator frame. await foreach (var chunk in stream) { Console.WriteLine(chunk); // Only decoded events; never the `[DONE]` sentinel. } ``` ## Read Timeout Configuration To guard against a server that opens a stream but then stalls indefinitely, streaming SDKs expose a read-timeout client configuration option. It bounds the maximum idle window allowed between two consecutive frames, and never the caller's own processing time. If no frame arrives within that window, the stream fails with a timeout error. The default is 60 seconds. The `streamReadTimeout` option is a number of milliseconds (default `60000`). ```typescript const client = new Client({ // Fail if the server stalls for more than 30 seconds between frames. streamReadTimeout: 30000, }); ``` The `StreamReadTimeout` option is a `TimeSpan?` (default 60 seconds). Set it to `null` to wait indefinitely. ```csharp var client = new Client(httpClient, new ClientOptions { // Fail if the server stalls for more than 30 seconds between frames. StreamReadTimeout = TimeSpan.FromSeconds(30), }); ``` ## Error Handling In addition to the usual API error, streaming endpoints can surface two SSE-specific errors while the stream is being consumed: * A **timeout error**, thrown when the server stalls between frames for longer than the configured read timeout. It exposes the idle window that elapsed without a frame arriving. * A **decode error**, thrown when a frame's payload can't be decoded into the expected type `T`. It exposes the raw frame payload that failed, along with the underlying cause. The errors are `SseTimeoutError` (with `idleTimeoutMs`) and `SseDecodeError` (with `rawFrame` and `cause`). Both extend the `SseError` base type. ```typescript import { SseDecodeError, SseTimeoutError } from 'your-sdk'; try { const response = await chatController.createChatCompletion(body); for await (const event of response.result) { console.log(event); } } catch (error) { if (error instanceof SseTimeoutError) { // The server stalled longer than `streamReadTimeout`. console.log(error.idleTimeoutMs); } else if (error instanceof SseDecodeError) { // A frame could not be decoded into the expected type. console.log(error.rawFrame, error.cause); } else { console.log(error); } } ``` The errors are `SseTimeoutException` (with `IdleTimeout`) and `SseDeserializationException` (with `RawFrame`, and the underlying `InnerException`). Both extend the `SseException` base type. A non-success initial status throws by default; use the `AsResult` variant to receive a typed `RawError` instead. ```csharp using YourSdk.Core.Exceptions; try { var stream = await client.CreateChatCompletion(request); await foreach (var chunk in stream) { Console.WriteLine(chunk); } } catch (SseTimeoutException ex) { // The server stalled longer than StreamReadTimeout. Console.WriteLine(ex.IdleTimeout); } catch (SseDeserializationException ex) { // A frame could not be deserialized into the expected type. Console.WriteLine(ex.RawFrame); Console.WriteLine(ex.InnerException); } ``` ## Benefits * **Typed Events**: Every frame is decoded into the response schema type, so consumers work with typed objects rather than raw text. * **Familiar Interface**: The stream is a standard async sequence, consumed with the language's natural async iteration loop. * **OpenAPI-Driven**: Automatically applied to any operation with a `text/event-stream` response, with no extra configuration required. * **Safe by Default**: A configurable read timeout prevents stalled connections from hanging indefinitely, and the connection is released as soon as iteration stops. --- # Webhooks and Callbacks Source: https://docs.apimatic.io/generate-sdks/sdk-features/webhooks-and-callbacks/ import Tabs from '@theme/Tabs'; import TabItem from '@theme/TabItem'; APIMatic's SDKs provide comprehensive support for webhooks and callbacks, enabling developers to handle asynchronous API events with type-safe processing and built-in security features. This capability simplifies the integration of event-driven workflows and real-time notifications in modern applications. ## Webhooks and Callbacks Configuration in OpenAPI Here is an example of how to define webhooks and callbacks in your OpenAPI specification: ```yaml paths: /payments: post: summary: Create a payment callbacks: paymentCallback: '{$request.body#/callbackUrl}': post: summary: Payment status callback requestBody: required: true content: application/json: schema: type: object properties: status: type: string webhooks: rejectedPayment: ... verifiedPayment: post: summary: Verified payment status webhook requestBody: required: true content: application/json: schema: type: object properties: paymentId: type: string status: type: string ... ``` For advanced configuration options including signature verification and custom grouping, APIMatic also supports webhook and callback [OpenAPI extensions](/specification-extensions/swagger-codegen-extensions#webhook-group-extension) that provide enhanced functionality beyond the standard OpenAPI specification. ## Usage Examples ```csharp [Route("webhooks")] [ApiController] public class WebhooksController : ControllerBase { // Use the provided handler to verify and parse the incoming event private readonly PaymentHandler handler = new PaymentHandler("hmac-secret-key"); [HttpPost] public async Task ReceiveEvent() { // Create the HttpRequestData from the incoming HttpRequest var eventRequest = HttpRequestData.FromAspNetCoreParams( Request.Method, Request.Scheme, Request.Host.ToString(), Request.Path.ToString(), Request.QueryString.ToString(), Request.Headers, Request.Body, Request.Query, Request.Cookies, Request.Protocol, Request.ContentType, Request.ContentLength ); var eventParsingResult = await handler.VerifyAndParseEventAsync(eventRequest); var result = eventParsingResult.MatchSome( verifiedPaymentEvent: payment => $"Payment verification received {payment}", rejectedPaymentEvent: payment => $"Payment rejection received {payment}", signatureVerificationFailed: error => $"Signature verification failed {error}", unknown: () => "Unknown event received" ); return Ok(); } } ``` ```java @RestController public class WebhooksController { @PostMapping("/webhooks") public ResponseEntity receiveEvent( HttpServletRequest request, @RequestBody(required = false) String body) { // Create the HttpRequest from the incoming Request HttpRequest httpRequest = HttpRequest.fromHttpServletRequest( Collections.list(request.getHeaderNames()).stream().collect(Collectors.toMap( h -> h, h -> Collections.list(request.getHeaders(h)) )), request.getParameterMap(), request.getRequestURL(), request.getQueryString(), request.getMethod(), body ); // Use the provided handler to verify and parse the incoming event PaymentHandler handler = new PaymentHandler("hmac-secret-key"); String result = handler.verifyAndParseEventAsync(httpRequest).thenApply(paymentParsingResult -> paymentParsingResult.matchSome(new PaymentParsingResult.SomeCases() { @Override public String verifiedPaymentEvent(VerifiedPaymentEvent verifiedPaymentEvent) { // TODO: add handling logic return "VerifiedPaymentEvent event received " + verifiedPaymentEvent; } @Override public String rejectedPaymentEvent(RejectedPaymentEvent rejectedPaymentEvent) { // TODO: add handling logic return "RejectedPaymentEvent event received " + rejectedPaymentEvent; } @Override public String unknown() { // TODO: add unknown event handling return "Unknown event received"; } @Override public String signatureVerificationFailed(SignatureVerificationResult signatureVerificationResult) { // TODO: add signature verification failure handling return "SignatureVerificationResult event received " + signatureVerificationResult; } }) ).join(); return ResponseEntity.status(200).body(result); } } ``` ```python app = Flask(__name__) # Step 1: Create the handler with your shared secret key. handler = PaymentHandler(secret_key="hmac-secret-key") @app.route("/webhooks", methods=["POST"]) def webhooks(): # Step 2: Convert the incoming request using to_core_request (Django/Flask) # or await to_core_request_async (FastAPI). core_req = to_core_request(request) # Step 3: Verify and parse the request into a typed event. event = handler.verify_and_parse_event(core_req) # Step 4: Pattern match on the event types and handle it. if isinstance(event, VerifiedPaymentEvent): print("Payment verification received") # TODO: add handling logic elif isinstance(event, RejectedPaymentEvent): print("Payment rejection received") # TODO: add handling logic elif isinstance(event, SignatureVerificationFailure): print("Signature verification failed") # TODO: add signature verification failure handling elif isinstance(event, UnknownEvent): print("Unknown event") # TODO: add unknown event handling # Step 5: Return 200 OK to acknowledge receipt. return Response(status=200) ``` ```ruby # Define route Rails.application.routes.draw do post '/webhooks/receive', to: 'webhooks#receive' end # Define controller class WebhooksController < ActionController::API def receive # Step 1: Create the handler with your shared secret key. handler = PaymentHandler.new('hmac-secret-key') # Step 2: Use the Rails request directly (Rack::Request compatible). event = handler.verify_and_parse_event(request) # Step 3: Pattern match on the event types and handle it. case event when VerifiedPaymentEvent puts 'Payment verification received' # TODO: Add handling logic when RejectedPaymentEvent puts 'Payment rejection received' # TODO: Add handling logic when SignatureVerificationFailure puts 'Signature verification failed' # TODO: Add failure handling when UnknownEvent puts 'Unknown event received' # TODO: Add unknown-event handling else # TODO: Add default handling end # Step 4: Return 200 OK to acknowledge receipt. head :ok end end ``` ```typescript // Create the handler with your shared secret key. const handler = new PaymentHandler("hmac-secret-key"); // Define the webhook endpoint. app.post("/webhooks", (req: Request, res: Response) => { // Convert the incoming Express request into a core request. const coreRequest = convertExpressRequest(req); // Verify and parse the request into a typed event. const event = handler.verifyAndParseEvent(coreRequest); if (PaymentParsingResult.isVerifiedPaymentEvent(event)) { console.log("Payment verification received"); // TODO: add handling logic } else if (PaymentParsingResult.isRejectedPaymentEvent(event)) { console.log("Payment rejection received"); // TODO: add handling logic } else if (PaymentParsingResult.isSignatureVerificationFailure(event)) { console.log("Signature verification failed"); // TODO: add signature verification failure handling } else if (PaymentParsingResult.isEventTypeUnknown(event)) { console.log("Unknown event"); // TODO: add unknown event handling } // Return 200 OK to acknowledge receipt. res.status(200).send('OK'); }); ``` ```php // Create the handler with your shared secret key. $handler = PaymentHandler::init('hmac-secret-key'); Route::post( '/webhooks', function (Request $request) use ($handler) { // Verify and parse the request into a typed event. $result = $handler->verifyAndParse($request); if ($result instanceof SignatureVerificationFailure) { // TODO: add signature verification failure handling return response("Received an event with invalid signature: {$result->getErrorMessage()}", 400); } elseif ($result instanceof VerifiedPaymentEvent) { // TODO: add handling logic return response("Received an event of type FulfillmentCallback: $result"); } elseif ($result instanceof UnknownEvent) { // TODO: add unknown event handling return response("Received an unknown event with payload: {$result->getData()}", 400); } } ); ``` ```go func WebhooksGinEventHandler(c *gin.Context) { // Create the handler with your shared secret key. handler, err := callbacks.PaymentHandler("hmac-secret-key") if err != nil { c.JSON(400, map[string]any{"unexpected error": err.Error()}) } // Verify and parse the request into a typed event. parsingResult := handler.VerifyAndParseEvent(c.Request) if event, ok := parsingResult.AsVerifiedPaymentEvent(); ok { // TODO: add handling logic c.JSON(200, map[string]any{ "status": "success", "eventInfo": fmt.Sprintf("VerifiedPaymentEvent event received %v", event), }) } else if parsingResult.AsUnknownEvent() { // TODO: add unknown event handling c.JSON(200, map[string]any{ "status": "success", "eventInfo": "UnknownEvent received", }) } else if event, ok := parsingResult.AsSignatureVerificationFailure(); ok { // TODO: add signature verification failure handling c.JSON(200, map[string]any{ "status": "success", "eventInfo": fmt.Sprintf("SignatureVerificationFailure event received %v", event), }) } } ``` ## Benefits - **Type-Safe Event Handling**: Automatically generated handlers ensure type safety when processing webhook/callback events. - **Built-in Signature Verification**: Support for HMAC-based signature verification and payload validation to ensure authenticity and integrity. - **Event Type Detection**: Intelligent parsing and narrowing support multiple event or response types within the same endpoint. - **Simplified Integration**: Eliminates the need for custom parsing and validation logic when working with asynchronous flows. - **Error Handling**: Comprehensive error handling for malformed payloads, signature verification failures, and unknown event types. ## Error Handling The SDK provides built-in error handling for common issues encountered in both webhooks and callbacks: ### Common Error Types - **Signature Verification Failure** This error occurs when: - The calculated HMAC signature doesn't match the signature provided in the headers - The required headers are missing - **Unknown Event Type** This error occurs when: - The request body is empty - The request body contains invalid or malformed JSON - The request body doesn't match any known event - The request body maps to more than one event --- # Supported Versions and Dependencies Source: https://docs.apimatic.io/generate-sdks/supported-sdk-version-dependencies/ This page lists the supported language/framework versions and dependencies in each of the [SDKs generated](overview-sdks.md) by APIMatic. ## Supported SDK Language Versions This table lists all supported versions for each supported SDK language. | Language/Platform | Supported Versions | | ---------------- | ------------------ | | C# (a.k.a .NET) | .NET Standard 2.0. [See compatibility table](supported-sdk-version-dependencies.md#reference-net-standard-versions).
Note that our SDK uses C# language version 7.3. | | Java | Version >= 8 | | PHP | Version >= 7.2 | | Python | Version >= 3.7 | | Ruby | Version >= 2.6 | | TypeScript | TypeScript Version >= 4.1
*For Node.js environment:* Node.js Version >= 14
*For the browser environment:* All modern browsers are supported. For older browsers, some polyfills might be needed. | | Go | Version >= 1.18 | ### **Reference: .NET Standard Versions** This table shows the compatibility of **.NET Standard 2.0** (used in our SDK right now) with .NET Core, .NET Framework and other .NET platforms’ versions. ![.NET Standard](/images/sdks/dotnet-2-0-standard.png) Source: [https://dotnet.microsoft.com/platform/dotnet-standard#versions](https://dotnet.microsoft.com/platform/dotnet-standard#versions) ## Supported Dependencies This section covers all mandatory and optional dependencies for each SDK along with any specific use cases where the dependency may be required. ### Java SDK Dependency | Version | Mandatory/Optional | Use Cases ----------------------|--------------------|--------------------|--------------------------------------------------------------------------------- `core` | [![Maven Central](https://img.shields.io/maven-central/v/io.apimatic/core?color=green)](https://central.sonatype.com/artifact/io.apimatic/core) | Mandatory | All SDKs `core-interfaces` | [![Maven Central](https://img.shields.io/maven-central/v/io.apimatic/core-interfaces?color=green)](https://central.sonatype.com/artifact/io.apimatic/core-interfaces) | Mandatory | All SDKs `okhttp-client-adapter` | [![Maven Central](https://img.shields.io/maven-central/v/io.apimatic/okhttp-client-adapter?color=green)](https://central.sonatype.com/artifact/io.apimatic/okhttp-client-adapter) | Mandatory | All SDKs `junit` | 4.13.2 | Optional | In case of test cases `jackson-jsog` | 1.1.1 | Optional | In case of `jsog` Identity type in models ### C# Standard Project Dependency | Version | Mandatory/Optional | Use Cases -----------------------------|----------|--------------------|--------------------------------- `APIMatic.Core` | [![Version](https://img.shields.io/nuget/v/APIMatic.Core)](https://www.nuget.org/packages/APIMatic.Core) | Mandatory | All standard projects `Microsoft.CSharp` | 4.7.0 | Mandatory | All standard projects `Microsoft.Extensions.Configuration.Binder` | 8.0.0 | Mandatory | Environment-based configuration `JsonSubTypes` | 2.0.1 | Optional | Discriminator-based models `Microsoft.Bcl.HashCode` | 1.1.1 | Optional | Immutable models `Microsoft.Extensions.Primitive` | 8.0.0 | Optional | Webhooks and callbacks `System.Xml.XmlSerializer` | 4.3.0 | Optional | XML support ### C# Test Project Dependency | Version | Mandatory/Optional | Use Cases -----------------------|---------|--------------------|------------------- `Microsoft.NET.Test.Sdk` | 17.5.0 | Mandatory | All test projects `NUnit` | 3.13.3 | Mandatory | All test projects `NUnit3TestAdapter` | 4.3.1 | Mandatory | All test projects ### Python SDK Dependency | Version | Mandatory/Optional | Use Cases ----------------------------------------|-----------------|--------------------|----------------------- `apimatic-core` | [![PyPI](https://img.shields.io/pypi/v/apimatic-core)](https://pypi.org/project/apimatic-core/) | Mandatory | All SDKs `apimatic-core-interfaces` | [![PyPI](https://img.shields.io/pypi/v/apimatic-core-interfaces)](https://pypi.org/project/apimatic-core-interfaces/) | Mandatory | All SDKs `apimatic-requests-client-adapter` | [![PyPI](https://img.shields.io/pypi/v/apimatic-requests-client-adapter)](https://pypi.org/project/apimatic-requests-client-adapter/) | Mandatory | All SDKs `python-dotenv` | >=0.21, <2.0 | Mandatory | To read SDK configurations from environment `pytest` | >=7.2.2 | Optional | In case of tests ### Ruby SDK Dependency | Version | Mandatory/Optional | Use Cases --------------------------------|--------------------------|--------------------|---------------------- `apimatic_core_interfaces` | [![Gem Version](https://badge.fury.io/rb/apimatic_core_interfaces.svg)](https://badge.fury.io/rb/apimatic_core_interfaces) | Mandatory | All SDKs `apimatic_core` | [![Gem Version](https://badge.fury.io/rb/apimatic_core.svg)](https://badge.fury.io/rb/apimatic_core) | Mandatory | All SDKs `apimatic_faraday_client_adapter` | [![Gem Version](https://badge.fury.io/rb/apimatic_faraday_client_adapter.svg)](https://badge.fury.io/rb/apimatic_faraday_client_adapter) | Mandatory | All SDKs `minitest` | ~> 5.14, >= 5.14.1 | Optional | In case of tests `minitest-proveit` | ~> 1.0 | Optional | In case of tests `nokogiri` | ~> 1.10, >=1.10.10 | Optional | In case of XML ### PHP SDK Dependency | Version | Mandatory/Development | Use Cases | -------------------------|--------------------------|-----------------------|---------------------------| `apimatic/core` | [![Version](https://img.shields.io/packagist/v/apimatic/core.svg?style=flat)](https://packagist.org/packages/apimatic/core) | Mandatory | All SDKs | `apimatic/core-interfaces` | [![version](https://img.shields.io/packagist/v/apimatic/core-interfaces.svg?style=flat)](https://packagist.org/packages/apimatic/core-interfaces) | Mandatory | All SDKs | `apimatic/unirest-php` | [![version](https://img.shields.io/packagist/v/apimatic/unirest-php.svg?style=flat)](https://packagist.org/packages/apimatic/unirest-php) | Mandatory | All SDKs | `ext-json` | latest | Mandatory | All SDKs| `squizlabs/php_codesniffer`| >=3.5 <4.0 | Development | All SDKs| `phan/phan` | 5.4.2 | Development | All SDKs| `phpunit/phpunit` | >=7.5 <10.0 | Development | In case of tests| ### TypeScript SDK Dependency | Version | Mandatory/Optional | Use Cases ----------------------------------|--------------------------|----------------------|---------------------- `@apimatic/schema` | [![npm shield](https://img.shields.io/npm/v/@apimatic/schema)](https://www.npmjs.com/package/@apimatic/schema) | Mandatory | All SDKs `@apimatic/core` | [![npm shield](https://img.shields.io/npm/v/@apimatic/core)](https://www.npmjs.com/package/@apimatic/core) | Mandatory | All SDKs `@apimatic/authentication-adapters` | [![npm shield](https://img.shields.io/npm/v/@apimatic/authentication-adapters)](https://www.npmjs.com/package/@apimatic/authentication-adapters) | Mandatory | All SDKs with Auth `@apimatic/oauth-adapters` | [![npm shield](https://img.shields.io/npm/v/@apimatic/oauth-adapters)](https://www.npmjs.com/package/@apimatic/oauth-adapters) | Mandatory | All SDKs with OAuth `@apimatic/axios-client-adapter` | [![npm shield](https://img.shields.io/npm/v/@apimatic/axios-client-adapter)](https://www.npmjs.com/package/@apimatic/axios-client-adapter) | Mandatory | All SDKs `@apimatic/test-utilities` | [![npm shield](https://img.shields.io/npm/v/@apimatic/test-utilities)](https://www.npmjs.com/package/@apimatic/test-utilities) | Mandatory | All SDKs with Tests `typescript` | ^4.9.5 | Mandatory | All SDKs `tslib` | ^2.5.0 | Mandatory | All SDKs `@types/jest` | ^29.4.0 | Mandatory | All SDKs `jest` | ^29.4.3 | Mandatory | All SDKs `ts-jest` | ^29.0.5 | Mandatory | All SDKs `@typescript-eslint/eslint-plugin` | ^5.52.0 | Mandatory | All SDKs `@typescript-eslint/parser` | ^5.52.0 | Mandatory | All SDKs `eslint` | ^8.34.0 | Mandatory | All SDKs `xml2js` | ^0.4.23 | Optional | For XML `@types/xml2js` | ^0.4.5 | Optional | For XML ### Go SDK Dependency | Version | Mandatory/Optional | Use Cases -------------------------|--------------------------|----------------------|---------------------- `apimatic/go-core-runtime` | [![GitHub release](https://img.shields.io/github/v/release/apimatic/go-core-runtime)](https://pkg.go.dev/github.com/apimatic/go-core-runtime?tab=versions) | Mandatory | All SDKs --- # SDK Coding Standards Source: https://docs.apimatic.io/generate-sdks/sdk-coding-standards/ At APIMatic, we’re obsessed with the quality of the code we generate, so our SDKs are compliant with the latest industry accepted coding standards. This makes our SDK code consistent, reliable and maintainable. Moreover, to ensure that the SDK code adheres to the coding standards, we use coding style checker tools for each language as an extra step. The following table provides information about the coding standards and coding style checkers used for each language: | Language | Coding Standard Used | Coding Style Checker Used | |------------|---------------------------------------------------------------------------------- |---------------------------| | C# | [Microsoft C# Style Guide](https://learn.microsoft.com/en-us/dotnet/fundamentals/code-analysis/overview) |[Roslyn Analyzers](https://learn.microsoft.com/en-us/visualstudio/code-quality/roslyn-analyzers-overview)| | Java | [Google Java Style Guide](https://google.github.io/styleguide/javaguide.html) |[Checkstyle](https://checkstyle.org/)| | PHP | [PSR-12 Coding Style Guide](https://www.php-fig.org/psr/psr-12/) |[PHP CodeSniffer](https://github.com/squizlabs/PHP_CodeSniffer)| | Python | [PEP8 Coding Style Guide](https://www.python.org/dev/peps/pep-0008/) |[pycodestyle](https://pycodestyle.pycqa.org/en/latest/)| | Ruby | [Ruby Style Guide](https://github.com/rubocop/ruby-style-guide) |[RuboCop](https://rubocop.org/)| | TypeScript | [Prettier-like Style](https://prettier.io/) |[Prettier](https://prettier.io/)| You can also learn more about what [versions our SDKs support](supported-sdk-version-dependencies.md) for each language. --- # CodeGen FAQs Source: https://docs.apimatic.io/generate-sdks/frequently-asked-questions/ ## How to create a single SDK from multiple API specification definitions? If you have multiple APIs, you can [stitch them up into a single API spec](https://docs.apimatic.io/manage-apis/api-merging/) and use that specification to [create a single SDK](https://docs.apimatic.io/generate-sdks/create-sdks/create-sdks-through-web/). ## In APIMatic definition, what do API and an endpoint equate to? - API: API is the API specification that contains endpoints and models e.g an open API file. You can group as many endpoints as you'd like in a single API specification and call them as a single API. For APIMatic CodeGen, 1 API = 1 API spec (swagger, RAML, etc.) - Endpoint: 1 unique HTTP request to a server. For instance, 1 post request and 1 get request are 2 unique API endpoints. ## Do SDKs support GraphQL, streaming APIs or AsyncAPI? SDK generation doesn't support GraphQL or AsyncAPI. Streaming APIs are partially supported. Endpoints that stream their response over [Server-Sent Events (SSE)](sdk-features/server-sent-events-streaming.md) are currently supported in TypeScript and .NET (v4 beta) SDKs only. ## Which discriminators are supported in SDKs? We support `allOf`, `oneOf` and `anyOf`. ## Why do example values for some parameters not show up in code even though valid examples are added in the spec? By default, SDKs don't show example values for optional parameters. To enable this feature, you can use the `GenerateExamplesForOptionalFields` [CodeGen setting](../customize-sdks/codegen-settings/docs-settings#generate-examples-for-optional-fields). ## How does the GitHub deployment work? Publishing an SDK to GitHub is quite seamless. Simply provide access to your GitHub account and we can either push the source code to a repository of your choice or automatically create a new repository under your account. For more details refer to our [Publishing](/generate-sdks/sdk-publishing/sdk-publishing-overview/) documentation. --- # Api Portal Overview Source: https://docs.apimatic.io/publish-apis/api-portal-overview/ # API Portal Overview A good developer experience starts with a well-built API documentation portal containing every possible endpoint. The purpose is to showcase every detail of the API with proper descriptions and examples for smooth API usage by the developer. With APIMatic, you can generate an API portal from your API specification file as a platform to host generated docs and SDKs. The portal is your developer's hub to see the HTTP Reference API Documentation, run your code samples, get SDKs, and much more. Here is a list of features the documentation portals offer: - Live API Playground - Reactive code samples - SDKs in all supported languages - Language-specific API documentation - Custom Markdown guides - Performance Monitoring with Analytics Dashboard - Auto-generated manuals ## Live API Code Playground The [live API playground](https://docs.apimatic.io/publish-apis/api-console/) showcases how to call an API endpoint with live input validation. The API playground has auto-generated usage examples, reactive code samples, API response body and headers. The API code playground shows reactive code samples that change with the user input and the response can be viewed at runtime. User can provide values dynamically to see the output. Code samples are error-free and provided in a number of language so the developers can copy the code into their applications. ![API Code Playground](/images/api-portal/api-code-playground.png) ## SDKs in all supported Languages [SDK](https://docs.apimatic.io/generate-sdks/overview-sdks/) helps accelerate the API consumption process as the API integration becomes seamless and the updates are automatically generated in the SDK. The SDKs can be downloaded using the portal in more than 6 supported languages. Following are the supported languages: - Python - .NET - Ruby - Java - PHP - TypeScript - Go ![SDKs in supported languages](/images/api-portal/get-sdk.png) ## Language Specific API Documentation The documentation section in the portal refers to the language-specific API documentation. All the endpoints are listed along with code samples in seven different languages. The HTTP reference can be viewed in the language of your choice and the "Try it Out" section allows you to try the API in real time. ![Language Specific Docs](/images/api-portal/language-specific-docs.png) ## Custom Documentation The API portal provides the flexibility of adding [custom guides and documentation](https://docs.apimatic.io/publish-apis/customize-docs/) to the API portal. The custom guides, as the name suggests can contain any custom information about the API such as getting started, API usage, licensing, and much more. Custom guides are provided in [Markdown format](https://docs.apimatic.io/publish-apis/markdown-syntax/) and it supports adding images and videos. You can add as many sections in the documentation to make it as comprehensive as possible. ![Language Specific Docs](/images/api-portal/custom-docs.png) ## Portal Customization For a better developer experience, you can [customize](https://docs.apimatic.io/publish-apis/customizing-your-portal/) the look and feel of your portal according to your own style. Customizations can be made to the generated portal such as uploading the company's logo URL, a cover image, adding the tagline and title of the page, and much more. ![Customized portal](/images/api-portal/customized-portal.png) ## Hosting Options for Portal The API developer portal can either [hosted as a separate project](https://docs.apimatic.io/publish-apis/hosting-your-portal/) entirely on a domain of your choice or you can [embed the portal](https://docs.apimatic.io/publish-apis/embedding-your-portal/) in your existing documentation site. ## Monitor Portal Performance with Analytics Dashboard APIMatic provides an analytics dashboard that monitors and analyzes the performance of the API portal for multiple API versions. The dashboard contains a [number of metrics](https://docs.apimatic.io/publish-apis/analytics-dashboard/) such as portal visits, page views, SDK downloads, and much more. --- # Docs as Code Overview Source: https://docs.apimatic.io/docs-as-code/documentation-as-code-overview/ API documentation plays an important role for a good developer experience. However, API documentation is mostly an afterthought when APIs are rapidly updating, resulting in no synchronization between the newer APIs and their documentation. For this purpose, APIMatic offers a **docs as code** solution which allows the users to provide all aspects of API documentation as part of the code. ## Understanding the Docs as Code Workflow Docs as code is an approach to treat the documentation as a connected part of the code and write it using the same tools and processes that developers use for their daily coding activities. This practice allows the developers and writers to engage in a collaborative environment where everyone is able to write, update and publish documentation on their own. Treating documentation as code practically means: - Working in plain text files - Using static site generators to build files - Storing documentation using version control system such as Git - Updating documentation by collaborating with other teams using pull requests - Publishing documentation using CI/CD processes ## Benefits of Using Docs as Code To keep API documentation synchronized with constant API updates, adopting a docs as code approach elevates the documentation writing experience in the following ways: 1. **Faster API documentation updates** allows all team members to update any change and publish it automatically without any dependence. 2. **Smaller feedback loops** gives team members the leverage to deploy feature branches, preview changes and then gather relevant feedback. 3. **Increased collaboration** between all team members makes it easier to contribute towards updating API documentation by working on the same repositories. 4. **Full version control** allows all team members to easily track every change to the documentation and fix bugs super quick by instantly rolling back. 5. **Working with the familiar tools** like **GitHub, GitLab, VSCode**, etc. allows developers to work on known tools without the need to learn any new ones. APIMatic offers the [docs as code](pathname:///platform-api#/net-standard-library/guides/generating-on-prem-api-portal/overview-generating-api-portal) solution for generating an API Portal. You can generate the API Portal using one of the following methods: - [Using the Sync API](docs-as-code/generate-api-portal-via-apimatic-docs-as-code/generate-using-sync-api.md) Suitable for most use cases. - [Using the Async API](docs-as-code/generate-api-portal-via-apimatic-docs-as-code/generate-using-async-api.md) Recommended for large or complex API specifications. The **Sync API** is sufficient for most scenarios. However, it has a time limit of 4 minutes. If your API specification is large and complex, we recommend using the **Async API** to avoid potential timeouts and ensure successful portal generation. --- # Contents of the Build Directory Source: https://docs.apimatic.io/docs-as-code/contents-of-the-build-directory/ Your API Portal is managed through a **build directory** that contains all the files and folders required to configure and customize the portal. Understanding this structure is essential. To get started with creating the build directory, follow the APIMatic CLI's [Quickstart Guide](cli-getting-started/portal-quickstart-dac.md). A typical build directory looks like this: ```bash ├─ APIMATIC-BUILD.json # Defines all configurations for the API portal ├─ README.md ├─ content # Includes custom documentation pages in Markdown | ├─ guides | | └─ guide1.md | └─ toc.yml # Controls the navigation structure ├─ spec # Contains API definition files | ├─ APIMATIC-META.json | └─ openapi.json └─ static # Includes all static files, such as images, GIFs, and PDFs └─ images ├─ favicon.ico └─ logo.png ``` ### Spec Directory The spec directory contains: - OpenAPI specification file Some considerations for API specification files in this directory are: - The API specification must be in one of the [formats supported by APIMatic](https://www.apimatic.io/transformer/#supported-formats). - The API specification format is detected automatically by APIMatic. - You can include multiple API Specification files here if you want them all documented in the same API Portal and APIMatic will merge them for you, even if they're in different specification formats. For further details, take a look at this [sample spec directory](https://github.com/apimatic/sample-docs-as-code-portal/tree/master/src/spec). If you have multiple API specifications, go to the [API specification documentation](pathname:///platform-api#/http/guides/generating-on-prem-api-portal/api-specification) for additional handling. ### Content Directory The content directory contains: - Custom Markdown guides written in GitHub-flavored Markdown for your product documentation, changelogs, step-by-step tutorial guides, etc. - Custom table-of-content as the *content\toc.yml* file. This allows you to create a content hierarchy displayed in the navigation sidebar. A sample *toc.yml* file looks like: ```yaml toc: - group: Getting Started items: - generate: How to Get Started from: getting-started - group: Guides dir: guides - generate: API Endpoints from: endpoints - generate: Models from: models - generate: SDK Infrastructure from: sdk-infra ``` Providing custom content is optional. For further details, go to the [Custom Content Documentation](pathname:///platform-api#/http/guides/generating-on-prem-api-portal/custom-content). ### Static Directory The static directory contains: - Images - Logos - PDFs Providing static content is optional. Take a look at this [sample static directory](https://github.com/apimatic/sample-docs-as-code-portal/tree/master/src/static/images). ### Build Configuration File The name of the build configuration file ends with *`APIMATIC-BUILD.json`* and should be placed in the root directory. You can customize the generated API Portal by specifying properties in the build file such as: - Which SDKs to generate and include within the portal. - Package information for the SDKs to be included in the documentation. - Page title and logo image for the portal. - Portal color theme and typography. - Custom CSS. A minimal build file would look like this: ```json { "$schema": "https://titan.apimatic.io/api/build/schema", "buildFileVersion": "1", "generatePortal": { "apiSpecs": [ "spec1", "spec2" ], "languageConfig": { "http": {} } } } ``` --- # Automate API Portal Generation with Github Actions Source: https://docs.apimatic.io/docs-as-code/automate-api-portal-generation-via-apimatic-docs-as-code/ You can automate the docs-as-code process using [GitHub Actions](https://github.com/features/actions), ensuring that any changes to your documentation are instantly deployed. ## Workflow Overview Whenever a change is pushed to the GitHub repository: 1. The repository is checked out and the APIMatic CLI is used to generate the Portal. 2. The generated portal artifacts are deployed to a hosting service. :::note Take a look at the [GitHub repository](https://github.com/apimatic/sample-docs-as-code-portal) for a sample GitHub workflow. ::: ## Step 1: Fork the Sample Repository 1. Click Fork on the top-right corner of the sample GitHub repository. 2. Choose an Owner, provide a Repository name, and optionally add a Description. 3. Click Create Fork. ![fork repository](/images/docs-as-code/screenshot_17.png) The forked repository contains a workflow file, *DeployStaticPortal.yml*, located in *.github/workflows/*. This file defines the steps to build and deploy the API Portal. ## Step 2: Configure the Workflow The workflow file, [DeployStaticPortal.yml](https://github.com/apimatic/sample-docs-as-code-portal/tree/master/.github/workflows), executes the following steps: - Check out the repository. - Generate the portal using the @apimatic/cli npm package. - Deploy the portal to Netlify. ### DeployStaticPortal.yml file ```yml name: Deploy Static Portal on: workflow_dispatch: push: branches: - master jobs: generate-portal: runs-on: ubuntu-latest env: PORTAL_DIR: ${{ github.workspace }}/static-portal steps: - uses: actions/checkout@v4 name: Checkout repo id: checkout-repo - name: Setup Node.js uses: actions/setup-node@v4 with: node-version: "20" # Generate Portal with APImatic CLI - name: Generate Portal run: npx @apimatic/cli portal generate --auth-key="${{ secrets.API_KEY }}" --destination=${{ env.PORTAL_DIR }} # Upload Portal Artifact - name: Upload Artifact uses: actions/upload-artifact@v4 with: name: static-portal path: ${{ env.PORTAL_DIR }} - name: Deploy to Netlify uses: nwtgck/actions-netlify@v3.0 with: publish-dir: ${{ env.PORTAL_DIR }} production-branch: master github-token: ${{ secrets.GITHUB_TOKEN }} deploy-message: "Deploy from GitHub Actions" enable-pull-request-comment: false enable-commit-comment: true overwrites-pull-request-comment: true env: NETLIFY_AUTH_TOKEN: ${{ secrets.NETLIFY_AUTH_TOKEN }} NETLIFY_SITE_ID: ${{ secrets.NETLIFY_SITE_ID }} timeout-minutes: 2 ``` :::note You can deploy to other platforms such as [Cloudflare Pages](https://pages.cloudflare.com/) or [Azure Static Web Apps](https://azure.microsoft.com/en-us/services/app-service/static/#overview). ::: ## Step 3: Set Up Repository Secrets Since GitHub doesn't copy secrets when forking repositories, you need to reconfigure them manually: 1. Go to your forked GitHub repository. 2. Navigate to Settings > Secrets > Actions. 3. Click New repository secret and add the required credentials. ![creating repo secret](/images/docs-as-code/screenshot_18.png) ## Step 4: Trigger the Workflow - The workflow runs automatically whenever a commit is pushed to the master branch. - You can also manually trigger the workflow from the GitHub Actions tab. - Once the workflow completes, the updated portal will be available on the deployed server. ![testing the github action](/images/docs-as-code/screenshot_13.png) --- # Migrate from Web UI to the Docs as Code Workflow Source: https://docs.apimatic.io/docs-as-code/backup-hosted-portal-feature/ APIMatic allows you to easily migrate from an **existing Portal** created using the **UI workflow** to the **docs as code workflow** via the **build input**. The build input corresponds to the published or unpublished version of the Portal and enables you to: - Create a backup for the Portal - Migrate from the UI workflow to the docs as code workflow Furthermore, you can backup the build input in a Git repository and use it to restore the Portal if anything goes wrong. For details on description of the build input, go to [APIMatic Build Input Documentation](pathname:///platform-api#/http/guides/generating-on-prem-api-portal/build-file). :::note To get access to the API for generating a Portal via the docs as code workflow, please contact `sales@apimatic.io`. ::: ## Generate Build Input for Existing Portal You can generate a build input for any published or unpublished Portal created using the UI workflow and move to the docs as code workflow. The generated build input can be used to re-create the Portal via the docs as code workflow. For more information on the docs as code workflow, go to the [APIMatic API Documentation](pathname:///platform-api#/http/guides/generating-on-prem-api-portal/overview-generating-api-portal). - On the [APIMatic Dashboard](https://app.apimatic.io/dashboard), choose any **API** you want to generate a build input for. ![Choose API](/images/api-portal/imported-api.png) - Next, click on the kebab menu (three vertical dots) on the API tile and select **API Integration Keys** from the options. ![API Integration Key](/images/api-portal/integration-key.png) - The displayed keys contain **API Group ID**, **API Key** and **API Entity ID** along with the API version. Copy the **API Group ID**. ![Choose Key](/images/api-portal/api-group-id.png) - Paste the **API Group ID** in the [Generate Build Input for Published Portal Endpoint](pathname:///platform-api#/http/api-endpoints/docs-portal-management/generate-build-input-for-published-portal) to generate a build input for the published version of the Portal and download it by clicking on the **Download file** button. ![Paste Key in endpoint](/images/api-portal/generate-build-input.png) :::note If you want to generate a build input for the unpublished version of the Portal, use the [Generate Build Input for Unpublished Portal Endpoint](pathname:///platform-api#/http/api-endpoints/docs-portal-management/generate-build-input-for-unpublished-portal). ::: --- # Generate a Portal using the Sync API Source: https://docs.apimatic.io/docs-as-code/generate-api-portal-via-apimatic-docs-as-code/generate-using-sync-api/ ## Step 1: Generate Portal Use *APIMatic API* to invoke the [Generate On-Prem Portal via Build Input](pathname:///platform-api#/http/api-endpoints/docs-portal-management/generate-on-prem-portal-via-build-input) endpoint. Provide the required Build Input in your request. For details on preparing the Build Input, refer to [this](docs-as-code/contents-of-the-build-directory.md) guide. A successful request returns a ZIP file containing the portal artifacts. ```http HTTP/1.1 200 OK Content-Type: application/zip Content-Disposition: attachment; filename="portal.zip" Content-Length: 123456 [Binary data not displayed] ``` ## Step 2: Host the API Portal Unzip the ZIP file you received in step 1. This directory contains the generated API Portal. To view your API Portal, you will need to host this directory on a web server. If you don't have a local http server installed, you can consider lightweight options like [http-server](https://www.npmjs.com/package/http-server). ![Host API Portal](/images/docs-as-code/screenshot_10.png) To automate the entire docs as code process, go to the [Automate API Portal Generation using Docs as Code](docs-as-code/automate-api-portal-generation-via-apimatic-docs-as-code.md). --- # Generate a Portal using the Async API Source: https://docs.apimatic.io/docs-as-code/generate-api-portal-via-apimatic-docs-as-code/generate-using-async-api/ ## Step 1: Initiate Portal Generation Use the *APIMatic API* to invoke the [Generate On-Prem Portal via Build Input Async](pathname:///platform-api#/http/api-endpoints/docs-portal-generation-async/generate-on-prem-portal-via-build-input-async) endpoint. Provide the required Build Input in your request. For details on preparing the Build Input, refer to [this](docs-as-code/contents-of-the-build-directory.md) guide. A successful request returns a response containing an `id` and `links` to check the status and download the portal. ```http HTTP/1.1 202 Accepted Content-Type: application/json { "id": "0194caa0-d38a-72e9-bcc8-df71acb5fd97", "links": { "status": "https://api.apimatic.io/portal/v2/0194caa0-d38a-72e9-bcc8-df71acb5fd97/status", "download": "https://api.apimatic.io/portal/v2/0194caa0-d38a-72e9-bcc8-df71acb5fd97/download" } } ``` ## Step 2: Monitor Generation Status Poll the `status` endpoint periodically to check the portal generation progress. ```http HTTP/1.1 200 OK Content-Type: application/json { "status": "InProgress" } ``` ## Step 3: Download the Generated Portal Once generation is complete, the `status` endpoint responds with a `302 Redirect` to the `download` endpoint. The download endpoint provides a ZIP file containing the portal artifacts. ```http HTTP/1.1 200 OK Content-Type: application/zip Content-Disposition: attachment; filename="portal.zip" Content-Length: 123456 [Binary data not displayed] ``` ## Step 4: Host the API Portal 4. Extract and host the generated portal on any web server. You can preview it locally using [http-server](https://www.npmjs.com/package/http-server) or similar tools. ![Host API Portal](/images/docs-as-code/screenshot_10.png) # Alternative: Using a Callback URL As an alternative to polling the status endpoint to monitor progress, you can configure a callback URL to receive a notification when your portal generation completes. ## Step 1: Send a Request with a Callback URL Pass the `X-APIMatic-CallbackUrl` header in your request to the async API. When the portal is ready, APIMatic will send a request to the provided URL with the generation status and download link. ### Sample Callback Request Body ```JSON { "id": "0194caac-2a02-799f-a3ef-4d6aee48df1a", "status": "GenerationCompleted", "link": "https://api.apimatic.io/portal/v2/0194caac-2a02-799f-a3ef-4d6aee48df1a/download" } ``` This approach eliminates the need for polling and ensures automatic notification once portal generation is complete. To automate the entire docs as code process, go to the [Automate API Portal Generation using Docs as Code](docs-as-code/automate-api-portal-generation-via-apimatic-docs-as-code.md). --- # Hosting Your Generated Portal Source: https://docs.apimatic.io/docs-as-code/hosting-your-generated-portal/ When you generate an API portal with the APIMatic CLI, it writes a folder of portal artifacts: plain HTML, CSS, JavaScript, and assets. That output is a static site. It runs no server of its own, so you host it wherever you already serve static content. This gives you full control. The portal lives on your own domain, behind your own access rules, alongside the rest of your developer content. You decide how it deploys, when it updates, and who can reach it. ## What you get from generation Generate the portal with the CLI by following the [Quickstart](cli-getting-started/portal-quickstart-dac.md). When it finishes, the CLI reports where the portal artifacts landed and starts a local preview server. That artifacts folder is the self-contained static site you deploy. Point any static host at the folder and the portal works. There's no runtime to install, no database to provision, and no server process to keep alive. Because it's static, the portal is fast to serve, cheap to run, and easy to put behind a CDN. ## Where to host it You can serve the portal from any platform that hosts static sites. These are the common choices: - **Netlify.** Connect a Git repository or push the build folder directly. Netlify handles builds, previews, and custom domains. - **Cloudflare Pages.** Deploy from Git or upload the build output, and serve it from Cloudflare's global network. - **Vercel.** Import the project or drop in the static output, and Vercel serves it with automatic HTTPS and preview deployments. - **Microsoft Azure.** Use [Azure Static Web Apps](https://azure.microsoft.com/en-us/products/app-service/static/) for a managed static host, or serve the folder from Azure Blob Storage with Azure CDN in front. - **Amazon Web Services.** Upload the build to an Amazon S3 bucket and put Amazon CloudFront in front of it for global delivery and HTTPS. Any host that serves a folder of static files over HTTPS works here, so you aren't limited to this list. Pick the platform your team already runs on. ## A typical deployment flow 1. Generate the portal with the APIMatic CLI by following the [Quickstart](cli-getting-started/portal-quickstart-dac.md). 2. Find the portal artifacts folder that the CLI reports on completion. 3. Deploy that folder to your chosen host, either by connecting your Git repository or by uploading the folder. 4. Map your custom domain and let the host issue an HTTPS certificate. To keep the portal current, wire this into your CI/CD pipeline. Regenerate the portal whenever your API specification changes, then let the pipeline redeploy it. :::info Don't want to host it yourself? APIMatic can host the portal for you. Reach out to [support@apimatic.io](mailto:support@apimatic.io) and the team will walk you through the options. ::: --- # Api Copilot Source: https://docs.apimatic.io/ai-capabilities/api-copilot/ # API Copilot API Copilot is an AI assistant integrated into APIMatic's Developer Portal. It allows developers to describe their integration requirements in natural language and receive precise answers as well as working code tailored to their specific use case and programming language. Developers typically search through multiple API documentation pages to understand API behavior and then write code to implement their desired use case. API Copilot combines these steps into a single chat interface where developers can request and receive complete code for their integration scenarios. Experience API Copilot firsthand on the Spotify Web API Developer Portal - a live implementation showcasing its capabilities. ## Features #### Hallucination-Free Code Generation Generates accurate code based on APIMatic-generated SDKs and code samples, eliminating the possibility of hallucination. #### Natural Language Query Processing Processes complex integration requirements described in plain English, including multi-endpoint scenarios and workflow combinations. #### API Use Case Guidance Provides step-by-step code explanations alongside generated snippets for any API use case. #### 24/7 Instant Assistance Delivers immediate responses without human intervention, scaling support capacity and reducing documentation dependency. #### Customizable Prompt Suggestions Allows portal owners to configure welcome messages with suggested queries that help developers discover API capabilities and common integration patterns. ## Enable API Copilot using the CLI Run the copilot configuration command to set up your AI assistant: ```bash apimatic portal copilot ``` Learn more about the `portal copilot` command in the [CLI Reference](../../apimatic-cli/commands/#configure-api-copilot).
Enable API Copilot using the Web Dashboard (retired) The Web Dashboard is being retired; the CLI method above is the current path. See [Web Dashboard (Retired)](/web-dashboard-retired). 1. Go to the API Copilot page in the Portal Editor. 2. Turn on the switch to enable it. 3. Customize the user's experience by adding a welcome message and suggestive prompts. 4. Save your settings. 5. Publish your portal.
--- # Llms Txt Source: https://docs.apimatic.io/ai-capabilities/llms-txt/ # LLMs.txt LLMs.txt is a web standard that makes your API documentation AI-accessible. APIMatic's LLMs.txt generation feature automatically creates standardized files that enable AI tools like ChatGPT to understand and work with your API documentation effectively. Like `sitemap.xml` or `robots.txt`, your `llms.txt` files generate and update automatically as part of your developer portal build process. This enables AI coding assistants to provide accurate, context-aware help to developers using your APIs. APIMatic creates two complementary files that serve different AI tool consumption patterns. ### The llms.txt file The `llms.txt` file contains a summary of your documentation with one-sentence descriptions and links for each page. AI tools use this file to quickly understand what documentation you have and where to find specific information. You can access this file at `https://your-portal.com/llms.txt`. ### The llms-full.txt file The `llms-full.txt` file contains your complete documentation text including API references, guides, and code examples. AI tools read this file to get detailed information about your API for generating accurate code suggestions. This file is available at `https://your-portal.com/llms-full.txt`. The files regenerate automatically whenever your documentation changes, ensuring AI tools always have access to your latest content. Both files follow the plain text llms.txt standard specification for maximum compatibility with AI tools. ## Benefits - AI tools provide accurate, context-aware code assistance based on your actual documentation - Better discovery of relevant API features and faster problem-solving with AI suggestions - Lower support burden as AI tools can answer routine documentation questions ## Enable LLMs.txt :::note Currently, this feature is only available for developer portals using the Docs-as-Code workflow. The files are generated for the default language specified in your `initialPlatform` setting, which defaults to HTTP if not explicitly configured. ::: Add the following configuration to your `APIMATIC-BUILD.json` file under the `generatePortal` section: ```json { "generatePortal": { "baseUrl": "your-base-url", "llmsContextGeneration": { "enable": true } } } ``` ### Verification After rebuilding your portal, verify the files are generated and accessible: 1. Navigate to `https://your-portal-url/llms.txt` 2. Navigate to `https://your-portal-url/llms-full.txt` ### Additional Resources For detailed configuration options and troubleshooting, see the [LLMS Context Generation Reference](pathname:///platform-api#/http/guides/generating-on-prem-api-portal/build-file-reference/generateportal-llmscontextgeneration) in the APIMatic documentation. --- # Mcp Server Overview Source: https://docs.apimatic.io/generate-mcp-servers/mcp-server-overview/ # MCP Server Generation Overview The **Model Context Protocol (MCP)** allows AI applications like **Claude Desktop, VS Code, and Cursor** to connect seamlessly with external APIs as tools. These AI applications are called **MCP Clients** and they connect to your APIs via **MCP Servers**. If you already use APIMatic for **developer portals**, MCP server generation requires **minimal additional effort** and immediately unlocks AI integration capabilities for your API ecosystem. :::note The APIMatic MCP Server Generator is currently in active development. Contact the APIMatic team at [support@apimatic.io](mailto:support@apimatic.io) to join the alpha program and get early access. ::: ## How It Works The MCP Server Generator integrates directly into your existing APIMatic workflow: ### Unified Input → Multiple Outputs * From a single API specification, APIMatic generates **SDKs**, **Developer Portals**, and now **MCP Servers**. MCP Server generation fits seamlessly into your **Docs-as-Code workflow**, the same one used for Developer Portal and SDK generation. * Your API definition may need some enhancements before enabling MCP Server generation. Consult with the APIMatic team to learn more about **OpenAPI optimization for MCP Server generation**. ### Built on your TypeScript SDK * The generated MCP Server builds on your existing **TypeScript SDK**, ensuring **stability**, **consistency**, and **minimal additional maintenance**. ## Core Capabilities ### OpenAPI Feature Translation * **Complex Schema Support**: Handles `anyOf` with or without discriminators * **Authentication Support**: Supports common authentication schemes like API Key, OAuth2 (Client Credentials & Resource Owner Password), and custom auth types that use headers, query or form parameters ### Ready-to-Use Artifacts * **Comprehensive documentation**: Auto-generated README with setup instructions for popular AI applications like Claude Desktop, VS Code, and Cursor * **Flexible deployment**: Supports both local (`stdio`) and remote (`HTTP`) operation modes ### Context Management * **Tool filtering**: For large APIs with many endpoints, enabling all available tools in an MCP Server can overwhelm large language models. Use endpoint tags to control which tools are exposed, helping manage context and prevent overload. ## Publishing and Distribution * **Distributable as an npm package**: Each generated MCP server includes a `package.json` file, making it convenient to publish as an npm package. * **Local installation**: Users can install the npm package via `npm install` or run with `npx` ## Enable MCP Server Generation :::note To request access to the MCP server generator, please reach out to [support@apimatic.io](mailto:support@apimatic.io). ::: Add the following configuration to the root of your `APIMATIC-BUILD.json` file: ```json { "mcpServer": { "isEnabled": true } } ``` Make sure that TypeScript is enabled under the `generatePortal.languageConfig` section: ```json { "generatePortal": { "languageConfig": { "typescript": {} } } } ``` After regenerating your portal, your generated MCP server can be found under the `static/` directory in a new folder named `mcp-server/`. ### Installation The `mcp-server/` directory should look like this: ``` mcp-server/ ├── sdk/ └── server/ ``` The `sdk/` directory contains the generated TypeScript SDK that's used by the MCP Server. The `server/` directory is the actual MCP Server itself. To set things up, open a terminal in the `mcp-server/` directory and run these commands(Requires Node.js 22 or higher): ``` cd sdk npm i cd ../server npm i ``` The `server/` directory contains a `README.md` file which you should follow for further instructions. --- # Installing APIMatic CLI Source: https://docs.apimatic.io/apimatic-cli/intro-and-install/ **APIMatic CLI**, or *apimatic* is a **command-line interface** to APIMatic for use in your favorite terminal or automation scripts. ## Features Supported by APIMatic CLI Currently, APIMatic CLI supports the following features: 1. [Validation of API Specifications](rulesets/overview.md). 2. [Transformation](api-transformer/overview-transformer.md) between API specification formats including **OpenAPI/Swagger**, **RAML**, **WSDL** and **Postman Collections**. To view a full list for these formats, refer to [API Transformer](https://www.apimatic.io/transformer/). 3. [SDK/Client library generation](generate-sdks/overview-sdks.md) for APIs. 4. [SDK publishing](generate-sdks/sdk-publishing/sdk-publishing-overview.md) to package registries and source repositories using publishing profiles configured in the APIMatic App. 5. [API Documentation generation](/content/docs-as-code/documentation-as-code-overview.md). ## How to Install APIMatic CLI? APIMatic CLI is built with **Node.js** and is [available on **npm**](https://www.npmjs.com/package/@apimatic/cli). :::note If you don't have Node.js and npm, please install through [Node.js Downloads](https://nodejs.org/en/download/current/). ::: ### Install CLI Run the following command to install the CLI. ```bash npm install -g @apimatic/cli ``` ### Verify Installation To verify the CLI installation, use `apimatic --version` command. You should be able to see the installed version of the CLI after successful installation. ```bash apimatic --version ``` To learn more about APIMatic commands, refer to [Getting Started Guide](apimatic-cli/getting-started.md). --- # Getting Started with APIMatic CLI Source: https://docs.apimatic.io/apimatic-cli/getting-started/ In this guide, we will walk you through the commands used within APIMatic CLI. Most of the commands require authentication and for that, you will need to create an **APIMatic account** on our website. :::note Signing up is free! Take a free trial by signing in to create an [APIMatic account](https://app.apimatic.io/account/register). ::: ## Authentication APIMatic CLI supports authentication via different methods explained below. ### Authentication via APIMatic Credentials APIMatic CLI supports authentication using the **APIMatic credentials** through which you signed in to your account. Use the `apimatic auth login` command to authenticate via APIMatic credentials. The authentication process will open your default browser for secure login: ```bash apimatic auth login Please continue with authentication in the opened browser window. You have successfully logged into APIMatic ``` ### Authentication via Auth Keys Use the `--auth-key` option with the login command to authenticate using the API key. You can generate an API key by visiting the [Get API Authentication Keys Docs](https://docs.apimatic.io/account-management/obtaining-auth-keys/). ```bash apimatic auth login --auth-key=xxxxxx Successfully logged in as developer@yourcompany.com ``` ### Overriding Auth Keys in API Calls APIMatic CLI allows providing an **API key** for each individual command that requires authentication using the `--auth-key` option. This is useful when you need to override the authentication state of the CLI for a specific command. ```bash apimatic api validate --url=https://petstore.swagger.io/v2/swagger.json --auth-key=xxxx Specification file provided is valid ``` ## Using APIMatic CLI Help Command Run `apimatic help` to display a list of commands supported by APIMatic. ```bash apimatic help The official CLI for APIMatic. VERSION @apimatic/cli/0.0.0-alpha.0 win32-x64 node-v20.18.3 USAGE apimatic [COMMAND] TOPICS api Transform & Validate your API specifications. auth Login using your APIMatic credentials, or view your authentication status. portal Generate, download and serve an API Documentation portal for your APIs. publishing Manage SDK publishing configurations. sdk Generate and publish SDKs for your APIs in multiple languages. COMMANDS autocomplete display autocomplete installation instructions help display help for apimatic ``` Related commands are grouped together into topics. To view the commands included in each topic, run `apimatic [topic] help` . For instance, to view the commands included in the topic `api`, run `apimatic api help`. Each topic may have multiple commands associated with it. Run `apimatic [topic] [command] --help` to display help for each command associated with a topic. ```bash apimatic auth login --help login to your APIMatic account USAGE apimatic auth login OPTIONS --auth-key=auth-key Set authentication key for all commands EXAMPLE $ apimatic auth login Please continue with authentication in the opened browser window. You have successfully logged into APIMatic ``` --- # APIMatic CLI Commands Source: https://docs.apimatic.io/apimatic-cli/commands/ The APIMatic CLI empowers engineering teams and API providers to automate key aspects of the API lifecycle, such as validation, transformation, SDK generation, and documentation portal delivery, directly from the command line. :::note For installation and getting started, see [Installing APIMatic CLI](intro-and-install.md) and [Getting Started Guide](getting-started.md). ::: --- ## Command Topics Overview The APIMatic CLI groups commands into the following topics: - [Quickstart](#quickstart): Get started with your first API documentation portal or SDK. - [Portal Commands](#portal-commands): Generate, serve, and manage API documentation portals. - [API Commands](#api-commands): Validate and transform API specifications. - [SDK Commands](#sdk-commands): Generate and publish SDKs for your APIs in multiple languages. - [Plugin Commands](#plugin-commands): Generate a context plugin for your published SDKs (Claude Code, VS Code, Cursor). - [Publishing Commands](#publishing-commands): Manage SDK publishing configurations. - [Auth Commands](#auth-commands): Manage authentication for CLI operations. Run `apimatic --help` to see all available topics and commands. > **Note:** > All command flags are optional unless marked as **_(required)_**. --- ## Quickstart This interactive command will guide you step-by-step through setting up and visualizing your first API portal or generating your first SDK, no prior setup required! **Start here:** ```bash apimatic quickstart ``` _No flags required._ This command is the best way to get hands-on with [APIMatic Docs as Code](/content/docs-as-code/documentation-as-code-overview.md) and see results instantly. This will setup a build directory for you directly. The name of the build directory is set as `src`. To learn more about the build directory, visit the [Contents of the Build Directory](/content/docs-as-code/contents-of-the-build-directory.md). ## Portal Commands Easily generate and manage your API portal right from the terminal, seamlessly integrating documentation, SDKs, and code samples into your CI/CD pipelines and developer workflows. ### Generate a Portal Once you're comfortable with the build directory structure, you can generate a static API documentation portal from your `src` directory. This is perfect for integrating into your automation scripts or release process. ```bash apimatic portal generate ``` The generated portal will be downloaded to the location specified by the `--destination` flag. To preview the portal, use the serve command below in the [Preview Locally](#preview-locally) section. **Flags:** - `--input=` : Path to the parent directory containing the 'src' directory, which includes API specifications and configuration files. Defaults to `./`. - `--destination=` : Path where the portal will be generated. Defaults to `/portal`. - `--force, -f` : Overwrite if a portal exists in the destination. - `--zip` : Download the generated portal as a .zip archive. - `--auth-key=` : Override current authentication state with an authentication key. ### Preview Locally During development, you can build and serve your API documentation portal locally with hot reload. The `portal serve` command combines portal generation and serves your portal too. This makes it easy to preview changes and iterate quickly. ```bash apimatic portal serve --open ``` **Flags:** - `--input=` : Path to the parent directory containing the 'src' directory, which includes API specifications and configuration files. Defaults to `./`. - `--destination=` : Path where the portal will be generated. Defaults to `/portal`. - `--port, -p ` : Port to serve the portal. Defaults to `3000`. - `--open, -o` : Open the portal in the default browser. - `--ignore, -i ` : Comma-separated list of files/directories to ignore. - `--auth-key=` : Override current authentication state with an authentication key. - `--no-reload` : Disable hot reload. ### Generate a Table of Contents (TOC) Automatically create a TOC YAML file for your portal content and specs. This helps organize your documentation for a better developer experience, and controls the way sections are displayed in your portal's side navigation bar. ```bash apimatic portal toc new ``` **Flags:** - `--destination=` : Optional path where the generated TOC file will be saved. Defaults to `/src/content`. - `--input=` : Path to the parent directory containing the 'src' directory, which includes API specifications and configuration files. Defaults to `./`. - `--force` : Overwrite the TOC file if one already exists at the destination. - `--expand-endpoints` : Include individual entries for each endpoint in the generated TOC. Requires a valid API specification in the working directory. - `--expand-models` : Include individual entries for each model in the generated TOC. Requires a valid API specification in the working directory. - `--expand-webhooks` : Include individual entries for each webhook in the generated TOC. Requires a valid API specification in the working directory. - `--expand-callbacks` : Include individual entries for each callback in the generated TOC. Requires a valid API specification in the working directory. Learn more about the [TOC file here](https://docs.apimatic.io/platform-api/#/http/guides/generating-on-prem-api-portal/toc-customization). ### Create API Recipes Generate an API Recipe file to provide step-by-step guides or workflows within your documentation portal. ```bash apimatic portal recipe new ``` **Flags:** - `--name=` : Name for the recipe. - `--input=` : Path to the parent directory containing the 'src' directory, which includes API specifications and configuration files. Defaults to `./`. You can read more about [API Recipes here](https://docs.apimatic.io/platform-api/#/http/guides/generating-on-prem-api-portal/api-recipes). ### Configure API Copilot Add the API Copilot configuration to your APIMATIC-BUILD.json file. This feature allows you to integrate AI-powered assistance into your API documentation portal. ```bash apimatic portal copilot ``` **Flags:** - `--input=` : Path to the parent directory containing the 'src' directory, which includes API specifications and configuration files. Defaults to `./`. - `--disable` : Marks the API Copilot as disabled in the configuration. - `--auth-key=` : Override current authentication state with an authentication key. --- ## API Commands The APIMatic CLI makes it easy to ensure your API specifications generate optimal quality SDKs and documentation. Whether you're validating a new OpenAPI file, converting between formats, or preparing for SDK generation, these commands help you automate and standardize your API quality checks. ### Validate Your API Before you generate SDKs or publish documentation, it's a best practice to validate your API specification. The APIMatic CLI can check both the syntax and semantics of your API files so you can catch issues early and resolve them on-the-go. ```bash apimatic api validate --file=./specs/sample.json ``` ```bash apimatic api validate --url=https://petstore.swagger.io/v2/swagger.json ``` **Flags:** - `--file=` : Path to the API specification file to validate. - `--url=` : URL to the specification file to validate. Can be used in place of the `--file` option if the API specification is publicly available. - `--auth-key=` : Override current authentication state with an authentication key. ### Transform API Specifications Need to convert your API definition from one format to another? The transform command supports a wide range of formats (OpenAPI, RAML, WSDL, Postman, and more), making it easy to integrate with different tools or partners. This is especially useful for teams working across multiple API ecosystems. ```bash apimatic api transform --format=OpenApi3Json --file=./specs/sample.json ``` ```bash apimatic api transform --format=RAML --url="https://petstore.swagger.io/v2/swagger.json" ``` **Flags:** - `--format=` : _(required)_ Specification format to transform API specification into. Run the command with the `--help` flag to see all options available. - `--file=` : Path to the API specification file to transform. - `--url=` : URL to the API specification file to transform. Can be used in place of the `--file` option if the API specification is publicly available. - `--destination=` : Directory to download transformed file to. Defaults to `./`. - `--force, -f` : Overwrite if same file exists in the destination. - `--auth-key=` : Override current authentication state with an authentication key. --- ## SDK Commands Accelerate developer adoption and integration by generating SDKs for your APIs in popular programming languages. ### Generate SDKs With a single command, you can generate SDKs for your API in languages like Python, Java, C#, TypeScript, Ruby, PHP, and more. Input can be a local API Specification file or a remote URL, making it easy to fit into any workflow. ```bash apimatic sdk generate --language=python ``` **Flags:** - `-l, --language=` : _(required)_ programming language for SDK generation. Run the command with the `--help` flag to see all options available. - `-i, --input=` : Path to the parent directory containing the 'src' directory, which includes API specifications and configuration files. Defaults to `./`. - `-d, --destination=` : Directory where the SDK will be generated. Defaults to `/sdk/` or `/sdk//`. - `--api-version=` : Version of the API to use for SDK generation (if multiple versions exist) - `--skip-changes` : Don't apply the saved changes to the generated SDK - `--track-changes` : Generate SDK source tree in the src directory to enable tracking changes across generations - `--codegen-version=