Customize Portal Settings
New projects use the CLI flow. These pages stay available while you migrate. See how to move and the full list of Web Dashboard docs.
Overview
The Developer Experience Portal offers comprehensive customization options to align the portal's appearance and functionality with your brand and specific requirements. This guide walks you through the various customization settings available in the Portal Editor.
Prerequisites
Before beginning customization:
- Generate your Developer Experience Portal
- Ensure you have the necessary permissions to modify portal settings
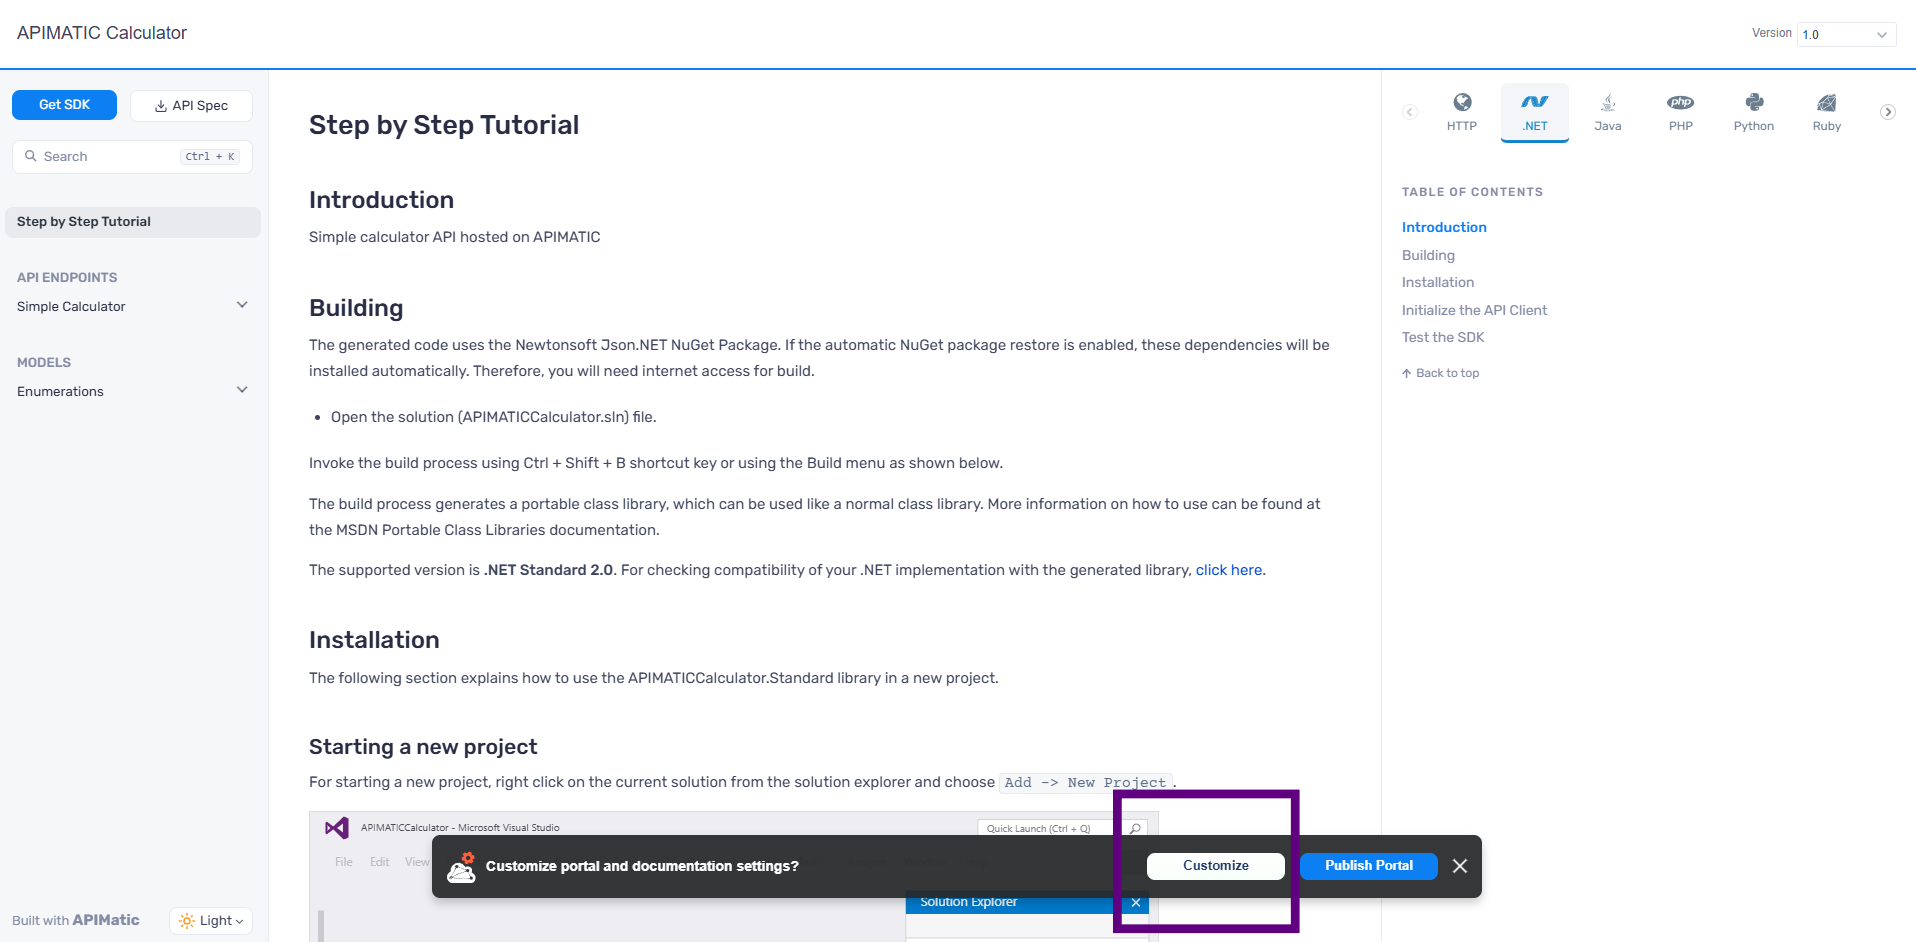
Accessing the Portal Editor
- Navigate to your generated portal
- Click on the Customize button to open the Portal Editor
Customization Options
The Portal Editor provides several key customization categories:
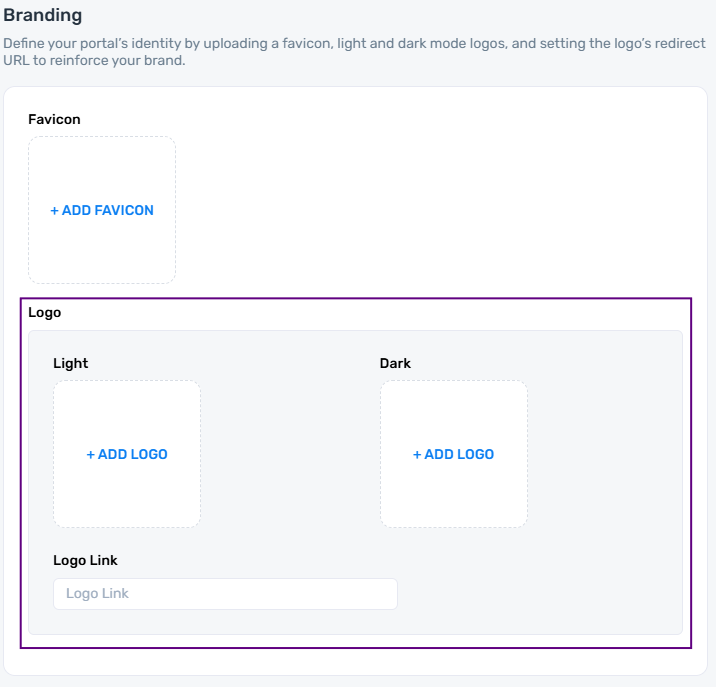
1. Branding
You can customize the look and feel of your portal through the Branding tab on the sidebar of the dashboard.
Favicon
- To update a Favicon, click on ADD FAVICON and select the desired image to use as a favicon for your portal.
- Recommended: Use a square image for best results
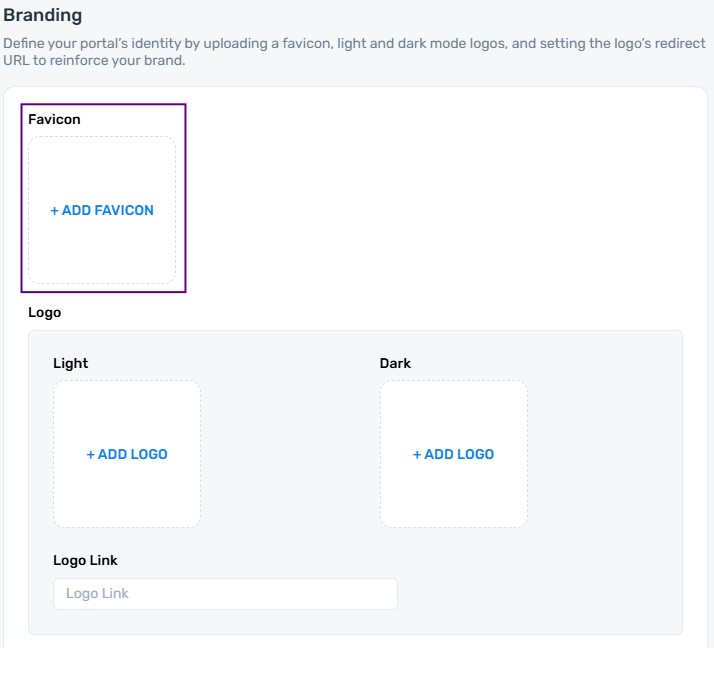
Company Logo
- Click the + Add Logo button to update your organization's logo. This will open a file browser, allowing you to select an image from your device.
- Upload separate logos for Light and Dark modes to ensure optimal visibility in both themes.
- Optionally, add a redirect link to the logo, so users are taken to a specified URL when they click on it.
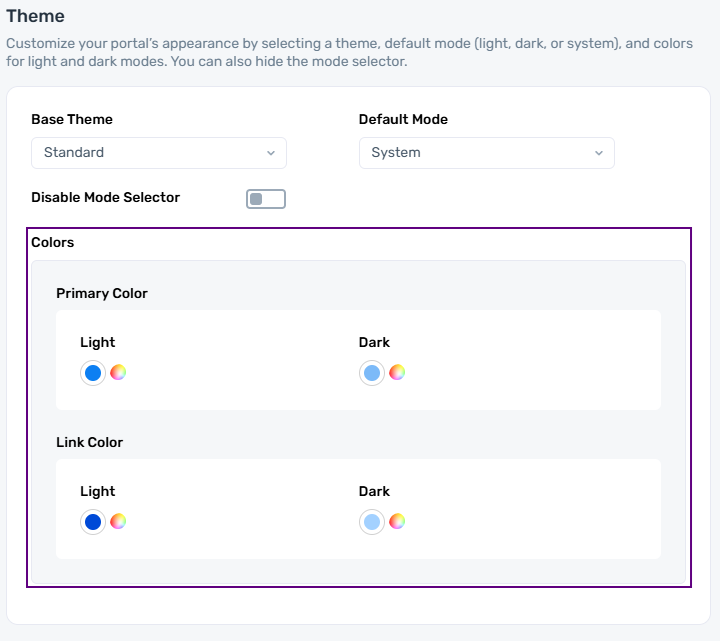
Theme
The theme settings allow you to customize the look and feel of your Portal. You can now set a base theme, configure the default theme mode, and select primary and link colors for the light and dark modes.

Base Theme
The base theme allows you to set the overall color scheme of the portal.
- To update the base theme, select your preferred option from the dropdown menu under the theme section.
- Standard is the default base theme applied to the portal, and currently it is the only available option. More themes will be introduced soon.
Standard Theme
- Light Mode
- Dark Mode

Cosmos Theme
- Light Mode
- Dark Mode
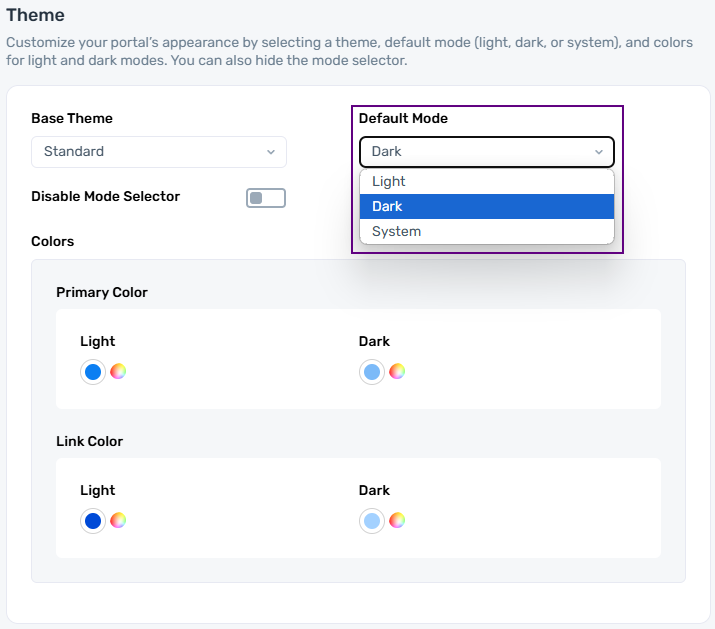
Mode Configuration
The Default Mode setting lets you select how the portal will load in terms of light and dark modes.
You can choose the following options:
- Light Mode: Default light color scheme
- Dark Mode: Default dark color scheme
- System: Follows device system preferences
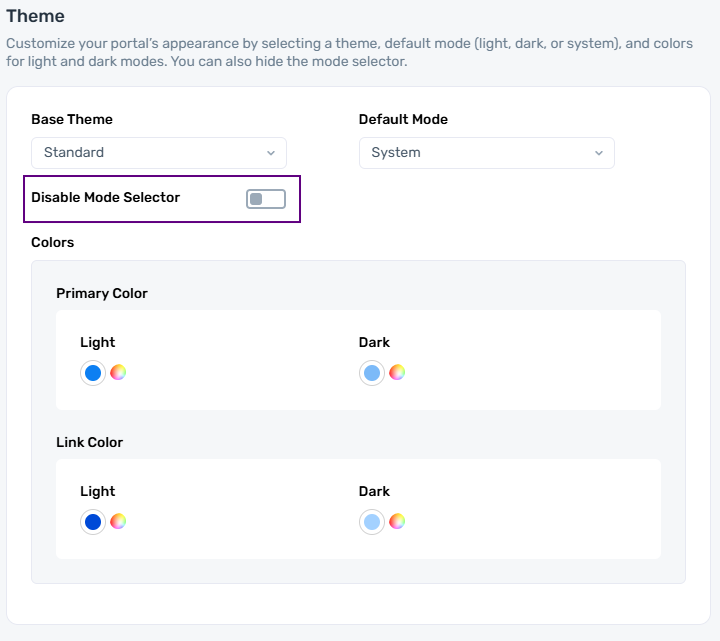
Disable Mode Selector
- This option allows you to hide the toggle that lets users switch between light, dark, or system modes within the portal.
- When enabled, users cannot change between light, dark or system modes.
Colors
The Primary Color and Link Color can be set independently for both light and dark modes.
- Primary Color: Defines the primary color used in buttons, headers, and key action areas of the portal.
- Link Color: Sets the color for hyperlinks displayed on the portal.
If no custom colors are specified, system default colors will be applied.
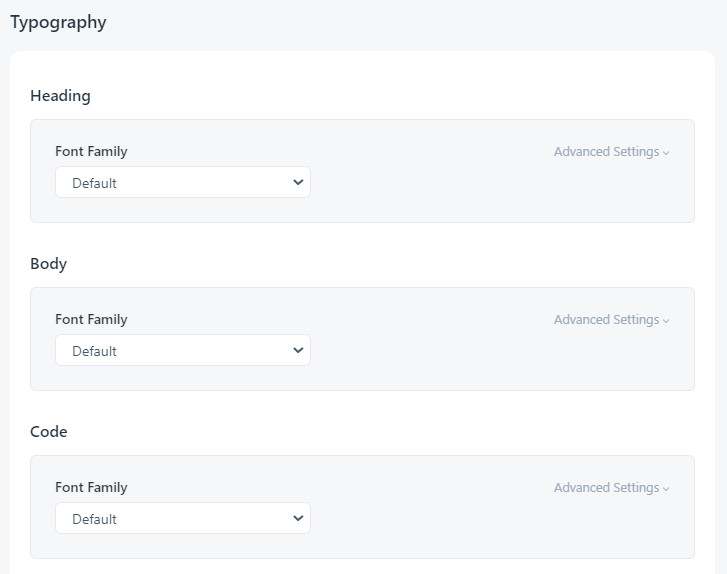
2. Typography
Global Typography Settings
- You can also change the Typography of the portal. To set the global settings, change any of the fonts from the dropdown menu for Headings, Body and Code.
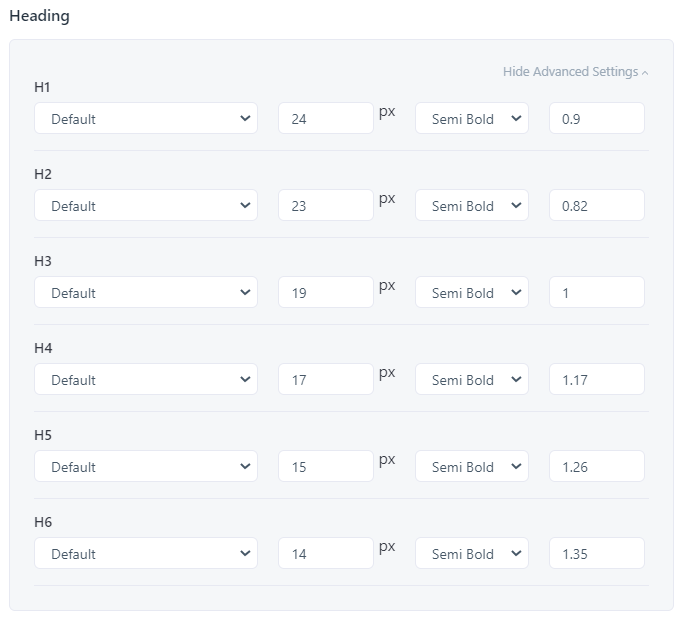
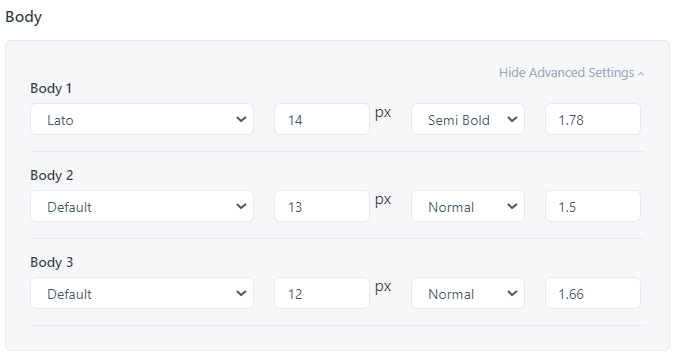
Advanced Typography Options
- For Advanced Heading settings, click on Advanced Settings under Headings. You can individually specify the font family, size, weight and line height for H1, H2, H3, H4, H5 and H6.
- For Advanced Body settings, click on Advanced Settings under Body. You can individually specify the font family, size, weight and line height for Body 1, Body 2 and Body 3.
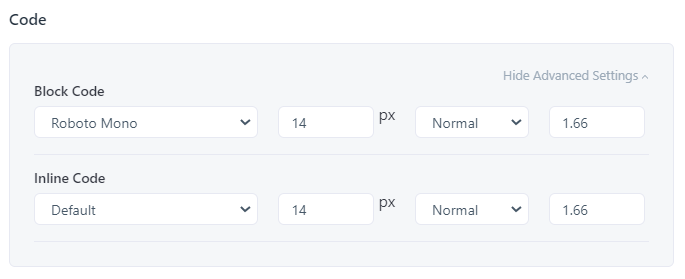
- For Advanced Code settings, click on Advanced Settings under Code. You can individually specify the font family, size, weight and line height for Block Code and Inline Code.
Saving and Previewing Changes
Once you have made your desired changes to the portal, click on Save on the top-right on your Dashboard. Any changes made will be saved.
To preview how the saved changes will be reflected on your portal, click on Preview.

- If you have any unsaved changes, a prompt is shown asking to continue without saving or preview after saving the changes. Click on the required option and the portal will be displayed in a new tab.

Publishing Options
Once you are satisfied with your customization, you can publish the portal. You can choose to proceed with any of the publishing options:
- Host this portal on apimatic.io
- Embed portal in an existing domain/portal
- Get your portal white-labelled to host on your domain
Deprecated Features
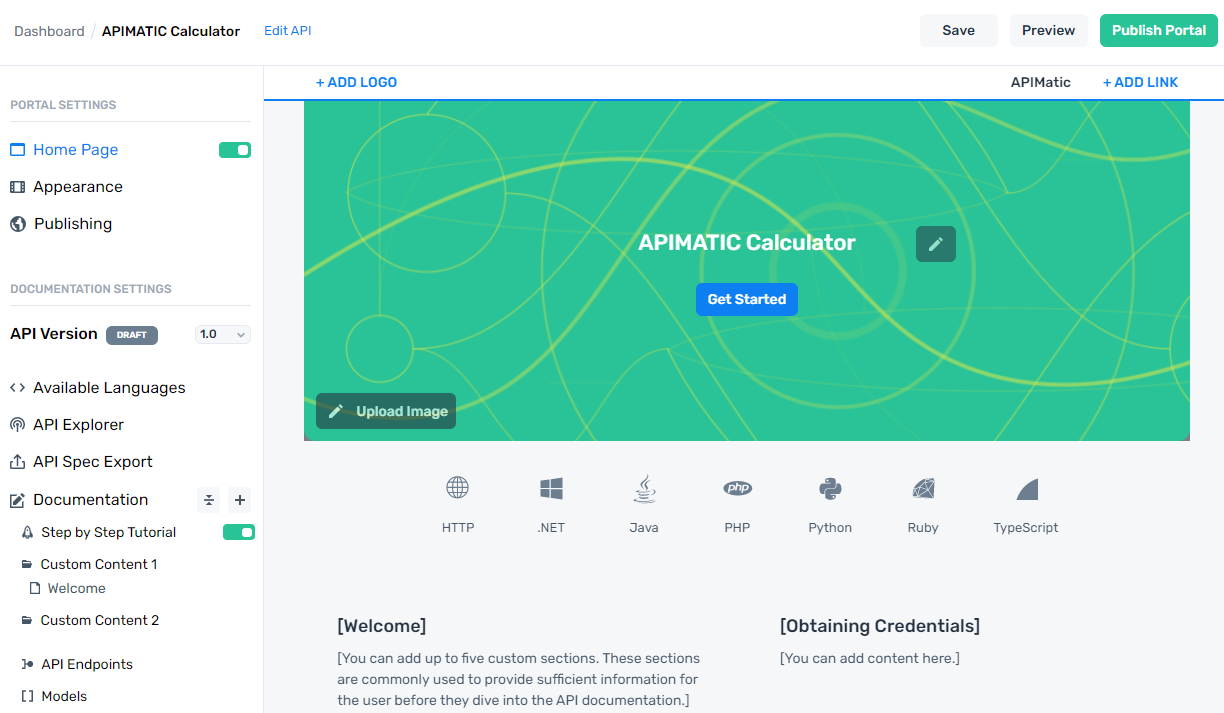
Home Page
The Home Page feature has been deprecated and is no longer supported or maintained.
The home page serves as the entry point to your portal, so you can customize it in accordance with your needs. You can:
- Change the title of your home page
- Assign a tagline for the portal
- Upload a cover image if you don't prefer to use the default one
- Upload your company's logo image
- Provide a URL to link the portal header to your website
- Change color schemes, typography and branding of the portal
- Add custom sections to the landing page to provide any additional introductory information
- Override the default navigational links present in the header by adding your own
- Enable/disable badges that appear at the bottom of the portal
Skip Homepage
On the left navigation bar, you can choose to skip showing the homepage via the toggle button.

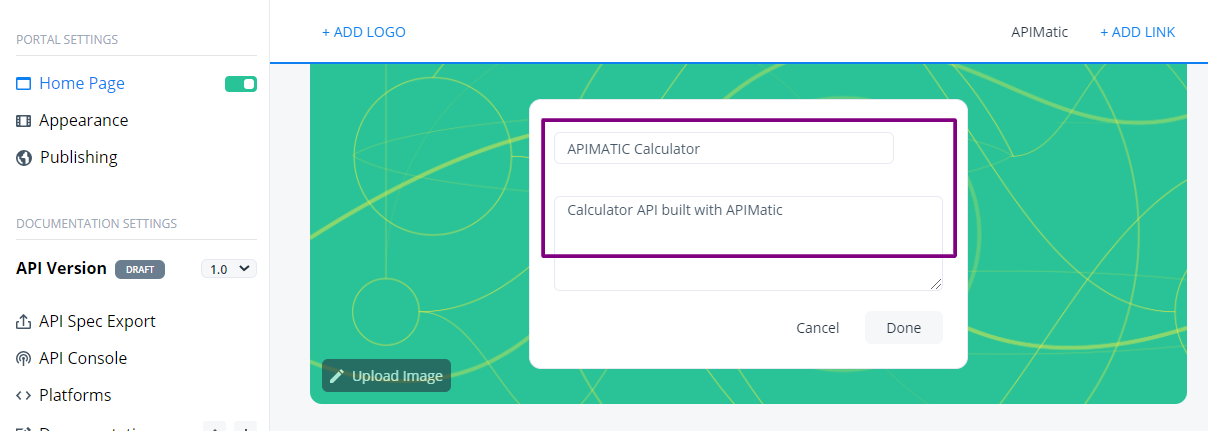
Change API Title
- To change the title of your API on the homepage, click on the edit button against the existing title.
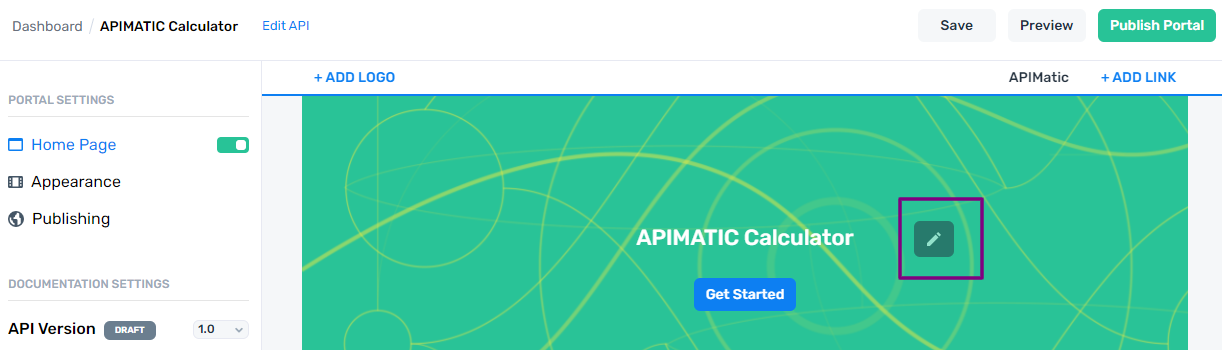
- You can even add a tagline/description to explain what the API does. Once changes are made, click on Done.
Update Cover Image
To change the background image of the header, click on Upload Image. This will open up a directory so you can browse and select any image of your choice.

Manage Navigational Links
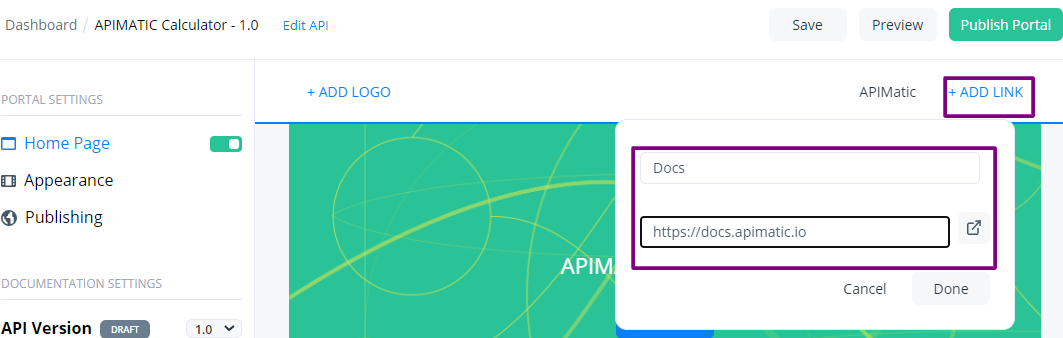
You can add additional links to the navbar through the + Add Link button on the top-right.
Provide the title for the link and the appropriate URL starting with https://. Click on Done.
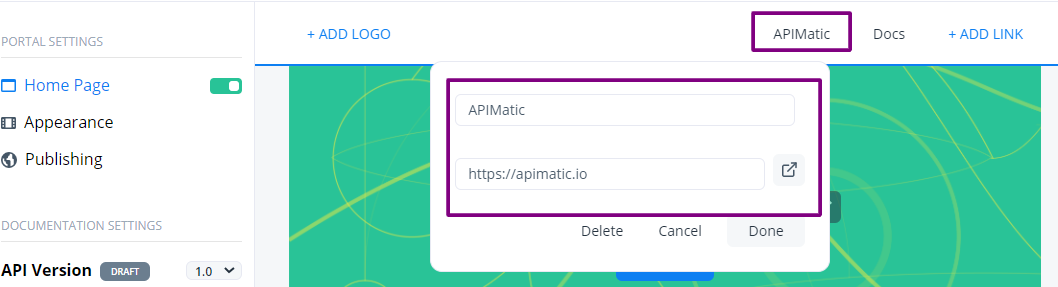
You can edit existing links by clicking on the link to edit -> updating the text -> Done.
You can delete a link by clicking on the link to delete -> Delete.
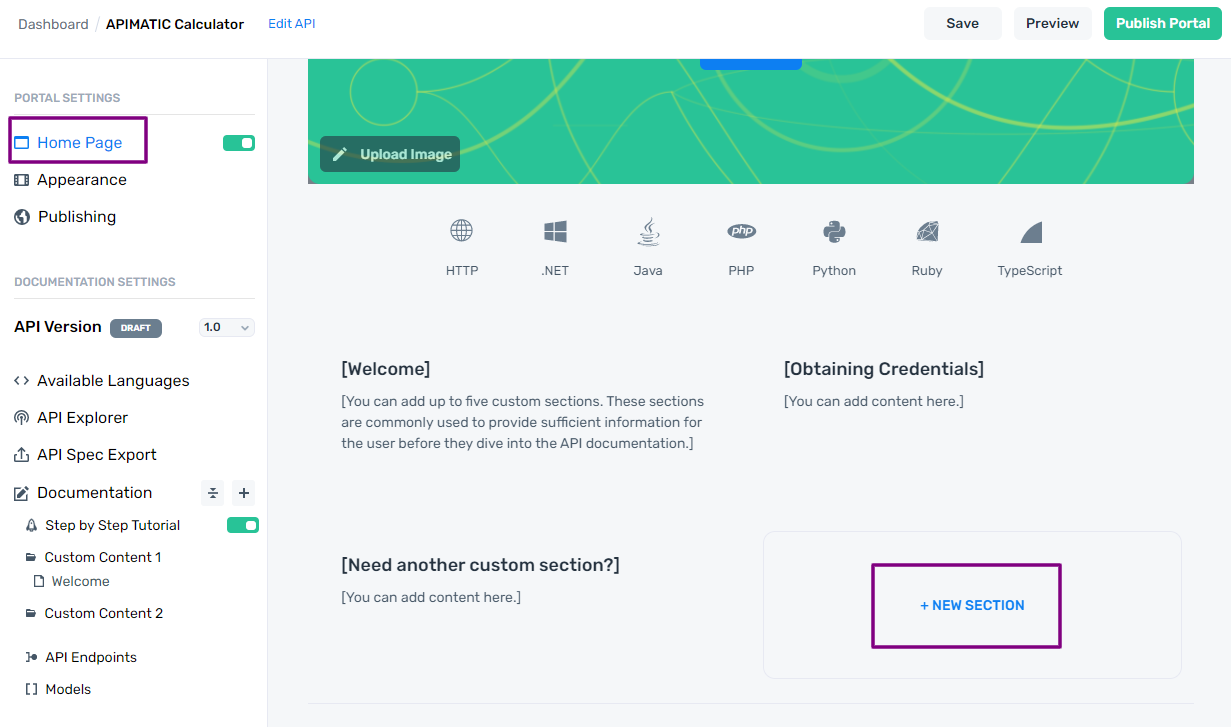
Manage Sections
Sections are used to provide highlighted information to the user before they dive into the API documentation. Sections can contain information like how to obtain credentials for authentication or more.
- To add a new section, click on the + New Section button.
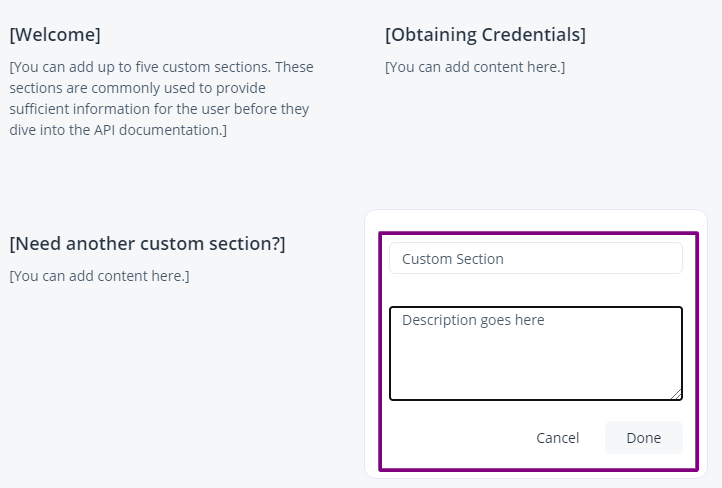
- Click on the edit icon and select Edit.

- Provide the required title and content. Click on Done.
To edit a section, click on the edit button next to an existing section. Select Edit. Update the content and click on Done.
To delete a section, click on the edit button next to an existing section. Select Delete.
Manage Badges
Badges provide an insight into what features the portal offers. These can include any 4 of the following:
Getting Started Guides
Authentication
API Console
HTTP Reference
API Entities
API Transformation
SDKs and Code Samples
Custom Guides
By default, 4 badges are displayed. To replace an existing badge, click on the ... button and click on Replace. Select the badge to replace from the list.
![]()
- A list containing the badge titles is displayed. Select the required badge and it is displayed.
![]()
- To delete a badge, click on the ... button and click on Delete.