Customize Documentation Settings
The documentation section in the portal refers to the language specific docs, HTTP reference documentation and custom guides to make consumption of your API even easier. You can customize the following components:
- Choose to keep/remove HTTP docs section in the portal.
- Enable/disable the option to allow users to export to various formats from your portal.
- Enable docs for languages of only your choice e.g. you can choose to disable docs for PHP. You can also specify a link to GitHub repository where that language's SDK is deployed.
- Add documentation/guides to provide any additional information to your portal users in the docs.
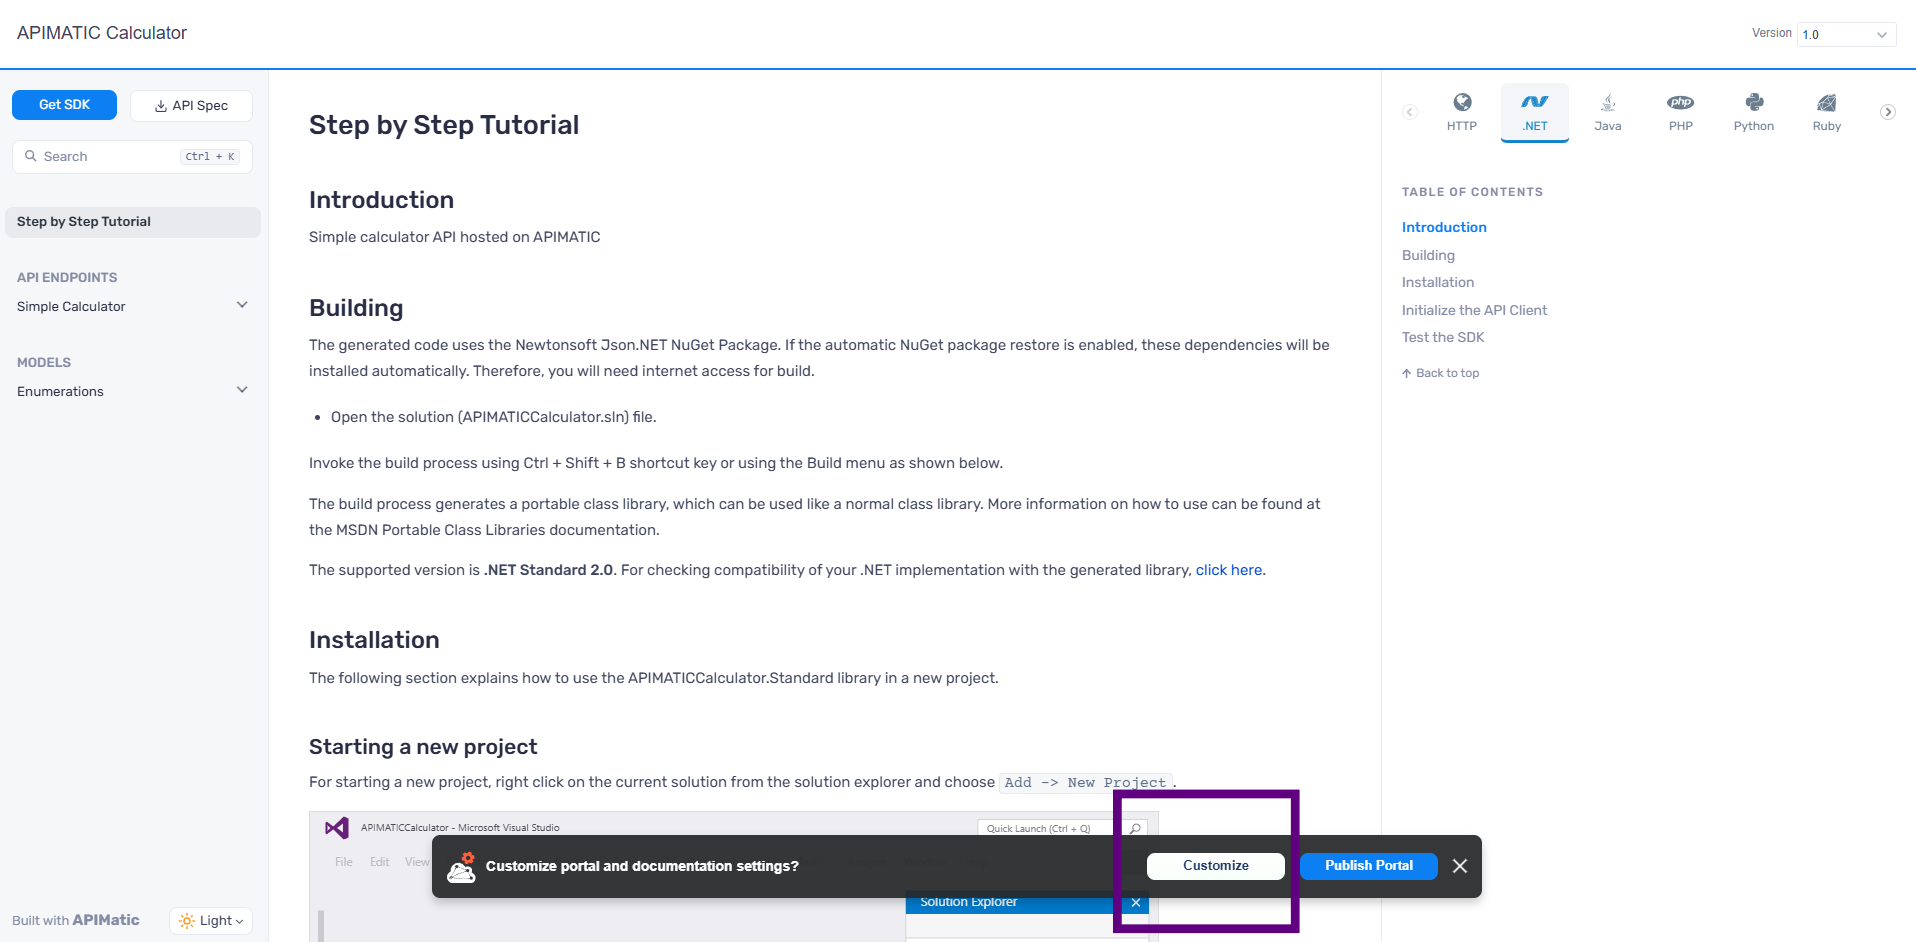
- Once you have generated your portal, click on Customize to open up the Portal Editor.
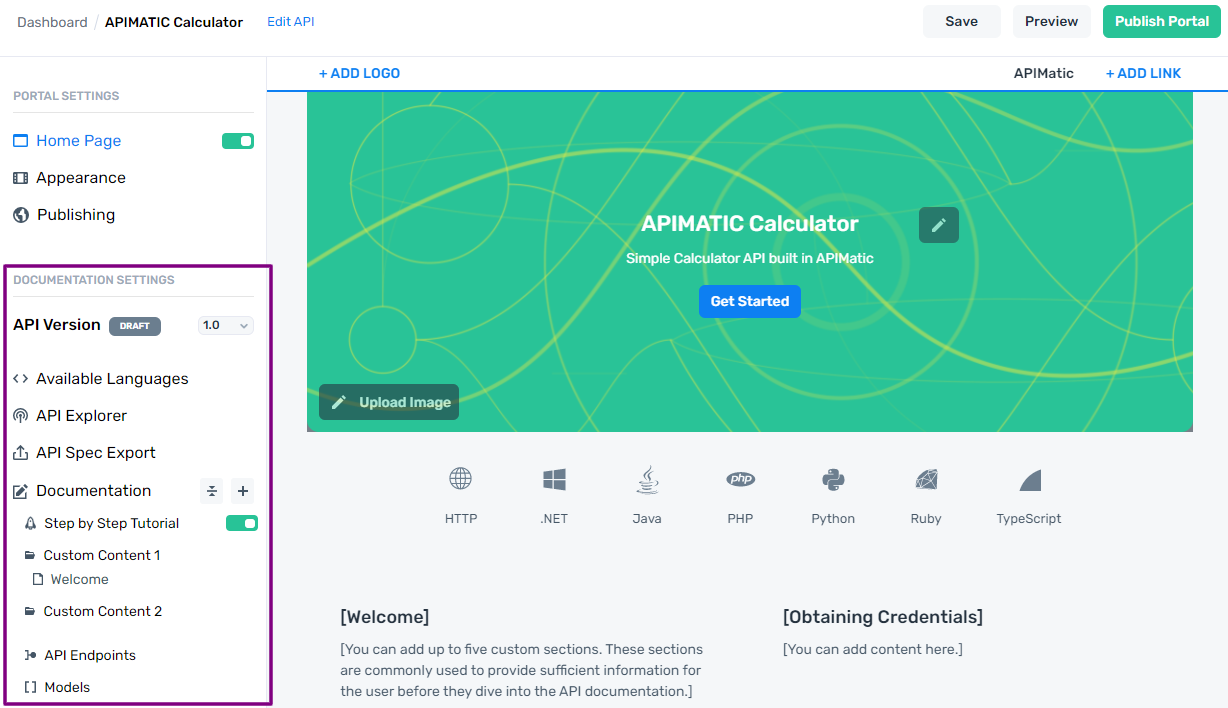
- You can customize the settings for each version of your API.
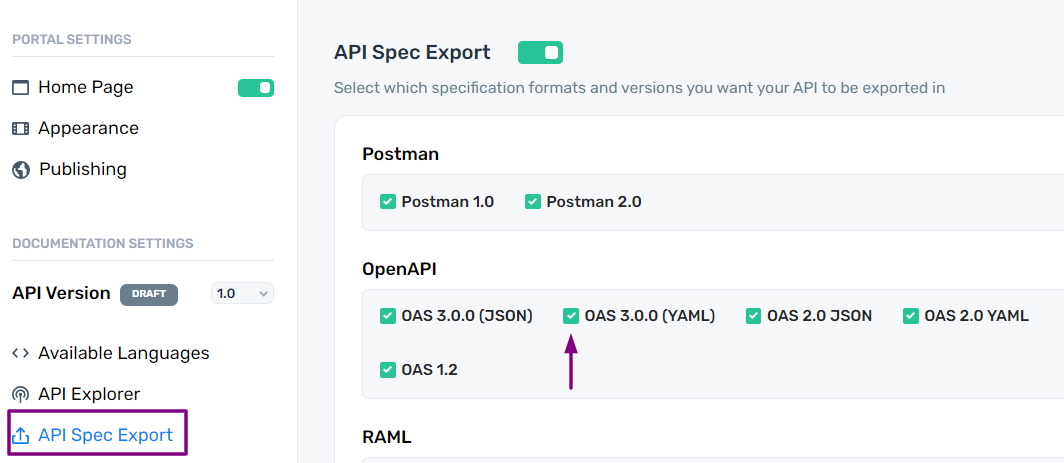
API Spec Export
You can provide the option to developers to export your API definition into any supported format.
Click on API Spec Export under the Documentation Settings sidebar.
To show/hide the option to export your API definition, toggle the button against API Spec Export.
You can select which formats and versions you want to provide export support for by checking or unchecking the required formats.
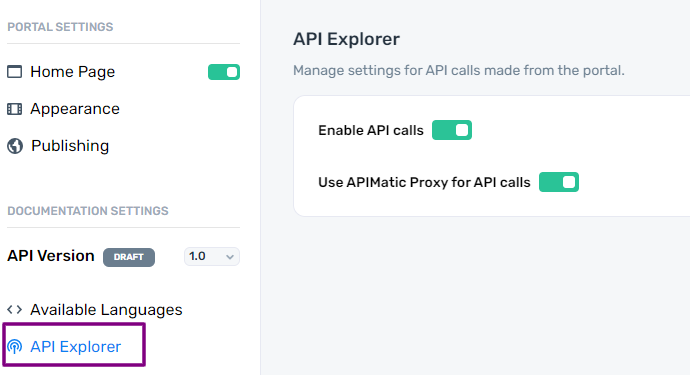
API Explorer
You can directly make dynamic real-time API calls through the API Explorer. This allows developers to have a first-hand experience of your API without having to code.
Click on API Explorer under the Documentation Settings sidebar.
You can enable/disable this option by using the toggle button against Enable API Calls.
If you don't want to expose your API directly, you can use a proxy server to serve your API. This is required for APIs that do not support CORS. This option can be enabled through Use APIMatic Proxy for API Calls.
Available Languages
APIMatic offers multiple language support so you can view reference docs, get SDKs/ GitHub repo links and publish packages in any language.
Click on Available Languages under the Documentation Settings sidebar.
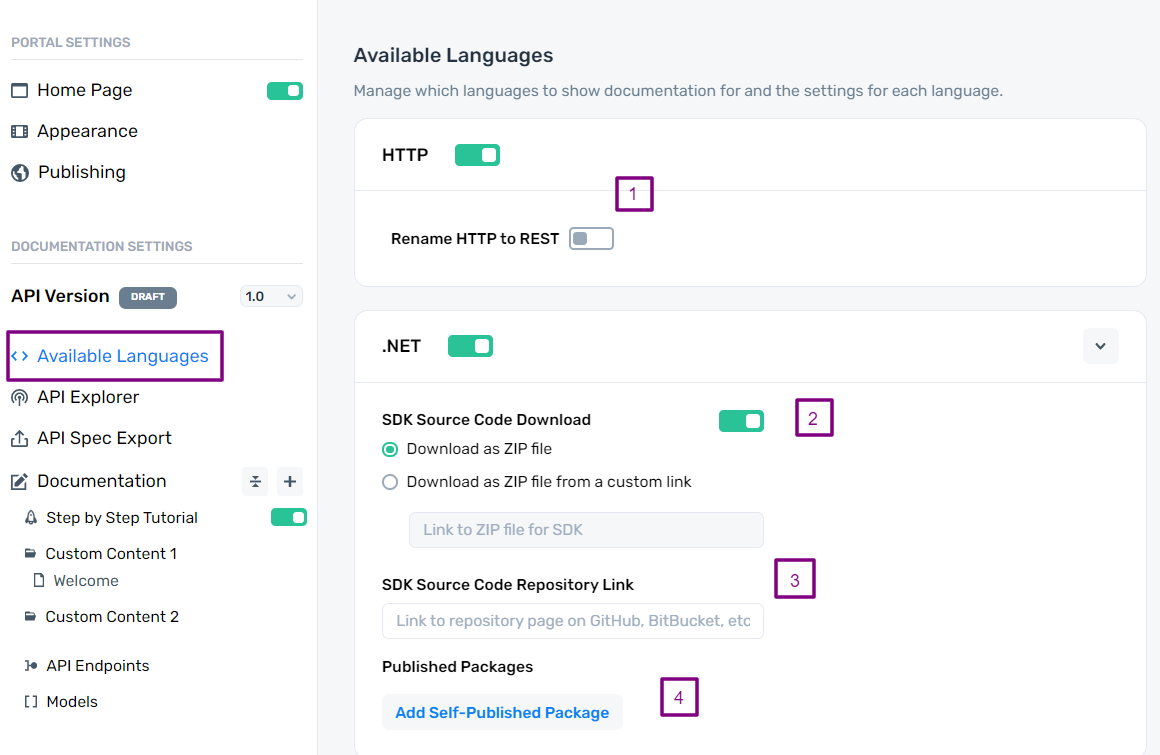
You can either choose to hide the HTTP documentation or Rename HTTP to REST through the toggle buttons available (labelled "1" in the reference screenshot).
For other language platforms, you can offer the following features on your portal:
- Show/hide the language according to your preference.
- SDK Download either in ZIP format, or as a link to the SDK (labelled "2" in the reference screenshot).
- GitHub Link to SDK (labelled "3" in the reference screenshot).
- Self-Published Packages by clicking on Add Self-Published Package and providing the Package Name and Version (labelled "4" in the reference screenshot).
Step-by-Step Tutorial
The Step-by-step tutorial is a getting started guide that helps developers set up things before they get started to use your API. For each SDK, it will contain language-specific instructions for:
- Installing the SDK
- Initializing the SDK
- Authenticating the API Calls
- Handling Errors from the API Calls
APIMatic automatically renders these docs from your API specification file once you publish the API. By default, the Getting Started guide is visible on your portal. You can choose to hide or rename this guide:
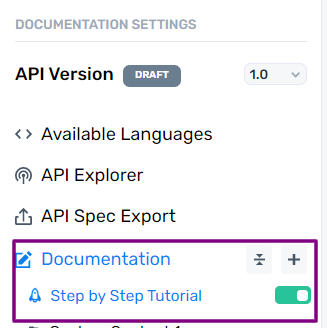
- Under Documentation Settings in the portal editor, toggle the button next to Step by Step Tutorial under Documentation.
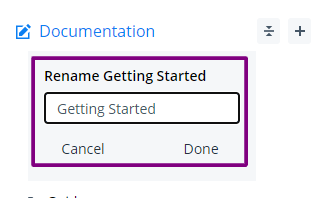
- To rename the guide, hover to Step by Step Tutorial and click on the edit icon. Provide the name for your guide and click on Done.
Custom Documentation
APIMatic offers the flexibility to add custom guides/documentation to your API docs portal. These can contain any contextual information about your product/API like installation, licensing, setting up environment, getting started and so on. The Portal Editor allows you to add as many sections and content pages as you like with custom slugs (unique IDs to refer your section/page content in the portal), and maintain a hierarchy with nested sections and pages. Moreover, you can define segments of your documentation to be language-specific; for example, if you mark a segment in your documentation to show for PHP, it will not show if any other language is selected.
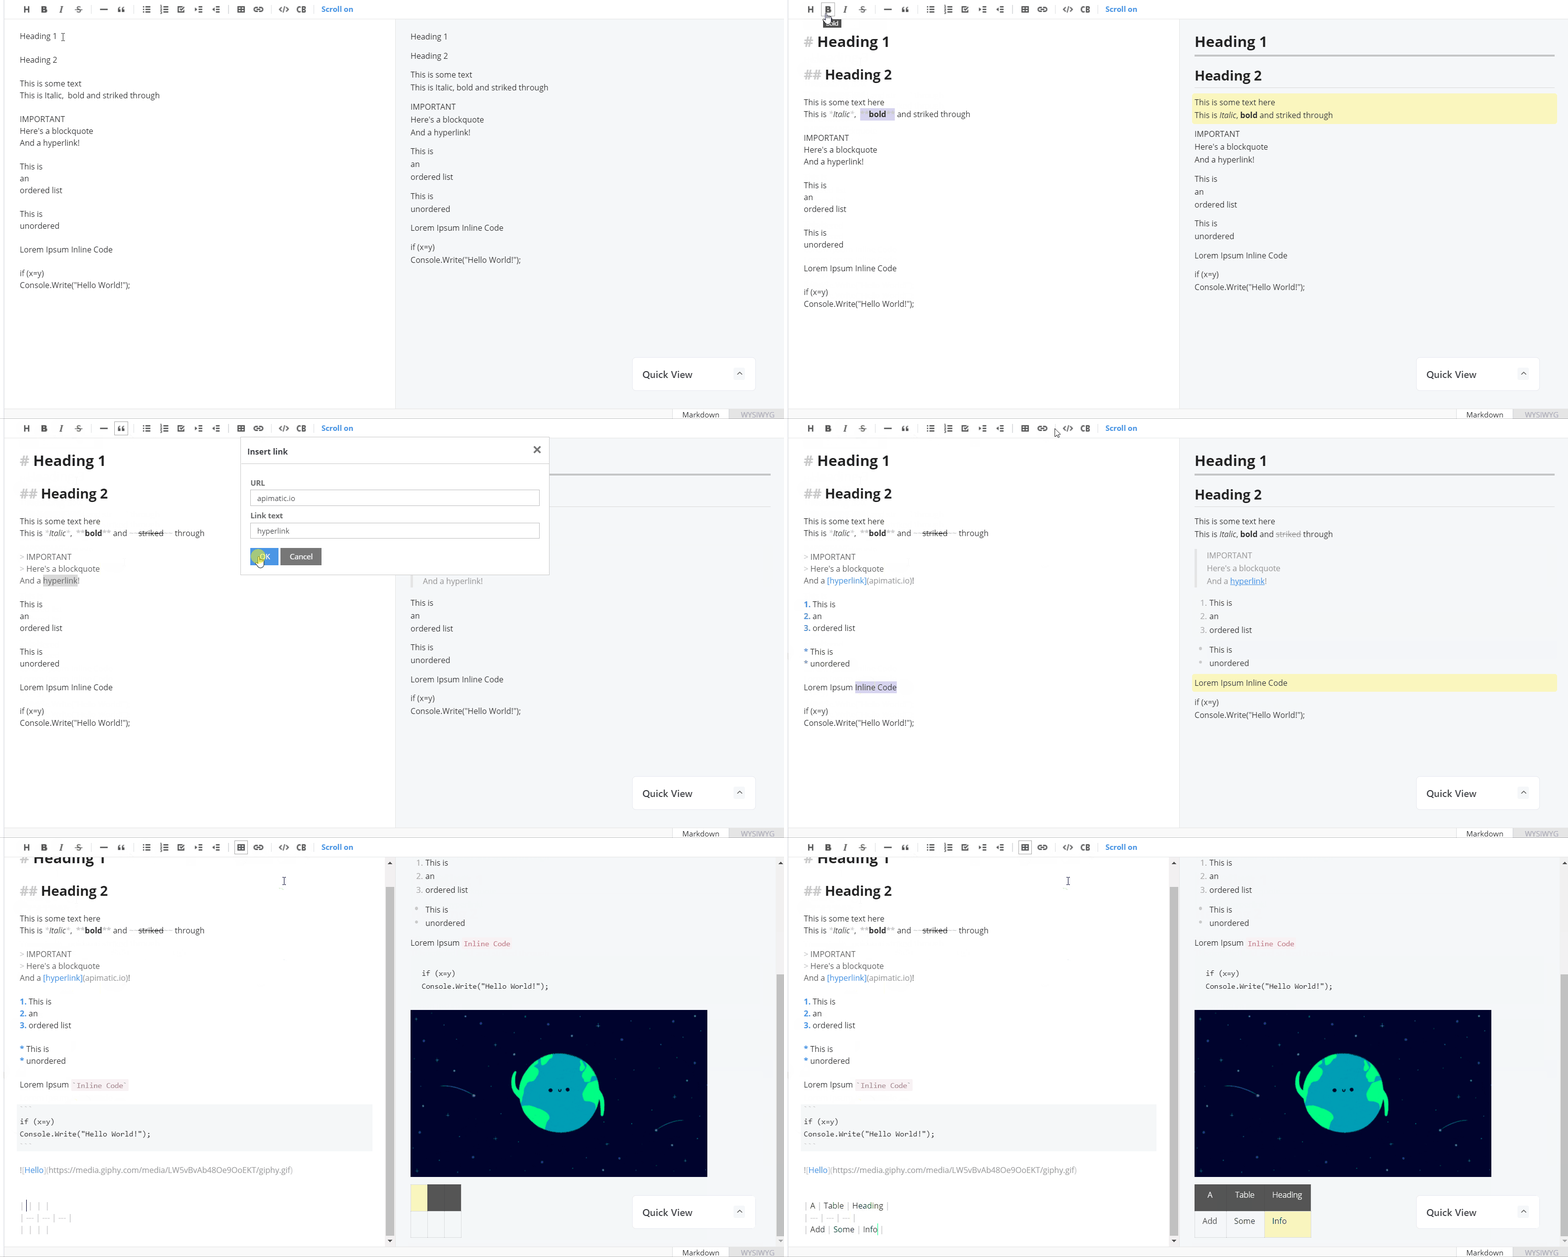
The Portal editor supports Markdown and generates a preview of your page on runtime.
Add New Section
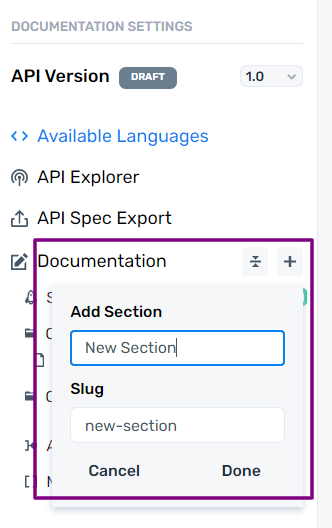
- Click on + next to Documentation. Provide the Name and Slug (optional) for the section. A slug is a unique ID used to refer to your section/page content in the portal. Click on Done.
Add Nested Section
- Click on ... next to the section you want to add a new section in. Select Add Section.
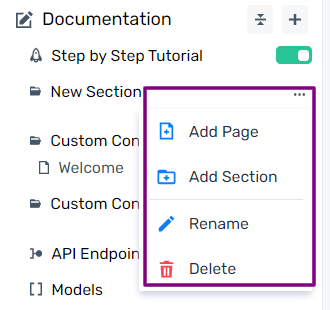
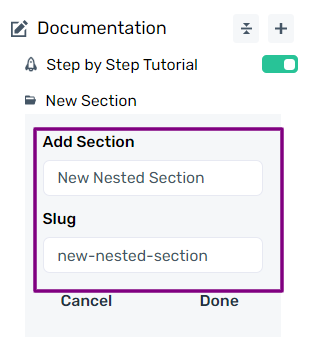
- Provide the Name and Slug (optional) for the nested section. A slug is a unique ID used to refer to your section/page content in the portal. Click on Done.
Add New Content Page
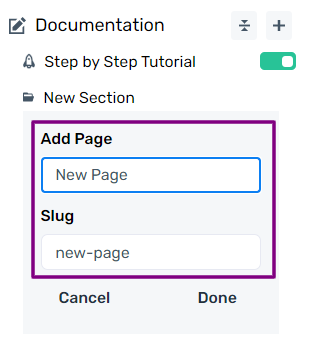
- Click on ... next to the section/nested section you want to add a new page in. Select Add Page.

- Provide the Name and Slug (optional) for the page. A slug is a unique ID used to refer to your section/page content in the portal. Click on Done.
- You can directly add Markdown content for your documentation in this page and preview it live, or add content in WYSIWYG view. Refer to Supported Markdown Syntax for a complete reference.
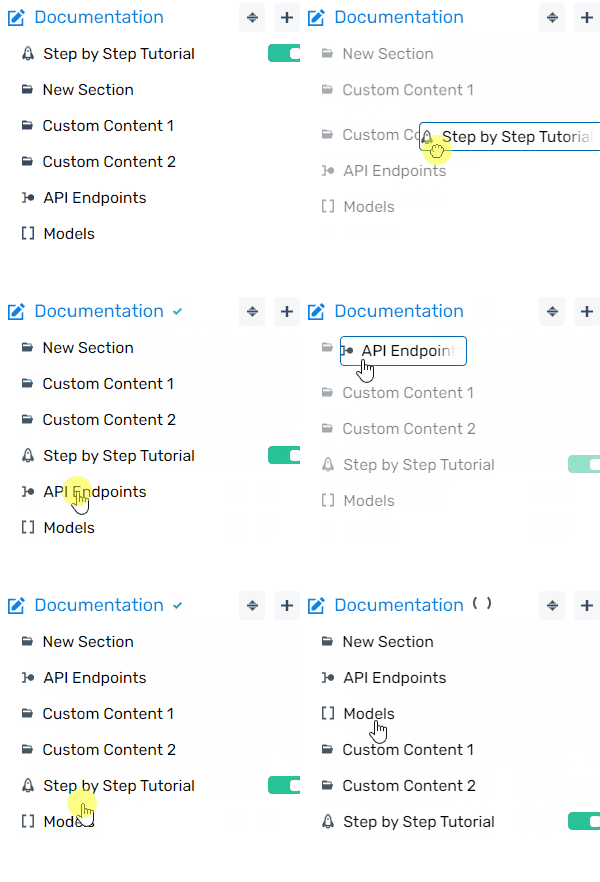
Reorder Section or Page
You can reorder the section or page hierarchy by a simple drag-and-drop action directly on the portal.
Save and Preview Changes
Once you have made your desired changes to the portal, click on Save on the top-right on your Dashboard. Any changes made will be saved.
To preview how the saved changes will be reflected on your portal, click on Preview.

- If you have any unsaved changes, a prompt is shown asking to continue without saving or preview after saving the changes. Click on the required option and the portal will be displayed in a new tab.
Publishing
Once you are satisfied with your customization, you can publish the portal. You can choose to proceed with any of the publishing options:
- Host this portal on apimatic.io
- Get your portal white-labelled to host on your domain
- Embed portal in an existing domain/portal