Jenkins
This walkthrough takes you through setting up Continuous Integration with Jenkins. We generate a configuration file called Jenkinsfile with your SDK for this purpose.
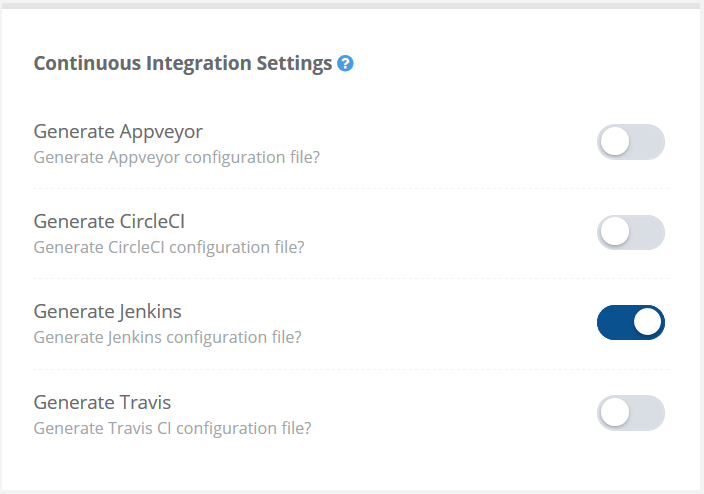
Configure CI Flag
The first step is to turn on the Jenkins flag in the Continuous Integration Settings section of the Code Generation Settings.
Create new job in Jenkins
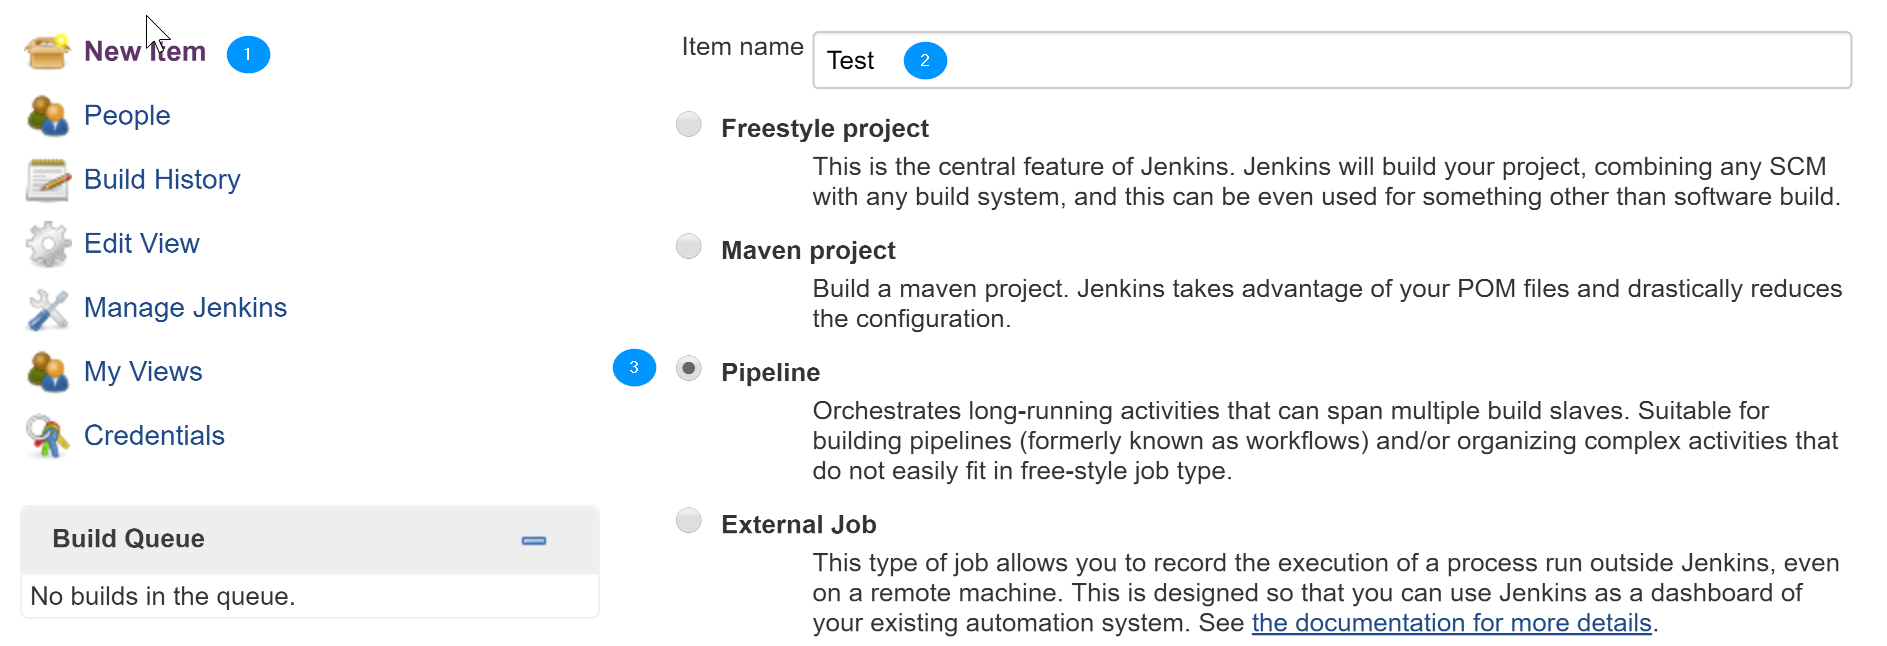
The second step is to create a new job for the deployed SDK. To do so click New Item on your Jenkins server homepage. After that input a suitable name for your job. Select Pipeline from the type of project as shown in the picture below and click Ok.
Configuring the Jenkins job
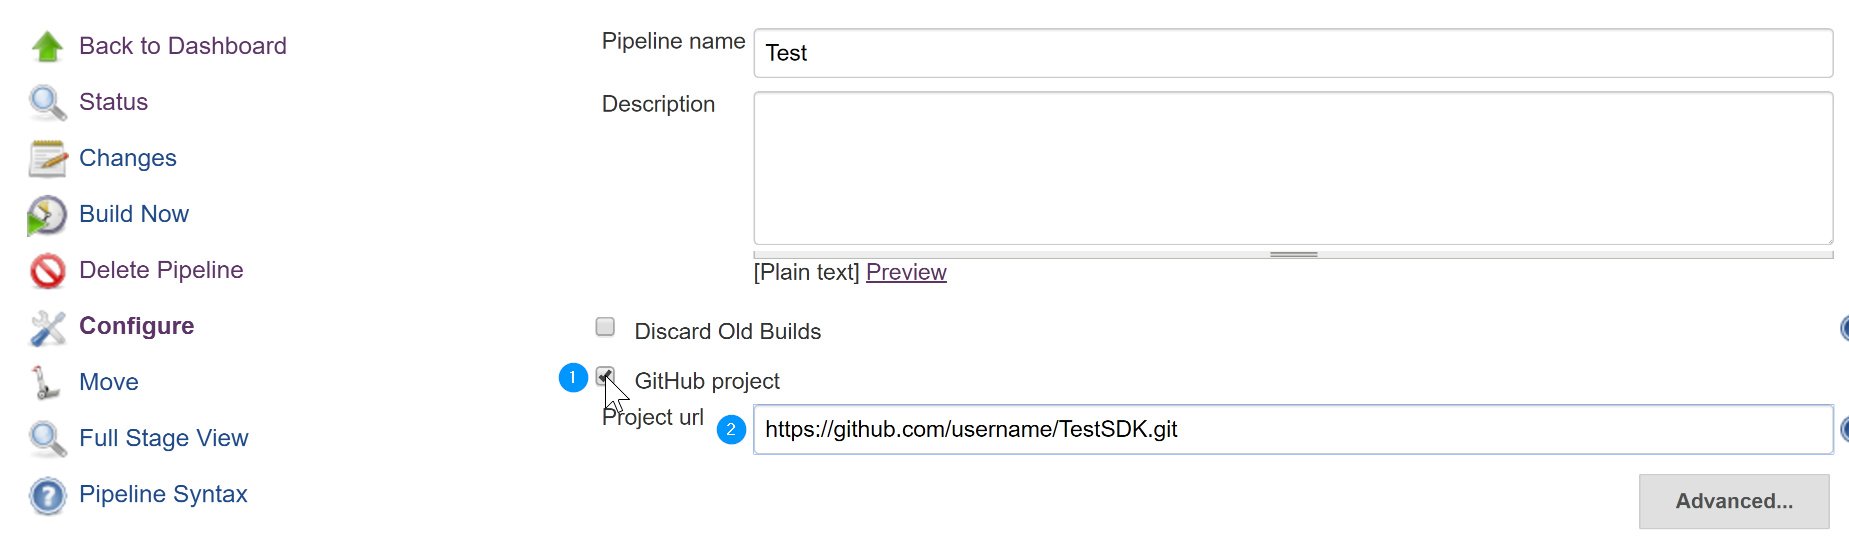
After that choose GitHub project from the list and add the link to your SDKs repository as shown in the picture below.
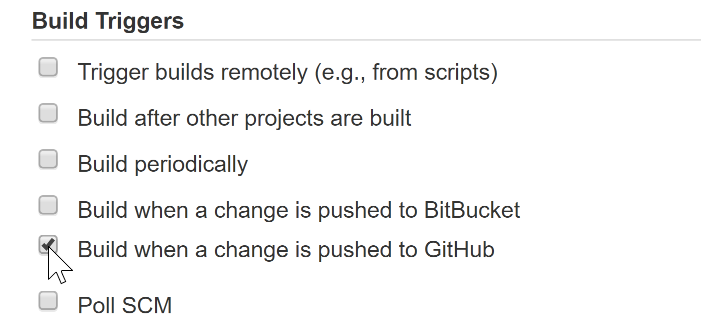
After that, choose Build when a change is pushed to GitHub
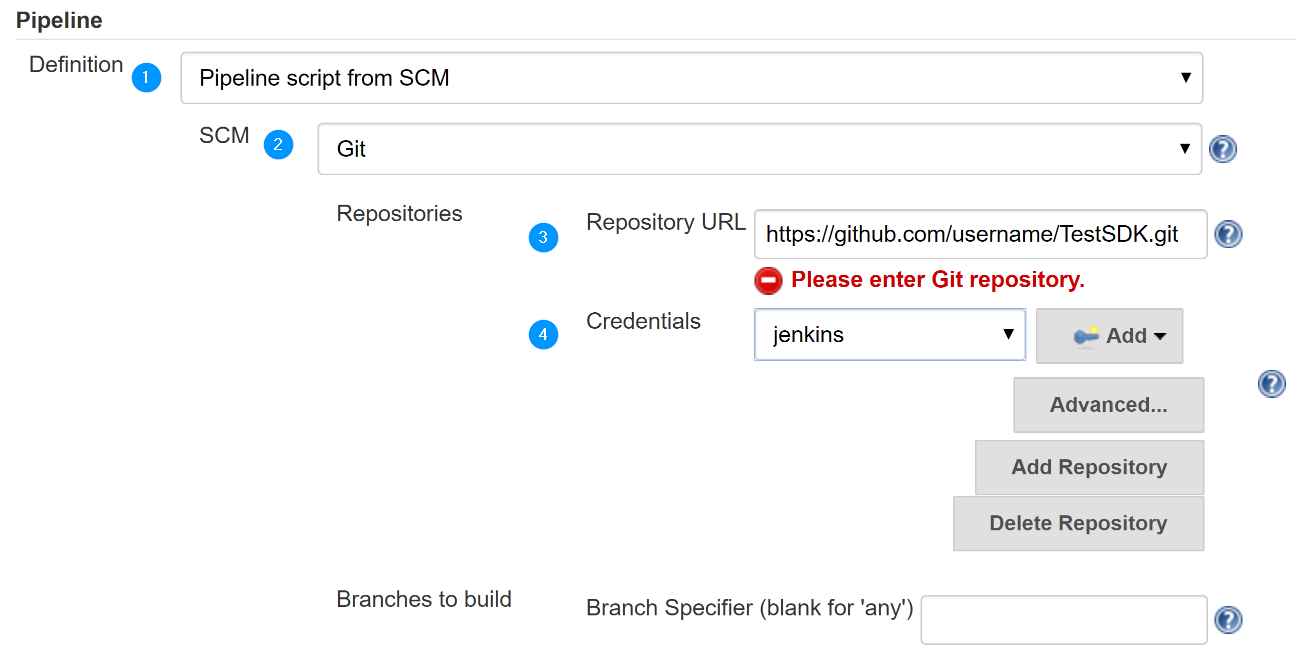
After that, scroll to the pipeline section and choose pipeline from SCM. Select Git as the SCM source. Add the link to your repository in the Repository URL field. Finally choose the credentials for your Git account.
Deploy to GitHub
The next step is to generate your SDK and push a new commit to GitHub in the already existing repository.
You have to use the existing repository which you added to Jenkins.
Watch it run
The final step is to sit back and watch your API and the SDK being tested.
