Setting Up an API Workspace
To work with one or more API definitions in the APIMatic's VS Code extension, you are first required to select a workspace folder in VS Code as your dedicated API workspace with all relevant files. There are several ways available to set up your API workspace and we will walk you through each of the available options below.
Ensure that your API workspace contains only relevant files for the API definition. See tips for working with large workspaces in the extension without affecting performance.
The documentation covers the following topics:
- Opening an API Workspace
- Adding an API Definition to Your Workspace
- Closing an API Workspace
- Managing Large Workspaces
- Configuring Workspace Notifications
Opening an API Workspace
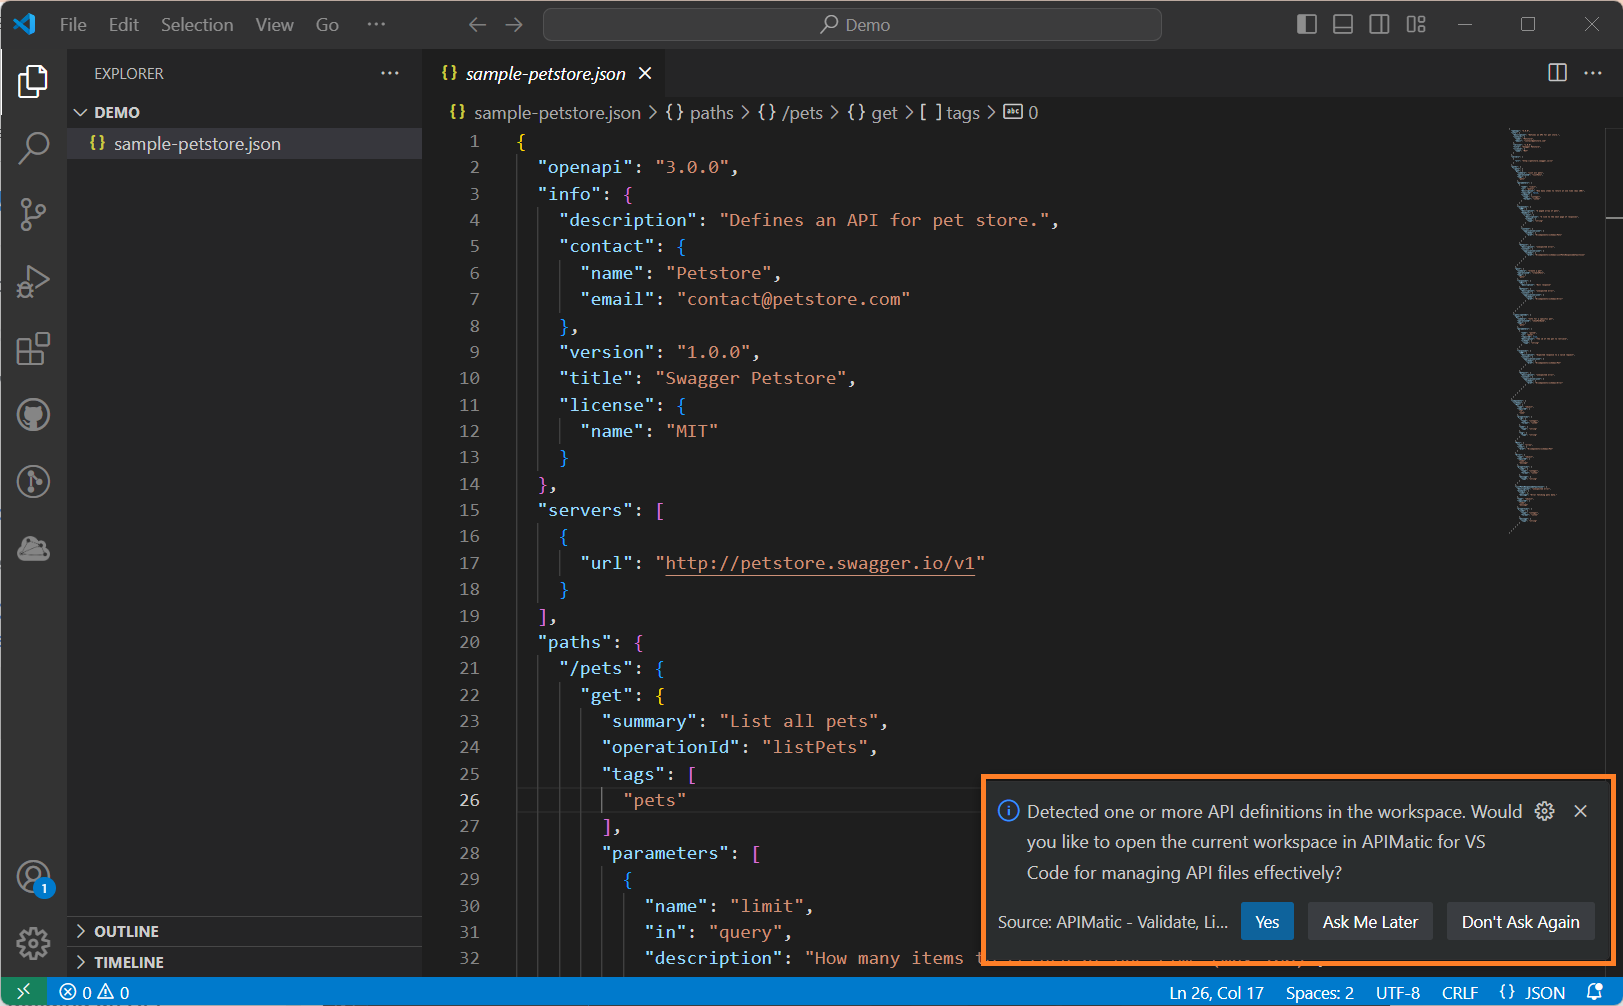
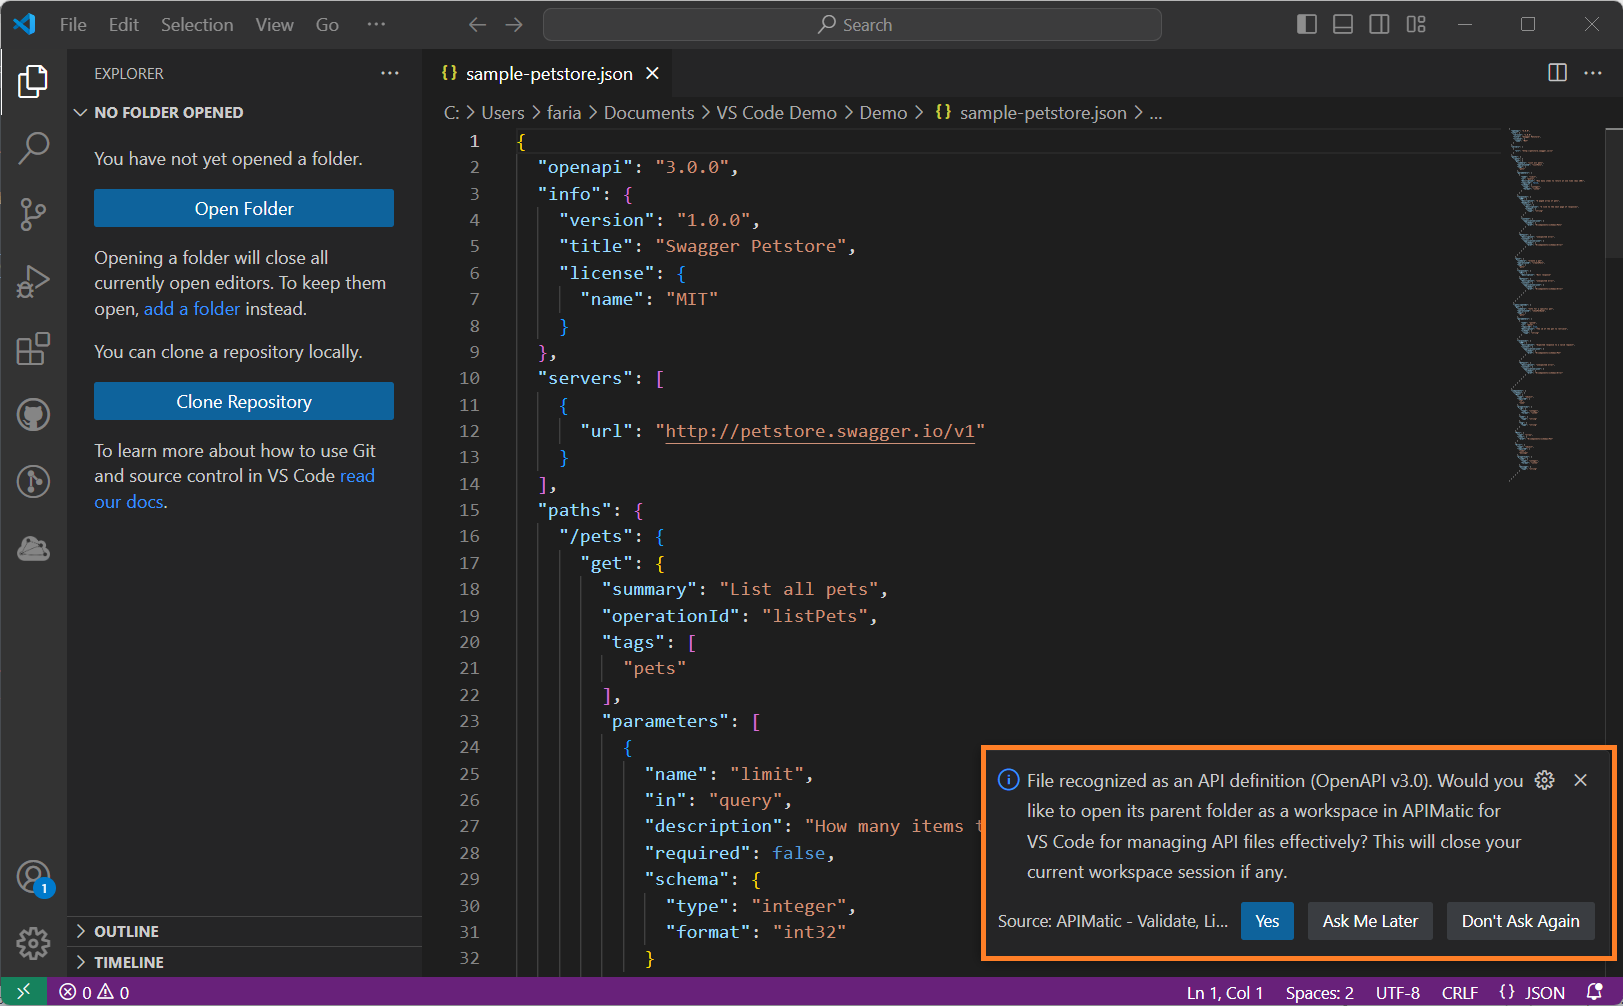
If you just opened a workspace folder with an API definition (for example, OpenAPI) or opened an API definition file directly, you may receive a notification to open the folder or the API definition's parent folder as an API workspace in the extension. Click Yes to select it as your API workspace:
Alternatively, you can simply navigate to the APIMatic API Explorer view from the Activity Bar. Based on your usage, you may see one or more of the following options:
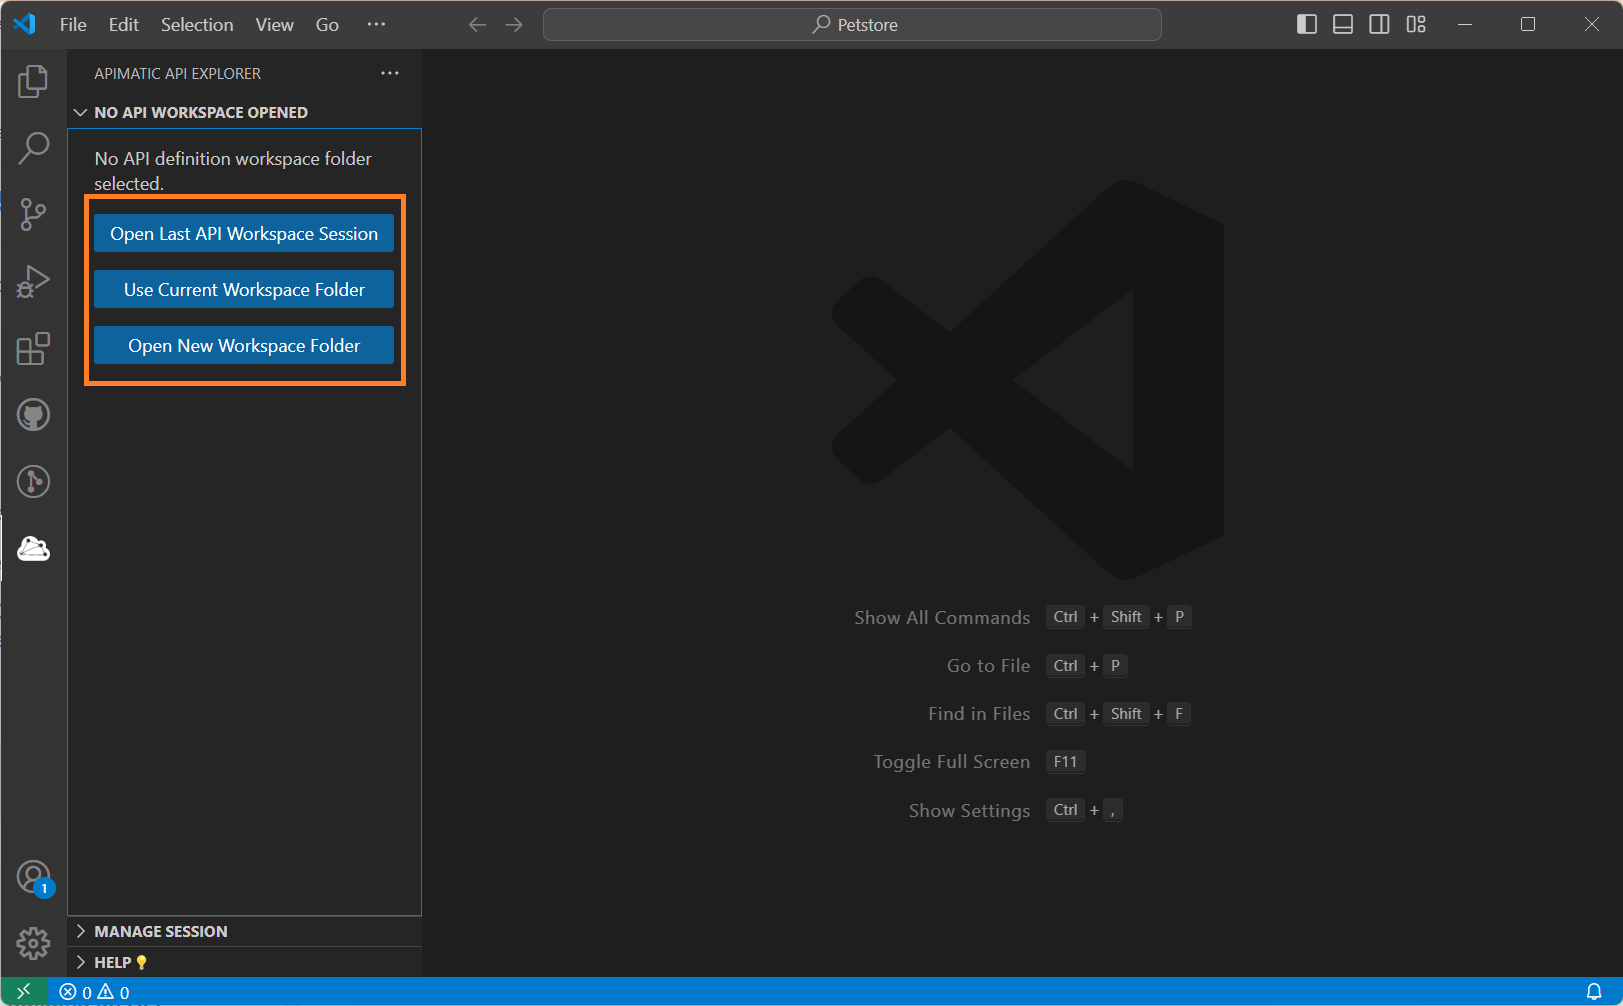
Here is what you can expect from each of these:
Option 1: Open a New API Workspace
The Open New Workspace Folder option will let you browse your system for a folder that you can use as your API workspace:

Choose a folder and click on Select Folder to open it in the APIMatic API Explorer view as an API workspace. Note, that this will close your existing workspace session, if any.
Option 2: Open Last API Workspace
The Open Last API Workspace Session option will only be available if you've previously worked on an API workspace. Selecting this option will help restore your last API workspace session so you can resume working from where you left.
Option 3: Use Current Workspace as API Workspace
The Use Current Workspace Folder option will be available if you have a workspace folder open that isn't already marked as an API workspace. Selecting this option will keep your current folder open but will make it accessible in the APIMatic API Explorer view as an API workspace.
Adding an API Definition to Your Workspace
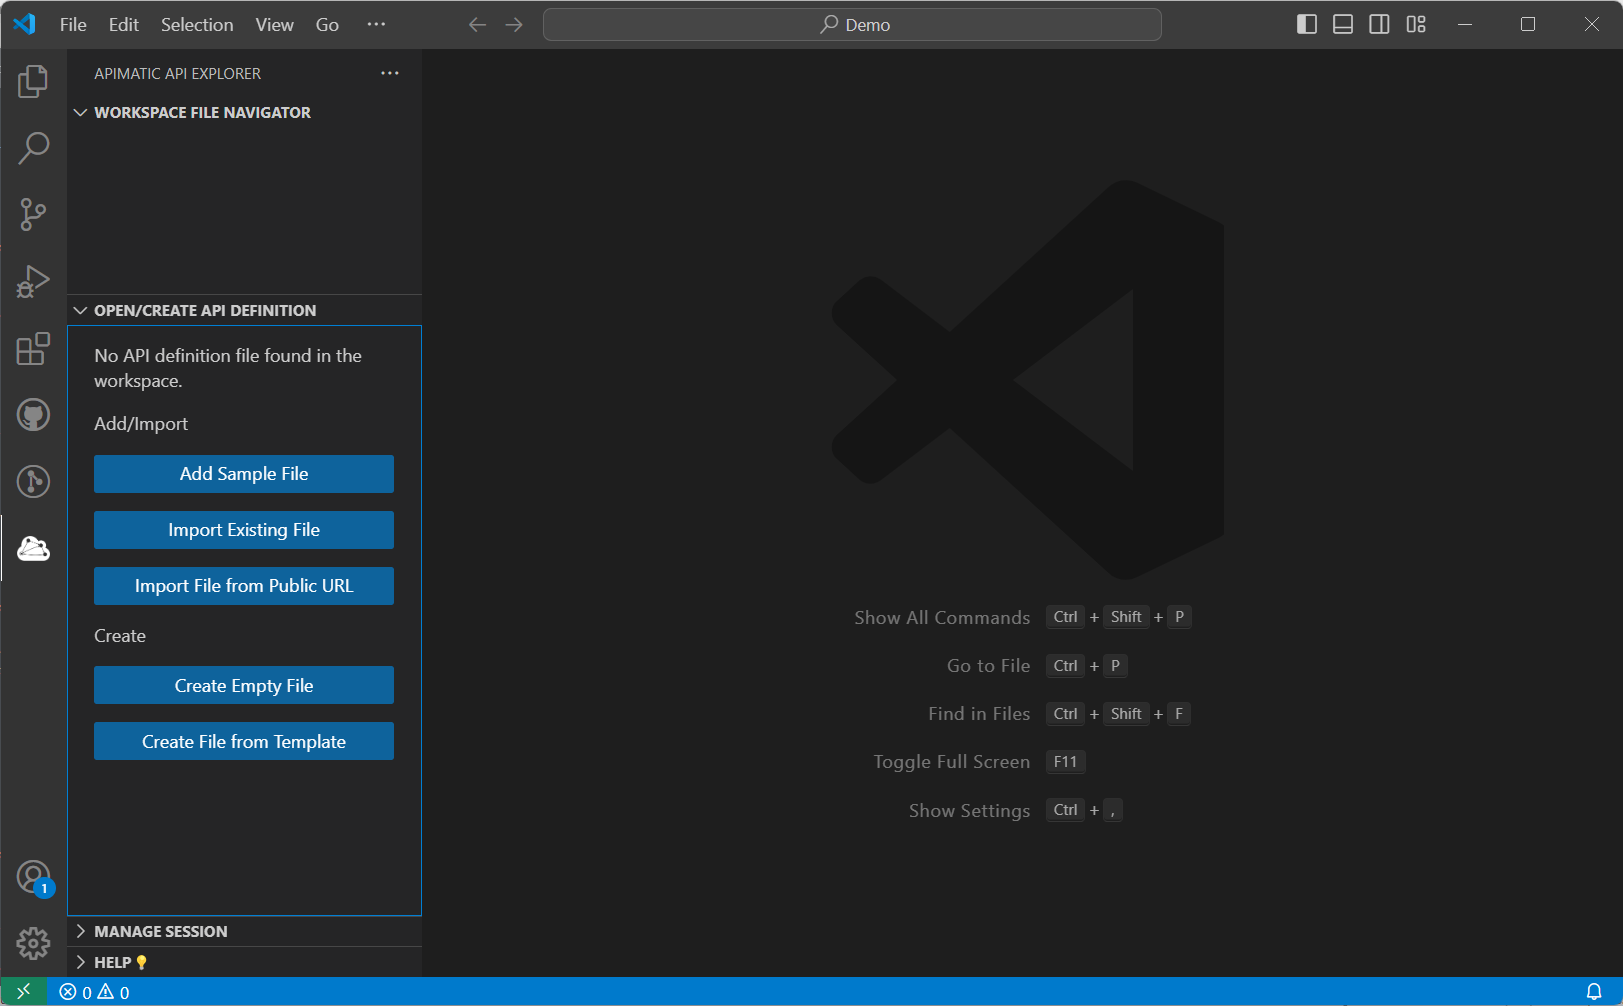
Once you have your API workspace ready, you can begin the next steps of adding an API definition along with any relevant files. We offer some options to help you get started, in the Open/Create API Definition side view which are discussed in more detail in the next few sections.
Adding/Importing an Existing API Definition
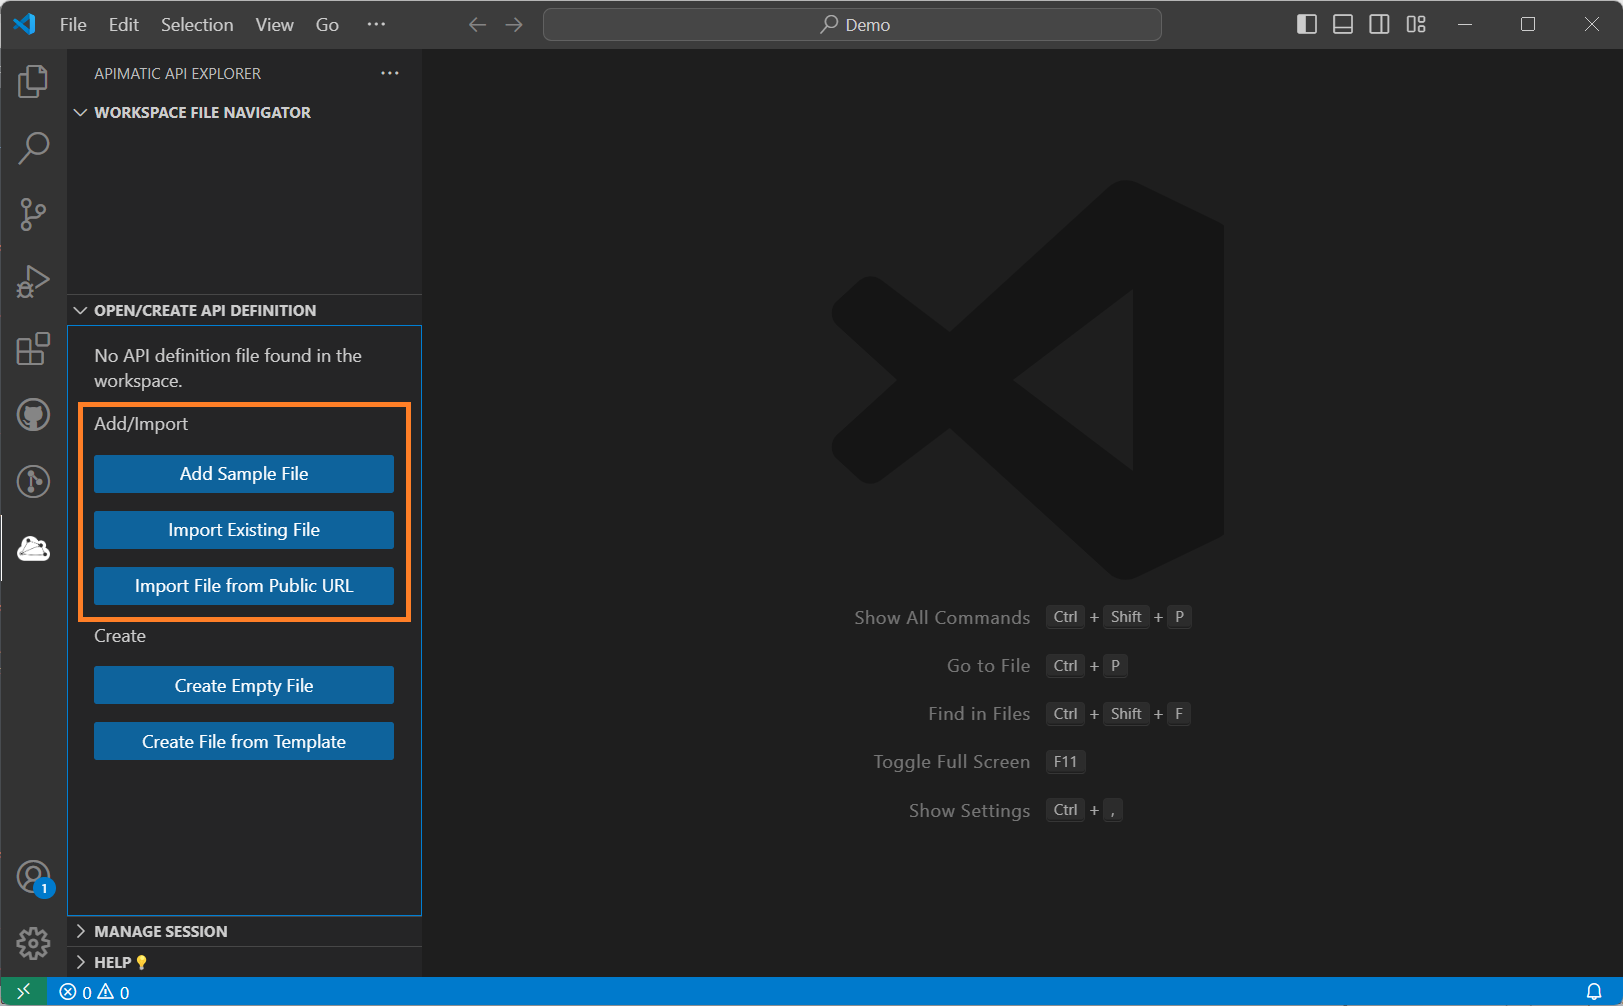
If you already have a raw API definition file in your local system or at a public URL, you can import that into your workspace using the relevant import options. Alternatively, if you are just looking to explore the extension and get an idea of things, you can even add a sample file. All of these options should be visible to you under the Add/Import title:
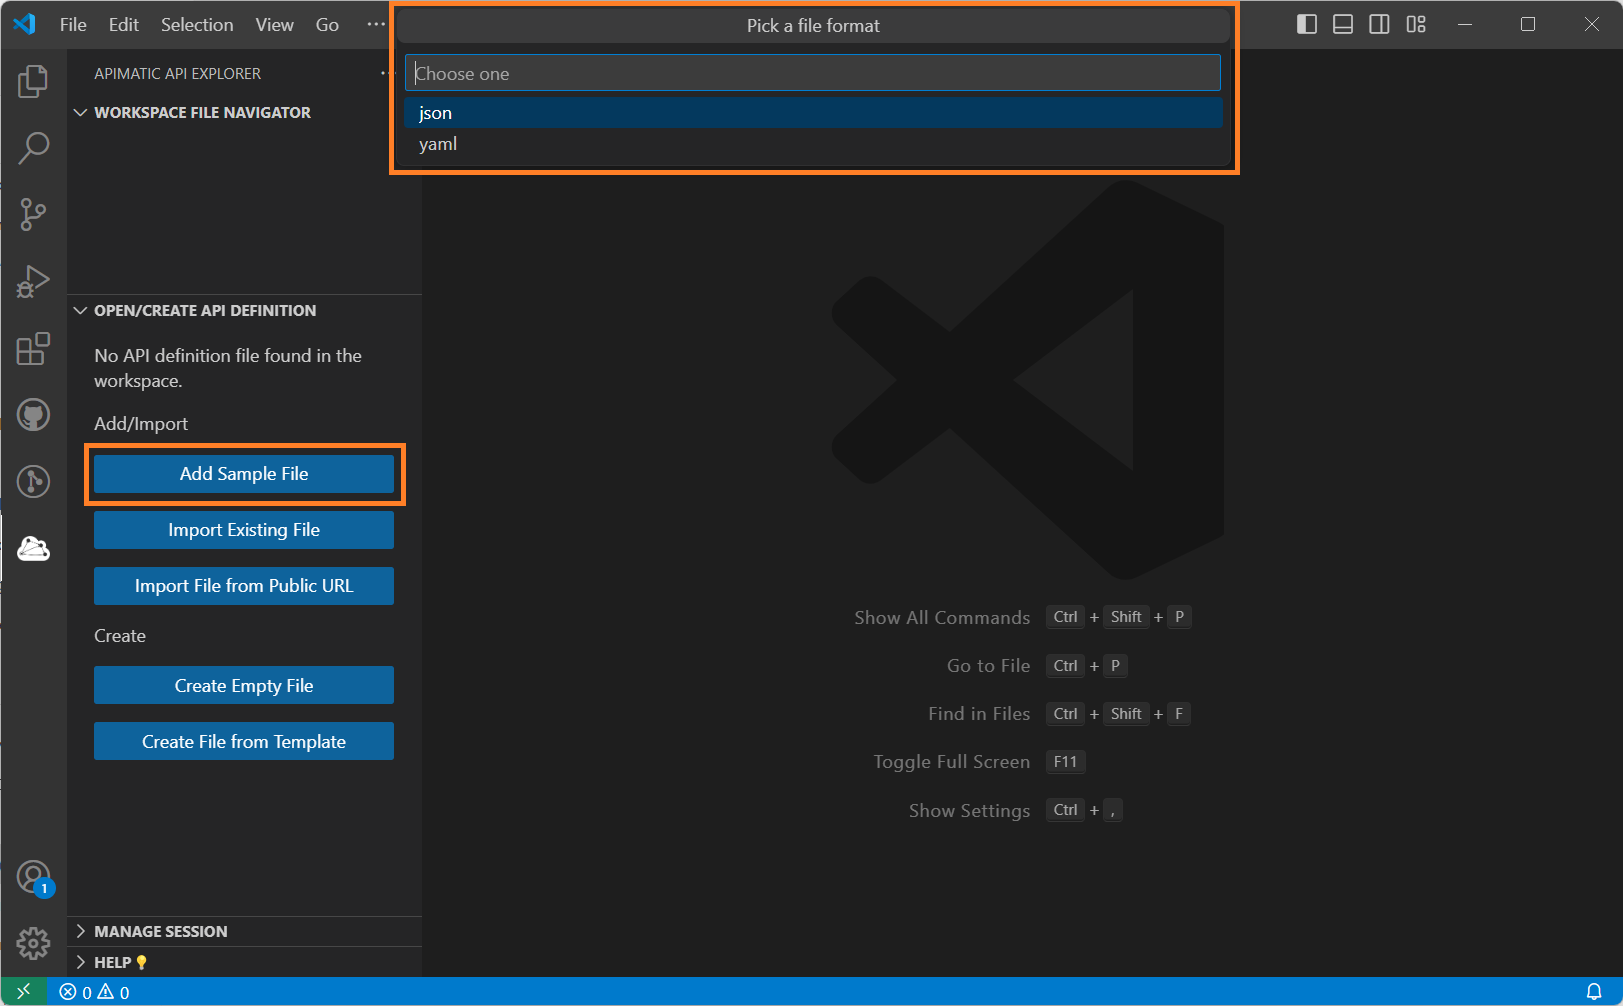
Option 1: Adding a Sample File
Click on Add Sample File. You will be asked to select the desired output format (json or yaml) after which a sample-petstore.<ext> will be added in your API workspace instantly.
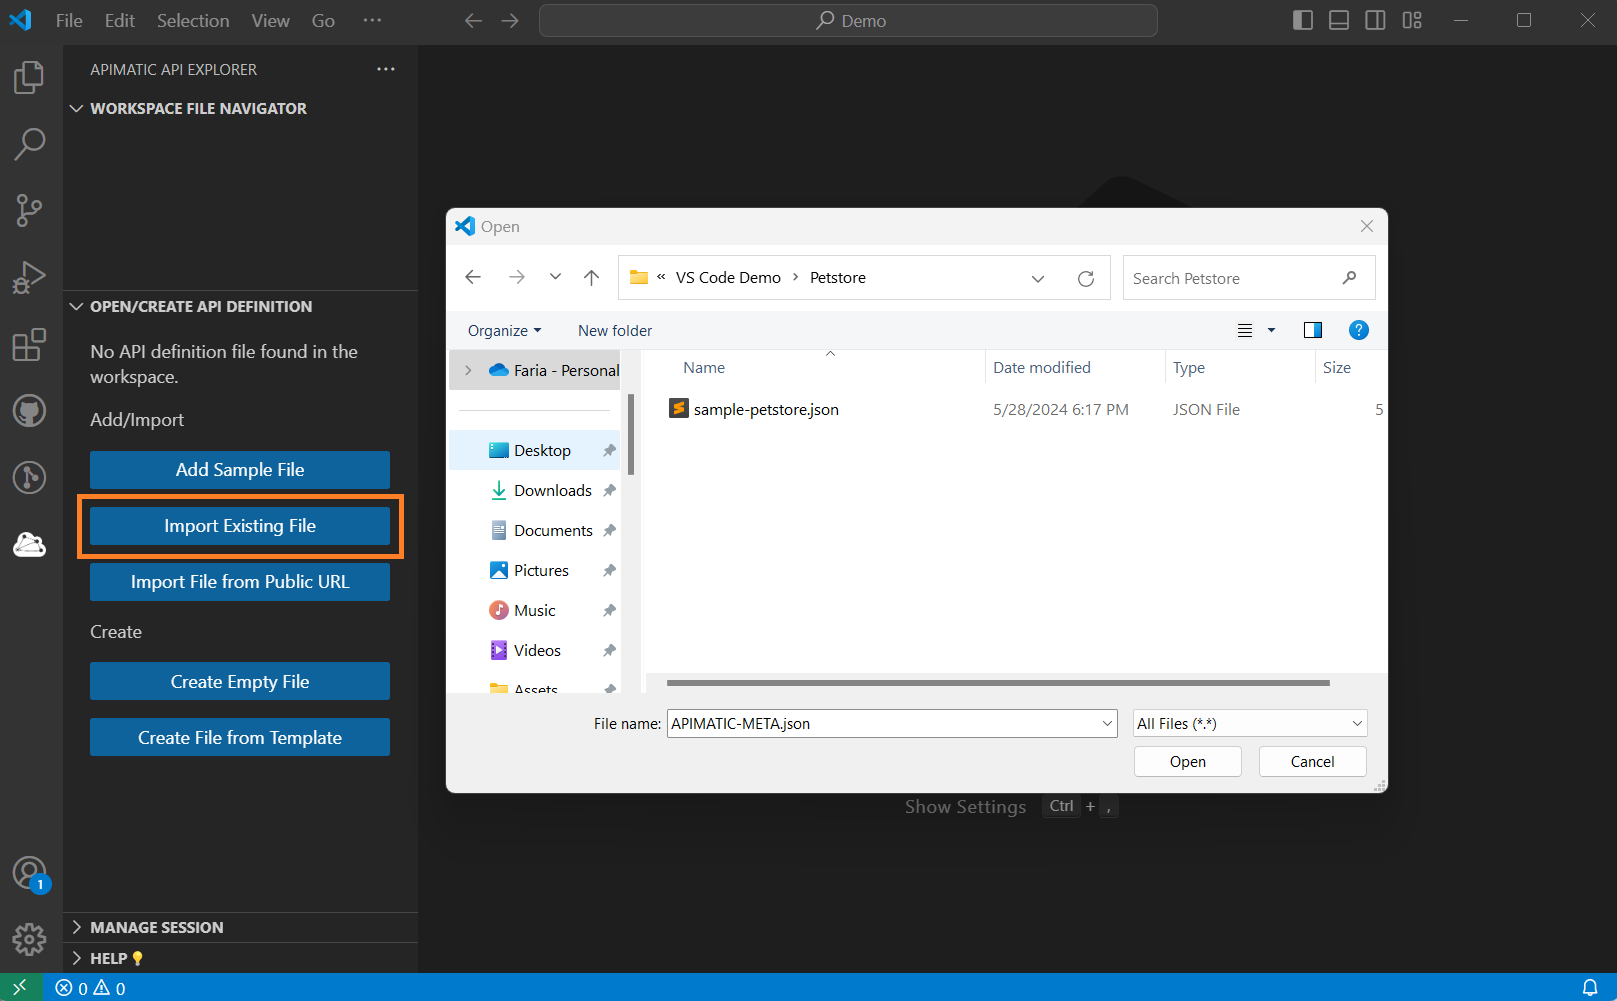
Option 2: Importing an Existing File from Local System
You can browse your local system and import any existing API definition file into your current API workspace using the Import Existing File option. The API definition file must be in one of the supported formats. Note, that multi-file selection or ZIP files aren't supported for this option.
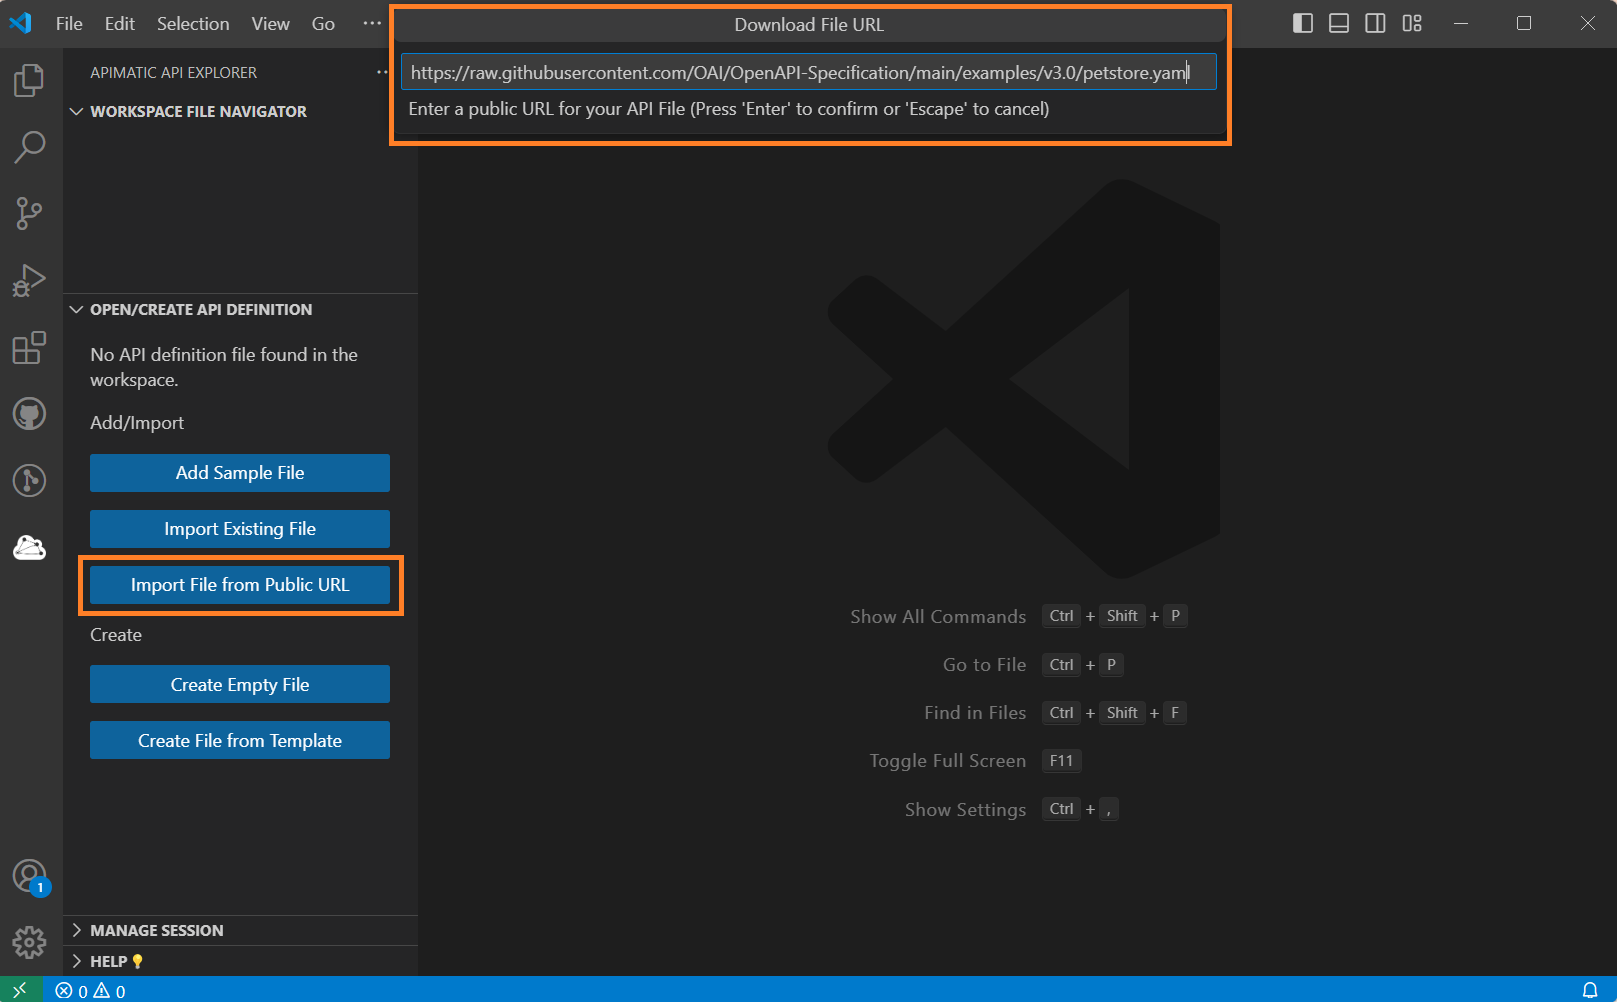
Option 3: Importing an Existing File from Public URL
If your raw API definition file is available publicly at a URL, you can import it into your current API workspace using the Import File from Public URL option. The API definition file must be in one of the supported formats. Note, that multi-file selection or ZIP files aren't supported for this option.
Ensure that you have a stable network connection and then provide a valid public URL path in the input dialog that opens:
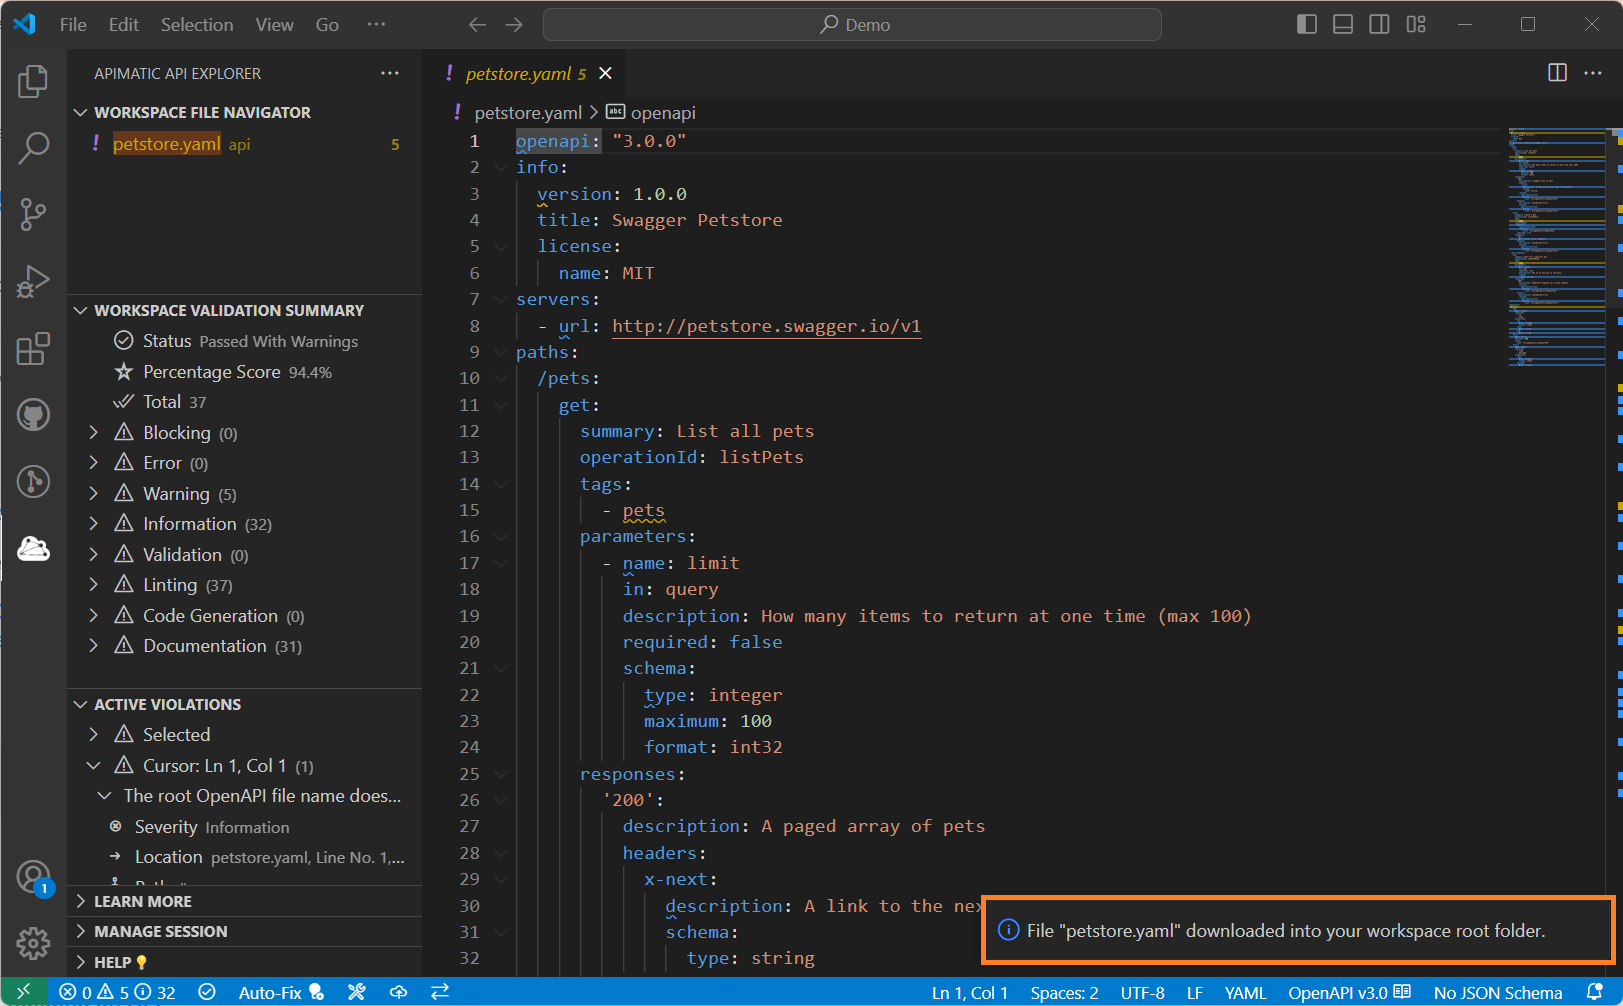
If the URL is valid, the file should download successfully into your workspace in a few seconds (depending upon the size):
Creating an API Definition from Scratch
If you don't have an API definition, you can create one from scratch using options listed under the Create title:
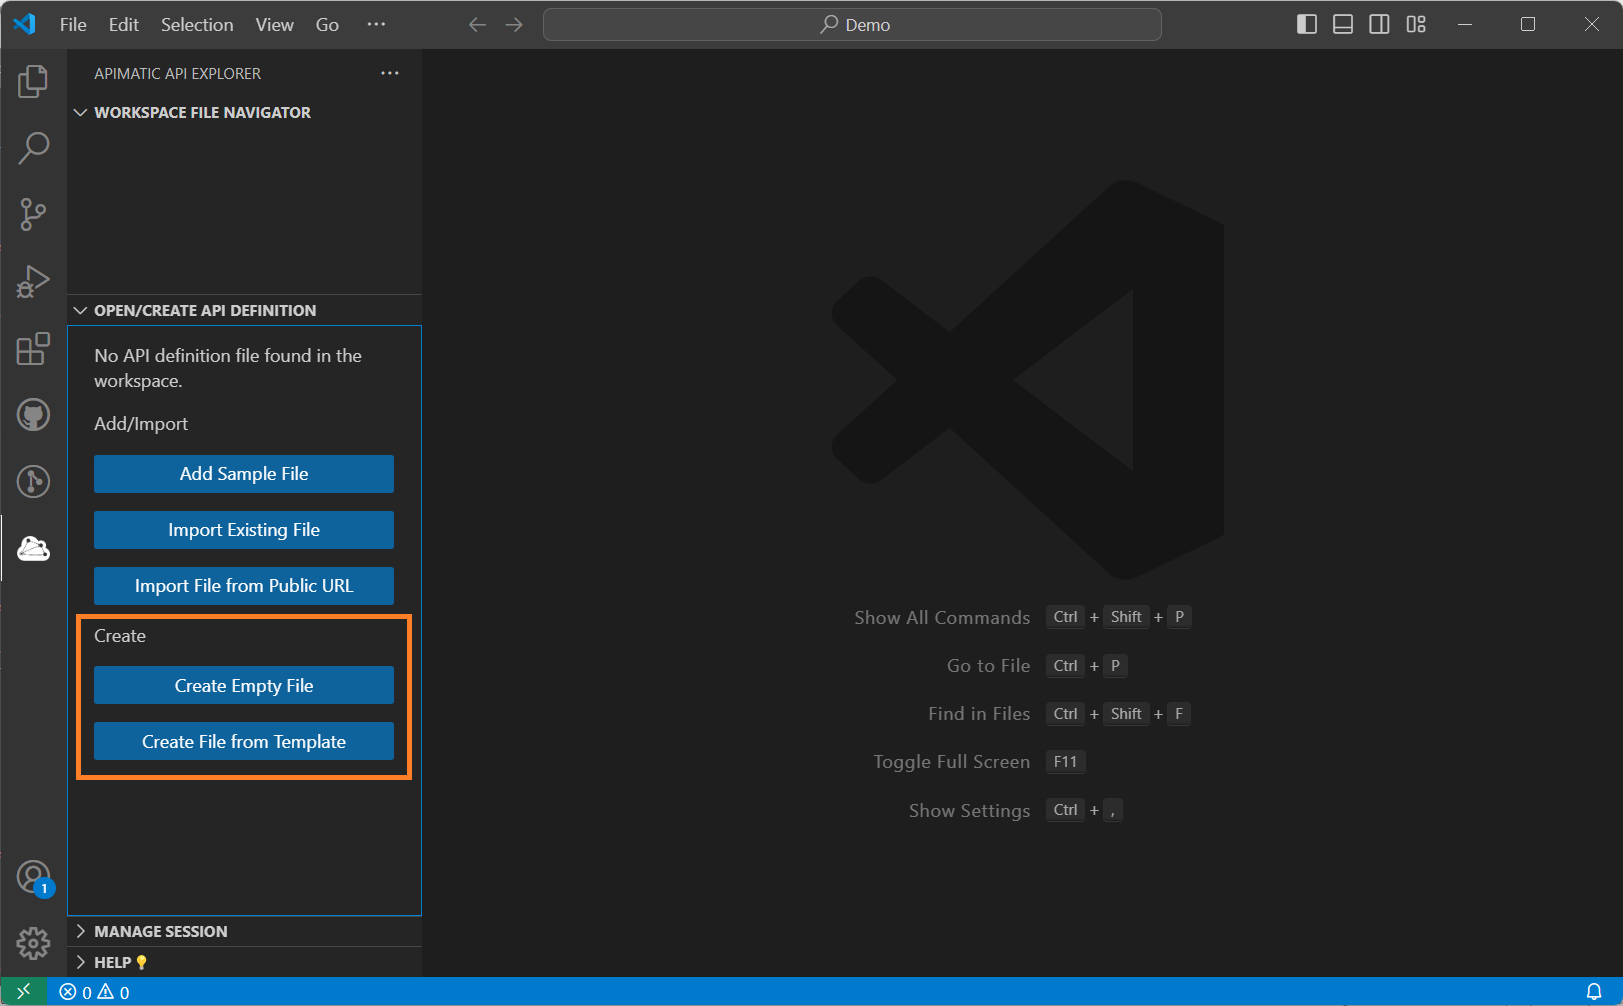
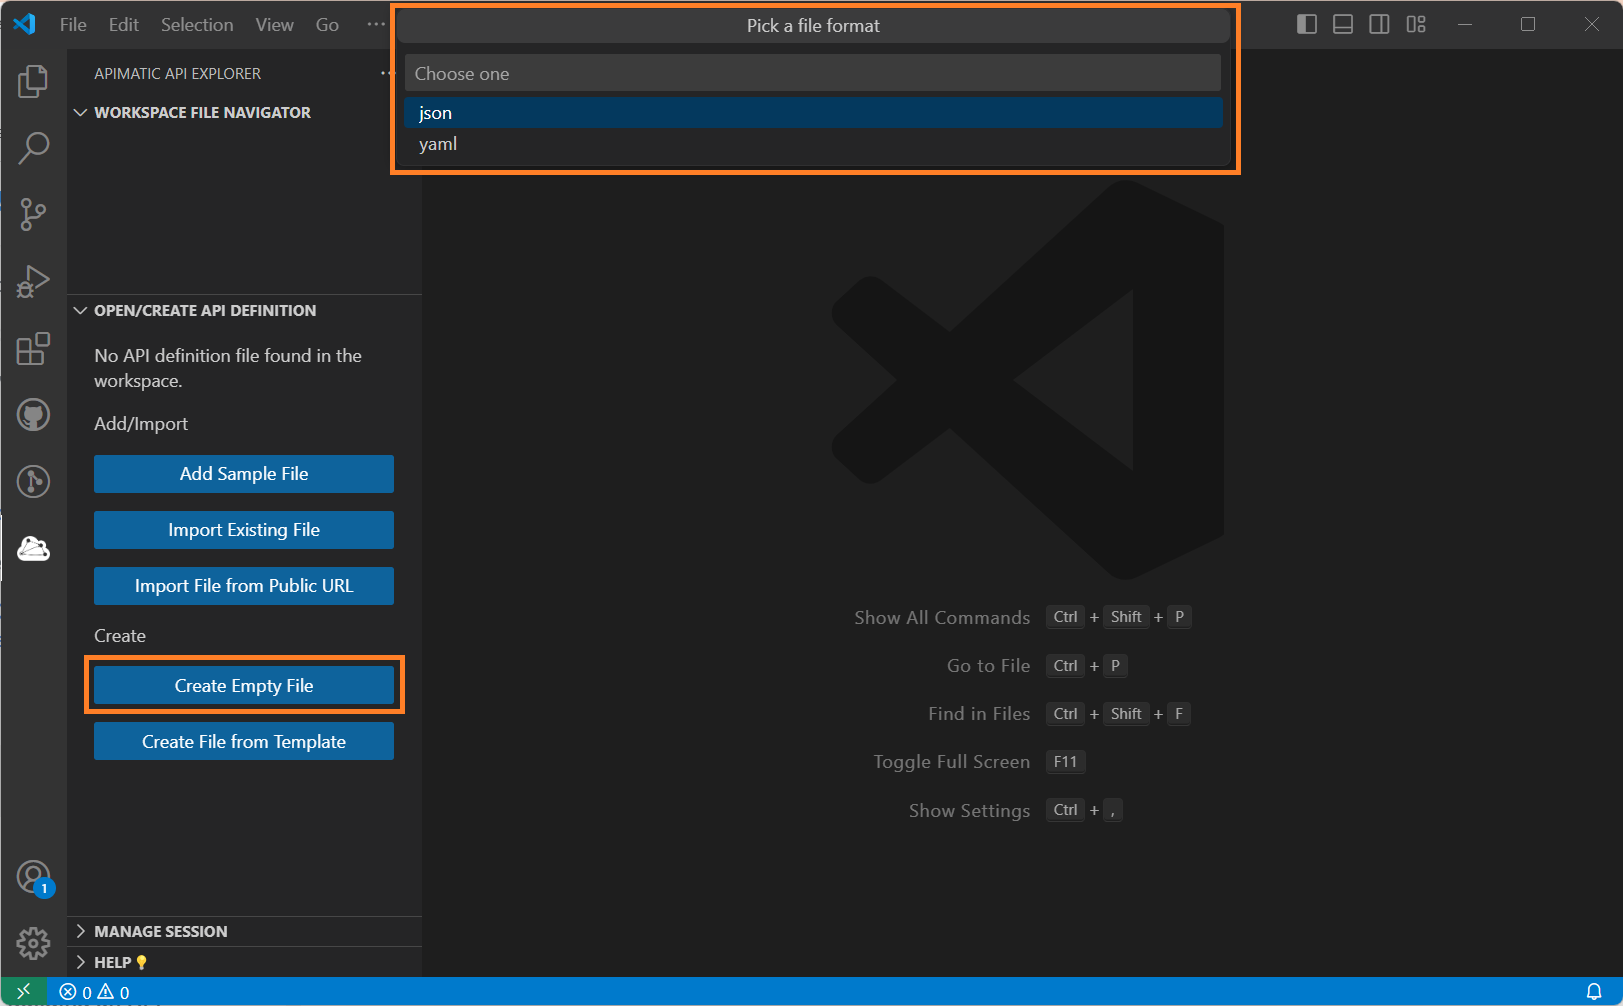
Option 1: From an Empty File
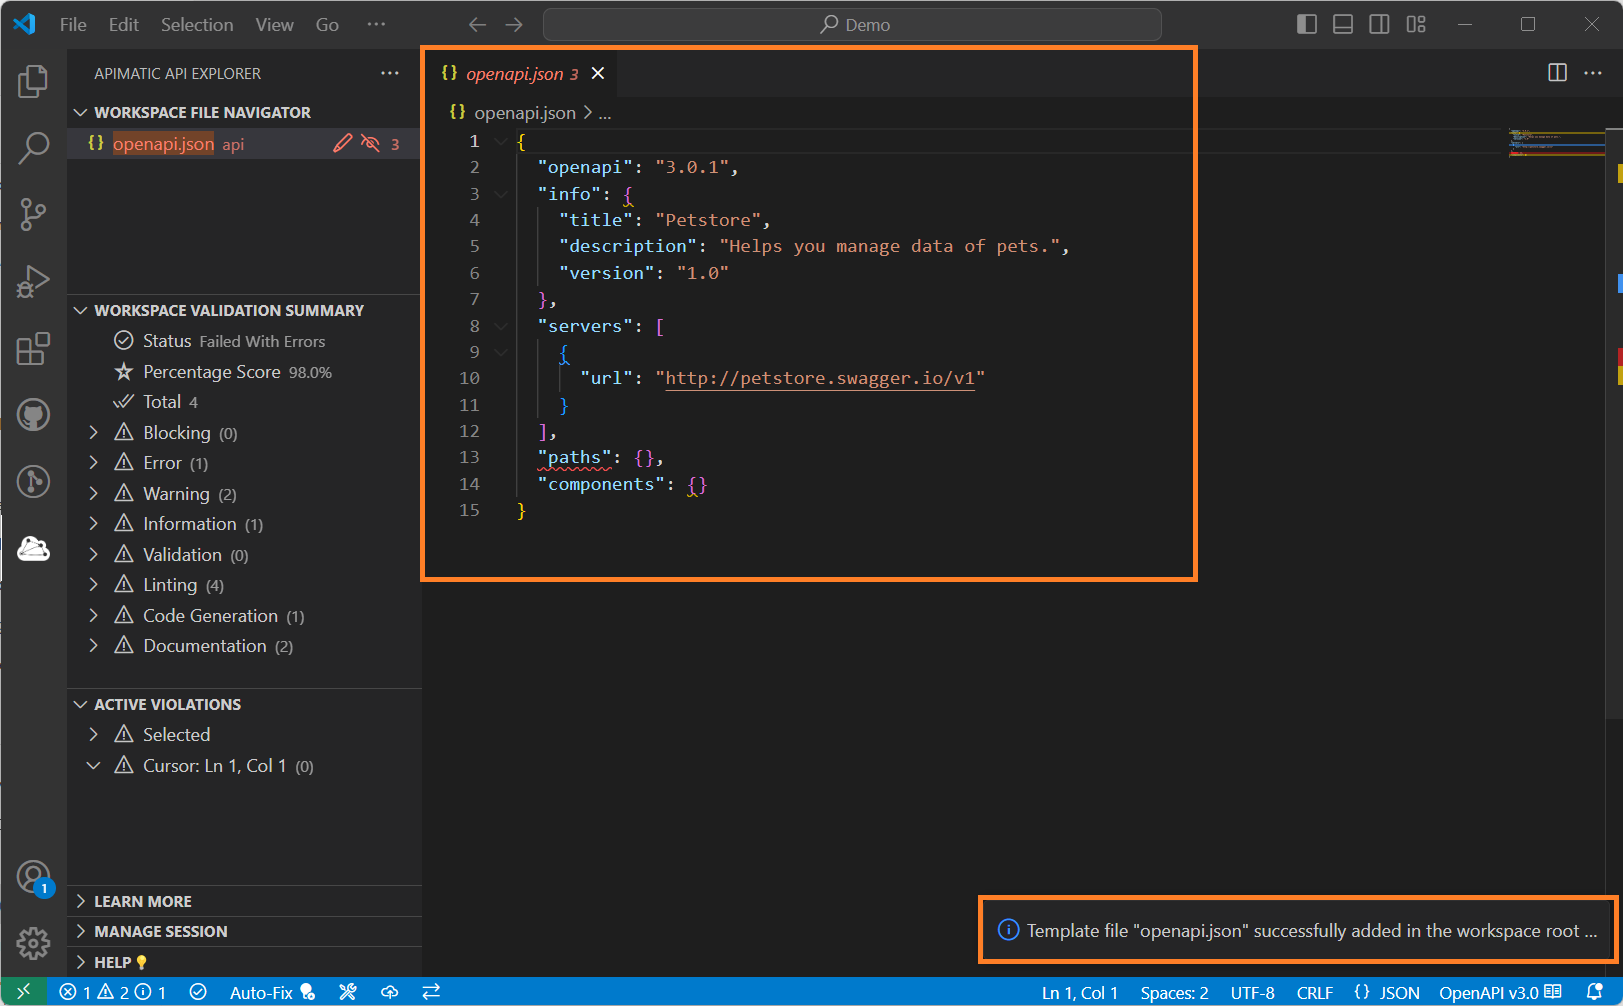
Click on Create Empty File. You will be asked to select the desired output format (json or yaml) after which a openapi.<ext> will be added in your API workspace instantly.
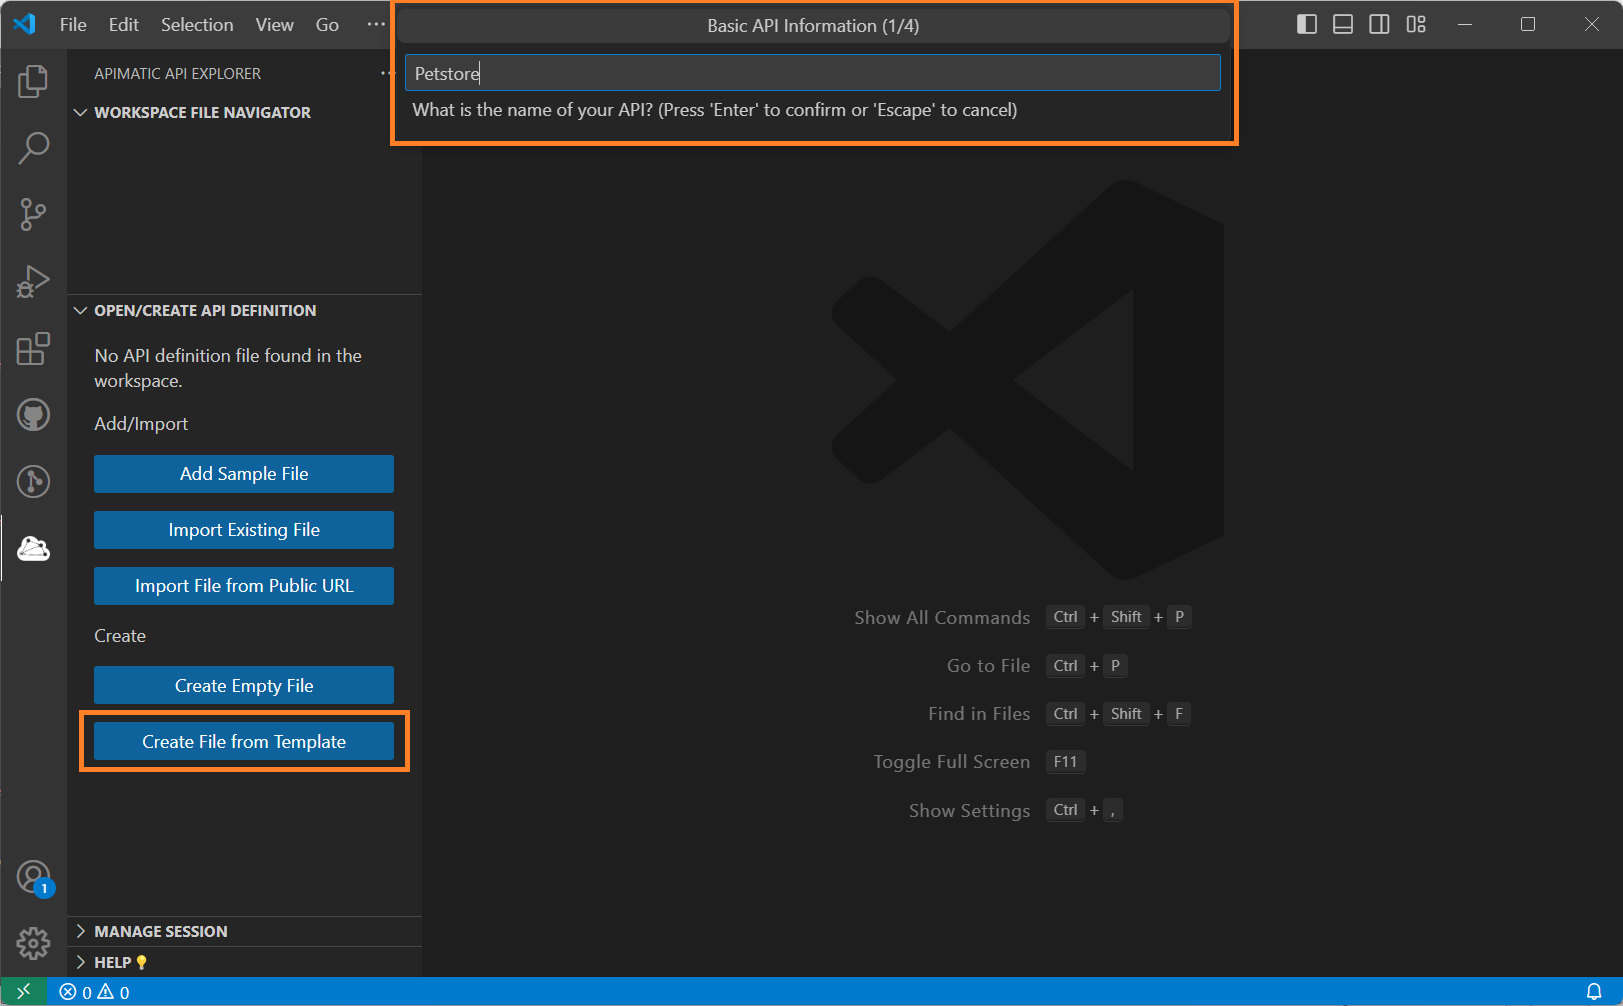
Option 2: From a Template
We can help you create a basic OpenAPI definition by collecting relevant metadata and generating an API definition accordingly. Click on the Create File from Template option to begin.
First, you will be required to enter a short meaningful name for your API service:
Next, you will be asked to briefly describe what service your API provides:

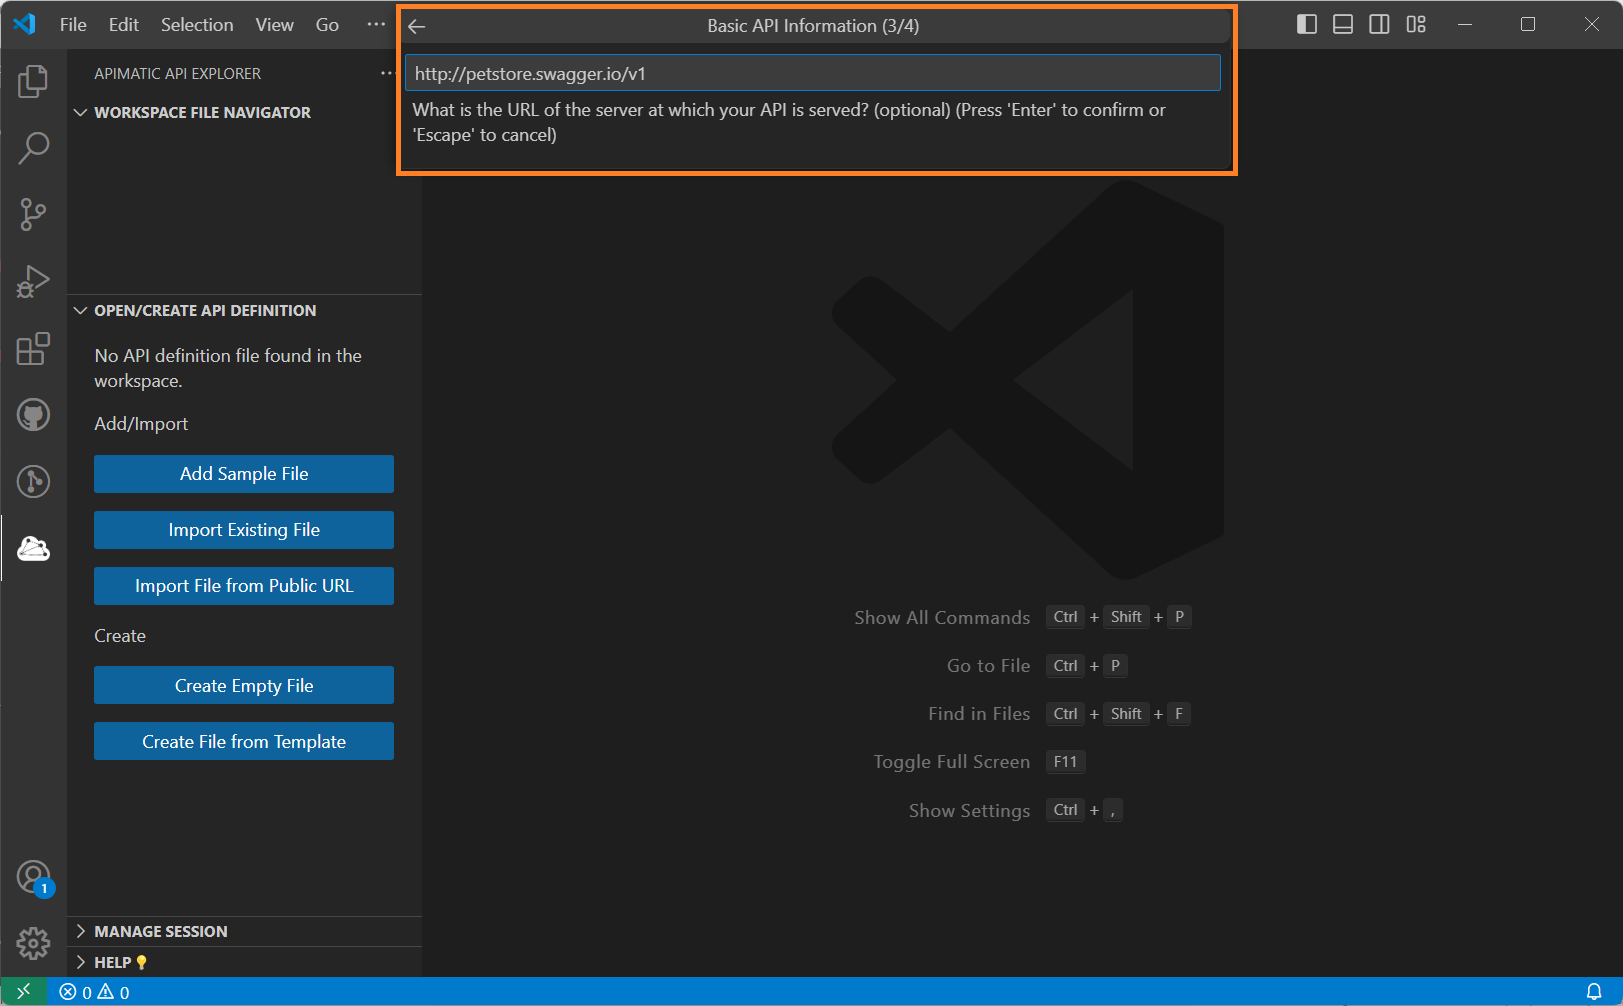
Next, enter the URL of the server at which your API is served:
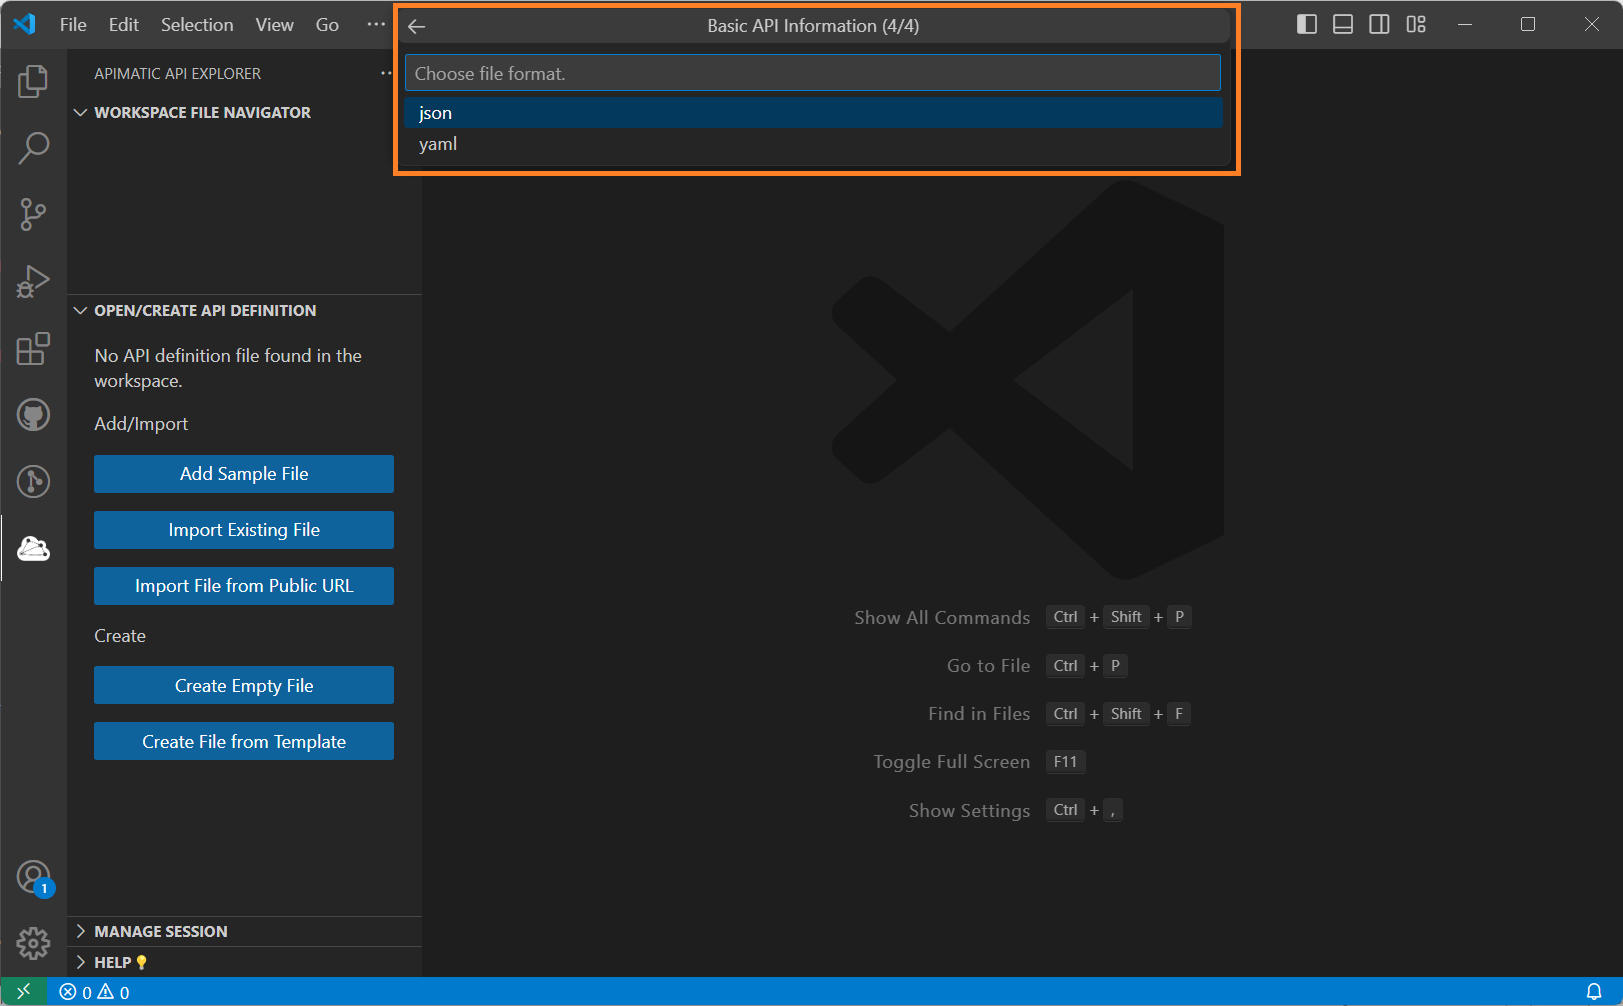
Lastly, pick an output format for your API definition file (JSON/YAML):
After the above data is collected, an API definition file will be instantly generated in your API workspace based on the collected information:
Working with an API Definition
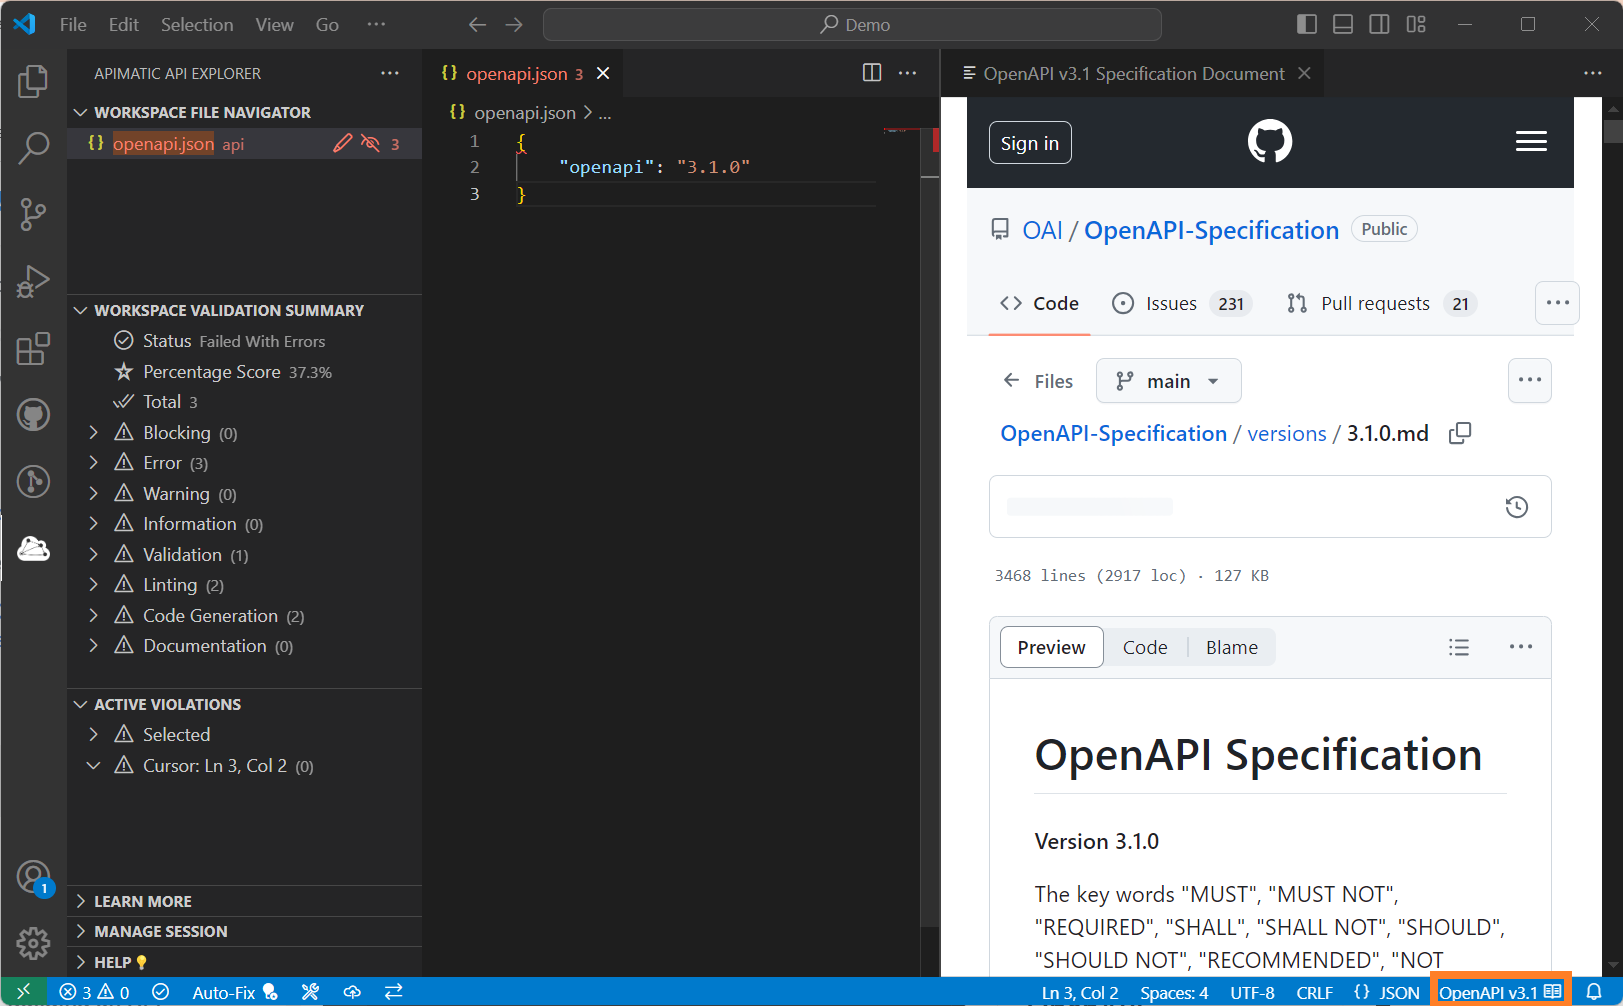
We recommend defining your API using the latest available OpenAPI specification version. If you feel the need to refer to the specification documentation at any time while working on your API definition, you can click on the API format name in the status bar at the bottom right side which will open the standard documentation within the extension in a separate tab:
Closing an API Workspace
To close a currently open API workspace in the extension (not the VS Code), you can use the Close API Workspace option from the Manage Session view:
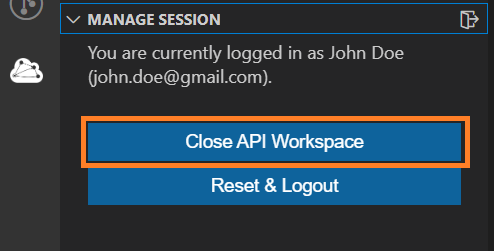
You will be asked to confirm this action before proceeding:
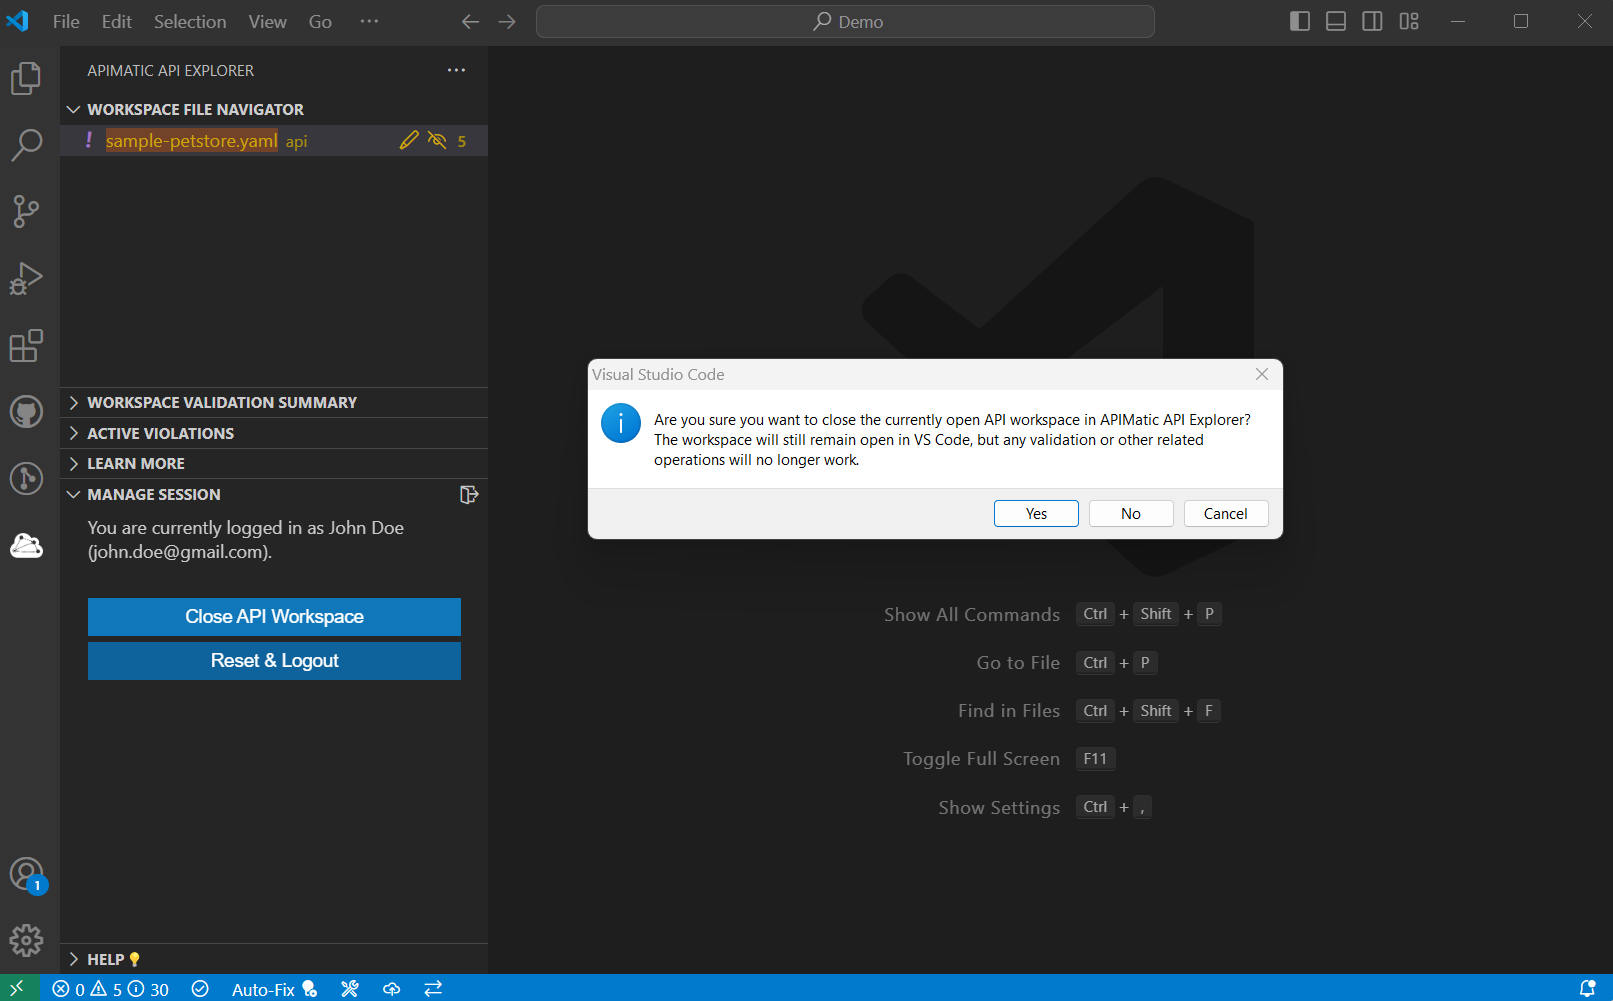
Once closed, validation and other features won't work until the workspace is re-opened/re-selected as an API workspace.
Closing the API workspace will only remove the extension's access to the workspace folder. The workspace folder will still remain open in VS Code.
Managing Large Workspaces
For optimal performance, it's recommended to keep the API workspace small and focused with only relevant files present. Ideally, the workspace shouldn't exceed 20MB in size. However, if you have a large workspace that you would like to open in your VS code, there are certain ways available to improve extension performance. Without those measures, you may encounter performance related warnings as shown below:

Here are some tips for better performance when working with large workspaces:
Manually delete any extra files or folders that aren't relevant and can be safely removed.
Exclude the files or folders that aren't directly related to the API definition itself using the Workspace File Navigator view's Exclude option:
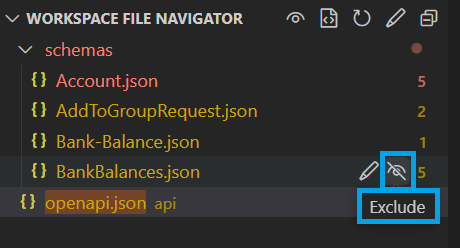
Excluded files/folders will remain in the workspace but will be safely ignored by the extension for all of its operations.
Configuring Workspace Notifications
If the extension doesn't have any API workspace open, it will still run in the background, automatically detect API definition files and show relevant notifications:
On loading a new workspace folder with one or more API definitions:
On opening an API definition file directly:
If you no longer wish to receive such notifications, you can click on the Don't Ask Again option:
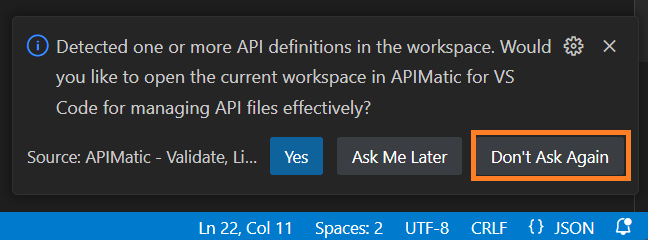
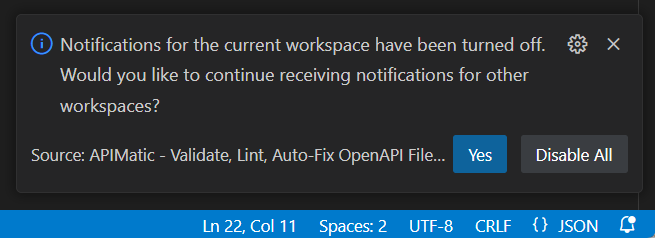
Disabling file specific notifications will disable notifications for all workspaces by default.
Disabling notifications shown for currently open workspace folder will, by default, disable notifications for that particular workspace only. You will be asked to confirm whether you wish to continue receiving notifications for other workspaces or not:
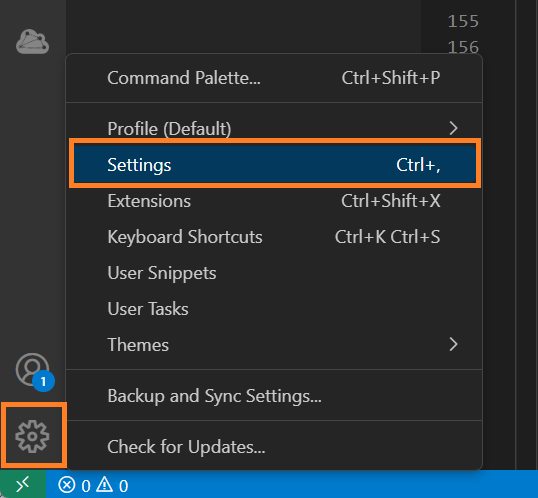
Once your notification preferences have been updated, you can change them at any time from the extension settings. To do this, navigate to the VS Code Settings (click on the gear icon at the bottom left side of the Activity Bar):
Next, navigate to the APIMatic settings from the Extensions side-menu:
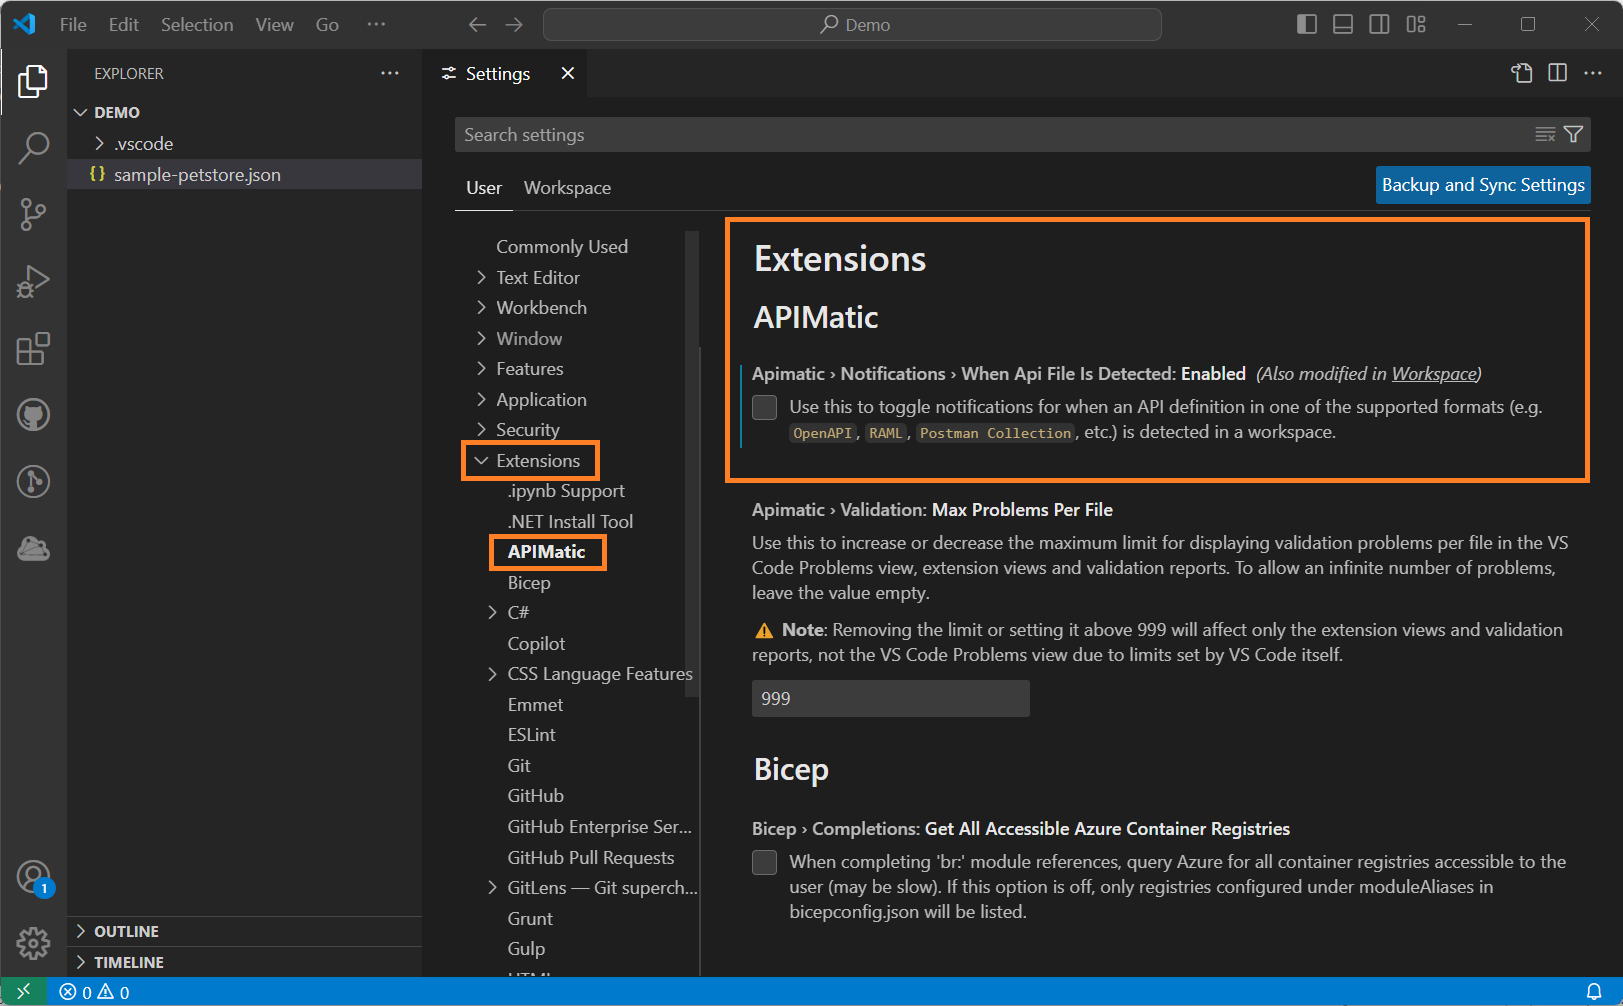
Here you can toggle notifications for the When API File is Detected setting either for a specific workspace or globally for all workspaces in the User tab, as per your preferences.