Validating an API Workspace
Once your API workspace is set up along with an API definition, you can start validating it. The extension offers multiple dedicated views to help you get the information you need as efficiently as possible.
The documentation covers the following topics:
- Triggering the Validation
- Validation Messages in the Problems View
- Validation Messages in the Active File Editor
- Obtaining a Workspace Validation Summary
- Finding Additional Information for a Validation Issue
- Configuring Validation
- Adding Your Own Linting Rules
- Merge-Aware Validation
- Configuring Maximum Validation Messages Limit
Triggering the Validation
The validation process triggers automatically with the following events:
- When the API workspace is loaded at startup.
- When a new API workspace is loaded after the workspace folder changes.
- When a user saves a file present in the API workspace.
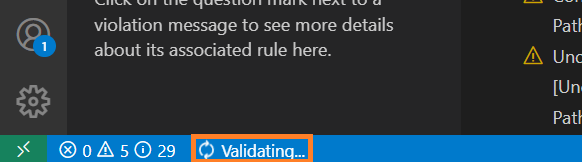
In case of any trouble, the validation can also be manually triggered using the status bar button. Note, however, that the validation only works on saved files and any unsaved changes aren't considered:
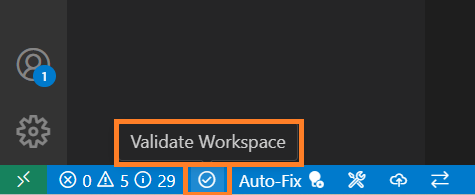
For validation triggering to work as expected, it's important that your API workspace contains a main entry file in one of the supported specification formats with all relevant identification metadata available, for example, OpenAPI v3.1 files must contain a root level openapi property with value set as 3.1.0. The extension automatically detects the main entry file based on this identification metadata, highlights its name and labels the detected file with a small api keyword next to the file name in the Workspace File Navigator view:
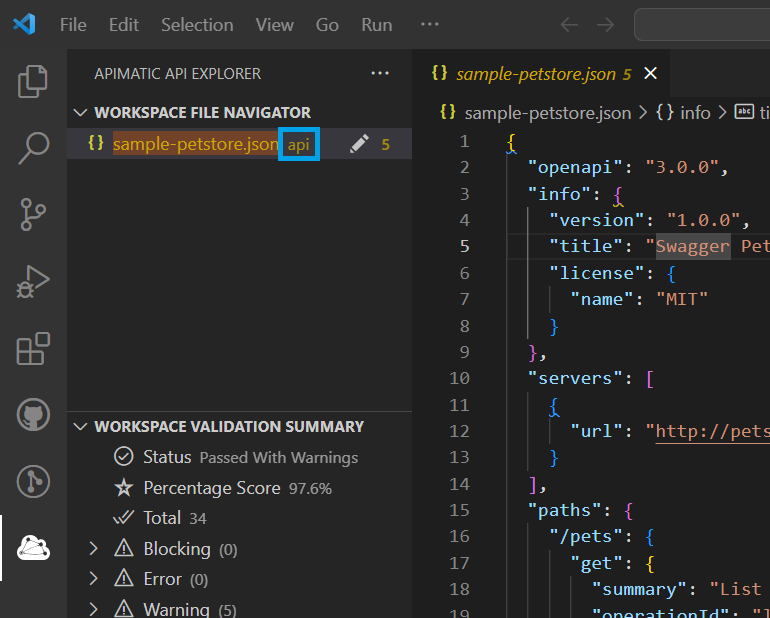
If you don't see this label in front of any of your files, and your workspace contains multiple directories it's possible that your file is hidden from view. To reveal the main file in such cases, you can use the reveal feature. Hover near the Workspace File Navigator view title and click on the Reveal All Main API Files option:
This will expand all directories and highlight any files labelled as api .
If you are still unable to find a file with the api label, it's likely that your main entry file lacks the identification data we require. Please see our troubleshooting tips to resolve such issues.
Once the main file is detected, you should see the validation process being triggered as expected. The validation process will run in the background. While the validation is running, you should see a Validating... message in the status bar:
Validation Messages in the Problems View
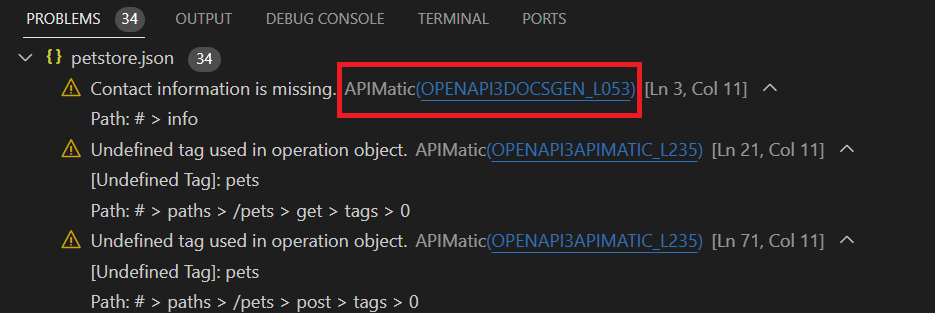
Once the validation completes, you should see one or more validation logs in the VS Code Problems view if any issue is found in your API definition:
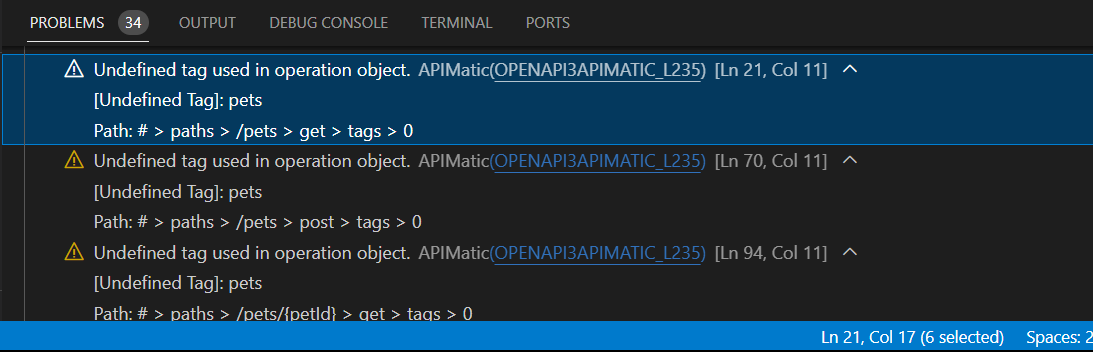
The validation log will be shown with the appropriate severity level and contain the source name (APIMatic), issue message, line/path information as well as any contextual data related to the issue in the form of key-value pairs, for example, in the above screenshot the name of the unused tag is shown in a key-value form with key set as Undefined Tag. The validation message will also list the issue code (OPENAPI3APIMATIC_L235) which can be used to view more details about it in the Learn More view.
Validation Messages in the Active File Editor
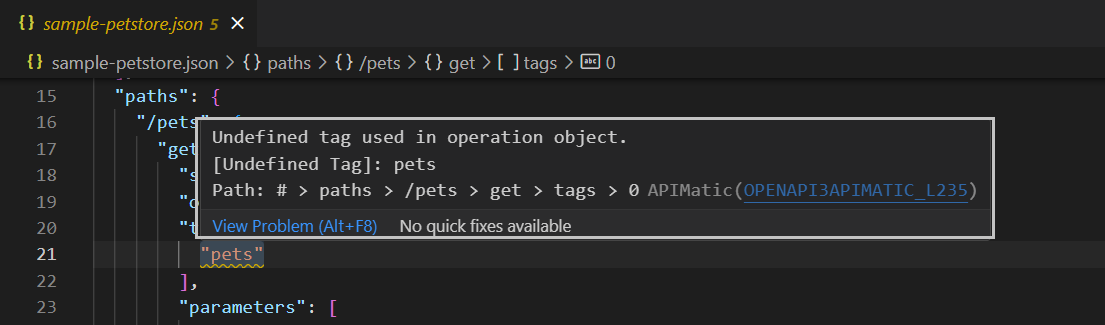
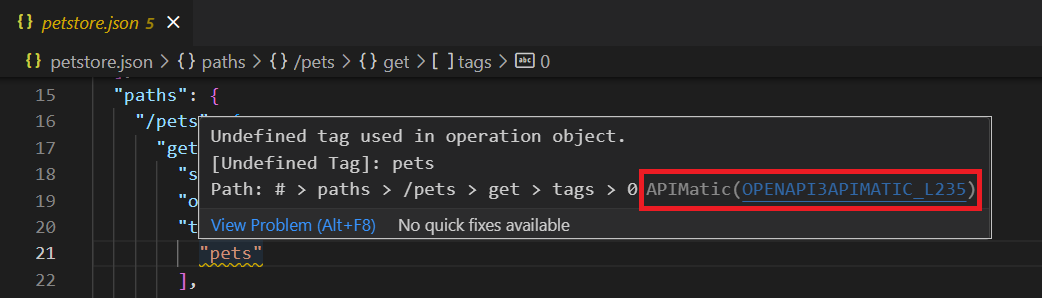
If you currently have a workspace file open in the Editor with validation issues, those issues will be highlighted in the editor at a specific line and position with appropriate squiggles based on severity of messages. Hovering over a squiggly will provide you further information about the issue, for example, the source (APIMatic), issue message, line/path information as well as any contextual data related to the issue in the form of key-value pairs, for example, in the screenshot below the name of the unused tag is shown in a key-value form with key set as Undefined Tag. The hover message will also list the issue code (OPENAPI3APIMATIC_L235) which can be used to view more details about it in the Learn More view.
In some cases, the hover message may also show information about components referencing the current component using $ref:
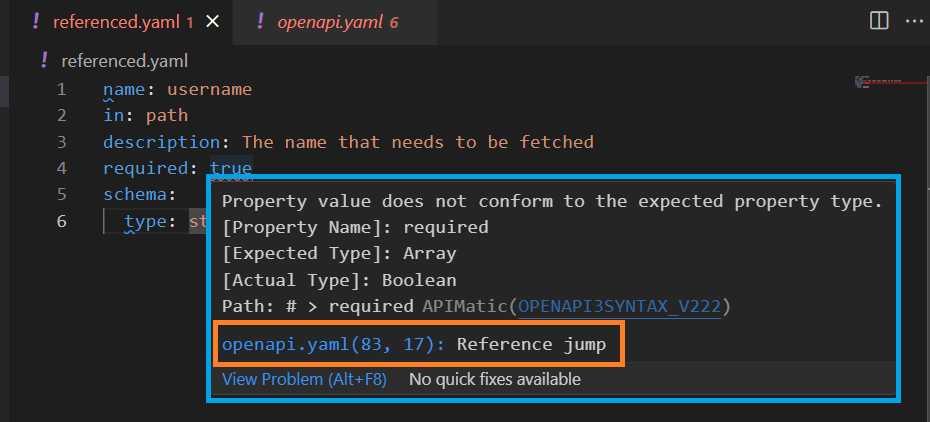
For more details about this feature, please see related documentation here.
Issues at Cursor Position
The amount of information that can be provided for an issue in the hover message is limited. Therefore, the dedicated view named Active Violations can be used to view complete set of issues/violations and their details, based on where your current cursor position is in the active editor.
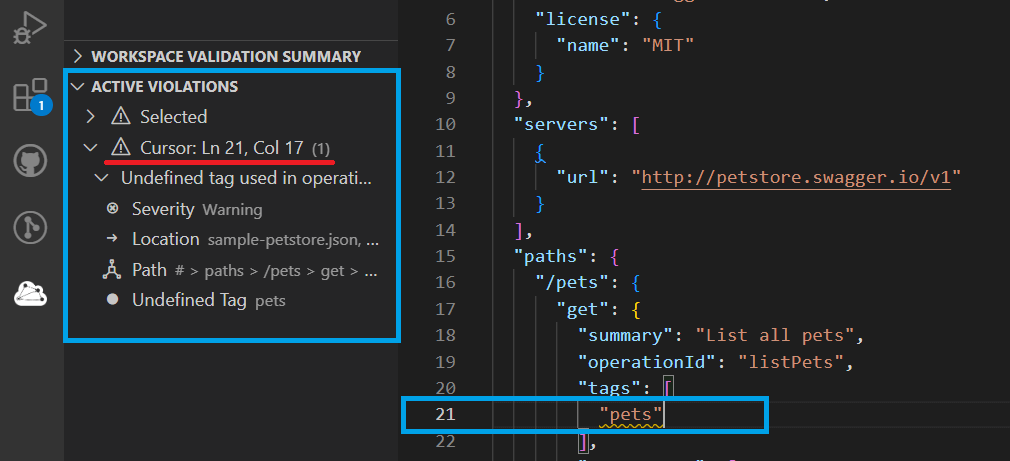
The details of a particular violation can include the following:
- Message associated with the issue.
- Severity of the issue.
- Key-value pairs contextual data (if any) associated with the issue.
- Location, for example, line/path information for the issue.
- Reference call tree to help trace origin of issue when the current component containing the issue is referenced by one or more components.
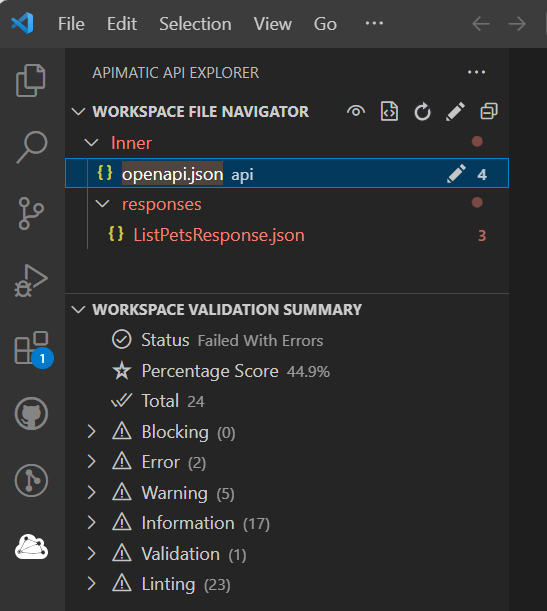
Obtaining a Workspace Validation Summary
To get an overall summary of all validation issues found in the complete API workspace, you can use the dedicated Workspace Validation Summary view. This view offers intelligent grouping of the issues to help you tackle problems efficiently as well as gives you an overall score of your workspace which can help roughly predict the quality of output you can hope to get in any API tool (including APIMatic) with your current API definition:
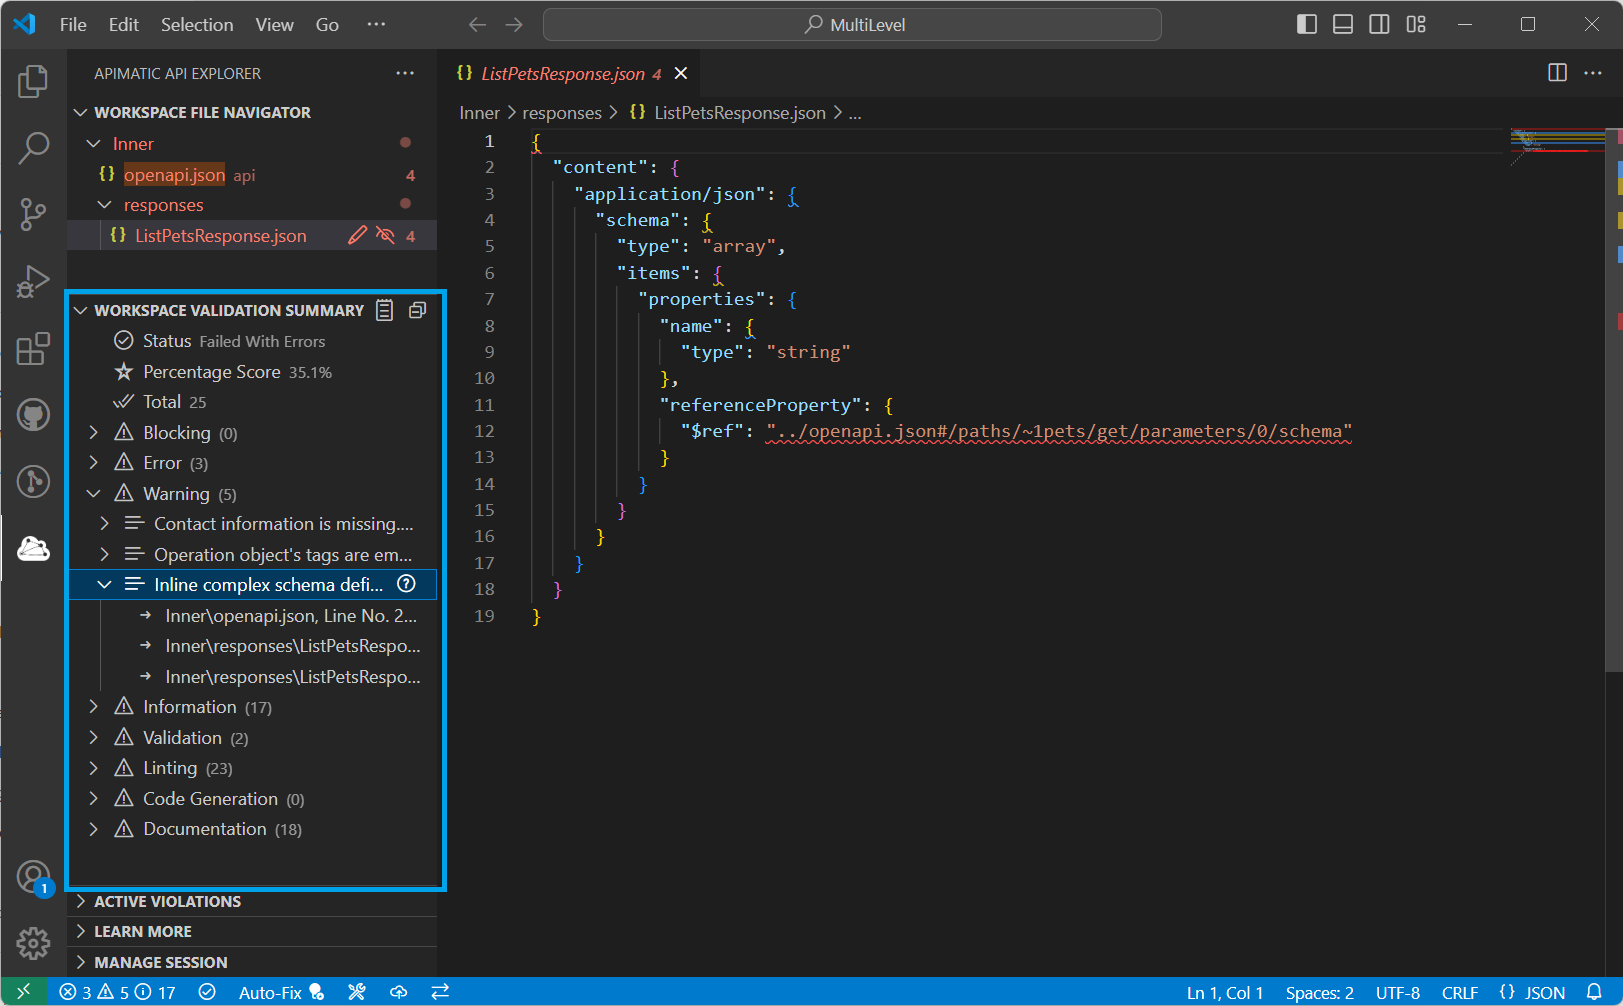
As can be seen in the screenshot, the issues in this view are grouped into various meaningful categories based on their severity, whether they're validation or linting messages or whether they affect code generation or documentation generation. Within these groups, the issue instances are further grouped on the basis of the issue message. Therefore, you can easily select a particular issue based on its severity and then be able to navigate through all of its instances across the whole workspace as well. Similarly, if you want to resolve validation issues before moving on to linting issues, you can do that easily as well.
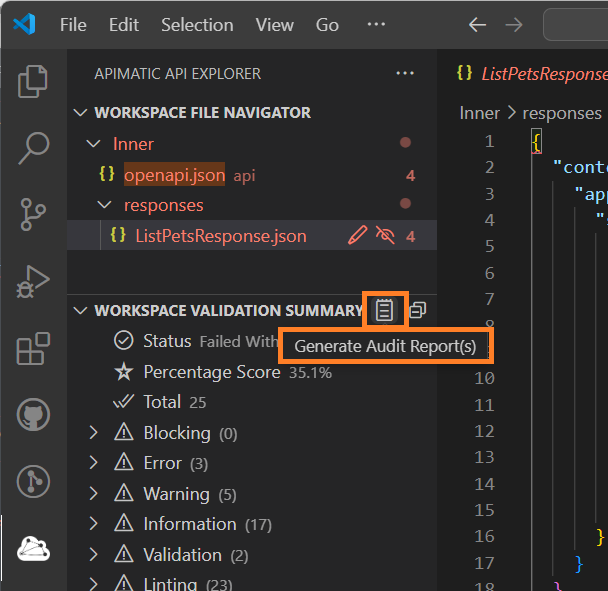
Generating Validation Reports
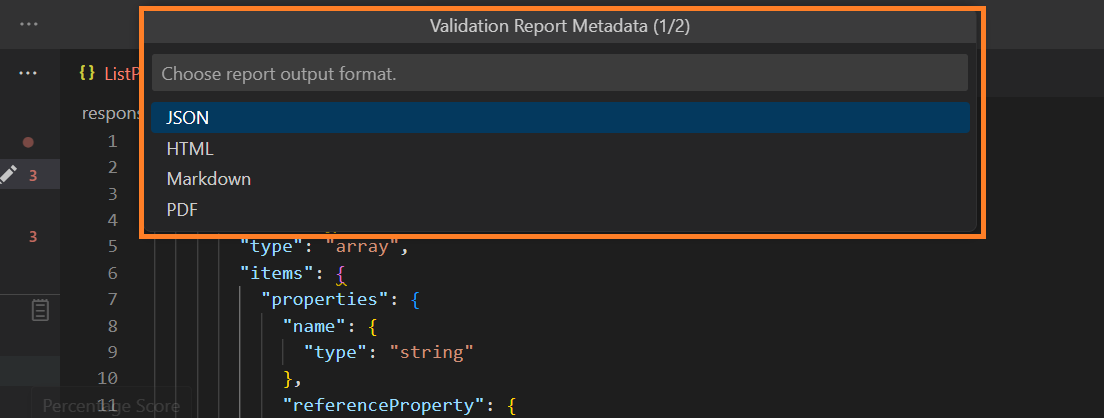
If you wish to share the validation summary of your API definition with external stakeholders, we recommend that you generate a validation report in one of the supported formats. Hover near the Workspace Validation Summary view title and you should see a Generate Audit Report(s) button near the top right corner. Click on it:
Select the desired output format of the report (JSON/HTML/Markdown/PDF):
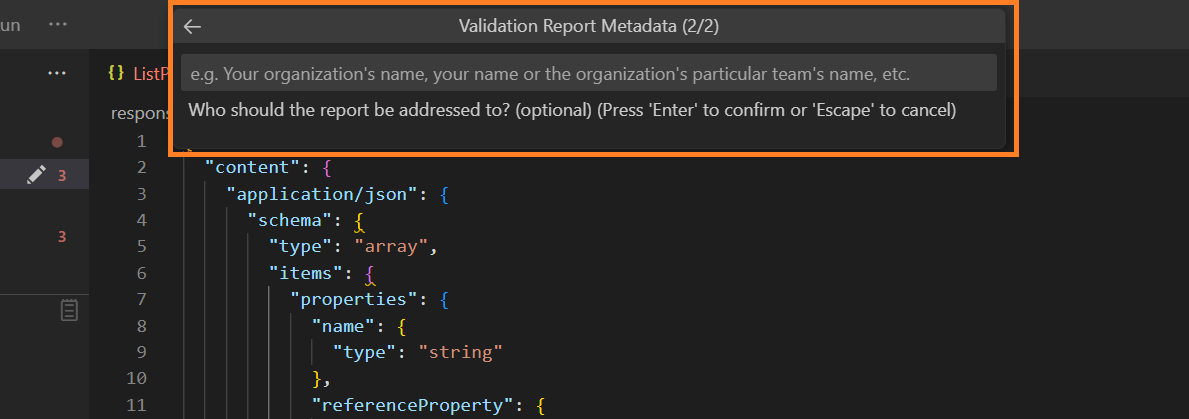
Next, you can optionally provide the name of the individual or organization to whom you intend to address the report:
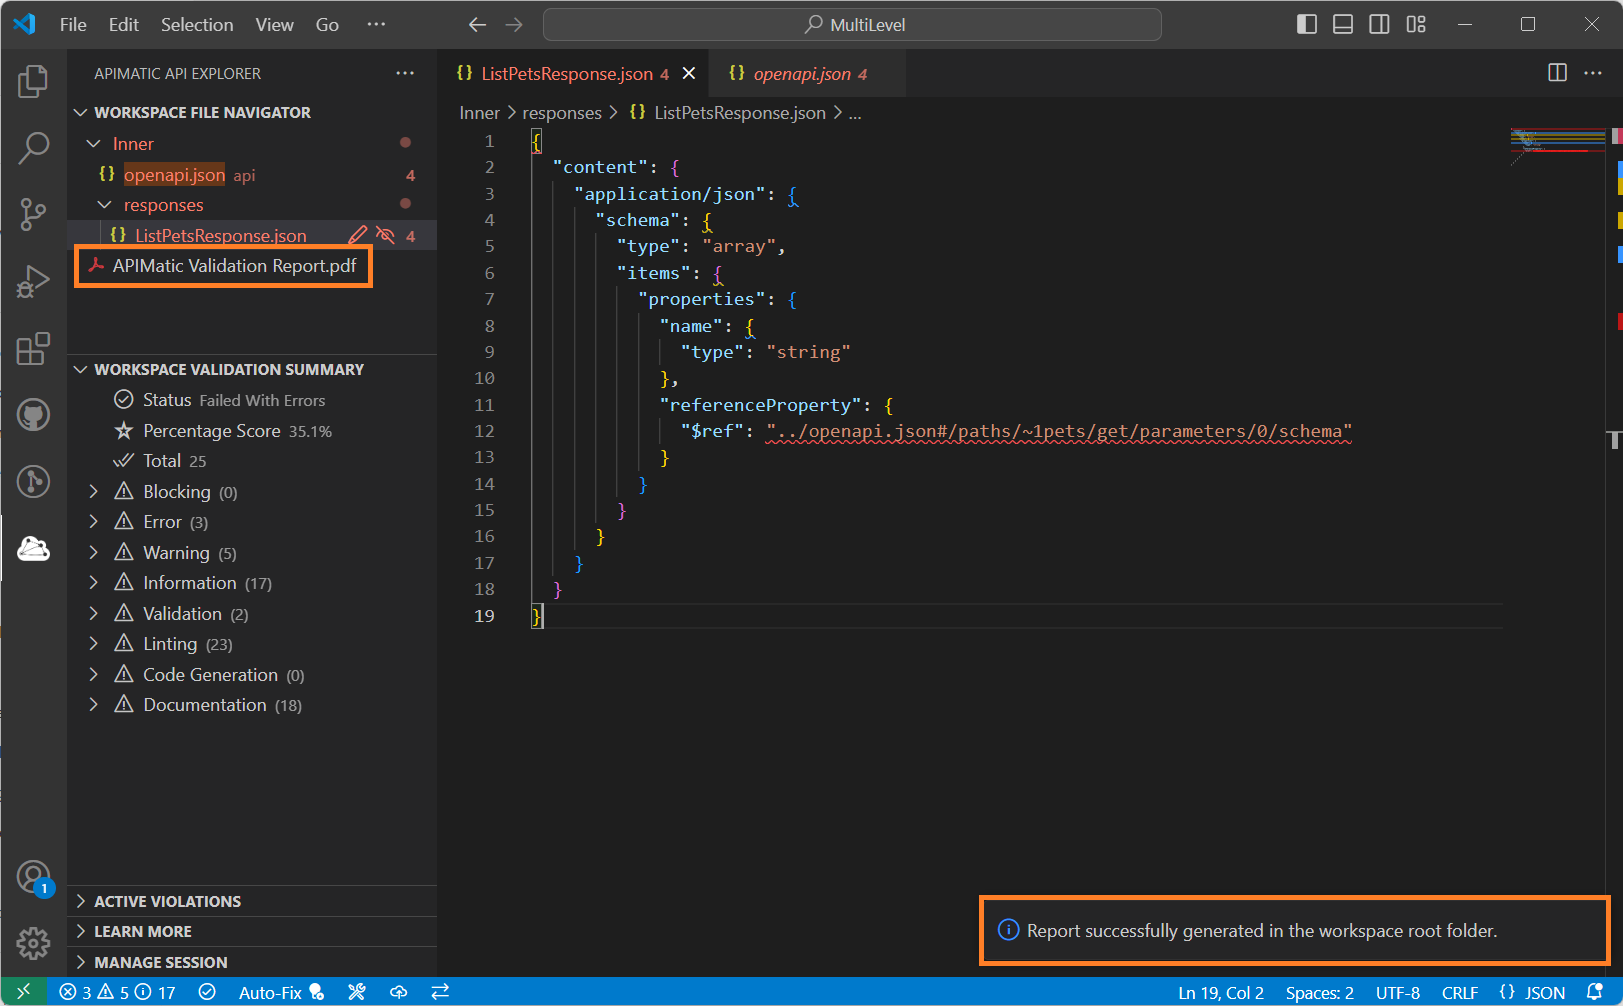
Once the information collection is completed, the generated report will be downloaded into the root folder of your API workspace:
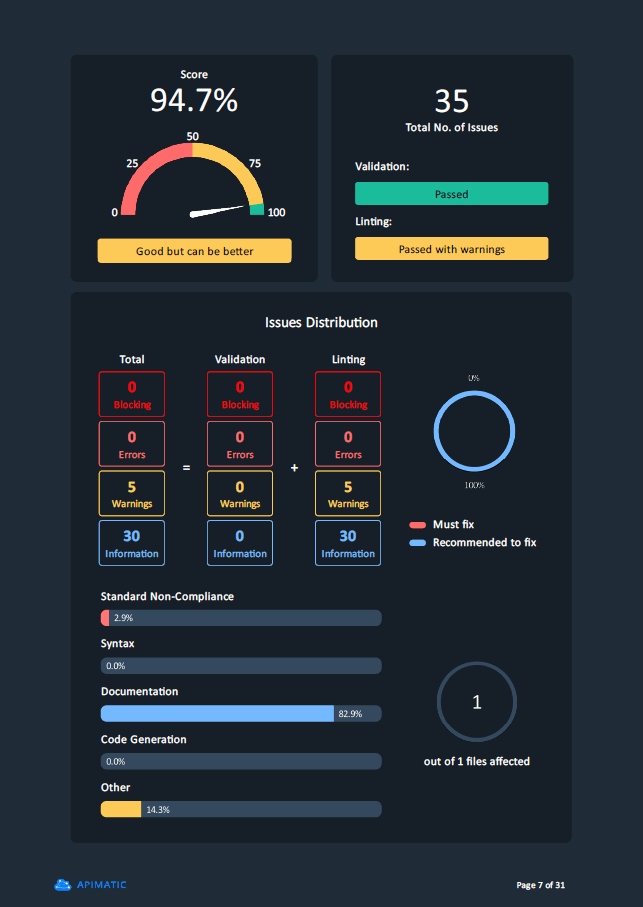
Here is a preview of a sample report generated with this option:
Note, that if multiple APIs are involved in the workspace or the workspace has also been built for APIMatic using the Build option, multiple reports may be generated in the form of a ZIP file.
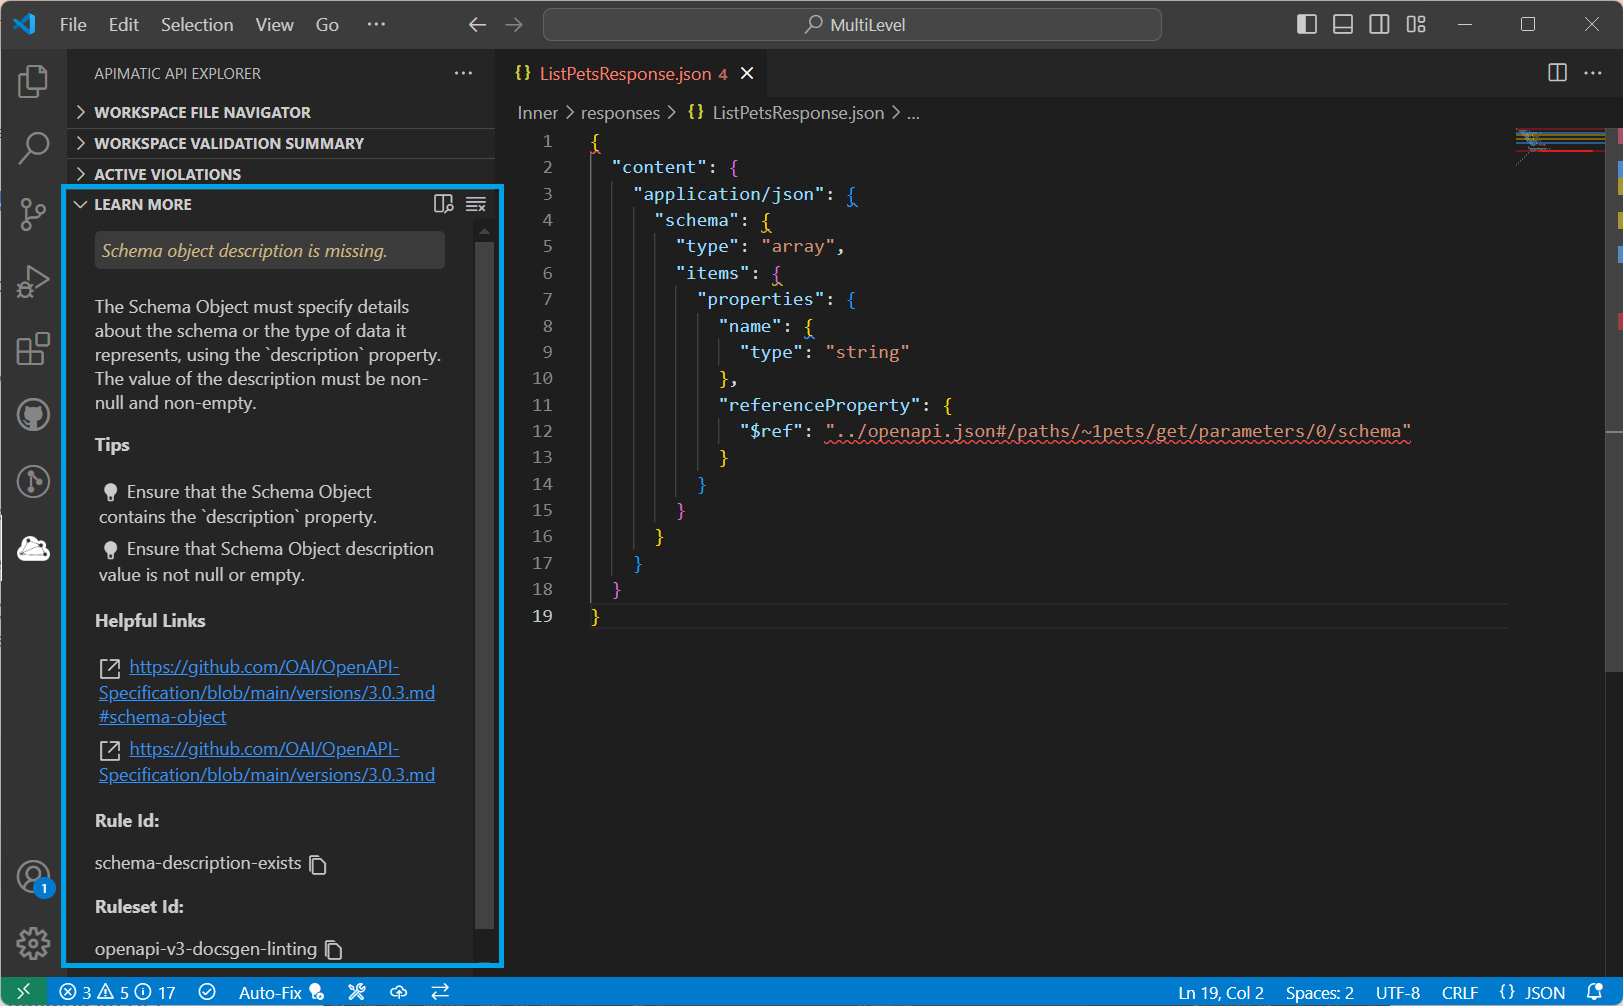
Finding Additional Information for a Validation Issue
There are several alternative ways available to access more details for a validation issue, for example, hints, external documentation, and links. These include:
Click on
(?)next to an issue message in either the Active Violations or Workspace Validation Summary views:
OR click on the message code in the Problems view:
OR hover over a problem in the Editor and click on the message code:
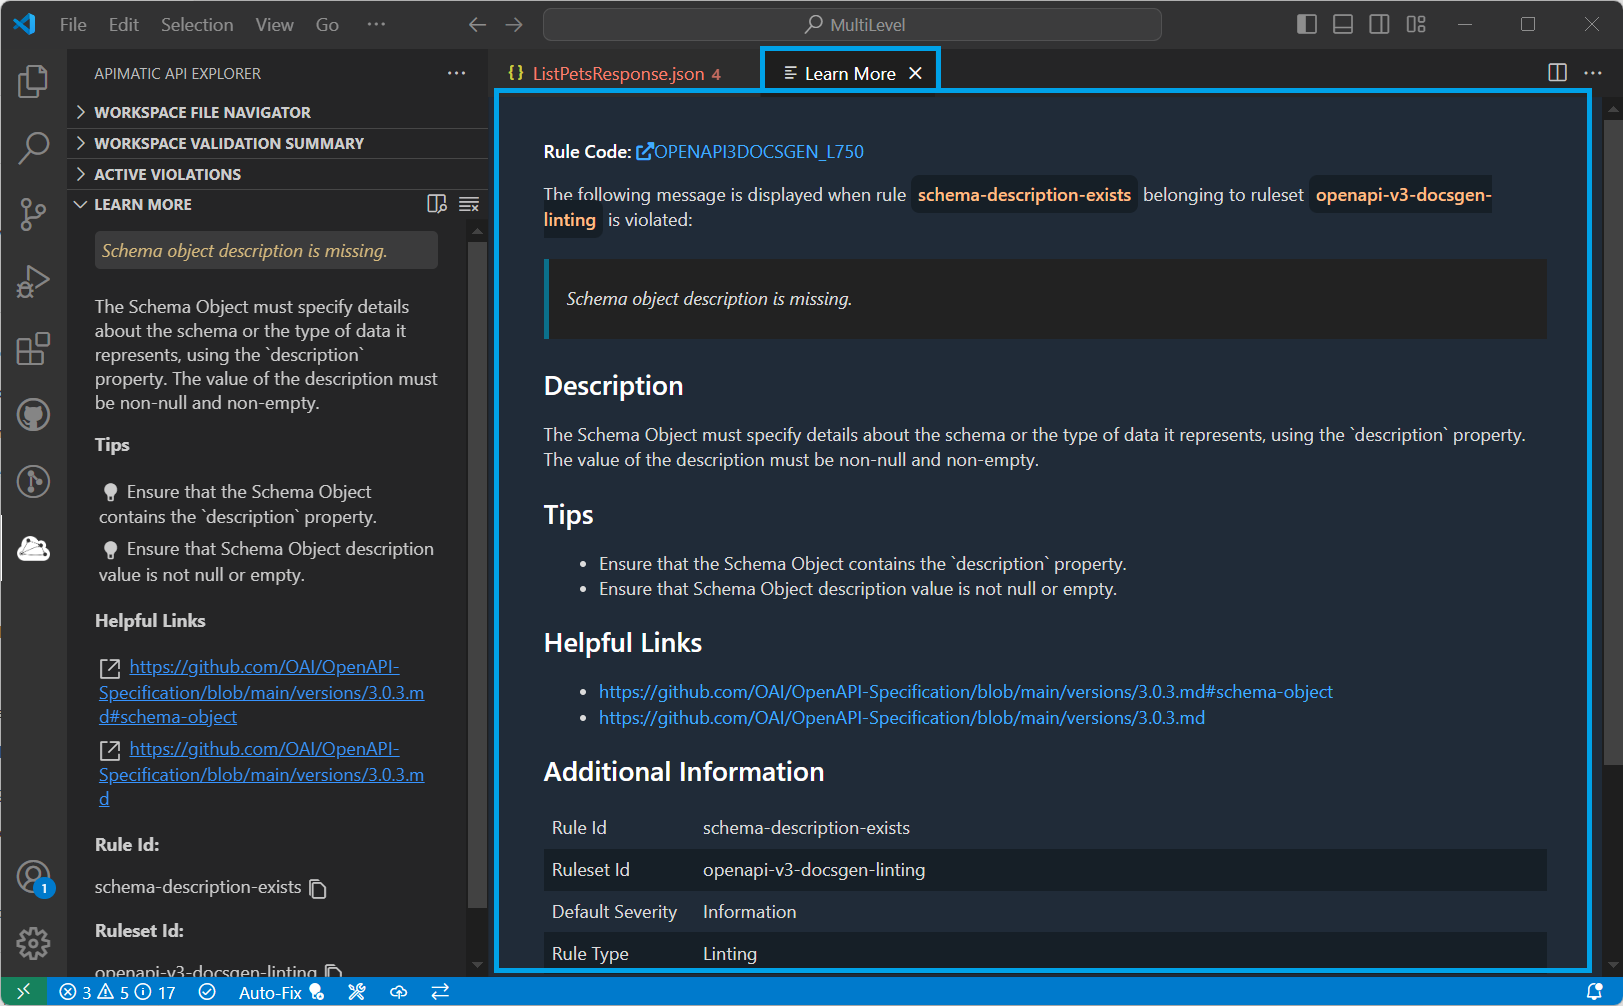
Doing any of the above actions will open up the Learn More view with all relevant details associated with the issue:
This view can be expanded further to explore details more easily:
Configuring Validation
You can configure the validation and linting process by providing a validation configuration object in the APIMatic's Metadata file. The extension allows you to easily add a Metadata file with a default validation configuration as follows:
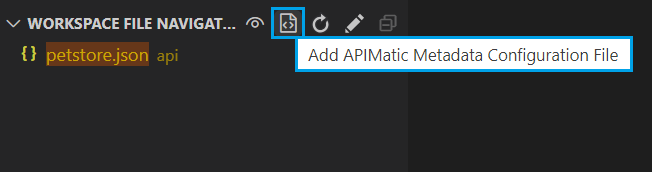
Hover near the Workspace File Navigator view title and click on the Add APIMatic Metadata Configuration File option:
You will be asked to select all items you'd like to initialize in the APIMatic Metadata file. For the current example, we will only select
Validationfrom the list: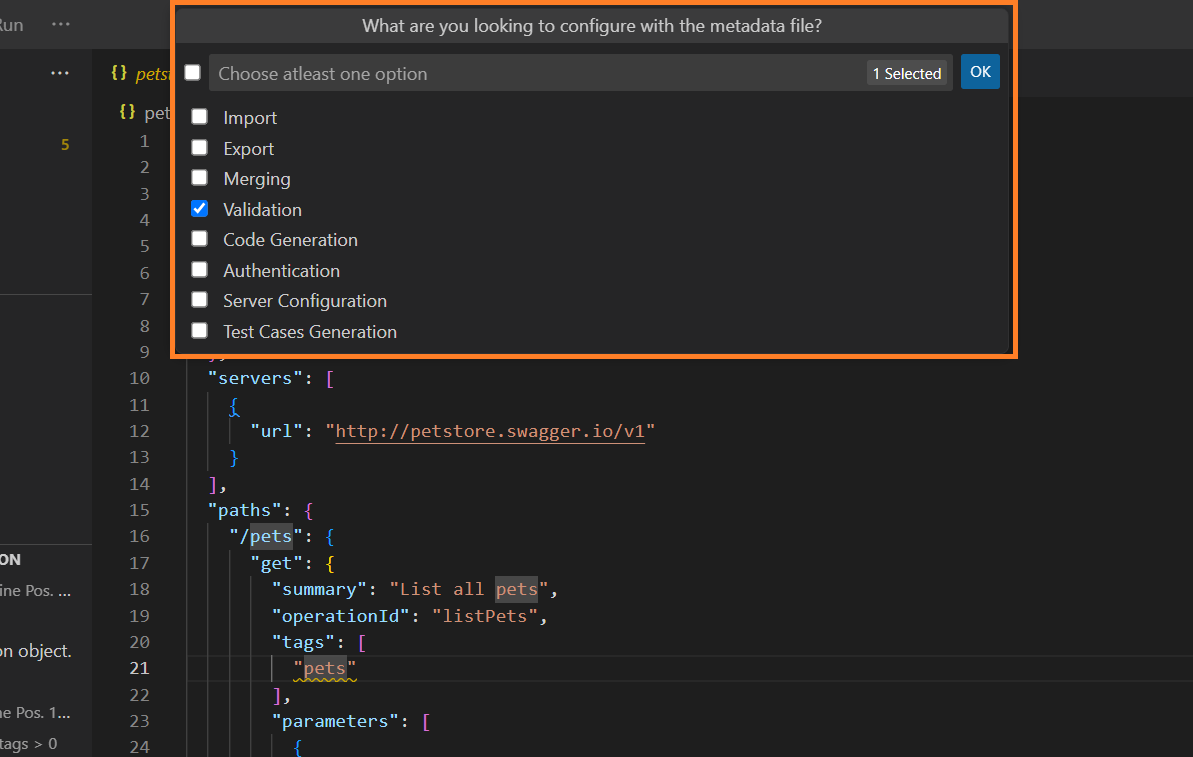
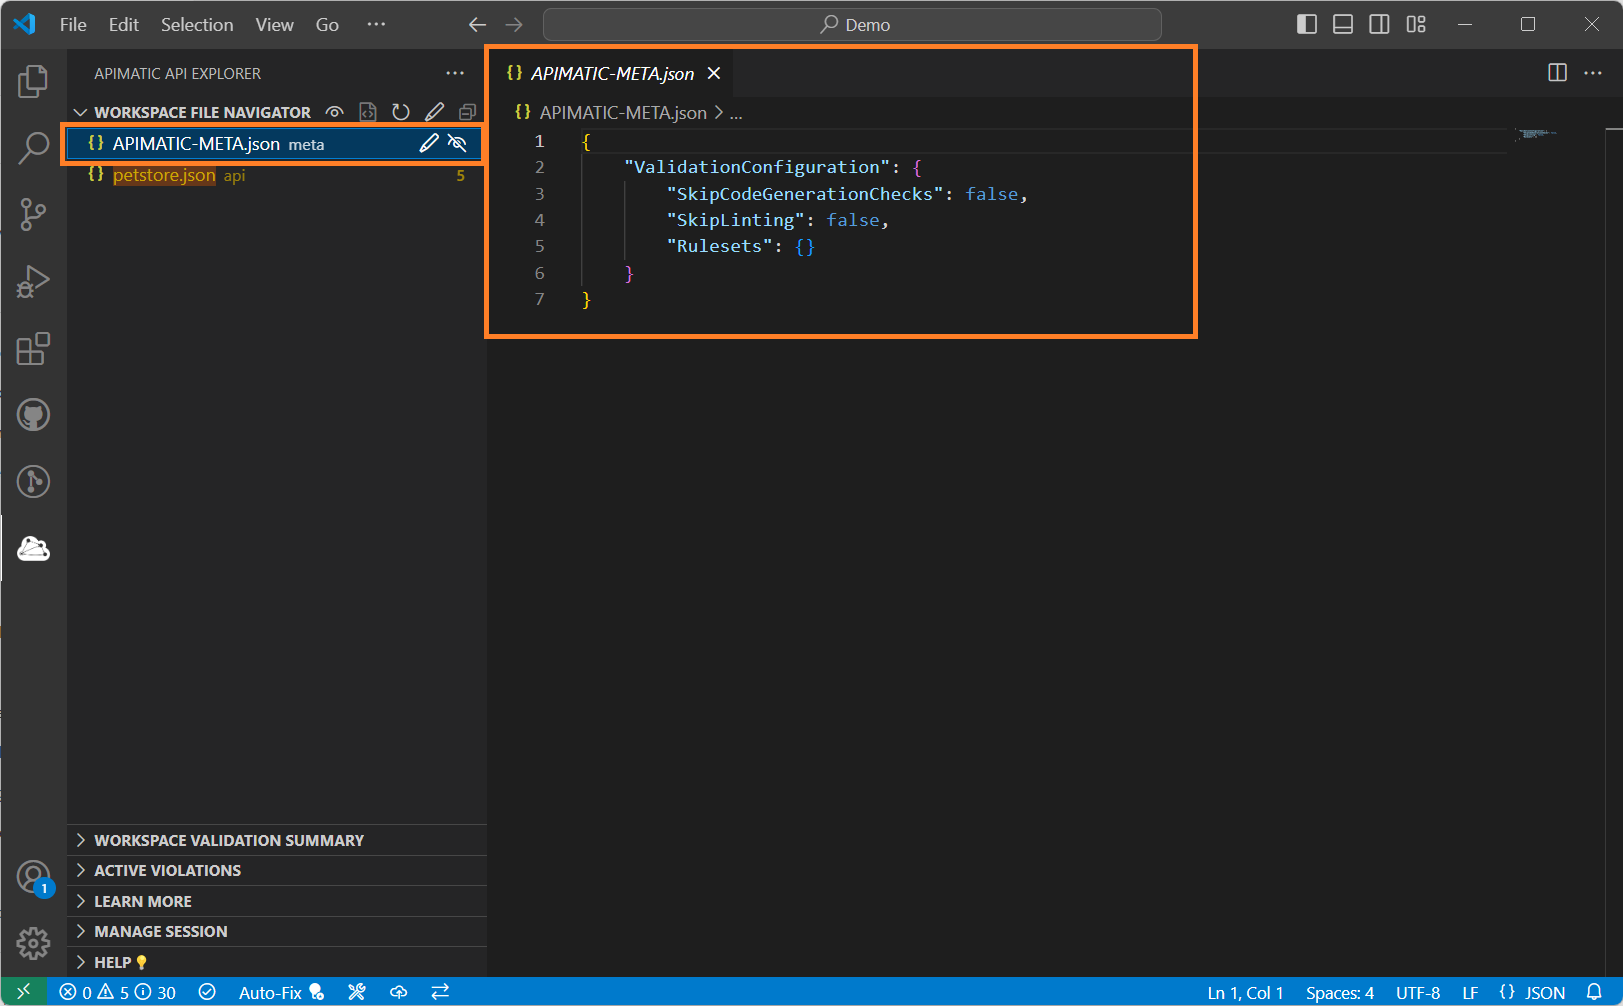
After proceeding, an APIMatic Metadata file will be successfully added in your workspace with a default validation configuration as shown below:
Please see our detailed documentation to learn more about configuring validation. While configuring, you may find it useful to refer with the Learn More view to obtain more details about the rule/ruleset you are looking to configure, for example, you can obtain the ids of the rule/ruleset as described here.
Adding Your Own Linting Rules
The extension supports validation against any custom lint rules defined by the user. See our detailed documentation to learn more about adding your own rules.
Merge-Aware Validation
APIMatic supports merging of multiple API definitions. To ensure a successful merge, it's required that:
- Each API definition involved in the workspace is valid, that is, it has no validation errors.
- Each API definition, when built for APIMatic using the Build option, results in a successful build.
- Each API definition when merged with another, results in a valid API definition which has no validation errors and also passes the build process.
The VS code extension lets you perform all of the above forms of validation layers on your APIs to be merged such that all views associated with validation, that were discussed earlier, are populated with data of all the APIs involved.
For better performance and ease of understanding, we recommend that you validate and build a single API definition at one time. This can be done by opening the API workspace folder containing only the specific API definition's files. Once you have ensured that all API's are valid this way, you can open the root workspace folder as your API workspace which contains the directories of all of your API definitions as well as the base APIMatic Metadata file responsible for initiating the merge process. Build this folder to ensure that all merge related checks pass for all your API definitions. If build passes, you should be able to easily export your workspace to APIMatic Dashboard for SDK/portal generation.
Configuring Maximum Validation Messages Limit
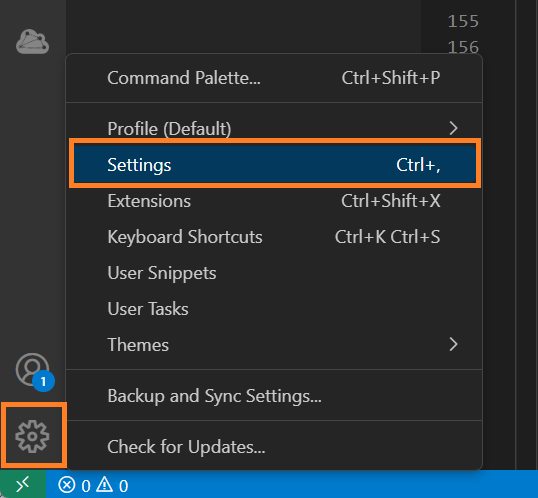
VS Code limits the maximum no. of validation messages per file to approximately 1000. To respect that and prevent any disconnect between the extension validation information and one shown on the Editor and Problems views, we've also limited the maximum no. of validation messages per file to be 999 by default. However, for bigger API definition files it's often common to see larger no. of issues in a single file. In such cases, if a user wishes to see the complete list of validation issues in the extension as well as generate full validation reports, they can change the maximum limit as per their needs or remove it entirely, from the extension settings. To do this, navigate to the VS Code Settings (click on the gear icon at the bottom left side of the Activity Bar):
Next, navigate to the APIMatic settings from the Extensions side-menu:
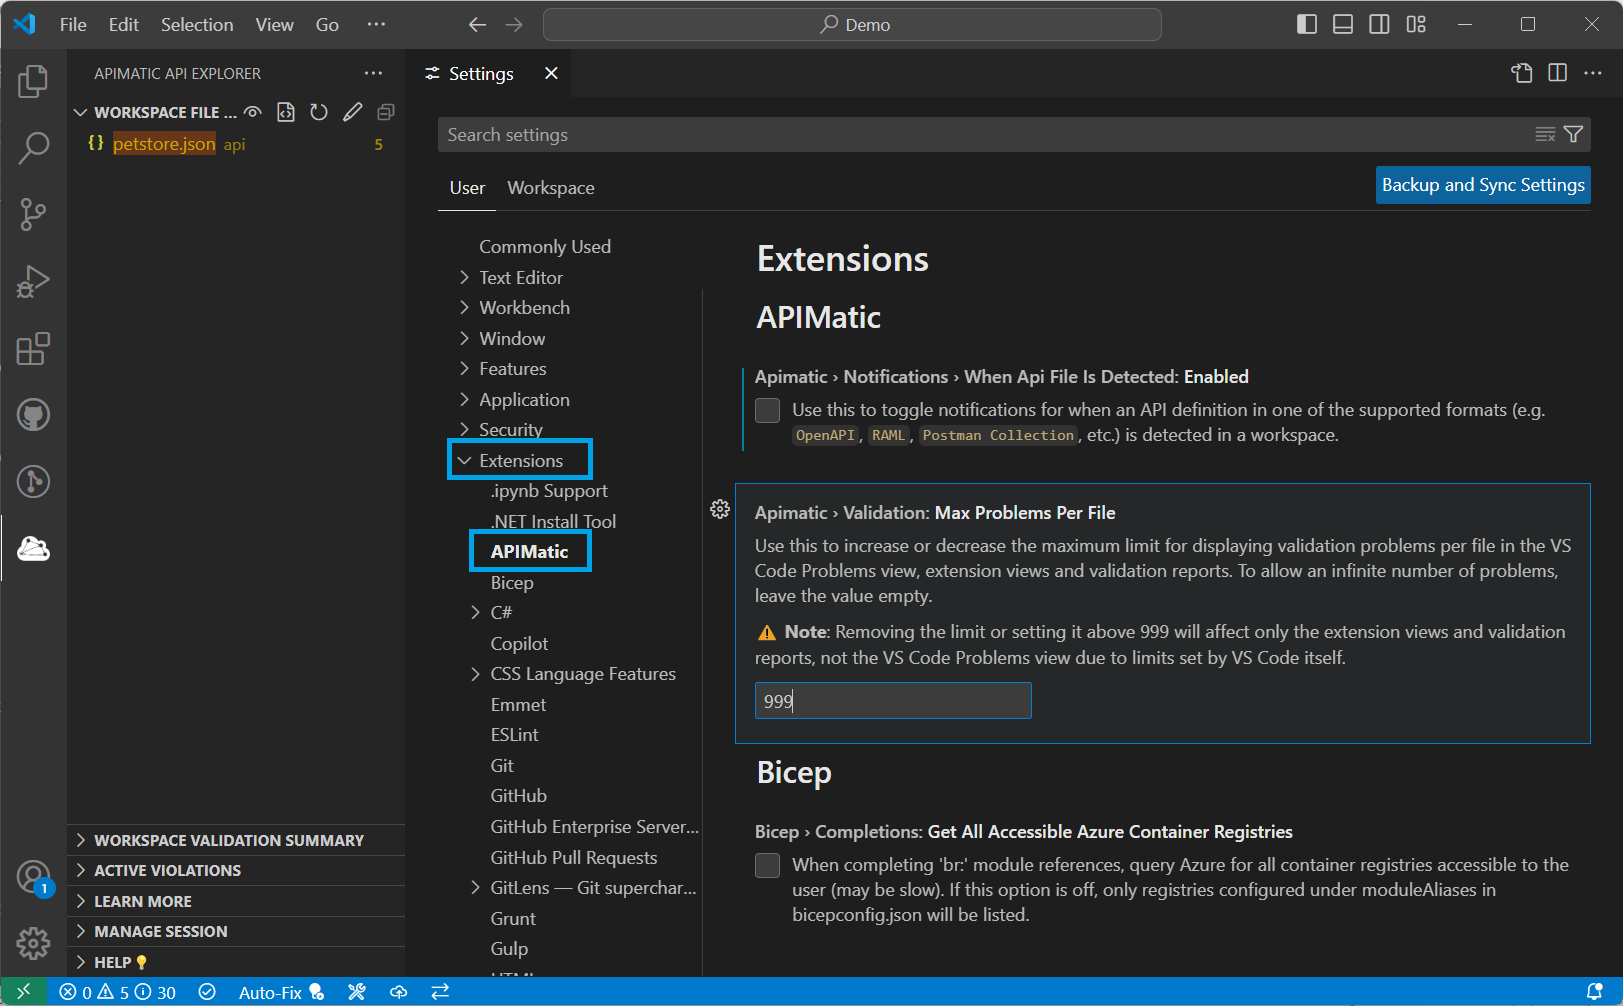
Here the limit value set in the Max Problems Per File setting can be increased/decreased either for a specific workspace or globally for all workspaces in the User tab, as per needs. To allow an infinite number of problems, leave the value empty.
Note, however, that changing the validation problems limit will only affect the extension views and validation reports and won't alter the VS Code Problems view or no. of Editor problems due to limits set by the VS Code itself.